Table of Contents
Advertisement
Advertisement
Table of Contents

Subscribe to Our Youtube Channel
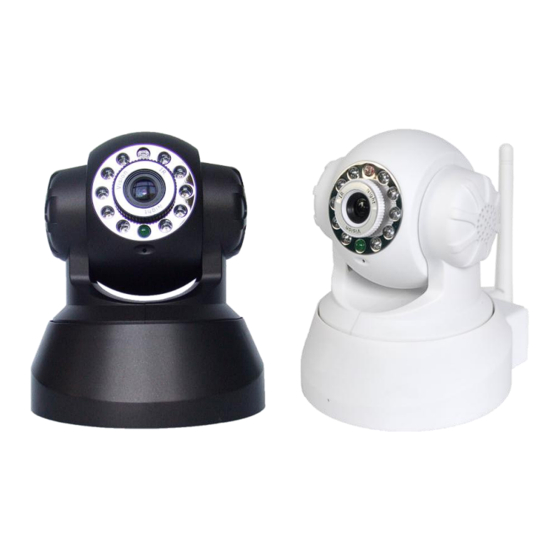
Related Manuals for Ipcam IP Camera

Summary of Contents for Ipcam IP Camera
- Page 1 IPCAM User Manual IP Camera User Manual 1 / 67...
-
Page 2: Table Of Contents
3.5.5 Mail and FTP Service…………………………………………………………36 3.5.6 Motion Detection………………………………………………………………41 4. HOW TO USE……………………………………….. ……………………………………44 4.1 Step by step to use……………………………………………………………………44 4.2 Setting Wi-Fi of IP Camera…………………………………………………………44 4.3 Using a router to access the Internet……………………………………………….45 4.4 Static IP user…………………………………………………………………………46 4.5 How to use DDNS……………………………………………………………………48 5. - Page 3 5.1.8 Can’t access the IPCAM in the internet? ……………………………………….59 5.2 Operate common problem solving……………………………………………………. 59 5.3 IPCAM special use………………………………………………………………………..61 5.31 Use vlc player and mplayer to play ip camera audio data prompt. …………..61 5.32 Set the camera miscellaneous parameters………………… …………………..64 5.4 Default Parameters……………………………………………………………………….64 5.5 Specification………………………………………………………………………………65...
-
Page 4: User Manual Brief Introduction
IPCAM User Manual 1.User Manual brief introduction Thank you for choosing our network ip camera. The manual can help you to use the camera correctly. Some descriptions maybe aren’t perfect. If you meet unsolvable problems according to this manual,please contact the product supplier.The camera’s software,hardware and shell will update ,we will be subject to change... -
Page 5: Maintenance And Protection
1.24 Packing list Item Quantity IP Camera 1 piece Wi-Fi Antenna 1 piece (only wireless IPCAM user) 1 piece(Include User Manual、IP camera tool) DC Power Supply(5V 2A) 1 piece 1 piece Network Cable... -
Page 6: Products Overview
You can use this IPCAM to monitor some special places such as your home and your office. Also controlling the IPCAM and managing image are simple by clicking the website through the network. -
Page 7: Advanced Features
A message as an email is send to you by this sensor. (The input/output discreteness can be chosen) DDNS support Using the IPCAM in the condition which including ADSL and IP change often is more convenient, because IPCAM provides dynamic DNS function. -
Page 8: Product Views
Network Indicator LED’s three conditions: 1) Slow blink(about every two seconds once),IPCAM is searching network 2) Blink (about once or twice per second),IPCAM is using wired network 3) Fast blink(about three or four times per second),IPCAM is using wireless network 4. -
Page 9: Interface
RESET BUTTON: Press and hold down the RESET BUTTON for 5 seconds.Release the power button and IP camera will be reset back to the factory default parameter 2.3 PC System Requirements System configuration requirements: ( Example for view four IP Camera ) CPU: 2.06GHZ or above Memory: 256M or above... -
Page 10: Hardware Instruction
2) Plug the power adapter into the camera and then into the power outlet. Figure 1.4 CAUTION: Make sure to only use the power adapter supplied with IPCAM. Using a non-approved power adapter may damage the camera. 3) The camera takes approximately 30 seconds to start up before it displays an IP address on the IP Camera Tool(details: 3.1). -
Page 11: Software Installation
IPCAM User Manual 2.5 Software installation Software installation is the key to the successful use of this product. 1 Open the CD,find the software as instruction; Figure 1.5 Click IPCamSetup.exe and install the software as instruction Figure 1.6 11 / 67... - Page 12 Use only the power adapter attached with the product. Use of unauthorized power adapter may cause damage to your IP Camera. IP Camera terminal shall be installed in an indoor environment. 12 / 67...
-
Page 13: Software Operation
: The software searches IP Servers automatically over LAN. There are 3 cases: 1 No IP Camera found within LAN. After about 1 minute search, the Result Field will show “not found IP Server” and the program shut automatically; 2 IP Cameras having been installed within LAN. All the IP Cameras will be listed and the total number is displayed in the result field as shown in Figure 2.0. - Page 14 IPCAM User Manual Figure 2.0 Basic Properties There are some device information in the Basic Properties, such as Device ID, System Firmware Version, Web UI Version Figure 2.1 Network Configuration In this page, you can configure the Network parameter. Figure 2.2...
- Page 15 IPCAM User Manual IP address: Fill in the IP address assigned and make sure it is in the same subnet as the gateway.(i.e.the first three sections are the same) Mask: The default subnet mask of the equipment is: 255.255.255.0 Gateway: Make sure it is in the same subnet with PC IP address. Default Gateway address is 192.168.1.1...
-
Page 16: Camera Login
3.2 Camera Login You can access the camera : 1.through IP Camera Tool or IE directly. Double click the IP address of the IP Camera listed(Figure 2.0).IE will be opened 16 / 67... - Page 17 IPCAM User Manual automatically and display the camera login page. 2. Access the camera by IE browser directly, type in the camera‟s IP address. for example. 1)By IE browser as below: Figure 2.5 ·The Camera Login page pop-up. Figure 2.6 enter your account and password on the login page as shown in Figure 2.6.
- Page 18 IPCAM User Manual Figure 2.7 Click “Sign in” to enter the monitoring page(Figure 2.8).You can set the username and password as Administrator, Operator or Visitor. Figure 2.8 18 / 67...
- Page 19 IPCAM User Manual 2) By Mozilla Firefox browser as below: Figure 2.9 The Camera Login page pop-up. Figure 3.0 Click sign in,Server Push Mode’s functions are less than ActiveX 19 / 67...
- Page 20 IPCAM User Manual Figure 3.1 3) with mobile phones equipped with special tools wap browser visit IPCAM with computer access similar as follows: Popup equipment connect interface: Figure3.2 Click Sign in 20 / 67...
- Page 21 IPCAM User Manual Figure 3.3 Also can browse ip camera by inputting ip address to browser: Figure 3.4 21 / 67...
-
Page 22: For Visitor
Alias_ Current time.Avi For example: IPCAM_20081211134442.Avi It means the device alias is IPCAM and its record‟s end time is : At 13:44:42 on December 11, 2008.When use motion detection and checked Send Mail on Alarm. -
Page 23: For Operator
IPCAM User Manual 3.4 For operator When login as operator or administrator,you can enter the For Operator. Vertical patrol Stop patrol Horizontal patrol I/O output Switch on /off Lens adjusting Image around flip Image fluctuation flip Set Preset Presets Figure 3.6 Direction control: click the different arrow will get different direction view. -
Page 24: For Administrator
Operator: You can control the direction of IP Camera and set some parameter. Administrator: You can setup the advanced configurations of the IP Camera. UpnP Settings: If you access IP Camera, to be make sure UpnP Status is Succeed. Upgrade Device Firmware: Upgrade Device Firmware and device embeded web UI software in this page. - Page 25 Firstly, make sure the camera added can access in the Internet with the IP address or DDNS domain. Like this:http:/219.133.200.165: 83 or http://IPCAM.dyndns.org:9008 You can enter the Host: 219.133.200.165 port: 83 or Host: IPCAM.dyndns.org port: 81.Enter the correct username and password then click “add”. Add more cameras in the same way as shown in Figure3.9...
-
Page 26: Network Settings
3.5.2 Network Settings Basic Network Settings If the router that the IP camera connect has DHCP function, you can choice “Obain IP from DHCP Server”else fill in the network parameters manually. Http Port: In most cases, you can leave this value as 80, however, if your Internet Service Provider blocks this port, you may switch to another port number such as 8999. - Page 27 IPCAM User Manual Figure4.1 Wireless LAN Settings 1) Please enter the wireless net setting page of the wireless Router to find out SSID, Channel(less than 10), Encryption Authentication as below: Figure 4.2 figure As Administrator to Login camera, open wireless LAN Settings page, fill in every setting(ensure keep the same as router‟s ), and then pulled out of the cable, wireless...
- Page 28 IPCAM User Manual Figure Adhoc point to point Wireless connection Setting 1)Open the basic network setting interface,check the device status Please remember the Ip address and Http Port of device. Figure 2)Open the wireless lan setting interface, choose Adhoc for network type, you...
- Page 29 Click wireless network and check the link status of ip camera.Please note IP address of your connected laptop must be the subset of your ip camera .if not, please reset the ip address of your laptop manually. 29 / 67...
- Page 30 IPCAM User Manual Figure 4)Now we can use the ip camera tool or enter ip address of camera derectly in browser blank to visit visit by ip camera tool : Figure Visit by ip address: Enter user name and password in the login interface ...
- Page 31 IPCAM User Manual Figure mobile phone ,ipad or other wireless device can also visit by entering the ip address of camera in browser blank ·Enter ip address in the browser Figure ·Enter user name and password in the login interface ·Click “Sign in”and visit...
-
Page 32: Upnp And Msn Settings
IPCAM User Manual Figure 5.3 3.5.3 UpnP and MSN settings 1) UpnP setting: If you wanna browse by Internet,you have to use UpnP to Map Port,check this function then click Submit button. Figure 5.4 32 / 67... - Page 33 Fill in your MSN account and password, then add account which need to receive IPCAM‟S ip address to IPCAM‟S MSN list (Figure 4.6),click submit then you‟d better restart IP camera. After it ,login your MSN to add IPCAM‟s MSN account to MSN List that you can receive IPCAM‟s ip address.
- Page 34 When IPCAM‟s MSN account shows online you can chat with it, input path command "url?" camera account will show its IP address in chatting box promptly as below : Figure5.9 You can input the IP address to browser then can browse ip camera as below: 34 / 67...
-
Page 35: Ddns Service Settings
IPCAM User Manual Figure 6.0 Attention:You should fill MSN account in IPCAM first. 3.5.4 DDNS Service Settings DDNS Service: The system supports protocols from some DDNS providers: Dyndns.org. User and Password: the user name and password used when applying for the domain name. -
Page 36: Mail And Ftp Service
IPCAM User Manual Figure 6.1 3.5.5 Mail and FTP Service Note: When Alarm Service Settings-> Send Mail on Alarm is check, the Mail Service takes effect. Figure 6.2 Configure the E-mail box to receive and send mails. The E-mail box is used for receiving the images sent after alarm and the system IP address after successful dial-up. - Page 37 IPCAM User Manual Figure 6.3 Gmail also set as the same: Figure6.4 1 Can not connect to the server 2 Network Error. Please try later 3 Server Error 4 Incorrect user or password 5 The sender is denied by the server. Maybe the server need to authenticate the user, please check it and try again。...
- Page 38 8 The server does not support the authentication mode used by the device Report Internet IP by Mail: When ipcam port or Internet IP changed, it will send the internet IP by mail.(for example: IPCAM 's url is http://119.123.207.96:9002). Make sure the port is map to the router correctly by UPNP or Virtual Map function.
- Page 39 IPCAM User Manual 2. Step by step setting until finish it. Figure6.7 3. Start Server Continue to finish it 39 / 67...
- Page 40 IPCAM User Manual Figure6.8 4. IPCAM‟S account can be used. Figure 6.9 5. IP camera‟s FTP Server set 40 / 67...
- Page 41 IPCAM User Manual Figure7.0 6. Set up and complete testing is successful,when it alarms, IP camera will upload pictures to the FTP server Settings of main directory path (as shown ) Figure7.1 FTP Server: the FTP server address. FTP port: the port usually is 21 FTP Mode: support standard(POST) mode and passive(PASV) mode.
-
Page 42: Motion Detection
Input Pins: The input pins can be used for 1-way external sensor input. For example, you may connect a Person Infrared Sensor (PIR) to it for motion detection. When external sensor triggered, IPCAM can be programmed to send an email with picture or control the internal relay output. - Page 43 IPCAM User Manual Choose it. Figure7.2 Upload Image on Alarm Enable upload image on alarm and set upload interval(Seconds). When alarming it will upload pictures to choosing email and FTP server after setting Figure7.2 REC automatically and save to PC When you enable motion detect and open the camera monitoring page on the PC.
-
Page 44: How To Use
2) Enter IP Camera Tool to set the basic configuration.(details: 3.1) 3) When IP address of the Camera listed in the Result Field of the IP Camera Tool, it means the basic configuration is completed. 4) set the safety property of IE in the PC when you view it first time.(details: 5.1.3... -
Page 45: Setting Wi-Fi Of Ip Camera
IPCAM User Manual 4.2 Setting Wi-Fi of IP Camera 1) To use the wireless functions of the IP Camera,a wireless router like linksys is required. 2) Enter the wireless router setup page(you may see the wireless router user manual).To Find out the SSID, Channel(less than 10), Security Way(NONE,WEP),Authentication Type,encryption. - Page 46 IPCAM User Manual Figure7.6 1) Use Network cable connect IP Camera to the LAN. 2) Enter IP Camera Tool to set the basic configuration.(details:3.1) 3) login the Camera homepage as Administration 4) Enter DDNS Settings Page and ennable DDNS service.Click <submit> and the device will reboot.(detail:3.5.4)
-
Page 47: Static Ip User
Static IP user is not need to use DDNS for remote access. When finished the setting of the IP Camera in LAN, you can access the Camera directly from Internet by the WAN IP. You can obtain the WAN IP by two ways. -
Page 48: How To Use Ddns
IPCAM User Manual Figure7.9 Access the IP Camera from the Internet User can access the IP Camera from the Internet, Enter WAN IP address + port number in the IE to access IP Camera. For example, Http:// 116.25.51.115:8999 Note: Make sure the Port mapping is success. You can do port mapping by two ways: Enter setting page of the router which IPCAM connect with to enable UPNP function. - Page 49 Camera.Wait for several minutes and the IP Camera will dial up to access the Internet automatically, and the communication with the DDNS server is established successfully. In the way, the user can access the IP Camera from a WAN by using the DDNS domain name.
- Page 50 IPCAM User Manual Figure 8.1 Figure 8.2 Add more devices: 50 / 67...
-
Page 51: Appendix
Default administrator password: No password 5.1.2 IP Address configuration Check whether IP address of the IP Camera server shares the same subnet as your work station: Click My Computer > Control Panel>Network & Dial-up Connections > LAN > Attributes >Internet Protocols (TCP/IP), and check IP Address and Subnet Mask. -
Page 52: No Pictures Problems With Activex Controller
The video streaming is transmitted by the ActiveX controller. If ActiveX controller isn‟t installed correctly ,you will see no video image. There are two way to solve this problem: 1) Install “IP Camera Tool”, ActiveX controller is installed simultaneity (recommendable). -
Page 53: Problems With Network Bandwidth
3. the number of visitors (Too many visitors will slow down the image frame rate.); 4. choice of switch or hub (Use a switch for multiple IP Camera Servers rather than a HUB.). 5.1.6 For example: Register procedure from a DDNS web 1.Users use DDNS management system first time.Users need to apply account... - Page 54 IPCAM User Manual Figure8.6 Step2: enter your information Figure8.7 54 / 67...
- Page 55 IPCAM User Manual Figure8.8 Step3: After a minute, you will receive an E-mail from DynDNS Support and it will give you a confirmation address (e.g. https://www.dyndns.com/confirm/create/e-YS60Gz9oBASMm7rbO6AA Step4: Open the link to active your Domain Name as below. 55 / 67...
- Page 56 IPCAM User Manual Figure8.9 Figure9.0 56 / 67...
- Page 57 IPCAM User Manual Figure9.1 Step6: Now you obtained a Dynamic Domain Name(Figure 8.4),and can use it in the DDNS Service Settings(details: 3.5.4) Figure 9.2 2. Fill the DDNS account you applied in DDNS Settings,If it success,it will show as below...
- Page 58 IPCAM User Manual Figure 9.3 Figure9.4 3. How to test whether DDNS is on-line? Click Start > Running >input CMD then click Enter,test DDNS by PING as below: Figure 9.5 58 / 67...
-
Page 59: Why Pop-Up The Prompt "Fail To Connect To The Device
Figure 9.6 5.1.8 Can’t access the IPCAM in the internet? There are some reasons: 1 ActiveX controller is not installed correctly(see more details:5.1.4). 2 The port IPCAM used is blocked by Firewall or Anti-virus software. Please change a 59 / 67... -
Page 60: Operate Common Problem Solving
If your router has the Virtual Map function. Enter router setting page, add IPCAM‟s IP and port to the Virtual map list. When use ADSL, the IP is dynamic. You should set DDNS(see more details 3.5.4 & 5.1.6) and also make sure port mapping success. -
Page 61: Ipcam Special Use
Solution:Press reset button to factory default state,then reconnecting.systen default to gain ip address automatic,subnet mask is 255.255.255.0 5.3 IPCAM special use 5.31 Use vlc player and mplayer to play ip camera audio data prompt. (parameter: /videostream.asf?user=&pwd=&resolution=&rate=) Show as below: 61 / 67... - Page 62 IPCAM User Manual Figure 9.7 As figure 8.8 shows IPCAM current ip address is http://192.168.1.111:8999 Internet ip address is http://szneo1.dyndns.org:8999 ,you can view video of IPCAM by inputting ip address. Figure 9.8 Open broadcast position by “VLC media player”: Figure9.9 LAN broadcast address: Figure10.1...
- Page 63 IPCAM User Manual Figure 10.2 Open the Internet play position: User Resolution:640x4 Figure10.3 Watch ip camera send streaming format video as show below: 63 / 67...
-
Page 64: Set The Camera Miscellaneous Parameters
IPCAM User Manual Figure 10.4 5.32 Set the camera miscellaneous parameters Grammar: /set_misc.cgi?led_mode=&ptz_center_onstart=&ptz_auto_patrol_interval =&ptz_auto_patrol _type=& ptz_patrol_h_rounds=& ptz_patrol_v_rounds=& ptz_disable_preset=&user=&pwd=&next Parameter: led_mode:0:mode;1:mode;2: turn off indicator light ptz_center_onstart: ptz_auto_patrol_interval: =0:doesn’t auto patrol interval ptz_auto_patrol_type:0:None;1:horizontal; 2:vertical;3:horizontal &vertical ptz_patrol_h_rounds: ptz_patrol_v_rounds: ptz_patrol_rate: ptz_patrol_up_rate: 64 / 67... -
Page 65: Default Parameters
IPCAM User Manual ptz_patrol_down_rate: ptz_patrol_left_rate: ptz_patrol_right_rate: ptz_disable_preset: 5.4 Default Parameters Default network Parameters IP address: dynamic obtain Subnet mask:255.255.255.0 Gateway: dynamic obtain DHCP: Disabled DDNS: Disabled Username and password Default administrator username: admin Default administrator password : No password 5.5 Specification... - Page 66 IPCAM User Manual Image Frame 15fps(VGA),30fps(QVGA) Rate Resolution 640 x 480(VGA), 320 x 240(QVGA) Flip Mirror Vertical / Horizontal Images Light Frequency 50Hz, 60Hz or Outdoor Audio Function Two-way Talk Video Brightness, Contrast Parameters Communication Ethernet One 10/100Mbps RJ-45 Supported...
- Page 67 IPCAM User Manual Storage Temper -10° C ~ 60° (14° F ~ 140° F) Storage 0% ~ 90% non-condensing Humidity 2.0GHZ or above (suggested 3.0GHz) Memory Size 256MB or above (suggested 1.0GHz) Display Card 64M or above PC Requirements Supported OS Microsoft Windows 2000/XP/Vista/window7 IE 5.0,IE 6.0, IE7.0, IE8.0, firefox2.0, firefox3.0 or...
Need help?
Do you have a question about the IP Camera and is the answer not in the manual?
Questions and answers