Table of Contents
Advertisement
Quick Links
Advertisement
Table of Contents

Related Manuals for SMA Sunny Boy 3800U


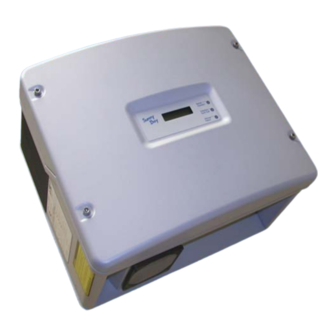
Summary of Contents for SMA Sunny Boy 3800U
-
Page 3: Revision History
Specifications are subject to change without notice. Every attempt has been made to make this document complete, accurate and up-to-date. Readers are cautioned, however, that SMA America reserves the right to make changes without notice and shall not be responsible for any damages, including indirect, incidental or... -
Page 4: Safety And Hazard Symbols
Installation Guide IMPORTANT SAFETY INSTRUCTIONS SAVE THESE INSTRUCTIONS This manual contains important instructions for the Sunny Boy 3800U that must be followed during installation and maintenance of the inverter. The Sunny Boy is designed and tested according to international safety requirements, but as with all electrical and electronic equipment, certain precautions must be observed when installing and/or operating the Sunny Boy. -
Page 5: Warnings
It calls attention to a procedure or practice, which, if not correctly performed or adhered to, could result in dam- age to or destruction of part or all of the SMA equipment and/ or other equipment connected to the SMA equipment or per- sonal injury. - Page 6 Sunny Boy shipping container. For warranty coverage, or if you have questions about the Sunny Boy warranty, contact SMA America at the address, telephone number or Web site listed on page i (to send E-mail, see the Contact section of the SMA America Web site).
-
Page 7: Table Of Contents
AC Voltage Configuration Opening the Sunny Boy 3800U ....4-1 Locating Internal Components ....4-2 Wiring the Sunny Boy 3800U Wiring the AC Output. - Page 8 Sunny Boy SB3800U Wiring Diagram... . . 10-2 Specifications ......10-2 SMA America SB3800U-12:SE2006...
-
Page 9: Introduction
Section 1: Introduction This installation guide provides all the information needed to install, commission and operate a Sunny Boy 3800U (SB3800U) grid-tied photovoltaic (PV) inverter. Note: To help avoid problems during the installation, familiarize yourself with the installation process by reading the entire Installation Guide before starting the installation. -
Page 10: Safety
Static Inverters and Charge Controllers for use in Photovoltaic Power Systems as well as IEEE-929-2000 Recommended Practice for Utility Interface of Photovoltaic Systems and IEEE 519 Standard Practices and Requirements for Harmonic Control in Electrical Power Systems. The SB3800U is also ETL listed under UL1741 for use in Canada. SMA America SB3800U-12:SE2006... - Page 11 Over twenty years of inverter manufacturing experience has gone into the design of the SB3800U. As a result, the SB3800U represents state-of-the-art technology, high reliability and overall ease of use - all the qualities you’ve come to expect from SMA, the industry leader in inverter technology. Some of the features included are: •...
-
Page 12: Installation Overview
Section 5: Wiring the Sunny Boy 3800U This section includes guidelines for selecting the correct wire sizes, cautions and warnings that you should follow to avoid injury and/or equipment damage and step- by-step instructions for wiring the SB3800U to a PV array, household electrical circuits and the utility grid. -
Page 13: Unpacking And Inspection
If you need assistance with a damaged Sunny Boy, contact your SMA dealer or SMA America. Contact information for SMA America is provided below. - Page 14 SMA America SB3800U-12:SE2006...
-
Page 15: Mounting
SB3800U-12:SE2006 SMA America... - Page 16 Sunny Boy. CAUTION: Outdoor installations must use raintight or wet location hubs that meet the requirements of the Standard for Fittings for Cable and Conduit, UL514B. SMA America SB3800U-12:SE2006...
-
Page 17: Dimensions And Recommended Clearances
SB3800U! In a normal operating environment with good ventilation, eight inches of clearance is adequate. Note: The National Electrical Code may require significantly larger working clearances (see NEC Section 110.26). SB3800U-12:SE2006 SMA America... - Page 18 434,60 mm (17,12 in) 250 mm (9,85 in) Figure 3-3 Dimensions of the Wall Mounting Bracket SMA America SB3800U-12:SE2006...
-
Page 19: Mounting Procedure
Wood wall mounting Stone wall mounting Bet rieb Op era tion lus s Be trie th Fau Op era tion Stö run Fai lure lus s th Fau Stö run Fai lur Figure 3-4 SB3800U with removable mounting plate SB3800U-12:SE2006 SMA America... - Page 20 DO NOT use molly or toggle bolts to mount the SB3800U to sheet rock or panelling. 5. Set the mounting plate aside temporarily, and drill holes at the marks on the wall. SMA America SB3800U-12:SE2006...
- Page 21 10.Tighten the screw to 44 inch pounds or 5 Nm. (Do not overtighten) 11.Verify that the SB3800U is securely mounted. 12.Snap the left and right exhaust fins into the SB3800U (Look for the L & R on the inside of the fins.) SB3800U-12:SE2006 SMA America...
- Page 22 SMA America SB3800U-12:SE2006...
-
Page 23: Ac Voltage Configuration
Section 4: AC Voltage Configuration Opening the Sunny Boy 3800U Remove the four screws and lock washers that attach the cover of the SB3800U. Place the cover, screws, and lock washers aside where they will be out of your way while connecting the wires and cables to the Sunny Boy. -
Page 24: Locating Internal Components
L1 L2 N Terminal (PE) DC– Output AC Line GFDI Ground Terminals Terminal Terminal Fuse Holder Terminals (PE) for (input from (input from (N, L1 and L2) Communication PV array) PV array) Figure 4-1 SB3800U Internal Components SMA America SB3800U-12:SE2006... - Page 25 Figure 4-2 Utility Configuration Jumpers The SB3800U may be configured for two different grid types commonly found in the U.S. The SB3800U is compatible with: • 208 V AC output • 240 V AC output ("split-phase" or open delta) SB3800U-12:SE2006 SMA America...
- Page 26 Figure 4-3 Common Utility Voltage Configurations Remember, when connecting the SB3800U to the utility, the phase relationship is not important, but the voltage must be compatible. SMA America SB3800U-12:SE2006...
- Page 27 120 V Figure 4-4 Utility Configuration Jumper Examples The figure above illustrates the proper jumper settings when connecting to a 240 Delta : 120V Stinger type transformer. Note the order in which inverters are connected to the phases. SB3800U-12:SE2006 SMA America...
- Page 28 SMA America SB3800U-12:SE2006...
-
Page 29: Wiring The Sunny Boy 3800U
Section 5: Wiring the Sunny Boy 3800U This section provides step-by-step procedures and other information required for wiring the SB3800U to the PV array and the utility grid. To complete the installation in a safe and efficient manner, complete the steps in the order that they appear. - Page 30 #6 AWG. Knockouts are provided on the bottom of the SB3800U near each of the terminals for the wires to enter the case (see Figure 5-6). 3/4” DC Knockout 3/4” AC Knockout GFDI Fuse 1/2” Communication Cable Gland Figure 5-1 SB3800U showing wiring knockout locations SMA America SB3800U-12:SE2006...
-
Page 31: Wiring The Ac Output
National Electrical Code (NEC), ANSI/NFPA 70. Use #8 AWG (maximum), 90 °C (194 °F), copper wire for all AC wiring connections to the Sunny Boy 3800U. Voltage drop and other considerations may dictate that larger size wires be used. - Page 32 Table 5-1 Voltage and Frequency Limits for the AC Connection Voltage Range for 208 V nominal, line to line 183 V - 229 V Voltage Range for 240 V nominal, line to line 211 V - 264 V Frequency Range 59.3 Hz - 60.5 Hz SMA America SB3800U-12:SE2006...
-
Page 33: Connecting The Ac Wires
9. Connect the L2 (AC line 2) and N (AC line N) wire to the terminal labeled L2 and N in the SB3800U. 10. Connect the wires and tighten to a torque of 18 in-lb. 11. Verify that all connections are correctly wired and properly torqued. SB3800U-12:SE2006 SMA America... - Page 34 N wire connected to N terminal L2 wire connected to L2 terminal L1 wire connected to L1 terminal L1 L2 N Equipment ground wire connected to PE terminal Figure 5-3 AC Connection Terminals SMA America SB3800U-12:SE2006...
-
Page 35: Wiring The Dc Input
DC wiring connections to the Sunny Boy. Voltage drop an other considerations may dictate that larger size wires be used. Note: Use the online SMA string size calculator at www.sma-america.com to determine the correct string configuration (see Figure 5-5). - Page 36 Figure 5-5 Online String-Configuration Calculator at www.sma-america.com SMA America SB3800U-12:SE2006...
-
Page 37: Connecting The Dc Wires
Connecting the DC Wires WARNING: You must connect the wires that carry the DC voltage from the PV array to the Sunny Boy 3800U in the order described in the following procedure. Deviating from this procedure could expose you to lethal voltages that can cause serious injury and/or death. - Page 38 Check both the polarity and the open-circuit voltage from the PV strings! Use the following procedure to connect the DC wires to the Sunny Boy 3800U: 1. Verify that the AC breaker is OFF. 2. Verify that the DC disconnect is OFF.
- Page 39 9. Connect the DC equipment ground wire to the terminal labeled PE in the SB3800U. 10. Torque all AC and DC wires in the SB3800U to 18 in-lb. 11. Verify that all connections are correctly wired and properly torqued. SB3800U-12:SE2006 SMA America 5-11...
-
Page 40: Connecting Communication Cables
Piggy-Back modules that can be installed and connected either at the time the inverter is installed or at any time thereafter. These modules are not included with the SB3800U. Please contact SMA America for information. Refer to the instructions included with the communication module for installation procedures. - Page 41 6. Connect the cable shield to the SB3800U’s case. (See Figure 5-7) Do NOT connect the cable shield to the PC’s DB-9 connector. The shield must remain floating at the CAUTION: All AC and DC power should be off when connecting the communication wiring to the SB3800U. SB3800U-12:SE2006 SMA America 5-13...
- Page 42 No jumper installed for RS-232 communication Terminal block for RS-232 communication 2 3 5 7 Ground terminal (PE) L1 L2 N for communication Figure 5-7 Connecting a SB3800U to a PC with an RS-232 Cable 5-14 SMA America SB3800U-12:SE2006...
-
Page 43: Rs-485 Communication
Two communication knockouts are provided for connecting multiple Sunny Boys on an RS-485 communication bus. 2. Connect the shield of the cable to the Sunny Boy 3800U’s case. (See Figure 5-8) Do NOT connect the cable shield to the PC’s DB-9 connector. The shield must remain floating at the PC. - Page 44 Note: The termination of the other end of the RS-485 cable will depend on what type of device you’re connecting to. For detailed information, please see the Tech Updates section of our web site at www.sma-america.com There you will find technical information on all of the Sunny Boy communication options.
-
Page 45: Replacing The Cover
3. Carefully position the cover on the front of the SB3800U so that the four holes in the cover are aligned correctly with the four threaded holes in the case. Note: Be sure when reinstalling the four screws that the lock washers are installed correctly. The teeth of the washers SB3800U-12:SE2006 SMA America 5-17... - Page 46 5. Verify that the cover is in the correct position and that the seal is in place between the case and the cover. 6. Tighten the cover screws to a torque of 79 lb-in. (9 nm.) 5-18 SMA America SB3800U-12:SE2006...
-
Page 47: Commissioning
2. Switch the DC disconnect to the on position. If there is sufficient sunlight available, the Sunny Boy 3800U will enter the “Wait“ mode at this time and the green LED will begin to blink. - Page 48 SB3800U will automatically begin feeding power to the utility grid. Note: If the SB3800U is not operating as expected after the commissioning procedure has been completed, refer to Section 7: Displays and Messages and to Section 8 for troubleshooting assistance. SMA America SB3800U-12:SE2006...
-
Page 49: Displays And Messages
The ground fault must be located and cleared and the inverter reset manually. The inverter will not restart automatically after detecting a ground fault. The ground fault may also clear the GFDI fuse. Note: All GFDI faults are disabled in turbine mode. SB3800U-12:SE2006 SMA America... - Page 50 Displays and Messages Betrieb Operation Erdschluss Earth Fault Störung Failure Figure 7-1 The Sunny Boy LED Status Indicator SMA America SB3800U-12:SE2006...
-
Page 51: Led Operation Indicators
Occasionally, during inclement weather or low irradiation, the LEDs may all turn on at once and then go off again. This indicates that the inverter is trying to initialize but the power available from the array is not sufficient for normal operation. This is not a malfunction. SB3800U-12:SE2006 SMA America... - Page 52 Note: If the inverter fails to connect to the utility grid 3 times in a row, it will wait 10 minutes before the next attempt. In case of a grid failure, the Sunny Boy will wait 5 minutes before it tries to reconnect to the grid. SMA America SB3800U-12:SE2006...
- Page 53 45°C and will derate as required to maintain safe internal component temperatures. Unnecessary derating can also be caused by blocked fan intakes. For this reason the fan intakes should be inspected often and cleaned when necessary. SB3800U-12:SE2006 SMA America...
-
Page 54: Led Fault Indicators
Troubleshoot the PV array for ground faults prior to replacing this fuse. CAUTION: For continued protection against the risk of fire, replace the GFDI fuse with fuses of the same type and rating only. The SB3800U is shipped with a Littelfuse KLKD 1 Amp, 600V AC/DC type fuse. SMA America SB3800U-12:SE2006... - Page 55 The SB3800U has detected a fault within the internal monitoring systems. When the inverter detects a fault of this kind it will no longer connect to the utility grid. To correct this, the inverter must be serviced by a qualified service technician. Contact SMA America for assistance.
-
Page 56: Grid Failure
AC disconnect between the Sunny Boy and the grid. CAUTION: Have the grid connection to the SB3800U checked only by qualified personnel. WARNING: If opening the SB3800U is required, do so only after disconnecting all sources of power and waiting at least 5 minutes. SMA America SB3800U-12:SE2006... - Page 57 WARNING: Disconnect the PV array from the SB3800U immediately. High DC input voltage can permanently damage the inverter. Have the input source checked by a qualified technician. WARNING: Always test the DC voltage at the DC disconnect switch before energizing the SB3800U. SB3800U-12:SE2006 SMA America...
- Page 58 The code is repeated 3 times. If the condition remains the code will continue to be sent. The inverter has encountered an internal fault that prohibits normal operation and will most likely require servicing. Contact SMA America for assistance. 7-10 SMA America...
-
Page 59: Status Messages On The Lcd
The backlight is activated by knocking twice on the lid. Additional knocks will scroll through the display messages. The backlight shuts off automatically after 2 minutes. INIT Messages The following messages are displayed during initialization Sunny Boy 3800U of the inverter: WR38UxxE Sunny Boy Inverter Model # BFR Version x.xx The installed firmware versions of the control system SRR Version x.xx... -
Page 60: Operation Messages
512h Total energy yield and total operating hours Note: The screens may also be scrolled through manually by repeatedly knocking on the lid of the inverter. Each knock advances the screen to the next message. 7-12 SMA America SB3800U-12:SE2006... -
Page 61: Fault Messages
Note: Each fault message is displayed for 5 seconds. After 5 seconds, the LCD will once again scroll through its normal operating screens. The fault condition will be included in the series of screens until the condition is cleared. SB3800U-12:SE2006 SMA America 7-13... -
Page 62: Communication Options
Sunny Boy Control Light or the full featured Sunny Boy Control Plus. For more information and assistance in choosing the right data option for your system, please visit the SMA America web site. 7-14 SMA America SB3800U-12:SE2006... - Page 63 Boys in the PV plant. Its graphic display shows a bar chart of actual output power as well as daily and total-energy-yields in a single window. For more information on SMA communications products, please refer to the individual product literature.
- Page 64 2 3 5 7 L1 L2 N Position of the switches for configuration of the LCD language Language Switch S2 Switch S1 German English French Spanish Switch S2 Switch S1 Figure 7-3 Language Selection Switches for the LCD 7-16 SMA America SB3800U-12:SE2006...
- Page 65 Power On: Total system start-up counter Serial number of the Sunny Boy Serial Number: Current operating mode Mode: Type of grid the Sunny Boy is connected to Grid Type: Error: Description of fault SB3800U-12:SE2006 SMA America 7-17...
- Page 66 Sunny Boy is in constant voltage MPP mode Derating: Reduction of the grid feeding power due to abnormal heatsink temperatures Disturbance: Grid related fault condition, self clearing Error: Inverter fault, user interaction required Warning: System warning advising further investigation 7-18 SMA America SB3800U-12:SE2006...
- Page 67 0 ... 100 Temperature for maximum fan (°C) rotation speed. Fan-Test 1 / 0 By setting this parameter to “1“ you can check the function of the fans. This test turns the fans at maximum speed. SB3800U-12:SE2006 SMA America 7-19...
- Page 68 Reset errors: Resets all permanent device disable errors. The following parameters appear in parameter list but cannot be modified: Table 7-2 Operating Parameters of the Sunny Boy 3800U (Fixed) Name Unit Range Default...
- Page 69 Default Description Storage Fixed permanent permanent: changed parameters are stored in EEPROM and are still available after restarting the Sunny Boys volatile: prevents storing the parameters in EEPROM, (i.e. parameters are only saved until next startup.) SB3800U-12:SE2006 SMA America 7-21...
- Page 70 Displays and Messages 7-22 SMA America SB3800U-12:SE2006...
-
Page 71: Troubleshooting
• If the system problem persists, contact technical support at: 530.273.4895 In order to better assist you when contacting SMA America, please provide the following information. This information is required for service assistance. - Page 72 • Number of modules in each string • Number of PV strings connected to the inverter If it becomes necessary to send the Sunny Boy back to the manufacturer for service, please ship it in the original box to avoid damage during shipping. SMA America SB3800U-12:SE2006...
-
Page 73: Error Messages
Sunny Boy enclosure. If the grid voltage is out of range due to your local grid conditions contact the utility company. If the grid voltage is within the tolerable range and you still observe the failure message “Vac-Bfr“ or “Vac-Srr“ contact SMA. Disturbance Fac-Bfr The AC grid frequency is exceeding the allowable range. - Page 74 Contact SMA for assistance. Error OFFSET Grid monitoring self-test failed. Contact SMA for assistance. Error The internal test of the Sunny Boy control system firmware failed. Contact SMA for assistance.
- Page 75 Error Type Error Code Description Error EeRestore Internal failure. Error Grid-Time- The type of grid could not be detected (208/240). Grid-Fault-S Error VacL1-Bfr Voltage is too high or too low. VacL2-Bfr VacL1-Srr VacL2-Srr SB3800U-12:SE2006 SMA America...
- Page 76 SMA America SB3800U-12:SE2006...
-
Page 77: Maintenance
This will damage the fan. • When the fan is clean, reinstall it using the above steps in reverse order. • Do not blow air through the fan or the fan screen while the fan is still mounted in the SB3800U. SB3800U-12:SE2006 SMA America... -
Page 78: Cleaning The Exhaust Vent
• Clean the filter and fins with a soft brush or cloth. Use mild soap and water if necessary. • When the fins are clean, reinstall the vent. Be tri Op er at io Er ds ch lu Ea rth Fa ul St ör un g Fa ilu SMA America SB3800U-12:SE2006... -
Page 79: Testing The Fan
Sunny Boy Control). • Use the jumper on the control board of the Sunny Boy 3800U (see Figure 9-1). Turn off the AC and DC breakers and wait five minutes until the LEDs got out. Open the Sunny Boy 3800U and set the jumpers as shown below for fan test. - Page 80 SMA America SB3800U-12:SE2006...
-
Page 81: Technical Specifications
• Consult the dealer or an experienced radio/TV technician for help. • The user is cautioned that changes or modifications not expressly approved by SMA America, Inc. could void the user’s authority to operate this equipment. Contact SMA America for more information. -
Page 82: Sunny Boy Sb3800U Wiring Diagram
Sunny Boy SB3800U Wiring Diagram Sunny Boy connection to 208 and 240 V AC utility grids. SUNNY BOY 3800U INVERTER *The AC disconnect switch shown above may or may not be required by the local utility. Specifications Inverter Technology Sine-wave, current source, high frequency... - Page 83 17.80 W x 13.83 H x 9.30 D inches (452 W x 351H x 236 D mm.) 85 lbs. (38 kg) Weight Compliance UL1741, E210376, IEEE 519, IEEE 929, FCC Part 15 A & B Specifications subject to change without notice. SB3800U-12:SE2006 SMA America 10-3...
- Page 84 10-4 SMA America SB3800U-12:SE2006...
Need help?
Do you have a question about the Sunny Boy 3800U and is the answer not in the manual?
Questions and answers