SMA SUNNY BOY 3300 Installation Manual
Pv inverters
Hide thumbs
Also See for SUNNY BOY 3300:
- Installation manual (76 pages) ,
- User manual (2 pages) ,
- User manual (24 pages)
Table of Contents
Advertisement
Quick Links
Download this manual
See also:
Installation Manual
Advertisement
Table of Contents

Related Manuals for SMA SUNNY BOY 3300


Summary of Contents for SMA SUNNY BOY 3300
- Page 1 PV Inverters SUNNY BOY 3300 / 3800 Installation Guide SB33_38-IEN083330 | IME-SB3800 | Version 3.0...
-
Page 3: Table Of Contents
SMA Solar Technology AG Table of Contents Table of Contents Notes on this Manual......5 Validity . - Page 4 Table of Contents SMA Solar Technology AG Communication........23 5.4.1...
-
Page 5: Notes On This Manual
Notes on this Manual 1 Notes on this Manual 1.1 Validity The manual describes how to install and commission SMA inverters of the types Sunny Boy 3300 and Sunny Boy 3800. This manual applies for the Sunny Boy 3300 firmware versions GRX33_2.85/2.79 and above and for the Sunny Boy 3800 firmware version GRX38_2.85/2.79 and above. -
Page 6: Symbols Used
Notes on this Manual SMA Solar Technology AG 1.5 Symbols Used The following types of safety instructions and general information appear in this document as described below: DANGER! DANGER indicates a hazardous situation which, if not avoided, will result in death or serious injury. -
Page 7: Safety
The free design program "Sunny Design" (www.SMA.de/en/SunnyDesign) will assist you in this. The manufacturer of the PV modules must have approved the modules for use with this Sunny Boy unit. You must also ensure that all measures recommended by the module manufacturer for long-term maintenance of the module properties are taken (see also Technical Information "Module Technology", in the download area of... -
Page 8: Safety Precautions
• Do not touch the housing of the Sunny Boy during operation. Grounding the PV generator Comply with the local requirements for grounding the modules and the PV generator. SMA Solar Technology recommends connecting and grounding the generator frame and other electricity conducting surfaces in such a way that there is continuous conduction in order to achieve maximum protection for systems and persons. -
Page 9: Unpacking
SMA Solar Technology AG Unpacking 3 Unpacking 3.1 Packing List Object Quantity Description Sunny Boy Rear panel Handle cover Socket element Set of documents with explanations and certificates Electronic Solar Switch Jumper for communication / fan test Cylinder head screw and M6 contact disk... -
Page 10: Check For Transport Damage
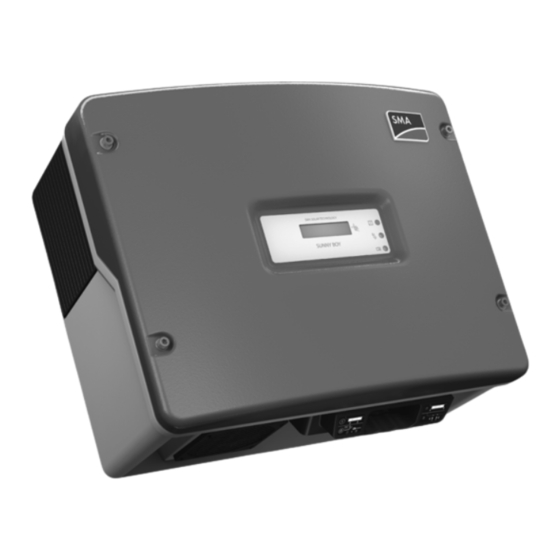
Unpacking SMA Solar Technology AG 3.2 Check for Transport Damage Check the Sunny Boy for visible external damage, such as cracks in the housing or display. Please contact your dealer if you find any damage. 3.3 Identification of the Sunny Boy You can identify the Sunny Boy by the type label. The type label is found on the right-hand side of the housing. -
Page 11: Installation
SMA Solar Technology AG Installation 4 Installation 4.1 Selection of the Mounting Location DANGER! Danger to life due to fire or explosion! Despite careful construction, a fire can occur with electrical devices. Do not install the Sunny Boy • on flammable construction materials, •... -
Page 12: Dimensions And Weight
Installation SMA Solar Technology AG 4.1.1 Dimensions and Weight 41 kg 4.1.2 Ambient Conditions • The mounting location and mounting method must be suitable for the weight and dimensions. • Mount on a solid surface. • The mounting location must be accessible at all times (do not mount in inaccessible locations). -
Page 13: Minimum Clearances
SMA Solar Technology AG Installation 4.1.3 Minimum Clearances Observe the following minimum clearances to walls, other devices or objects to guarantee sufficient heat dissipation and enough space for removing the Electronic Solar Switch. Direction Minimum clearance Sides 30 cm Above 20 cm... -
Page 14: Mounting Instructions
Installation SMA Solar Technology AG 4.2 Mounting instructions CAUTION! Risk of injury due to the heavy weight of the Sunny Boy! • Take the Sunny Boys weight of 41 kg into account. 1. Use the rear panel as a drilling template and mark the positions of the drill holes. - Page 15 SMA Solar Technology AG Installation 2. Close all the unnecessary holes in the rear panel using the sealing plugs provided in the accessories kit. Insert the sealing plugs in the rear panel from the outside (the side that will later be placed against the wall).
-
Page 16: Electrical Connection
Electrical Connection SMA Solar Technology AG 5 Electrical Connection NOTICE! Static discharges can damage the Sunny Boy! • Before you touch a component inside the Sunny Boy ground yourself by touching PE or a grounded object. 5.1 Overview of the Connection Area... -
Page 17: Connection To The Public Grid (Ac)
SMA Solar Technology AG Electrical Connection Object Description Communication socket Flat connection for grounding the cable shield with line-conducted communication Sunny Display Jumper slot for fan test Varistors Housing opening with sealing plugs for communication Communication terminal Jumper slot for communication... - Page 18 The cable cross-section should be sized using the "Sunny Design" design program (www.SMA.de/en/SunnyDesign) so that output losses do not exceed 1 % at nominal power. The maximum cable lengths are shown in the following table. Do not exceed the maximum cable length.
-
Page 19: Connection Procedure
The exact operating range of the Sunny Boy is specified in the operating parameters. You will find the relevant document in the download area at www.SMA.de/en. 2. Switch off the line circuit breaker and secure it to prevent it from being reactivated. - Page 20 Electrical Connection SMA Solar Technology AG DANGER! Danger to life due to non-earthed housing! When laying the AC cable, the PE conductor and the other conductors can be extracted from the socket element after they have been connected. • Make sure the wires are securely Connected wires connected.
-
Page 21: Solar Generator Connection (Dc)
SMA Solar Technology AG Electrical Connection 5.3 Solar generator connection (DC) 4.0 mm Communication String 1 String 2 String 3 Installation Guide SB33_38-IEN083330... - Page 22 Electrical Connection SMA Solar Technology AG Connection procedure DANGER! Danger to life due to high voltages on the Sunny Boy • Before connecting the PV generator, ensure that the line circuit breaker is switched off. 1. Remove the Electronic Solar Switch.
-
Page 23: Communication
• Check the handle of the Electronic Solar Switch is securely connected. 5.4 Communication There are various types of communication interfaces. These communication interfaces are used to communicate with SMA communication devices or a PC with appropriate software. See the communication device documentation for a detailed wiring diagram. 5.4.1 Line-conducted Communication... - Page 24 Electrical Connection SMA Solar Technology AG 10. Note down the conductor color coding for the respective pin numbers. – Pin 2 color:______________________ – Pin 3 color:______________________ – Pin 5 color:______________________ – Pin 7 color:______________________ 11. Connect the jumpers (E) if the connection plan of the communication device indicates this as necessary.
-
Page 25: Wireless Communication
SMA Solar Technology AG Electrical Connection 5.4.2 Wireless Communication Connection procedure for wireless communication 1. Open the Sunny Boy as described in section 7.1 „Opening the Sunny Boy“ (28). 2. Remove the sealing plugs from the housing feed-through. 3. Guide the antenna cable through the cable feed-through (A) of the Sunny Boy. -
Page 26: Commissioning
Commissioning SMA Solar Technology AG 6 Commissioning Check the following requirements before commissioning: • correct connection of the AC (grid) cable • full connection of the DC cables (PV strings) • unused DC plug connectors on the underside of the housing are sealed with caps •... -
Page 27: Display Language And Led Display
SMA Solar Technology AG Commissioning 6.1 Display Language and LED Display 6.1.1 Setting the Display Language The display language of the display is set with the switches underneath the display assemblies inside the Sunny Boy. You can change the language setting of the display as follows: 1. -
Page 28: Opening And Closing
Opening and Closing SMA Solar Technology AG 7 Opening and Closing NOTICE! Static discharges can damage the Sunny Boy! • Before you touch a component inside the Sunny Boy ground yourself by touching PE or a grounded object. 7.1 Opening the Sunny Boy... -
Page 29: Closing The Sunny Boy
SMA Solar Technology AG Opening and Closing 7.2 Closing the Sunny Boy 1. Fasten the cover to the housing with four screws and washers, with the toothing facing toward the housing cover. The screws must be tightened with approximately 6 Nm torque to ensure the sealing of the housing and the grounding of the cover. -
Page 30: Maintenance And Cleaning
Maintenance and Cleaning SMA Solar Technology AG 8 Maintenance and Cleaning 8.1 Checking Heat Dissipation You only need to check the heat dissipation of the Sunny Boy if during a visual inspection you notice a marked build-up in the fan guard or the Sunny Boy is increasingly observed to be in derating mode. -
Page 31: Cleaning The Fan Gills
Sunny Boy accessories kit). Setting the parameter 1. Request the installer password on the SMA Service Line (contact: see page 59). 2. Set the "Fan Test" parameter to "1" in the installer mode. 3. The Sunny Boy sucks air in from underneath and then blows it back out on the upper sides. Look out for any unusual noise which could indicate incorrect installation or that the fans are faulty. - Page 32 Maintenance and Cleaning SMA Solar Technology AG Jumper position for checking the fan 3. Close the Sunny Boy as described in section 7.2 „Closing the Sunny Boy“ (29). 4. Restart the Sunny Boy. The jumper is only recognized after the system has been restarted (i.e. all LEDs must have gone out before a restart).
-
Page 33: Inspection Of The Electronic Solar Switch
Electronic Solar Switch can no longer safely disconnect the DC side. Do not insert the handle again. Replacements for damaged Electronic Solar Switch handles are available from SMA Solar Technology. The metal tongues do not show brown Insert the Electronic Solar Switch securely in the socket on discoloration. -
Page 34: Troubleshooting
Event Measure There is a conducting connection. There is probably another fault in the Sunny Boy. Contact the SMA Service Line. Continue with point 4. There is no conducting connection. The respective varistor is defective and must be replaced. The varistors are specially manufactured for use in the Sunny Boy and are not commercially available. -
Page 35: Ground Fault Monitoring
SMA Solar Technology AG Troubleshooting 9.2 Ground fault monitoring DANGER! Danger to life due to live PV generator! • Do not touch the frame of the solar generator. • Do not touch PE. • Do not connect strings with ground faults to the Sunny Boy. -
Page 36: Decommissioning
Decommissioning SMA Solar Technology AG 10 Decommissioning 10.1 Disassembly CAUTION! Risk of injury due to the heavy weight of the Sunny Boy! • Take the Sunny Boys weight of 41 kg into account. DANGER! Lethal danger caused by high voltages in the Sunny Boy! •... -
Page 37: Packaging
Dispose of the Sunny Boy at the end of its service life in accordance with the disposal regulations for electronic waste which apply at the installation site at that time. Alternatively, send it back to SMA Solar Technology with shipping paid by sender, and labeled "ZUR ENTSORGUNG" ("for disposal"). -
Page 38: Technical Data
< 0.1 W General data Sunny Boy 3300 Sunny Boy 3800 EC Declaration of Conformity enclosed set of documents, download area at www.SMA.de/en under Certificate Dimensions (W / H / D) in mm 450 / 352 / 236 Weight 41 kg... - Page 39 SMA Solar Technology AG Technical Data General data Sunny Boy 3300 Sunny Boy 3800 Climatic conditions in accordance with DIN EN 60529: Location of type C: Class 4K4H extended temperature range: -25 °C to +60 °C extended air humidity range: 0 ...
- Page 40 Technical Data SMA Solar Technology AG Efficiency curves The efficiency of the Sunny Boy depends mainly on the input voltage of the connected PV strings. The lower the input voltage, the higher the efficiency. SB33_38-IEN083330 Installation Guide...
-
Page 41: Contact
SMA Solar Technology AG Contact 12 Contact If you have technical problems concerning our products, please contact the SMA Service Line. We require the following information in order to provide you with the necessary assistance: • Sunny Boy device type • serial number of the Sunny Boy •... - Page 42 Contact SMA Solar Technology AG SB33_38-IEN083330 Installation Guide...
-
Page 43: Exclusion Of Liability
The use of supplied software produced by SMA Solar Technology AG is subject to the following conditions: • SMA Solar Technology AG rejects any liability for direct or indirect damages arising from the use of software developed by SMA Solar Technology AG. This also applies to the provision or non-provision of support activities. - Page 44 SMA Solar Technology AG www.SMA.de Sonnenallee 1 34266 Niestetal, Germany Tel.: +49 561 9522 4000 Fax: +49 561 9522 4040 E-Mail: Vertrieb@SMA.de Freecall: 0800 SUNNYBOY Freecall: 0800 78669269...
Need help?
Do you have a question about the SUNNY BOY 3300 and is the answer not in the manual?
Questions and answers