Ubiquiti airCam Mini Quick Start Manual
Desktop security camera
Hide thumbs
Also See for airCam Mini:
- User manual (31 pages) ,
- Quick start manual (17 pages) ,
- Quick start manual (21 pages)
Table of Contents
Advertisement
Quick Links
Download this manual
See also:
User Manual
Advertisement
Table of Contents

Related Manuals for Ubiquiti airCam Mini


Summary of Contents for Ubiquiti airCam Mini
- Page 1 Desktop Security Camera...
-
Page 3: Package Contents
For instructions on using the software, refer to the documentation included on the CD‑ROM. The airCam Mini is equipped with an integrated microSD card writer. Using an optional microSD card (not included), audio and video can conveniently be captured and recorded simultaneously on the card and on an airVision‑controlled... -
Page 4: Hardware Overview
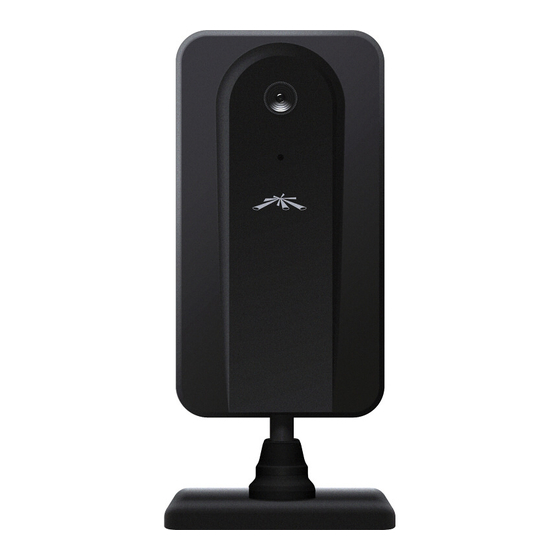
airCam Mini ™ Hardware Overview Front Focus Reset Reset Ring Button Microphone microSD Card Slot Ethernet Port Desktop Stand Back Camera body Base pivot joint rotates 360˚ rotates 360˚... - Page 5 Hardware Overview 30˚ 60˚ Camera can be angled to lean 60˚ forward or 30˚ backward. 50˚ 50˚ Maximum side-to-side tilt is 50˚ off vertical...
-
Page 6: Installation Overview
LED operation may be disabled using the Camera Configuration Interface. Installation Overview Your airCam Mini is pre‑assembled at the factory and is Plug and Play ready. If you do not plan on using the optional microSD recording feature, skip to step 2. -
Page 7: Wall Mount Installation (Optional)
Wall Mount Installation (Optional) Connect an Ethernet cable to the Ethernet port located on the back of the airCam Mini. Wall Mount Installation (Optional) Position the Wall Mount Bracket at the desired location on the wall. Mark the location of the hole, and drill the hole with a 6 mm drill bit. -
Page 8: Connecting The Power
Detach the airCam Mini from the Desktop Stand. Attach the airCam Mini to the Wall Mount Bracket. Connecting the Power Connect the other end of the Ethernet cable from the airCam Mini to the Ethernet port labeled POE on the PoE Adapter. -
Page 9: Camera Configuration Interface
Make sure that your host machine is connected to the same LAN as the airCam Mini. The airCam Mini is set to DHCP by default. If you have a router or DHCP server providing addresses on your network, check your DHCP client table to obtain the address of the airCam Mini. - Page 10 Mini ™ Launch your web browser. In the address field, type http:// and then the IP address of the airCam Mini, for example: http://192.168.1.20. Press enter (PC) or return (Mac). The login screen will appear. Enter ubnt in the Username and Password fields and click Login.
-
Page 11: General Warranty
Products furnished hereunder shall be free from defects in material and workmanship for a period of one (1) year from the date of shipment by UBIQUITI NETWORKS under normal use and operation. UBIQUITI NETWORKS sole and exclusive obligation under the foregoing warranty shall be to repair or replace, at its option, any defective Product that fails during the warranty period. - Page 12 Disclaimer: UBIQUITI NETWORKS does not warrant that the operation of the products is error‑free or that operation will be uninterrupted. In no event shall UBIQUITI NETWORKS be responsible for damages or claims of any nature or description relating to system performance, including coverage, buyer’s selection of products for buyer’s application and/or failure of...
-
Page 13: Industry Canada
Compliance Industry Canada This Class B digital apparatus complies with Canadian ICES‑003. Cet appareil numérique de la classe B est conforme à la norme NMB‑003 du Canada. CE Marking CE marking on this product represents the product is in compliance with all directives that are applicable to it. Alert sign! Follows CE marking Alert sign must be indicated if a restriction on use applied to the product and it must follow the CE marking. - Page 14 Nous vous recommandons de protéger vos réseaux contre les environnements les plus brutaux et les décharges électrostatiques les plus dévastatrices avec un câble Ethernet Ubiquiti Networks avec blindage renforcé. Pour en savoir plus, rendez‑vous sur www.ubnt.com/toughcable Italiano Si consiglia di proteggere le reti dagli ambienti e dagli attacchi ESD più...
-
Page 16: Ubiquiti Networks Support
Email: support@ubnt.com Phone (9 a.m. ‑ 5 p.m. PST): 408-942-1153 Online Resources Wiki Page: wiki.ubnt.com Support Forum: forum.ubnt.com Downloads: downloads.ubnt.com w w w . u b n t . c o m © 2012 Ubiquiti Networks, Inc. All rights reserved.
Need help?
Do you have a question about the airCam Mini and is the answer not in the manual?
Questions and answers