Table of Contents
Advertisement
Advertisement
Table of Contents

Related Manuals for Ubiquiti airCAM DOME


Summary of Contents for Ubiquiti airCAM DOME
- Page 1 Security Camera Camera Configuration Interface...
-
Page 2: Table Of Contents
airCam Dome User Guide Table of Contents ™ Table of Contents Chapter 1: Product Overview ........Package Contents . - Page 3 airCam Dome User Guide Table of Contents ™ Chapter 8: System Tab ..........Device .
-
Page 4: Chapter 1: Product Overview
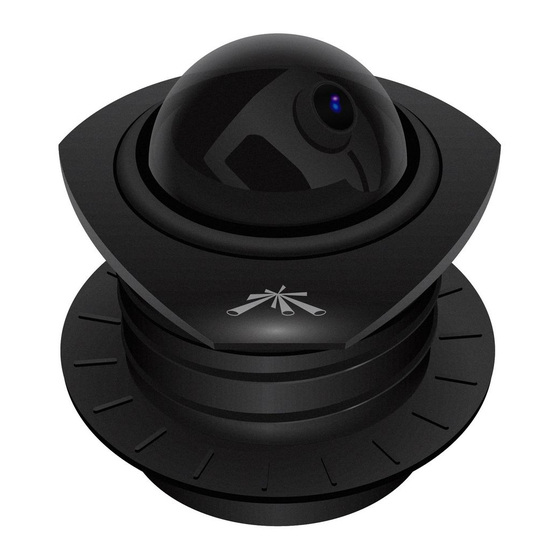
Dome, by Ubiquiti Networks. Removable Lens Cover This User Guide is designed to provide instructions about the installation of the airCam Dome and to provide details about how to install the camera and use the camera Lens configuration interface. Manual Lens The airCam Dome includes the airVision software. -
Page 5: Installation
™ Chapter 2: Installation 4. Insert the airCam Dome Base into the Bezel. The airCam Dome is designed to be mounted in a ceiling. Perform the following steps to install the airCam Dome. Installation 1. (Optional) Insert a microSD card into the slot on the side of the camera until it locks into the slot. - Page 6 Adapter. Connect the other end of the power cord to a power outlet. The Power LED should light up on the airCam Dome. 8. Connect the other end of the Ethernet cable to the Ethernet port labeled POE on the PoE Adapter.
-
Page 7: Chapter 3: Using The Camera Configuration Interface
1. Make sure that your host machine is connected to the same LAN as the airCam Dome. 2. The airCam Dome is set to DHCP by default. If you have a router or DHCP server providing addresses on Adjusting the Camera View... -
Page 8: Tools
airCam Dome User Guide Chapter 3: Using the Camera Configuration Interface ™ Network Ping • Services The Services tab covers the configuration of system management services including Ping Watchdog, Select Destination IP A remote system IP can be selected SNMP Agent, Web Server, SSH Server, Telnet Server, from the list which is generated automatically or can be NTP Client, Dynamic DNS, and System Log. -
Page 9: Chapter 4: Main Tab
Displays the version of the airVision software Live View installed. Uptime This is the total time the airCam Dome has been running since last power up (reboot) or software upgrade. The time is displayed in days, hours, minutes and seconds. Date Displays the current system date and time. -
Page 10: Camera Controls
Domain Name System (DNS) is an Internet “phone book” which translates domain names to IP addresses. These fields identify the server IP addresses that the airCam Dome uses for translation. It is assigned automatically by the DHCP server. DHCP Server Displays the IP address of the DHCP Server assigning the IP address to the airCam Dome. - Page 11 Refresh. ARP Table Lists all the entries of the Address Resolution Protocol (ARP) table currently recorded on the airCam Dome. ARP is used to associate each IP address to the unique hardware Media Access Control (MAC) address of each device.
-
Page 12: Chapter 5: Video Tab
Configuration Interface. If you need to insert a microSD card and haven’t installed your airCam Dome yet, refer to “Installation” on page 2. If you’ve already installed your airCam Dome but need to remove the airCam Dome Camera Base from the Bezel to insert a microSD card, perform the following steps: Ubiquiti Networks, Inc. -
Page 13: Formatting The Microsd Card
Rotate the camera to the desired position. 4. Insert the airCam Dome Base into the Bezel. Formatting the microSD Card 1. Go to the Video tab. 2. Click Format Memory Card. -
Page 14: Video Settings
airCam Dome User Guide Chapter 5: Video Tab ™ Removing the microSD Card Video Settings 1. Go to the Video tab. 2. Click Remove Memory Card. Bit Rate, Kbit/s This option allows the selection of the bit rate in kilobits per second. Options include 256, 512, 1024, 2048, 4096. -
Page 15: Motion Record
airCam Dome User Guide Chapter 5: Video Tab ™ Scheduled Record Select Full Frame Selects the entire camera frame for motion detection. New Selection Allows you to select a specific area of the frame for motion detection. Click and hold the area of the image that you want to select. -
Page 16: Video Playback
airCam Dome User Guide Chapter 5: Video Tab ™ Format Memory Card Use this option to format a new microSD card. Remove Memory Card Use this option to safely remove a microSD card. Name Displays the name of the recording. Place the cursor over the file name to see a preview image from the recording. -
Page 17: Chapter 6: Network Tab
Enter the Netmask for the Internet. This can be a DSL Modem, Cable Modem, or airCam Dome to use if a DHCP server is not found. a WISP Gateway Router. The airCam Dome will direct the packets of data to the gateway if the destination host is not within the local network. -
Page 18: Tcp Explicit Congestion Notification
LAN interface if enabled. The supported and enabled on both endpoints. TCP generated IP address is a unique Class B IP address from ECN is disabled on the airCam Dome by default. the 169.254.X.Y range (Netmask 255.255.0.0) which is Advanced Ethernet Settings intended for use within the same network segment only. -
Page 19: Chapter 7: Services Tab
Ping tool. The Ping works by sending ICMP “echo request” Ping Watchdog tool will reboot the airCam Dome. The packets to the target host and listening for ICMP “echo default value is 3. -
Page 20: Snmp Agent
Administrator credentials problems. For the purpose of equipment identification, in order to grant SSH access to the airCam Dome, it is always a good idea to configure SNMP agents with otherwise an Authentication Key will be required. -
Page 21: Dynamic Dns
DNS Server of any changes occurring in the airCam Dome’s IP setting, there by allowing access to the airCam Dome through a Domain Name even if the airCam Dome’s IP address has changed. Host Name Defines the Dynamic DNS Host Name. -
Page 22: Chapter 8: System Tab
Dome User Guide Chapter 8: System Tab ™ Chapter 8: System Tab Date Settings The System tab contains controls for the airCam Dome Device Settings, Date Settings, System Accounts, Configuration Management, and Device Maintenance. Device Timezone Specifies the timezone according to GMT Device Name (Host name) is the system wide device (Greenwich Mean Time). -
Page 23: Maintenance
This option will reboot • Read-Only Account Name Specifies the name of the the airCam Dome and all factory default settings will be system user. restored. You may want to use the Backup Configuration •... - Page 24 Please be patient, as the firmware upgrade routine can take 3-7 minutes. The airCam Dome will be inaccessible until the firmware upgrade routine is completed. 7. The firmware update progress bar will be displayed.
-
Page 25: Appendix A: Specifications
Dome User Guide Appendix A: Specifications ™ Appendix A: Specifications airCam Dome Specifications Dimensions 100 x 94 mm (length x diameter) Weight 184 g Ports (1) 10/100 Ethernet, microSD Card Slot Sensor Progressive Scan RGB CMOS ¼" Lens 1.96 mm/F2.0 Horizontal of View 90°... -
Page 26: Appendix B: Safety Notices
airCam Dome User Guide Appendix B: Safety Notices ™ Appendix B: Safety Notices 1. Read, follow, and keep these instructions. 2. Heed all warnings. 3. Only use attachments/accessories specified by the manufacturer. WARNING: Do not use this product in location that can be submerged by water. -
Page 27: General Warranty
airCam Dome User Guide Appendix C: Warranty ™ Appendix C: Warranty Disclaimer UBIQUITI NETWORKS does not warrant that the operation of the products is error-free or that operation will be General Warranty uninterrupted. In no event shall UBIQUITI NETWORKS UBIQUITI NETWORKS, Inc (“UBIQUITI NETWORKS”) be responsible for damages or claims of any nature represents and warrants that the Products furnished or description relating to system performance,... -
Page 28: Appendix D: Compliance Information
airCam Dome User Guide Appendix D: Compliance Information ™ Appendix D: Compliance Pour réduire le risque d’interférence aux autres utilisateurs, l’antenne type et son gain doivent être Information choisies de façon que l’équivalent puissance isotrope rayonnée équivalente (pire) n’est pas plus que cela autorisé... -
Page 29: Rohs/Weee Compliance Statement
airCam Dome User Guide Appendix D: Compliance Information ™ RoHS/WEEE Compliance Statement detallada sobre la eliminación segura de su aparato usado, consulte a las autoridades locales, al servicio de recogida y eliminación de residuos de su zona o pregunte en la tienda donde adquirió... -
Page 30: Appendix E: Declaration Of Conformity
airCam Dome User Guide Appendix E: Declaration of Conformity ™ Appendix E: Declaration of Malti Hawnhekk, UBIQUITI NETWORKS, jiddikjara li dan UBIQUITI NETWORKS device, jikkonforma mal- ti ijiet essenzjali u ma [Maltese] provvedimenti o rajn relevanti li hemm fid-Dirrettiva 1999/5/EC. Conformity Norsk UBIQUITI NETWORKS erklærer herved at utstyret UBIQUITI... -
Page 31: Appendix F: Contact Information
airCam Dome User Guide Appendix F: Contact Information ™ Appendix F: Contact Information Ubiquiti Networks Support Ubiquiti Support Engineers are located in the U.S. and Europe and are dedicated to helping customers resolve software, hardware compatibility, or field issues as quickly as possible.
Need help?
Do you have a question about the airCAM DOME and is the answer not in the manual?
Questions and answers