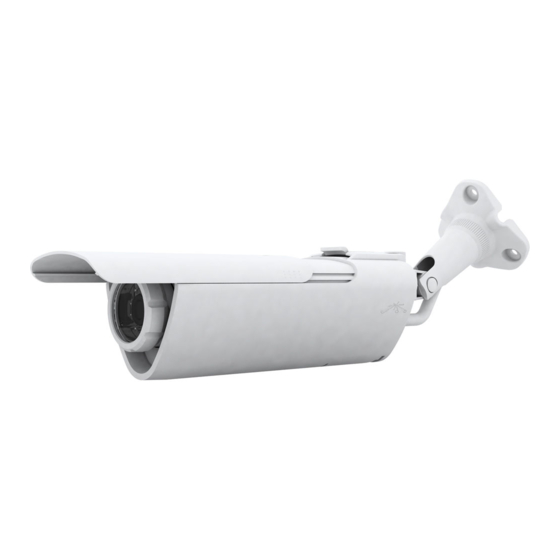
Ubiquiti airCam Quick Start Manual
Ubiquiti networks aircam quick start guide
Hide thumbs
Also See for airCam:
- User manual (28 pages) ,
- Quick start manual (29 pages) ,
- Quick start manual (25 pages)
Table of Contents
Advertisement
Quick Links
Advertisement
Table of Contents

Summary of Contents for Ubiquiti airCam
-
Page 3: Package Contents
Introduction Introduction Thank you for purchasing the airCam. This Quick Start Guide is designed to guide you through the installation of the airCam and show you how to access the airCam's configuration interface. The airCam includes the airVision software. For instructions on ™... -
Page 4: Hardware Overview
Hardware Overview Front Sun Shade Lens remove plastic lens film before use... - Page 5 (for outdoor installations) LEDs Power The Power LED will light steady orange when the airCam is connected to a power source. Ethernet The Ethernet LED will light steady green when an active Ethernet connection is made and flash when there is activity.
-
Page 6: Installation Overview
The ideal outdoor location for mounting the airCam would be under an overhang/eave that shelters the camera. If the airCam is located in a completely open outdoor environment without an overhang/eave, do not install camera with a down tilt of more than 45 degrees. - Page 7 Outdoor Installation 1. Press down on the release to remove the Ethernet Door. Important: Do not remove the plug. Plug 2. Connect the Ethernet cable to the Ethernet port.
- Page 8 Ethernet cable. Reconnect the Ethernet Door to the airCam leaving the Ethernet cable fed through the seal at the bottom of the camera. 4. Insert the Mounting Bracket into the airCam until a click is heard to confirm a secure installation.
- Page 9 Outdoor Installation 5. There are three recessed areas for the Ethernet cable on the Mounting Bracket Base. Thread the Ethernet cable through two of the recessed areas and out the one that will be nearest to your power source. Important: If the power source is above the camera extend the cable 70‑80 mm below the camera body before routing up to the power source.
-
Page 10: Indoor Installation
Indoor Installation 1. Remove the screw and knob that connect the Mounting Bracket Base to the camera attachment by turning the knob counter‑ clockwise. Mounting Bracket Base 2. Insert an Ethernet cable through the Mounting Bracket Base. 3. Reconnect the Mounting Bracket Base to the camera attachment by reconnecting the screw and knob. - Page 11 Indoor Installation 4. Unscrew the Plug on the back of the airCam. 5. Connect the Ethernet cable to the Ethernet port. 6. Insert the Mounting Bracket into the airCam until a click is heard to confirm a secure installation.
-
Page 12: Connecting The Power
7. Position the Mounting Bracket in the desired location and use a pencil to mark the holes on the wall. 8. Use a 6 mm drill bit to drill the holes in the wall. 9. Insert the 3 screw anchors into the wall. - Page 13 LAN on the PoE Adapter. 3. Connect the power cord to the power port on the PoE Adapter. Connect the other end of the power cord to a power outlet. The Power LED should light up on the airCam.
-
Page 14: Camera Configuration Interface
1. Make sure that your host machine is connected to the same LAN as the airCam. 2. The airCam is set to DHCP by default. If you have a router or DHCP server providing addresses on your network, check your DHCP Client Table to obtain the address of the airCam. -
Page 15: Adjusting The Camera View
Adjusting the Camera View 6. The Main screen will appear and you should see a live stream of video from the airCam. Adjusting the Camera View Adjusts Mounting Bracket Base Adjusts Camera Side to Side Adjusts Camera Up and Down Adjusts Camera Focus Hardware installation is complete. -
Page 16: General Warranty
Buyer for breach of warranty and shall constitute fulfillment of all liabilities of UBIQUITI NETWORKS with respect to the quality and performance of the Products. UBIQUITI NETWORKS reserves the right to inspect all defective Products (which must be returned by Buyer to UBIQUITI NETWORKS factory freight prepaid). -
Page 17: Industry Canada
Compliance Returns In the unlikely event a defect occurs, please work through the dealer or distributor from which this product was purchased. Compliance This device complies with Part 15 of the FCC Rules. Operation is subject to the following two conditions: 1. -
Page 18: Rohs/Weee Compliance Statement
CE Marking CE marking on this product represents the product is in compliance with all directives that are applicable to it. Alert sign! Follows CE marking Alert sign must be indicated if a restriction on use applied to the product and it must follow the CE marking. - Page 20 Công ty CP TM-DV Tân Viễn Tin Địa chỉ: 11B Nguyễn Đình Chiểu, P.Đa Kao, Quận 1 Điện thoại: 08 39 102 188 Website: www.thegioiwifi.vientin.com...


Need help?
Do you have a question about the airCam and is the answer not in the manual?
Questions and answers