
Subscribe to Our Youtube Channel
Related Manuals for Euromaid GOC64


Summary of Contents for Euromaid GOC64
- Page 1 Instructions and installation manual MODELS: GOC64 / GOC75 / GOC95 PLEASE READ THIS MANUAL BEFORE INSTALLING THE COOKTOP. COD. 04067LM 15.10.2014...
- Page 2 We also carry a complete range of spare parts for all Euromaid products. For all your spare parts enquiries please contact Parts on: 1800 805 300...
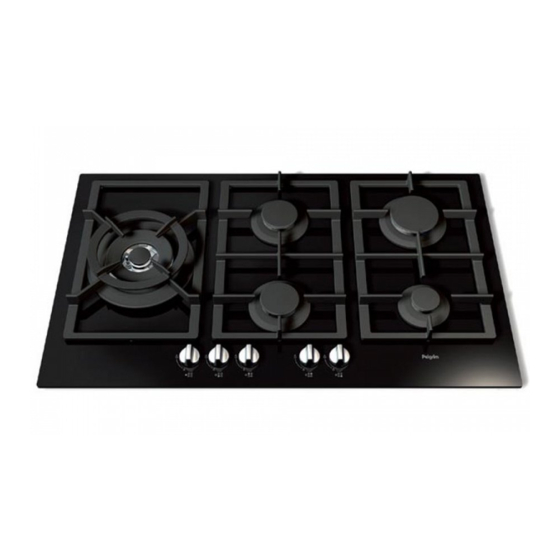
- Page 3 DESCRIPTION OF COOKTOP MOD.: GOC75 MOD.: GOC64 MOD.: GOC95 Fig. A To use the WOK pan support (If present) on ultra rapid gas burner only. Put it on the ultra rapid pan support and make sure of the stability (see fig. A).
- Page 4 1) BURNERS Power ratings Pan Ø A diagram is screen-printed above each knob on the Burners in cm Natural U-LPG front panel. This diagram indicates to which burner the knob in question corresponds. After having 24 ÷ 26 Ultra rapid/WOK 14.5 MJ/h 12.6 MJ/h opened the gas mains or gas bottle tap, light the Rapid 12.0 MJ/h 10.4 MJ/h...
- Page 5 WARNINGS AND ADVICE FOR THE USER: - Do not attempt to change the technical characteristics of the product because it can be dangerous. - If you decide longer use this appliance any more (or replace an old model), before disposing of it, make it inoperative in conformity with current law on the protection of health and the prevention of environmental pollution by making its dangerous parts harmless, especially for children who might play on an abandoned appliance.
- Page 6 CLEANING IMPORTANT: Always disconnect the appliance from the gas and electricity mains before carrying out any cleaning operation. 2) COOKTOP Periodically wash the hot plate, the enamelled stell pan support, the enamelled burner caps “A”, “B” and “C” and the burner heads "T" (see fig. 3 and 3/A) with lukewarm soapy water. They should also be cleaned plugs "AC"...
- Page 7 CLEANING COOKTOP CERAMIC GLASS If you wish to maintain the shine of the ceramic surface, treat the glass with a silicon-based film product before use to protect the surface against water and dirt. This protective film is not durable, so it is advisable to repeat the application of the product frequently. It is very important to clean the hob every time you use it, while the glass is still warm.
-
Page 8: Technical Information For The Installer
COMPLY WITH THE DIMENSIONS (in mm) 4F (60) 63.5 63.5 173.5 min. 5F (70) 63.5 63.5 173.5 min. 5F (90) 62.5 62.5 73.5 min. FIG. 4 Fig.4/A Mod.:GOC64 Fig.4/B Mod.:GOC75 Fig.4/C Mod.:GOC95... - Page 9 INSTALLATION 4) FIXING THE COOKTOP - When the appliance is installed so that the base can be touched, we recommend fitting a The cooktop has a special seal which prevents protecting shield. This shield must be at least liquid from getting into the cabinet. Strictly comply 70 mm below the base of the bench top (fig.
-
Page 10: Gas Connection
INSTALLATION 5) GAS CONNECTION direction) and transition pieces (supplied with the appliance), in accordance with figure 7. The gas connection is located in the rear and on The transition piece on the supply side of the the underside of the appliance 100 mm from the regulator must be provided by the installer. -
Page 11: Electrical Connection
INSTALLATION 6) ELECTRICAL CONNECTION connection since these could create false contacts and lead to dangerous overheating. IMPORTANT: the appliance must be installed When the appliance is connected straight to the following the manufacturer's instructions. The electricity main: - Install an omnipolar circuit-breaker between the manufacturer will not be liable for injury to appliance and the electricity main. - Page 12 ADJUSTMENTS Always disconnect the appliance from the 7) TAPS electricity main before making any adjustments. Our taps are suitable for all gas, they are male All seals must be replaced by the technician at conical type. the end of any adjustments or regulations. “Reduced rate”...
-
Page 13: Conversion Procedure
8) UNIVERSAL LP GAS TO NATURAL GAS 9) NATURAL GAS TO UNIVERSAL LP GAS CONVERSION PROCEDURE CONVERSION PROCEDURE Appliance models: Gas stainless steel cooktop Appliance models: Gas stainless steel cooktop models: models: GOC64 GOC64 4 Burners 4 Burners GOC75 GOC75 5 Burners 5 Burners... -
Page 14: Replacing The Injectors
CONVERSIONS 10) REPLACING THE INJECTORS and affix the label corresponding to the new gas regulation on the appliance instead of the already The burners can be adapted to different types of existing one. This label is supplied in the packet gas by installing injectors suited to the type of gas containing the spare injectors. -
Page 15: Technical Assistance And Spare Parts
SERVICING CABLE TYPES AND SECTIONS TYPE OF TYPE OF SINGLE - PHASE COOKTOP CABLE POWER SUPPLY Gas cooktop H05 RR - F Section 3 x 0.75 mm ATTENTION!!! If the power supply cable is replaced, the installer should leave the ground wire longer than the phase conductors (fig. - Page 16 Euromaid Appliances Pty Ltd. 20 Carlotta Street Artarmon NSW 2064 Australia please call sales and service on 1800 805 300 Website www.euromaid.com.au...
Need help?
Do you have a question about the GOC64 and is the answer not in the manual?
Questions and answers