
Related Manuals for Canyon CNS-SW7


Summary of Contents for Canyon CNS-SW7
-
Page 1: Table Of Contents
TABLE OF CONTENTS INTRODUCTION AFETY RECAUTIONS ACKAGE ONTENTS EVICE VERVIEW UTTON PERATION UMMARY BASIC OPERATION CURRENT TIME MODE UNCTIONAL ISPLAY EATHER ORECAST EATURE URRENT ETTINGS DAILY ALARM MODE NABLING AILY LARM OURLY HIME AILY LARM ETTINGS CHRONOGRAPH MODE PERATING HRONOGRAPH TIMER MODE UICK ALUE AND... - Page 2 DUAL TIME MODE ALTIMETER MODE EMPERATURE AND ISTORY ISPLAY ELECTION AND LTIMETER DJUSTMENT LTITUDE DJUSTMENT BSOLUTE LTITUDE DJUSTMENT EVEL RESSURE DJUSTMENT ACTORY EFAULT DJUSTMENT BAROMETER MODE EMPERATURE AND ISTORY ISPLAY ELECTION AND AROMETER DJUSTMENT BSOLUTE RESSURE DJUSTMENT ACTORY EFAULT DJUSTMENT COMPASS MODE AGNETIC ECLINATION...
-
Page 3: Introduction
To fully utilize the functions and features of CANYON CNS-SW7, please read through the user manual carefully before using the product, and follow all of the procedures in the manual to fully enjoy all features of the product. -
Page 4: Package Contents
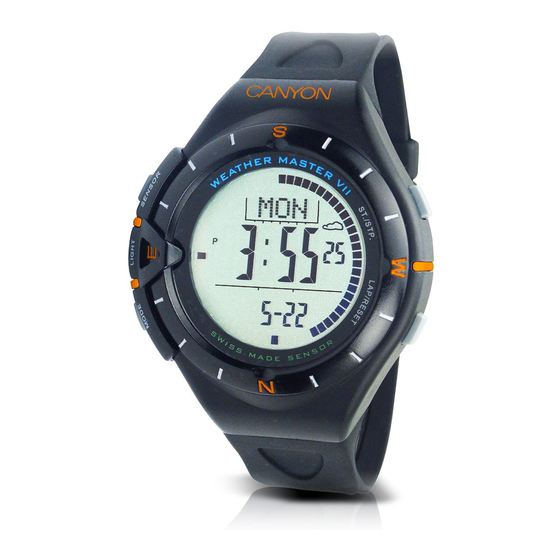
Package Contents Product Image Item Name CANYON CNS-SW7 Main Unit Quick Guide Documentation CD Device Overview [SR] Button [S/S] Button [EL] Button [L/R] Button [M] Button... -
Page 5: Button Operation Summary
Button Operation Summary Mode Button [M] Press to cycle through 6 functional modes. Press and hold to enter/exit Setting Mode. During Settings Mode, press to cycle through different settings. Sensor Button [SR] Press to cycle through Altimeter, Barometer, and Compass modes. Start/Stop Button [S/S] Press to show current date at Current Time Mode. -
Page 6: Basic Operation
Basic Operation CANYON CNS-SW7 is a multi-functional watch device that contains 9 functional modes including Current Time Mode, Daily Alarm Mode, Chronograph Mode, Timer Mode, Pacer Mode, Dual Time Mode, Altimeter Mode, Barometer Mode, Compass Mode. Press [M] to cycle through 6 Timekeeping modes and press and hold [SR] to... -
Page 7: Current Time Mode
Current Time Mode Functional Display Press [S/S] to toggle between different functional displays including Day of Week display, Temperature display, Altitude Tendency display, and Sea Level Pressure Tendency display Weather Forecast Feature The device provided 4 different symbols indicating the forecasted weather as shown. -
Page 8: Current Time Mode Settings
Current Time Mode Settings Press and hold [M] for 2 seconds to enter Settings Mode. Upon entering, the Settings Mode indicator SET will be displayed at the top of screen. Press [M] to shift through different digits and settings including month-day format, 12/24 hour format, LCD contrast level, and beeping. -
Page 9: Daily Alarm Mode
Daily Alarm Mode Enabling Daily Alarm/Hourly Chime Press [S/S] to switch between daily alarm1, daily alarm2, and hourly chime display. Press [L/R] to switch daily alarms on/off at their displays respectively. A daily alarm indicator will be displayed on the screen when daily alarm is switched on. -
Page 10: Chronograph Mode
Chronograph Mode Operating Chronograph Upon entering, the Chronograph Mode indicator CHR will be displayed at the top of screen. The device measures elapsed time and current lap time. Press [S/S] to start counting. Press the button again to stop counting and the elapsed time will be displayed on the screen. -
Page 11: Timer Mode
Timer Mode Quick Set Value and User Preset Value Upon entering, the Timer Mode indicator TMR will be displayed at the top of screen. Press [L/R] to cycle through quick set values of countdown timer. User Preset Value Settings Press and hold [M] for 2 seconds to enter target time setting. -
Page 12: Operating Timer
Operating Timer Press [S/S] to start countdown. The residual time will be displayed on the screen. Press [S/S] during count-down to pause. Press the button again to resume countdown. Press [L/R] to reset count-down timer to target time. NOTE: The device will beep once per minute when the timer reaches last 10 minutes, once every 10 seconds when timer reaches last one minute, and once every... -
Page 13: Pacer Mode
Pacer Mode Operating Pacer Upon entering, the Pacer Mode indicator PCR will be displayed at the top of screen. Press [S/S] to generate beeps at a pre-defined pacer rate. Press the button again to stop. The step counter increases one counter per beep. -
Page 14: Linking With Chronograph
Linking with Chronograph During Pacer Mode, press [M] to select Chronograph Mode. At Chronograph Mode, press [S/S] to start counting and beeping simultaneously. Press the button again to stop counting and beeping. -
Page 15: Dual Time Mode
Dual Time Mode Press and hold [M] for 2 seconds to enter Settings Mode. Press [M] to shift through different digits. Press [S/S] and [L/R] to adjust values. Press [M] to save modified settings and exit Settings Mode. -
Page 16: Altimeter Mode
Altimeter Mode Temperature and History Display Press [SR] anytime during main menu to cycle through Altimeter Mode, Barometer Mode, and Compass Mode. At the device screen display during Altimeter Mode, 1 of 2 Altimeter functions, temperature or history, will be displayed at the top row. Current (history) altitude and the current (history) time are displayed at the middle row and bottom row of... -
Page 17: Unit Selection And Altimeter Adjustment
Unit Selection and Altimeter Adjustment Press [S/S] to switch between measurement units including altitude units meter(m)/feet(ft) and temperature units (˚C)/ (˚F). There are 4 methods to adjust/ calibrate altimeter functions including Zero Altitude, Absolute Altitude, Sea Level Pressure and Factory Default Adjustment. Please refer to following sections for more details. -
Page 18: Absolute Altitude Adjustment
Absolute Altitude Adjustment Absolute Altitude function takes altitude measurement calculated from air pressure. The device requires calibration from time to time to obtain more accurate readings. NOTE: A precise altitude indication such as sea level (0m) or an altitude sign pole is required before calibration. -
Page 19: Sea Level Pressure Adjustment
Sea Level Pressure Adjustment Sea Level Pressure function takes altitude measurement calculated by the difference between current and sea level pressure. The device requires calibration from time to time to obtain more accurate readings. Press and hold [M] for 2 seconds during Altimeter Mode to enter Settings Mode. -
Page 20: Barometer Mode
Barometer Mode Temperature and History Display Press [SR] anytime during main menu to cycle through Altimeter Mode, Barometer Mode, and Compass Mode. At the device screen display during Altimeter Mode, press [S/S] to cycle through 3 Barometer functions including temperature, Sea Level Pressure, and history displayed at the top row. -
Page 21: Unit Selection And Barometer Adjustment
Unit Selection and Barometer Adjustment Press [S/S] to switch between measurement units including pressure units mb/hPa / inHg and temperature units (˚C)/ (˚F). There are 2 methods to adjust/ calibrate barometer functions including Absolute Pressure and Factory Default Adjustment. Please refer to following sections for more details. -
Page 22: Factory Default Adjustment
Factory Default Adjustment Factory Default adjustment function restores factory default value. The device requires calibration from time to time to obtain more accurate readings. Press and hold [M] for 2 seconds during Altimeter Mode to enter Settings Mode. Press [M] to toggle between 2 pressure adjusting methods and to select F.DEF option. -
Page 23: Compass Mode
Compass Mode Precautions: Please keep the device away from all magnets or appliances that generate magnetic fields such as mobile phones, speakers, motors, etc. The device, like most magnetic compass, points to the magnetic North which is slightly different from the true North. Please refer to section below for more details. - Page 24 The angular difference between Magnetic North Pole and True North Pole is called magnetic declination. Its magnitude (in units of degrees and minutes) and direction (East or West) are dependent on the location of device. For users who intend to perform accurate navigations, device must be adjusted to compensate magnetic declination.
-
Page 25: Calibrating Compass
Calibrating Compass NOTE: Please observe Precautions section and check up magnetic declination values from chart above or websites provided before perform compass calibration. To calibrate compass function, press and hold [M] for 2 seconds to enter compass calibration settings. Upon entering, the magnetic declination indicator CAL will be displayed at the top of screen. - Page 26 The direction of an object can be represented in term of either compass direction or compass bearing. The compass directions are North, Northeast, East, Southeast, South, Southwest, West, and Northwest. The compass bearing direction of an object is defined as the angular difference between North and the object while assuming 0˚...
- Page 27 To take a compass measurement: NOTE: Please make sure that the device is parallel to horizon to acquire the most accurate measurement. Turn the device until the navigation arrow is pointing at the direction of desired object for measurement. Press [L/R] to enter Compass mode and to display corresponding compass direction and compass bearing.
Need help?
Do you have a question about the CNS-SW7 and is the answer not in the manual?
Questions and answers