DriSteem Humidi-tech Installation, Operation And Maintenance Manual
Hide thumbs
Also See for Humidi-tech:
- Installation, operation and maintenance manual (52 pages) ,
- Installation instructions and maintenance operations manual (24 pages) ,
- Service kit manual (18 pages)

Related Manuals for DriSteem Humidi-tech


Summary of Contents for DriSteem Humidi-tech
- Page 1 ® H um idi-t e ch E lect r ic H umidif ie r Inst allatio n, Op eratio n , and Maint enance Man u al...
- Page 2 HVAC and electrical contractors and in compliance with local, state, federal, and governing codes. Improper installation can cause property damage, severe personal injury, or death as a result of electric shock, burns, or fire. DRI-STEEM Technical Support: 800-328-4447 Read all warnings and instructions Read this manual before performing service or maintenance procedures on any part of the system.
- Page 3 To prevent such damage from humidifiers without water tempering, allow the tank to cool before draining. Humidifiers equipped with a water tempering device such as a DRI-STEEM Drane-kooler need fresh make-up water in order to function properly. Make sure the water supply to the water tempering device remains open during draining.
-
Page 4: Table Of Contents
Tap/softened water ........8 DRI-STEEM Humidification System Design DI/RO water option . - Page 5 Inspection and maintenance ......36 Most DRI-STEEM product manuals can be Off-season shut-down procedure ..... 39 downloaded, printed, and ordered from our web site: www.dristeem.com...
-
Page 6: Overview
Humidifiers using DI/RO water control water Humidi-tech tap/softened water humidifiers can be converted in levels using a float valve and low-water the field for use with DI/RO water, and Humidi-tech DI/RO water cutoff switch. humidifiers can be converted in the field for use with tap/softened water. -
Page 7: Dispersion Options
In addition to single tube dispersion, shown in Figure 2-3, SDU mounting options the dispersion options shown on this page are available for Remote from humidifier Humidi-tech humidifiers. See the installation instructions beginning on Page 19. Figure 3-1: Ultra-sorb dispersion OM-56-1 Directly above humidifier... -
Page 8: Capacities, Electrical Specifications, And Weights
Overview Table 4-1: Humidi-tech electrical specifications, capacities and weights HT model Single-phase 230V Three-phase 400V Shipping Operating weight (kg) weight (kg) Steam capacity (kg/h) I max. (A) Steam capacity (kg/h) I max. (A) — — 16.0 8.7* 24.0 13.0* 10.0 31.9... -
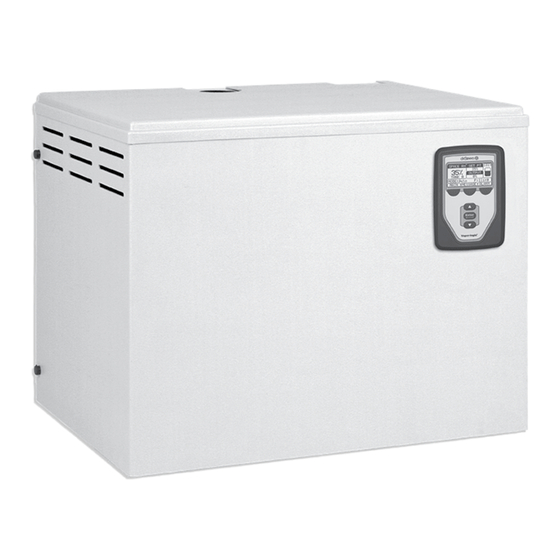
Page 9: Dimensions
Overview Figure 5-1: Humidi-tech dimensions Top view 614 mm 50 mm 50 mm 276 mm 25 mm 57 mm Power wiring knockout Steam outlet Control or SDU wiring knockout Venting Left side view Front view 472 mm 38 mm DN20 pipe thread frame drain... -
Page 10: Installation
Installation Humidifier When selecting a location for the humidifier, consider the following: Proximity to the duct Install the humidifier near the air duct system where the dispersion assembly will be located. The maximum recommended length for steam hose connecting a single humidifier to a dispersion assembly is 3 m. -
Page 11: Mounting The Humidifier
Figure 7-1: Humidi-tech clearance recommendations Maintain these clearances for service and maintenance. Top (when SDU is not mounted directly above To dispersion the Humidi-tech): 460 mm assembly Right side electrical controls: 915 mm Secured to supporting wall Supporting wall... -
Page 12: Tap/Softened Water
Humidi-tech (tap/softened water) field piping overview Steam vapor hose (maximum run 3 m). May also use pipe or tubing. Water supply line: See the DRI-STEEM Design Guide for maximum pipe or tubing lengths. nonmetallic, the first 1 m of water supply piping from humidifier should be metallic. -
Page 13: Di/Ro Water Option
Installation Figure 9-1: Humidi-tech (DI/RO water option) field piping overview Steam vapor hose (maximum run 3 m). May also use pipe or tubing. See the DRI-STEEM Design Guide for maximum pipe or tubing lengths. Water supply line: DN8 connection size... -
Page 14: Supply Water And Drain Piping
Drain piping may be of any code-approved material (copper, steel, Humidifiers equipped with a water or plastic rated for 100 °C minimum). If drainage by gravity is not tempering device such as a DRI-STEEM possible, use a reservoir pump rated for 100 °C water. Drane-kooler need fresh make-up water in order to function properly. -
Page 15: Drane-Kooler
Tank drain Discharge piping by installer Funnel Check valve Condensate pump Note: Use a condensate pump rated for your application. Pumps are rated by fluid temperature, head (pressure), and flow (gpm). Contact your local DRI-STEEM representative for pump selection. DC-1138... -
Page 16: Wiring
Installation Humidifier field wiring WARNING All wiring must be in accordance with all governing codes, and with Electric shock hazard the humidifier wiring diagrams. The diagrams are located inside the removable subpanel cover on the right side of the humidifier Only qualified electrical personnel cabinet. - Page 17 Installation Table 13-2: Figure 13-1: Shielded/screened cable drain wire connection to lug European breaker requirements I max. A Breaker size Humidifier side view 0 - 8.0 8.1 - 10.4 10.5 - 12.8 Vapor-logic4 12.9 - 16 keypad on front of cabinet 16.1 - 20 20.1 - 25.6 25.7 - 32...
-
Page 18: Humidistat And Transmitter Placement
Installation Other factors affecting humidity control Humidistat and sensor locations are critical Humidity control involves more than the Humidistat and sensor location have a significant impact on controller’s ability to control the system. Other humidifier performance. In most cases, do not interchanging duct factors that play an important role in overall and room humidity devices. -
Page 19: Selecting The Dispersion Assembly Location
Installation DRI-STEEM humidifiers operate with several types of dispersion Figure 15-1: assemblies for open spaces and for ducts and air handling units. Ultra-sorb with the High-efficiency Tube option Dispersion assemblies in ducts and air handling units must be positioned where the water vapor being discharged is carried off with the airstream and is absorbed before it can cause condensation or dripping. -
Page 20: Connecting To Humidifier With Vapor Hose
Installation I m p o r t a n t : The steam outlet on the humidifier is sized to the output of the humidifier. DO NOT use vapor hose or interconnecting Failure to follow the recommendations in this tubing/piping with an inside diameter smaller than the humidifier section can result in excessive back pressure on steam outlet. -
Page 21: Connecting To Humidifier With Tubing Or Pipe
WARNING pitch requirements for single tube applications. See Table 27-1 Excessive moisture hazard for interconnecting tubing and pipe pitch requirements for DRI-STEEM strongly recommends installing Rapid-sorb applications. a duct airflow proving switch and a duct high limit humidistat. These devices outlet and the dispersion system with pipe hangers. -
Page 22: Drip Tee Installation
Obstruction Insulate tubing and hard pipe to reduce steam loss Humidi-tech humidifier To dispersion assembly Tubing or pipe drip tee, by installer. DRI-STEEM 150 mm recommended part numbers for 304 stainless steel inline tees: 200 mm minimum DN20 25 mm air gap Open funnel or floor drain. -
Page 23: Mounting Sdu-I And Sdu-E
If the SDU-E or SDU-I is installed immediately above the panel, right side view Humidi-tech, disconnect both hose clamps on the steam hose, grip the hose and rotate it to break it loose from the tubing, and then slide the hose up onto the SDU steam tube until sufficient clearance VLC-OM-031 is provided to move the tank. - Page 24 Installation Figure 20-1: Figure 20-3: Wall-mounted Humidi-tech and SDU-I SDU mounting options Remote from humidifier Keyhole for M10 fasteners SDU chassis 406 mm 76 mm 451 mm 458 mm 406 mm 6.4 mm 76 mm Keyhole for M10 fasteners 470 mm...
- Page 25 Installation Table 21-1: SDU specifications Amps at Maximum Shipping 120V Horsepower model capacity weight (50/60 Hz) SDU-I 13.6 kg/h 31 kg 3.20 0.36 SDU-E 46.3 kg/h 28 kg 2.07 0.26 * Measurement taken 2 m in front of SDU cabinet. Figure 21-2: SDU-I mechanical detail Front view...
-
Page 26: Sdu-E Condensate Drain Connection
Installation SDU-E condensate drain connection Mounting SDU-E 1. Piping must be minimum DN20 and rated for 100 °C minimum continuous operating seal (provided by installer). See Figure 22-1 and instructions at temperature. left. 2. Drain line must be piped as shown in Figure 22-1. -
Page 27: Sdu-E Rise, Spread, And Throw
Installation SDU-E rise, spread, and throw Figure 23-1: SDU-E rise, spread, and throw As steam is discharged from the SDU-E, it quickly cools and turns to a visible fog that is lighter than air. As this fog is carried away from the SDU-E by the airstream, it tends to rise toward the ceiling. -
Page 28: Single Tube
Dashed lines indicate provided by installer. WARNING Installation notes Use DRI-STEEM’s hard pipe adapter kit to connect the steam Hot surface and steam hazard outlet to hard pipe. Use a hose clamp to connect the steam Dispersion tube, steam hose, tubing, or outlet to steam hose. - Page 29 Installation notes. drain 1% recommended DN15 condensate drain tube. Water seal Pitch 2% Humidi-tech humidifier 125 mm toward escutcheon plate. DN20 (minimum) condensate drain tube by installer. Must be suitable 100 °C water. 25 mm Open drain required. Locate air gap only in spaces with adequate air gap temperature and air movement to absorb flash steam;...
- Page 30 — horizontal-airflow duct with Rapid-sorb header level control, and spitting condensate from the either inside or outside the duct. See the Dri-calc Installation dispersion tube. Guides library or contact your representative/distributor or DRI-STEEM for installation instructions for air handler or vertical airflow applications.
-
Page 31: Rapid-Sorb
Installation Pitch requirements Table 27-2: Rapid-sorb dispersion tube capacities horizontal-airflow duct, consider the following: Tube capacity Tube diameter – DN40 dispersion tubes: Use a fastener of sufficient length to kg/h accommodate the 1% pitch requirements toward the DN20 header drain fitting. ≤... -
Page 32: Header Outside Of Duct, Horizontal Airflow
– 1% when using tubing or pipe Dimension A: 2 Use DRI-STEEM’s hard pipe adapter kit to connect steam outlet to hard pipe. Use a hose clamp to connect steam outlet to steam hose. Use a hose cuff and clamps to connect steam outlet to tubing. - Page 33 Installation 4. Position the flange of the L-bracket so it is upstream of the Note: tubes when the assembly is raised and fastened into position. See Page 32 for steam supply and condensate Fasten the L-bracket to the end of the dispersion tubes with the drain line connection instructions.
-
Page 34: Header Inside Of Duct, Horizontal Airflow
Open drain required: Locate air gap only in spaces with adequate temperature and air movement to absorb flash steam, or condensing on nearby surfaces may occur. Refer to governing codes for drain pipe size Humidi-tech and maximum discharge water temperature. humidifier OM-7399 * Pitch vapor hose, tubing, or pipe toward Rapid-sorb: –... - Page 35 Installation 4. Mount the dispersion tubes on the header with the slip Note: couplings or hose cuffs: See Page 32 for steam supply and condensate drain line connection instructions. take care not to shear O-rings. is resting on face of tubing. necessary, DO NOT use petroleum-based lubricant.
-
Page 36: Steam Supply Connections To Rapid-Sorb Header
Installation Steam supply connections to Rapid-sorb header CAUTION Connect the steam supply interconnecting piping from the Operate Rapid-sorb within rated humidifier to the Rapid-sorb. The steam supply piping requires a steam capacity minimum of 1% pitch toward the header. Excessive steam flow to the Rapid-sorb If multiple humidifiers are supplying one Rapid-sorb, a multiple steam dispersion assembly can cause steam supply connector is provided. -
Page 37: Operation
(see the Vapor-logic4 Installation and CAUTION Operation Manual). Damage from dry startup At start-up, DRI-STEEM recommends initially running the In the event the humidifier tank does humidifier with the factory default setting for skim time. See not contain water and the heaters are energized, turn main power off. -
Page 38: Start-Up Checklist
☐ Check the amp draw of the heaters. Refer to the humidifier wiring diagram for the proper rating. ☐ If you experience difficulties, have the keypad/display information available along with the serial number and humidifier Model, and call DRI-STEEM Technical Support at 800-328-4447. -
Page 39: Maintenance
Both humidifier cleaning and heated water flowing to the drain are Do not touch the tank or drain piping until operational costs. DRI-STEEM recommends that the user observe the unit has had sufficient time to cool, or and adjust the skim duration to achieve a balance between reducing serious injury can occur. -
Page 40: Cool Down Humidifier
– Allow approximately half the water to drain out of the tank. with DRI-STEEM's Humidifier De-scaling Solution, – In the Control Modes screen select Auto; the fill valve opens available for purchase from your DRI-STEEM and the humidifier cools down. representative or distributor. - Page 41 When installing, torque probe assembly to 13.6 N-m. – Inspect composite plastic probe housing. If any signs of Probe tools can be ordered from your DRI-STEEM distributor (Part no. 185101). cracking, roughness, or deterioration, replace assembly. – When sliding probe housing into bracket from which it...
- Page 42 Maintenance Table 38-1: wire is solidly connected to tank. Humidi-tech torque specifications Screw or lug location Torque seated and the chamber is sealed. Power block 1.8 N-m – Reconnect the fill line. Contactor 1.8 N-m – Reconnect electrical plugs (the plugs are color coded).
-
Page 43: Off-Season Shut-Down Procedure
Maintenance Off-season shut-down procedure 1. Switch off electrical power. 2. Remove the enclosure. 3. Shut off the water supply to the makeup valve. 4. Drain the evaporating chamber, and clean if necessary following the instructions in this manual. 5. Replace the enclosure. 6. -
Page 44: Cool Down Humidifier
Damage caused by tank is hot can discharge water with a chloride corrosion is not covered by your DRI-STEEM warranty. temperature up to 212 °F (100 °C) into the plumbing system. This can cause damage Cool down humidifier to the plumbing system if the humidifier... -
Page 45: Off-Season Shut-Down Procedure
Maintenance 2. Loosen the four cover bolts and remove the cover assembly from the tank. 3. Inspect the tank interior for debris or pitting. 4. Inspect the valve inlet for debris. 5. Check the operation of the float valve and the condition of the float seat. -
Page 46: Replacement Parts
Replacement parts Figure 42-1: Humidi-tech humidifier replacement parts Tap/softened water Humidi-tech DI/RO water Humidi-tech OM-768... - Page 47 Replacement parts Table 43-1: Humidi-tech humidifier replacements parts Description Qty. Part no. Description Qty. Part no. Head bolt, large Phillips, ¼ - 20 × 1" 700300-013 Nut, 8-32 hex, pltd 700200-002 Thermo cut-out 409560-001 Cover, humidifier electrical panel 120277 Cover, heater terminal...
- Page 48 Replacement parts Figure 44-1: SDU-E replacement parts OM-1503 Table 44-1: SDU-E replacement parts Description Qty. Part number Shroud 330002-001 Blower, SDU external assembly Switch, airflow 406190 Screw, 8-32 × 1½" PHMS Phillips 700170-007 Nut retainer, 8-32 409593-001 Cap, black 409593-002 Dispersion chamber for SDU with 1½"...
- Page 49 Replacement parts Figure 45-1: SDU-I replacement parts OM-1504 Table 45-1: SDU-I replacement parts Description Qty. Part number Shroud 330001-002 Blower, SDU external assembly Switch, airflow 406190 Screw, 8-32 × 1½" PHMS Phillips 700170-007 Nut retainer, 8-32 409593-001 Cap, black 409593-002 Tubelet, 0.375"...
- Page 50 Replacement parts Figure 46-1: Humidi-tech subpanel OM-7651 Table 46-1: Humidi-tech subpanel Description Qty. Part number Description Qty. Part number Subpanel, barrier, Vapor-logic4 120803 Terminal block, pressure contact, 3-pole 408300-002 Main controller, Vapor-logic4 408495-001 Fan, cooling 24" (610 mm) leads 408677-001...
- Page 51 Replacement parts Figure 47-1: Table 47-1: Humidi-tech subpanel with SDU Humidi-tech subpanel with SDU Description Qty. Part number Subpanel, barrier 120801 DIN rail, 8" long 167765-008 Lug wire 409250-003 Ground lug, medium 409250-027 Block, DIN rail terminal end 408252-006 Transformer 230V/400V,...
-
Page 52: Warranty
OF ITS PRODUCTS. The exclusion applies regardless of whether such damages are B-3520 Zonhoven sought based on breach of warranty, breach of contract, negligence, strict liability in Belgium tort, or any other legal theory, even if DRI-STEEM has notice of the possibility of +3211823595 (voice) such damages. +3211817948 (fax) E-mail: marc.briers@dristeem.com...
Need help?
Do you have a question about the Humidi-tech and is the answer not in the manual?
Questions and answers