Table of Contents
Advertisement
Quick Links
READ AND SAVE THESE INSTRUCTIONS
GTS
®
G a s-t o-St ea m Hu mi d if ie r
L X Ser ies
Installation, Operation,
and Maintenance Manual
WARNING
Fire or explosion hazard
If the information in this manual is not
followed exactly, a fire or explosion could
result, causing property damage, personal
injury, or death.
Do not store or use gasoline or other
flammable vapors and liquids in the
vicinity of this or any other appliance.
If you smell gas:
• Do not try to light any appliance.
• Do not touch any electrical switch; do
not use any phone in your building.
• Immediately call your gas supplier
from an off-site phone. Follow the gas
supplier's instructions.
• If you cannot reach your gas supplier,
call the fire department.
Installation and service must be performed
by a qualified installer, service agency, or
the gas supplier.
For toll-free support call DriSteem Technical
Support: 1-800-328-4447
Advertisement
Table of Contents

Related Manuals for DriSteem GTS LX Series


Summary of Contents for DriSteem GTS LX Series
- Page 1 Follow the gas supplier’s instructions. • If you cannot reach your gas supplier, call the fire department. Installation and service must be performed by a qualified installer, service agency, or the gas supplier. For toll-free support call DriSteem Technical Support: 1-800-328-4447...
- Page 3 This product must be installed by qualified HVAC and electrical contractors. Installation must be code approved. Improper installation can cause property damage, severe personal injury, or death as a result of electric shock, burns, or fire. DriSteem Technical Support: ® North America: 800-328-4447...
- Page 4 To convert the humidifier to a different gas type, contact DriSteem Technical Support or your local DriSteem Representative/Distributor. • Installation must conform to the requirements of the authority having jurisdiction or, in the absence of such requirements, must conform to: –...
- Page 5 Warnings and cautions WARNING Carbon monoxide, fire, explosion, and electrical shock hazards (continued) • With the exception of sealed combustion units, do not locate units in tightly sealed rooms or small compartments without provision for adequate combustion air and venting. Room air combustion must be supplied through a minimum of two permanent openings in the wall, with at least one near the bottom.
- Page 6 Warnings and cautions WARNING Hot surfaces and hot water This steam humidification system has extremely hot surfaces. Water in tank, steam tubing, and dispersion assemblies can be as hot as 212 °F (100 °C). Discharged steam is not visible. Contact with hot surfaces, discharged hot water, or air into which steam has been discharged can cause severe personal injury.
- Page 7 Warnings and cautions CAUTION Hot discharge water Discharge water can be as hot as 212 °F (100 °C) and can damage some drain plumbing. The humidifier is equipped with integrated water drain tempering that needs make-up water no greater than 90°F (32 °C) in order to function properly.
-
Page 8: Table Of Contents
Table of contents PRODUCT OVERVIEW . . . . . . . . . . . . . . . . . . . . . . . . . . . . . . . . . . . . . . . . . . . . . . . . . . . . . . . . . Supply water guidelines . - Page 9 Documents can be viewed, printed or ordered from our website, www.dristeem.com. Water quality recommendations ......62 Cool down procedure .
-
Page 10: Product Overview
• Excessive water hardness can increase the UNIVERSAL WATER humidifier maintenance requirements. DriSteem's GTS humidifier LX series incorporates universal water control for use To maximize humidifier service life and with any water type (well, tap, softened, DI or RO water). There is no need to minimize humidifier maintenance, DriSteem has established guidelines for supply water. -
Page 11: Water Level Control
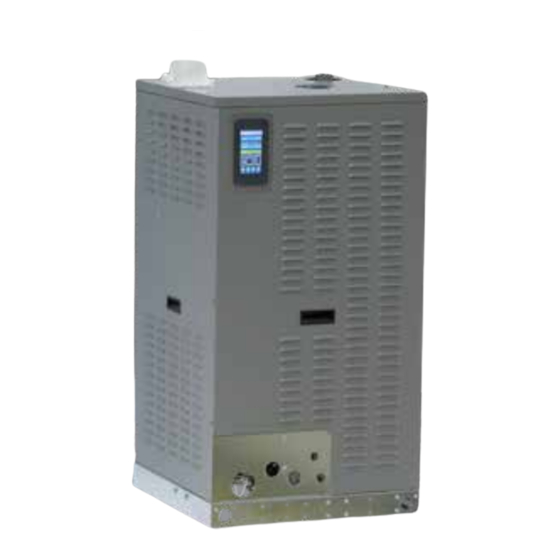
Product overview WATER LEVEL CONTROL FIGURE 9-1: WATER LEVEL CONTROL The LX series of GTS humidifiers control water level using a three-rod probe (see Figure 9-1). All water types and conductivities work with the universal water system. The user does not need to select a new water type or change Water level hardware to change water types. - Page 12 Product overview FIGURE 10-1: GTS HUMIDIFIER LX SERIES (MODELS LX-400 THROUGH LX-600) Steam outlet Water level sensing probe Combustion air pipe Flue gas vent Control components Primary heat Secondary heat exchanger exchanger Overflow outlet Supply water connection Blower Electrical field connection Gas valve Gas connection...
-
Page 13: Models, Capacities, Electrical Specifications, And Weights
SPECIFICATIONS Models, capacities, electrical specifications, and weights Table 11-1: GTS models, capacities, electrical specifications, turndown, and weights GTS humidifier LX series* Maximum Water usage Tank Full load steam Input at maximum Turndown Shipping volume amps* Operating capacity capacity (empty) weight model weight** gals/... -
Page 14: Indoor Dimensions
SPECIFICATIONS Indoor dimensions FIGURE 12-1: LX MODELS 50 - 150 INDOOR UNIT DIMENSIONS Side view Front view Top view OM-7946 See "Indoor unit dimensions" on page 13-1. FIGURE 12-2: LX MODELS 200 - 300 INDOOR UNIT DIMENSIONS Side view Front view Top view OM-8014 See "Indoor unit dimensions"... - Page 15 SPECIFICATIONS Indoor dimensions FIGURE 13-1: LX MODELS 400 - 600 INDOOR UNIT DIMENSIONS Side view Front view Top view OM-7998 For outdoor dimensions see page 21. Table 13-1: Indoor unit dimensions LX-50, LX-75, LX-100 LX-150 LX-200, LX-250, LX-300 LX-400, LX-500, LX-600 Description inches inches...
-
Page 16: Installation
INSTALLATION Location and clearance recommendations FINDING A LOCATION • Provide a level, solid foundation for the humidifier. WARNING • The GTS humidifier LX series vent and air piping can be installed through Installation requirements the roof or through a sidewall. Use only vent/air piping methods described The humidifier must be installed by in this IOM. - Page 17 INSTALLATION Location and clearance recommendations FIGURE 15-1: LX SERIES CLEARANCE RECOMMENDATIONS (INDOOR UNITS) 18" (457 mm) Indoor Unit 1" (25 mm) 1" (25 mm) 36" (914 mm) 30" (762 mm) for LX-50 through LX-150 54" (1372 mm) for LX-200 through LX-600 OM-7947 FIGURE 15-2: LX SERIES CLEARANCE RECOMMENDATIONS (OUTDOOR UNITS) Outdoor Unit...
-
Page 18: Optional Floor Stand Mount (Models 50, 75,100, And 150 Only)
FLOOR STAND MOUNTING INSTRUCTIONS 1. Refer to Figure 17-1 for assembly of the floor stand. Model LX-150 2. Use the hardware provided by DriSteem to assemble. 3. Arrange appropriate lifting mechanism and personnel to mount the GTS humidifier LX series on the floor stand. - Page 19 INSTALLATION Optional floor stand mount (Models 50, 75,100, and 150 only) FIGURE 17-1: LX SERIES WITH FLOOR STAND MOUNT (MODELS 50, 75, AND 100) 21.125" (537mm) OM-7970 See "Indoor unit dimensions" on page 13-1. OM-7962 FIGURE 17-2: LX SERIES WITH FLOOR STAND MOUNT (MODEL 150) 21.125"...
-
Page 20: Optional Wall Mount (Models 50, 75 And 100 Only)
INSTALLATION Optional wall mount (Models 50, 75 and 100 only) FIGURE 18-1: LX SERIES WITH WALL MOUNT 23.13" (587 mm) 22.88" (581 mm) 42.75" (1086 mm) 20.13" (511 mm) 24.63" (626 mm) OM-7993 See "Indoor unit dimensions" on page 13-1. OM-7992 GTS HUMIDIFIER LX SERIES INSTALLATION, OPERATION, AND MAINTENANCE MANUAL... -
Page 21: Outdoor Enclosure
-40 ºF to 122 ºF (-40 ºC to 50 ºC). The unit is intended to be mounted on a concrete pad or rooftop curb. Properly sized curbs are available from DriSteem. • The knockouts located on the front of the unit are used to run electrical power and gas to the unit. -
Page 22: Operation
INSTALLATION Outdoor enclosure: Operation If the ambient temperature in the enclosure is below 50 ºF (10 ºC), the heater is powered up. The heater remains powered up until the enclosure reaches 50 ºF (10 ºC). When there is no call for humidity, an aquastat maintains tank temperature at the factory default of 50 ºF (10 ºC). -
Page 23: Dimensions
INSTALLATION Outdoor enclosure: Dimensions FIGURE 21-1: OUTDOOR ENCLOSURE TOP VIEW Exit for standard steam outlet Ventilation fans GTS humidifier LX series Control cabinet Exit for optional steam outlet (through pipe chase) Access panel door Pipe chase Heater Flue (by installer) Access panel door Air intake OM-8010... -
Page 24: Location
INSTALLATION Outdoor enclosure: Location • The following information is not intended to supersede any requirements of federal, state, or governing codes having jurisdiction; prior to locating the unit, authorities having jurisdiction should be consulted. • The GTS must be level and located so there is enough clearance for opening the access panels (see recommended clearances on Page 15). -
Page 25: Mounting
• Verify that the position of the pad or curb properly supports the unit and that support structure dimensions coincide with unit dimensions. • DriSteem rooftop curbs are shipped knocked down for ease of transporting to the roof. The curb is manufactured out of 14-gauge galvanized steel and is shipped with all hardware for bolt-together assembly, a curb gasket for sealing between the curb and the unit, and an installation drawing. - Page 26 INSTALLATION Outdoor enclosure: Piping FIGURE 24-1: GTS OUTDOOR ENCLOSURE WITH STANDARD OR OPTIONAL STEAM OUTLET, ELEVATION VIEW Standard steam outlet Optional steam outlet Steam outlet Steam outlet 1½" (38 mm) 1½" (38 mm) knockouts 4" knockouts 4" Ventilation Ventilation (102 mm) o.c. (102 mm) o.c.
-
Page 27: Freeze Protection Piping
INSTALLATION Outdoor enclosure: Freeze Protection Piping FIGURE 25-1: OUTDOOR ENCLOSURE FREEZE PROTECTION PIPING GTS humidifier in Outdoor Enclosure installed on rooftop Disconnect (by installer); see Detail A Drain connection Supply water piping (by installer) 120 V supply (230 V in Europe) Open drain or Install open vacuum breaker... -
Page 28: Venting
• Flue gas venting should include a 90 degree elbow and end with a tee to the back of the unit to minimize effects of wind and prevent condensate from dripping on to the unit. Governing codes prevail. • Combustion air is drawn from within the DriSteem outdoor enclosure which is sufficiently vented. Table 26-1:... -
Page 29: Wiring
INSTALLATION Wiring WARNING WARNING Grounding Fire hazard Installation must meet the requirements of governing codes or, in the absence of Do not connect aluminum wire between governing codes, in accordance with the National Electrical Code, ANSI/NFPA disconnect switch and humidifier. Use 70, or Canadian Electrical Code, CSA C22.1, or IEE wiring regulations (BS7671). -
Page 30: Piping
• For additional backflow prevention installation, install at a minimum of 40' (12 m) from the humidifier. • Damage caused by chloride corrosion is not covered by your DriSteem warranty. GTS HUMIDIFIER LX SERIES INSTALLATION, OPERATION, AND MAINTENANCE MANUAL... -
Page 31: Overview
• For additional backflow prevention installation, install at a minimum of 40' (12 m) from the humidifier. • Damage caused by chloride corrosion is not covered by your DriSteem warranty. GTS HUMIDIFIER LX SERIES INSTALLATION, OPERATION, AND MAINTENANCE MANUAL... -
Page 32: Connection Sizes
3/4 (pipe thread) (recommended) Notes: * For pipe thread steam outlet options, see DriCalc, DriSteem’s free sizing and selection software, available at www.dristeem.com. STEAM PIPING SUPPORT Support interconnecting piping between the humidifier steam outlet and the dispersion system with pipe hangers. Failure to properly support the entire steam piping weight can cause damage to the humidifier tank and void the warranty. -
Page 33: Condensate Return
INSTALLATION Condensate return Piping: FIGURE 31-1: LX SERIES CONDENSATE RETURN FIELD PIPING - MODELS LX-50 THROUGH LX-150 Optional condensate return piping from dispersion unit, ¾" pipe thread (DN20) fitting at humidifier Air vent tube 6" (150 mm) minimum vent height Condensate return Use union for cleanout plate removal Access by others... - Page 34 INSTALLATION Piping: Condensate return FIGURE 32-1: LX SERIES CONDENSATE RETURN FIELD PIPING - MODELS LX-200 THROUGH LX-600 Air vent tube Optional condensate return piping from dispersion unit, ¾" pipe thread (DN20) fitting at humidifier 6" (150 mm) minimum vent height Access by others Condensate return Manual drain valve (if required)
-
Page 35: Supply Water And Drain Overflow Connections
INSTALLATION Piping: Supply water and drain overflow connections AUTOMATIC DRAIN WATER TEMPERING The GTS humidifier LX series is shipped with drain water tempering enabled. This feature can be disabled in the Vapor-logic controller. When drain water tempering is enabled, the following steps will take place to ensure drain water is less than 140°F (60 °C): 1. -
Page 36: Supply Water And Drain
Damage caused by chloride • The GTS humidifier has a 2" (51 mm) internal air gap to prevent back corrosion is not covered by your DriSteem siphoning into a potable water system. However, some governing codes warranty. See “Supply water guidelines” on Page 8. - Page 37 INSTALLATION Piping: Supply water and drain Do not locate the humidifier directly above a floor drain — skim and drain Drain water tempering water dumped into the drain will cause flash steam. This steam will rise Governing codes may require that the 212 °F (100 °C) drain and skim/overflow water and saturate electrical components, adversely affecting component life and from the humidifier be tempered before it is...
-
Page 38: Flue Gas Condensate
Minimum drain pipe size is " inside diameter. • If treatment is needed, DriSteem offers a condensate neutralizer kit. The neutralizer should be installed per manufacturer instructions below condensate p-trap level. Avoid obstructions as condensate could be damaging to surrounding surfaces and articles. - Page 39 INSTALLATION Piping: Flue gas condensate FIGURE 37-1: GTS SEALED COMBUSTION CONNECTION - MODELS LX-200 THROUGH LX-600 Combustion air intake Flue gas vent to outside Optional condensate neutralizer 5/8" (16 mm) 5/8" (16 mm) secondary heat exchanger condensate Open drain Notes: OM-7995 Use flexible tubing that is rated for acidic condensate.
-
Page 40: Gas
To convert the humidifier to natural • Piping that is subject to wide temperature variations should be insulated. gas or LP gas, contact DriSteem Technical Support or your DriSteem • Pitch piping up toward unit at least 1/4" (6 mm) per 15' (4.5 m) of Representative/Distributor. - Page 41 INSTALLATION Piping: Gas (continued) • Piping to units should conform with local and national requirements for Table 39-1: type, volume, and gas handled and for pressure drop allowed in the line. Specific gravity conversion factors Refer to the tables on this page to determine the gas flow in ft /hr or m for the type of gas and size of unit to install.
- Page 42 INSTALLATION Piping: Gas (continued) EXAMPLE Gas leak testing For this example, refer to the tables on Page 39. • When leak-testing the gas supply piping system, disconnect the humidifier and its gas shutoff valve during any pressure in excess To determine gas piping size, begin by calculating the cubic feet/hour (ft /hr) of 24"...
- Page 43 INSTALLATION Piping: Gas (continued) FIGURE 41-1: GTS GAS PIPING All Models See page 30 for connection sizes Manual gas shutoff valve Plugged test gauge connection OM-7953 3” (76 mm) min. Drip pocket GTS HUMIDIFIER LX SERIES INSTALLATION, OPERATION, AND MAINTENANCE MANUAL...
-
Page 44: General Venting
INSTALLATION General venting The GTS humidifier is pre-plumbed to support both room air and sealed WARNING combustion. See Warning. Requirements and recommendations for each follow. Air for combustion Air for combustion must not be contaminated by halogen compounds, ROOM AIR COMBUSTION which include fluoride, chloride, •... - Page 45 INSTALLATION General venting (continued) WARNING Combustion air quality (list of contaminants) Sample list of contaminants to be avoided: The recommended source of combustion air is to use the outdoor air supply. However, the use of indoor air in most applications is acceptable except as follows: 1.
- Page 46 INSTALLATION General venting (continued) FIGURE 44-1: ROOM AIR COMBUSTION FOR THE LX-50, LX-75, AND 100 CAUTION Flue gas vent to outside Flue condensate removal (For Models LX-50 - LX-300 only). Install a drip tee within the first 3' (1 m) Quantity of two 2"...
- Page 47 INSTALLATION General venting (continued) FIGURE 45-1: ROOM AIR COMBUSTION FOR THE LX-400, LX-500, AND LX-600 Flue gas vent to outside Quantity of two 90° elbows (See Table 48 for vent size) Bird screen No drip tee required See Table 48-1 for flue venting sizes and lengths.
-
Page 48: Sealed Combustion (Combustion Air From Outside The Building)
INSTALLATION General venting (continued) SEALED COMBUSTION (COMBUSTION AIR FROM OUTSIDE THE BUILDING) WARNING • The GTS is pre-plumbed to support sealed combustion using PVC, CPVC ABS, polypropylene, or stainless steel or piping (see Figure 46-1). Requirement for manifolding sealed All GTS models have a single point connection on top of the humidifier combustion piping runs shroud. -
Page 49: Guidelines
INSTALLATION General venting (continued) GUIDELINES WARNING • The GTS is a Fan Assisted Category IV (condensing, positive pressure) Appliance. Installation requirements • Maximum flue temperature is 140 °F (60 °C). The humidifier must be installed by a qualified technician and meet the •... - Page 50 INSTALLATION General venting (continued) • When applying the codes, reference also the venting manufacturer's instructions, the service gas supplier's regulations, and the specific instructions provided in this manual. • Install vent piping as direct as possible, with a minimum number of turns or elbows. •...
- Page 51 INSTALLATION General venting (continued) humidifier must be within the ranges shown in Table Table 49-2: 49-2 from full output to minimum output. Venting pressure • Do not common vent products of combustion the LX Description Minimum Maximum series GTS humidifier with another LX series or any other appliance.
-
Page 52: Vertical Venting
INSTALLATION Vertical venting • Never connect this humidifier to an existing chimney. FIGURE 50-1: CONCENTRIC VENT ROOF INSTALLATION • Rigidly support the vent pipe every 3' (1 m) or less with hangers or straps to ensure there is no movement after installation. - Page 53 INSTALLATION Vertical venting (continued) • Ensure that distances from vent terminal to adjacent public walkways, buildings, and openable windows and building openings are consistent with National Fuel Gas Code, ANSI Z223.1, CAN/CGA B149 Installation Codes, National Gas Safety Code (Installation & Use) Regulations (latest revision), or governing codes.
-
Page 54: Sidewall Venting
INSTALLATION Sidewall venting DETERMINE A LOCATION WARNING Consider the surroundings when terminating the vent and air: A gas vent extending through an • Position the vent where vapors will not damage nearby shrubs, plants, or exterior wall shall not terminate air conditioning equipment or be objectionable. - Page 55 INSTALLATION Sidewall venting (continued) FIGURE 53-1: GTS HUMIDIFIER LX SERIES SIDEWALL VENTING For Models LX-50 - LX-300 only: Install a drip tee within the first 3' (1 m) of flue venting for flue condensate removal. If flue vent is less than 10' (3 m) long and a sidewall exit, then no drip tee needed.
-
Page 56: Sidewall Installation
INSTALLATION Sidewall venting (continued) SIDEWALL INSTALLATION FIGURE 54-2: GTS HUMIDIFIER LX SERIES SIDEWALL VENTING See Figures 54-1 and Figures 54-2. WITH CONCENTRIC VENT • For Models LX-50 - LX-300 only: Install a drip tee within the first 3' (1 m) Overhang or of flue venting for flue condensate removal. -
Page 57: Selecting A Dispersion Location
Non-wetting distance can also be calculated using DriSteem’s DriCalc sizing and selection software, available at www.dristeem.com. Note that your current design conditions may vary from conditions used for system design. • In general, the dispersion assembly is best placed where the air can most readily absorb the moisture being added without causing condensation at or after the unit. -
Page 58: Operation
The manual was shipped with your humidifier. Additional copies can be viewed, printed, or ‰ Piping (gas) ordered on our website: www.dristeem.com • Verify that the gas type supplied to the humidifier matches the unit nameplate label. • Verify that all field and humidifier gas piping has been tested for leaks. -
Page 59: Start-Up Procedure
OPERATION Start-up START-UP PROCEDURE Systems and safeguards The GTS humidifier has a number of systems 1. Refer to the Vapor-logic Installation and Operation Manual, and verify that and safeguards to ensure proper operation. the installer has followed the Pre-installation Checklist (including proper wiring). -
Page 60: Start-Up Commissioning Checklist
Vapor-logic Installation and Operation Manual shipped Program code ___________________________________________ with your humidifier. If you do not have this manual, go to DriSteem rep ____________________________________________ www.dristeem.com to download or order a copy. Supply water Required clearances ‰ RO ‰... - Page 61 OPERATION Start-up commissioning checklist Dispersion Additional comments ‰ Ultra-sorb __________________________________________________ ‰ Rapid-sorb __________________________________________________ ‰ Single tube ‰ Single tube with drain __________________________________________________ ‰ Space distribution unit __________________________________________________ __________________________________________________ Condensate/drain piping __________________________________________________ Water seal height of dispersion system __________________________________________________ ________________________________ __________________________________________________ ‰...
-
Page 62: Maintenance
MAINTENANCE Inspection recommendations USER INSPECTION EVERY 30 DAYS • Vent adapter and flue gas inspection port are in place with vent pipe WARNING seated and secured. SHUTDOWN PROCEDURE • Physical support of the appliance is sound without sagging, cracks, or To prevent severe personal injury gaps between floor stand or tank flanges. -
Page 63: Replacement Parts
79. Refer to the rating plate on the GTS humidifier for complete unit model number, serial number, and company address. Any substitution of parts or controls not approved by DriSteem will be at owner’s risk and will void the warranty. -
Page 64: Water Quality And Maintenance
Potable water carries To keep humidifiers operating as efficiently as possible, remove scale with DriSteem's a variety of minerals and other materials in a mix that varies from location to Humidifier De-scaling Solution, available for location. -
Page 65: Cool Down Procedure
• Verify regularly that water processing equipment is operating correctly. The presence of chlorides in improperly processed DI water can cause pitting and failure of the tank and heat exchanger. Your DriSteem warranty does not cover damage caused by chloride corrosion. -
Page 66: Inspection And Maintenance
MAINTENANCE Inspection and maintenance 1. Annually (also recommended when maintenance is performed) WARNING • Inspect tank, piping, and gaskets for water and gas leaks. • Inspect condensate lines for blockage and verify condensate neutralizer Follow the shutdown procedure is in working condition (pH above 5). Follow the shutdown procedure on Page 60 before performing •... - Page 67 Verify that the drain valve assembly is in the closed position. • After confirming the plumbing connections are secure, perform a tank de-scaling procedure using the DriSteem GTS humidifier tank de-scaling kit. • When the chemical de-scaling process is complete: Replace and secure all covers and doors.
- Page 68 Humidifier tank Primary heat exchanger (see page 67 for instructions) • Drain humidifier tank and rinse. • Perform a tank de-scaling using the DriSteem GTS humidifier tank de- scaling kit. • After cleaning, the humidifier should remain empty until humidification is required.
-
Page 69: Heat Exchangers
MAINTENANCE Inspection and maintenance: Heat exchangers REMOVAL OF THE PRIMARY HEAT EXCHANGER 1. Disconnect: • Incoming gas line • Water lines (at the primary tank secondary tank and Drain-kooler water tempering device) • Main drain line • Component power connections (blower, ignition module and tank temp sensor) 2. -
Page 70: Combustion Assemblies
MAINTENANCE Combustion assemblies REMOVING THE COMBUSTION ASSEMBLY WARNING This is not a regular maintenance item, but if the heat exchanger tubes contain carbon deposits, soot, or other residue, clean as follows: Respiratory hazard When cleaning burners with 1. Follow the shutdown procedure on Page 60. compressed air, wear appropriate respiratory protection. -
Page 71: Burner Maintenance Instructions
MAINTENANCE Combustion assemblies BURNER MAINTENANCE INSTRUCTIONS To service the burner system, clean both the blower and the burner. Remove the blower(s) from the system and allow you to clean dust from the wheel. Remove the four nuts from each burner assembly for cleaning. Removing and cleaning one burner at a time eases reassembly. -
Page 72: Replacement Parts
REPLACEMENT PARTS GTS humidifier (Models LX-50 through LX-150) FIGURE 70-1: GTS HUMIDIFIER LX SERIES REPLACEMENT PARTS (MODELS LX-50 THROUGH LX-150) OM-7966 GTS HUMIDIFIER LX SERIES INSTALLATION, OPERATION, AND MAINTENANCE MANUAL... - Page 73 207002-300 GASKET CLEANOUT PLATE LX 150 EPDM 308238-101 PRESSURE SWITCH 1" WC 127601-001 Contact SUBPANEL ASSY GTS LX DriSteem DUAL THERMOSTAT 600293 (OUTDOOR ENCLOSURE ONLY) 3/4" FREEZE PROTECTION VALVE 600086 (OUTDOOR ENCLOSURE ONLY) GTS HUMIDIFIER LX SERIES INSTALLATION, OPERATION, AND MAINTENANCE MANUAL...
-
Page 74: Gts Humidifier (Models Lx-200, Lx-250, And Lx-300)
REPLACEMENT PARTS GTS humidifier (Models LX-200, LX-250, and LX-300) FIGURE 72-1: GTS REPLACEMENT PARTS (MODELS LX-200 THROUGH LX-300) OM-8015 GTS HUMIDIFIER LX SERIES INSTALLATION, OPERATION, AND MAINTENANCE MANUAL... - Page 75 VALVE 3/4'' NPT SST (NC) 505077-001 Contact PRIMARY HX ASSY GTS LX 200-250 (304) 184410-250 SUBPANEL ASSY GTS LX DriSteem PRIMARY HX ASSY GTS LX 200-250 (316) 184410-251 MOUNT INTAKE/EXHAUST LX 200-300 600207 PRIMARY HX ASSY GTS LX 300 (304) 184410-300 ADAPTER 3 TO 1 DURO VENT 4"...
-
Page 76: Gts Humidifier (Models Lx-400 Through Lx-600)
REPLACEMENT PARTS GTS humidifier (Models LX-400 through LX-600) FIGURE 74-1: GTS REPLACEMENT PARTS (MODELS LX-400 THROUGH LX-600) OM-7999 GTS HUMIDIFIER LX SERIES INSTALLATION, OPERATION, AND MAINTENANCE MANUAL... - Page 77 REPLACEMENT PARTS GTS humidifier LX series (Models LX-400 through LX-600) Table 75-1: GTS replacement parts for Models LX-400 through LX-600) No . Description Part no . No . Description Part no . LEFT BURNER SHROUD GTS LX 400-600 600149 PROBE ASSY GTS LX 184315-003 LEFT BACK SHROUD GTS LX 600401...
-
Page 78: Electrical Parts
REPLACEMENT PARTS Electrical parts FIGURE 76-1: GTS ELECTRICAL REPLACEMENT PARTS OM-7968 Note: See Pages 78 and 79 for GTS Outdoor Enclosure replacement parts. GTS HUMIDIFIER LX SERIES INSTALLATION, OPERATION, AND MAINTENANCE MANUAL... - Page 79 REPLACEMENT PARTS Electrical parts Table 77-1: GTS electrical replacement parts No . Description Part no . MAIN CONTROLLER VL6 408496-006 DISPLAY VAPOR-LOGIC TOUCHSCREEN 408494 TRANSFORMER, 120V, 24V SEC - QC 408965-101 TRANSFORMER, 230/400, 24V SEC - 100VA (EUROPEAN) 408985-201 TRANSFORMER, 230/400, 24V SEC - 150VA (EUROPEAN) 408895-203 TRANSFORMER, 230/400, 115V SEC - 150VA (EUROPEAN) 408985-202...
-
Page 80: Outdoor Enclosure
REPLACEMENT PARTS Outdoor enclosure FIGURE 78-1: OUTDOOR ENCLOSURE ELECTRICAL REPLACEMENT PARTS OM-7969 GTS HUMIDIFIER LX SERIES INSTALLATION, OPERATION, AND MAINTENANCE MANUAL... - Page 81 REPLACEMENT PARTS Outdoor enclosure Table 79-1: Outdoor Enclosure electrical replacement parts No . Description Part no . MAIN CONTROLLER VL6 408496-006 DISPLAY VAPOR-LOGIC TOUCHSCREEN 408494 TRANSFORMER, 120V, 24V SEC - QC 408965-101 TRANSFORMER, 230/400, 24V SEC - 100VA (EUROPEAN) 408985-201 TRANSFORMER, 230/400, 24V SEC - 150VA (EUROPEAN) 408895-203 TRANSFORMER, 230/400, 115V SEC - 150VA (EUROPEAN)
-
Page 82: European Models
EUROPEAN MODELS European models only This equipment has been tested by the Canadian Standards Association Electrical warning label International to the Low Voltage, Gas Appliance, and EMC directives and has Location: Control cover, shroud Definition: Electrical shock hazard been certified by AFNOR for use in all EU countries. AUTHORIZED COUNTRIES OF DESTINATION GTS humidifiers bearing the CE mark are authorized for use in the European Important:... - Page 83 EUROPEAN MODELS European models only Table 81-1: Specifications for European models Minimum mass flow Model GTS Average flue Maximum Mass flow rate of rate of LX Series temperature flue back pressure combustion products combustion products LX-50 50 °C 1.2 mbar 5.9 g/s 1.2 g/s LX-75...
- Page 84 EUROPEAN MODELS European models only CAPACITY NOTES • At sea level, 402 kJ are required to raise the temperature of one kilogram of water from 4 °C to 100 °C. • An additional 2257 kJ are required to change the state of one kilogram of 100 °C water to vapor.
- Page 85 EUROPEAN MODELS European models only TYPE C3 BOILERS CAUTION The terminal outlets from separate combustion and air supply circuits shall fit inside a square of 100 cm and that the distance between the planes of the two Install connection for gas pressure test orifices shall be less than 100 cm.
- Page 86 Notes GTS HUMIDIFIER LX SERIES INSTALLATION, OPERATION, AND MAINTENANCE MANUAL...
- Page 87 Notes GTS HUMIDIFIER LX SERIES INSTALLATION, OPERATION, AND MAINTENANCE MANUAL...
-
Page 88: Warranty
Eden Prairie, MN 55344 breach of contract, negligence, strict liability in tort, or any other legal theory, even if DriSteem has 800-328-4447 or 952-949-2415 notice of the possibility of such damages.
Need help?
Do you have a question about the GTS LX Series and is the answer not in the manual?
Questions and answers