
Related Manuals for DriSteem R-1 Series


Summary of Contents for DriSteem R-1 Series
- Page 1 READ AND SAVE THESE INSTRUCTIONS ® R es is ti ve-to-St eam Hu mid ifi er Installation, Operation, and Maintenance Manual...
- Page 2 HVAC and electrical contractors and in compliance with local, state, federal, and governing codes. Improper installation can cause property damage, severe personal injury, or death as a result of electric shock, burns, or fire. DriSteem Technical Support: 800-328-4447 Read all warnings and instructions Read this manual before performing service or maintenance procedures on any part of the system.
- Page 3 • Children being supervised not to play with the appliance. • Thermal cut-out component is critical to the safety of this equipment: use only DriSteem replacement part. CAUTION Hot discharge water Discharge water can be as hot as 212 °F (100 °C) and can damage some drain plumbing.
-
Page 4: Table Of Contents
Product overview ......... 2 DriSteem Technical Support ®... - Page 5 Table of contents OPERATION . . . . . . . . . . . . . . . . . . . . . . . . . . . . . . . . . . . . . . . . . . . . . . . . . . . . . . . . . . . . . . Start-up .
-
Page 6: Overview
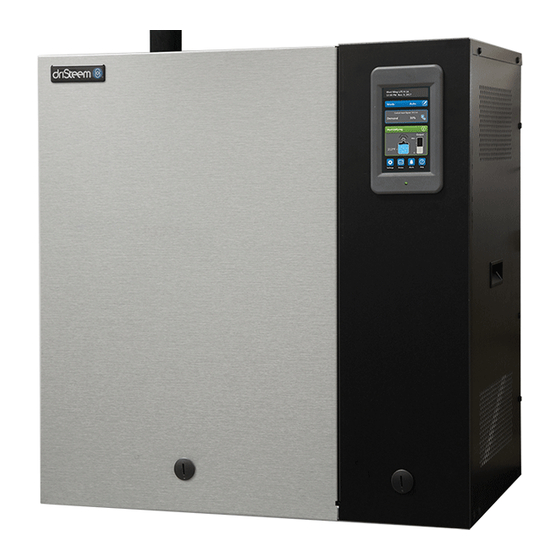
OVERVIEW Product overview From providing comfort humidity to meeting the strictest clean-room requirements, the RTS electric humidifier is designed to meet the humidification demands of any building environment. The RTS humidifier RX series is an electric humidifier that uses resistive heating elements to boil water into steam. While RO/DI water will grant you the best accuracy with the RTS, any water type can be used. -
Page 7: Principle Of Operation
OVERVIEW Principle of operation FIGURE 3-1: RTS HUMIDIFIER PRINCIPLE OF OPERATION OM-8050 1. When the system is first activated, the fast fill valve opens, the precision fill valve opens, and the tank fills with water to the operating level. 2. On a call for humidity, the heating elements are energized, causing the water to boil. The precision fill valve opens and closes as needed to maintain the operating water level. -
Page 8: Specifications
SPECIFICATIONS Models, capacities, and electrical specifications Table 4-1: RTS humidifier capacities, electrical specifications Total max current draw (amps) Maximum steam Power Stages capacity Single-phase Three-phase model lbs/hr kg/h Contactors 120V 208V 240V 277V 480V 600V 208V 240V 380V 480V 600V RX-6-1 16.7 21.7... - Page 9 SPECIFICATIONS Models, capacities, and electrical specifications (continued) Table 5-1: RTS humidifier capacities, electrical specifications (continued) Total max current draw (amps) Maximum steam Power Stages capacity Single-phase Three-phase RTS model lbs/hr kg/h Contactors 120V 208V 240V 277V 480V 600V 208V 240V 380V 480V 600V...
-
Page 10: Models, Capacities, And Electrical Specifications (Europe)
SPECIFICATIONS Models, capacities, and electrical specifications (Europe) Table 6-1: RTS humidifier capacities, electrical specifications (Europe) 230V Single Phase 400V Three Phase Total Total Maxi- Maximum RTS model Maximum Steam Power Maximum Steam Capacity Power Heater Heater Current Current Configuration* Configuration Draw Draw lbs/hr... - Page 11 SPECIFICATIONS Models, capacities, and electrical specifications (Europe) Table 7-1: RTS humidifier capacities, electrical specifications (Europe) 230V Single Phase 400V Three Phase Total Total Maxi- Maximum RTS model Maximum Steam Power Maximum Steam Capacity Power Heater Heater Current Current Configuration Configuration Draw Draw lbs/hr...
-
Page 12: Weights
SPECIFICATIONS Weights: RX-XX-1 and RX-XX-2 Table 8-1: RTS humidifier (RX-XX-1 and RX-XX-2) weights No Enclosure Indoor Enclosure Outdoor Enclosure Shipping Weight* Operating Weight No Shipping Weight* Shipping Weight* Operating Weight Operating Weight model (Empty) Enclosure (Empty) (Empty) RX-6-1 91.3 41.5 135.5 61.6 92.9... -
Page 13: Rx-Xx-3 And Rx-Xx-4
SPECIFICATIONS Weights: RX-XX-3 and RX-XX-4 Table 9-1: RTS humidifier (RX-XX-3 and RX-XX-4) weights No Enclosure Indoor Enclosure Outdoor Enclosure Shipping Weight* Operating Weight No Shipping Weight* Shipping Weight* RTS model Operating Weight Operating Weight (Empty) Enclosure (Empty) (Empty) RX-63-3 166.0 75.5 422.9 192.2... -
Page 14: Water
SPECIFICATIONS Water UNIVERSAL WATER Table 10-1: DriSteem's RTS humidifier RX series incorporates universal water control for use DriSteem supply water guidelines with any water type (well, tap, softened, DI or RO water). There is no need to Chlorides* change control configurations based on water type when ordering equipment Tap water <... -
Page 15: Indoor And No Enclosure Dimensions (Rx-Xx-1 And Rx-Xx-2)
SPECIFICATIONS Indoor and no enclosure dimensions (RX-XX-1 and RX-XX-2) FIGURE 11-1: RTS HUMIDIFIER DIMENSIONS Top view Steam outlet Touch Probe screen Mounting holes (4) Front view Back view Door access Electrical knockout J & G Bottom view OM-8076 0.75” (DN 20) NPT/BSP fill 1”... - Page 16 SPECIFICATIONS Indoor Indoor and no enclosure dimensions (RX-XX-1 and RX-XX-2) Table 12-1: Indoor unit dimensions RX-XX-1 RX-XX-2 Description inches inches Overall length 24.8 26.1 Overall width 16.4 21.0 Overall height 24.9 31.4 11.3 11.9 Steam outlet Supply water Drain water Electrical knockout (Control) 10.1 Electrical knockout (Power)
-
Page 17: Indoor And No Enclosure Dimensions (Rx-Xx-3 And Rx-Xx-4)
SPECIFICATIONS Indoor and no enclosure dimensions (RX-XX-3 and RX-XX-4) FIGURE 13-1: RTS HUMIDIFIER DIMENSIONS Top view Steam outlet Touch screen Probe keypad Electrical knockout Side view Front view Back view Door access Fill Drain OM-8077 Table 13-1: Indoor unit dimensions RX-XX-3 &... -
Page 18: Installation
INSTALLATION Location and clearance recommendations (Indoor and no enclosure) FIGURE 14-1: RX SERIES CLEARANCE RECOMMENDATIONS FOR -1 AND -2 MODELS (INDOOR AND NO ENCLOSURE UNITS) Maintain these clearances for service and maintenance. Top (when SDU is not mounted directly above the RTS humidifier): 24"(610 mm) To dispersion assembly Right side: 6"... - Page 19 INSTALLATION Location and clearance recommendations (Indoor and no enclosure) FIGURE 15-1: RX SERIES CLEARANCE RECOMMENDATIONS FOR -3 AND -4 MODELS (INDOOR AND NO ENCLOSURE UNITS) Maintain these clearances for service and maintenance. To dispersion assembly Top: 24"(610 mm) Right side: 24"...
-
Page 20: Selecting A Location
INSTALLATION Selecting a location When selecting a location for the humidifier, consider the FIGURE 16-1: INSTALLATION OVERVIEW following: Flexible steam PROXIMITY TO THE DUCT hose or tubing Install the humidifier near the air duct system where connects to dispersion tube(s) Single the dispersion assembly will be located. -
Page 21: Mounting
INSTALLATION Mounting WALL MOUNTING THE HUMIDIFIER (MODELS -1 OR -2 STAGE UNITS) WARNING Mount the humidifier level and plumb, using the lag bolts provided. Follow the instructions below for mounting on a stud wall with wood studs 16" (406 mm) Mounting hazard on center. - Page 22 INSTALLATION Mounting FIGURE 18-1: FLOOR STAND ASSEMBLY (MODELS -2, -3, AND -4) Notes: • The floor stand allows for condensate piping/pump. • Ensure the floor stand is level and shim as necessary. OM-8107 • Floor stand is not seismic rated. •...
-
Page 23: Piping
INSTALLATION Piping Overview FIGURE 19-1: RTS HUMIDIFIER FIELD PIPING OVERVIEW FOR -1 AND -2 UNITS Steam hose (maximum run 10' [3 m]). May also use tubing. Water supply line: • 3/4" NPT or BSP (DN20) connection size • 25 to 80 psi (175 to 550 kPa) required water pressure. - Page 24 INSTALLATION Piping Overview FIGURE 20-1: RTS HUMIDIFIER FIELD PIPING OVERVIEW FOR -3 AND -4 UNITS Steam hose (maximum run 10' [3 m]). May also use tubing. Water supply line: • 3/4" NPT or BSP (DN20) connection size • 25 to 80 psi (175 to 550 kPa) required water pressure.
-
Page 25: Steam
Hose clamp warranty. (for steam hose) • Refer to the DriSteem Interconnecting piping instructions for further information. • Maximum recommended length for steam hose is 10' (3 m). Longer distances can cause kinking or low spots. -
Page 26: Supply Water Piping
INSTALLATION Piping: Supply water piping Supply water piping may be of any code-approved material (copper, steel, or CAUTION plastic). The fill valve connection size is a 3/4" pipe thread (DN20) fitting. In cases where water hammer may be a possibility, consider installing a shock Excessive supply water pressure Supply water pressure greater than 80 arrestor. -
Page 27: Drain
INSTALLATION Piping: Drain DRAIN Note: Follow governing code requirements regarding size of drain pipe. The drain line piped from the humidifier must be run to an approved sanitary waste or suitable drain. Although the RTS humidifier is equipped with integral water tempering, if nonmetallic drain pipe or hose is used, it should be rated for 212 °F (100 °C) minimum continuous operating temperature. - Page 28 INSTALLATION Piping: Drain Drain piping after the water seal must be pitched a minimum of 1/8"/ft (1%) toward the drain. Governing codes may require more pitch. If the proximity of a drain requires the humidifier drain and skim water to be lifted, use a water pump with capacity of at least 12 gallons per minute (gpm) or 45.4 litres per minute (L/m).
-
Page 29: Drain Water Tempering
INSTALLATION Piping: Drain water tempering AUTOMATIC DRAIN WATER TEMPERING CAUTION Governing codes may require that the 212 °F (100 °C) drain and skim/ overflow water from the humidifier be tempered before it is discharged into the Hot discharge water building drain piping. The RTS humidifier RX series is shipped with drain water Discharge water can be as hot as 212 °F (100 °C) and can damage the tempering enabled. - Page 30 INSTALLATION Piping: Drain water tempering HOW IT WORKS: HOT + COLD = TEMPERED 1. Hot water discharged from a humidifier enters the device through piping/ hose connected to the top (-1 and -2 stage RTS) or side (-3 and -4 stage RTS) connection.
- Page 31 INSTALLATION Piping: Drain water tempering FIGURE 27-1: DRAIN WATER TEMPERING DIMENSIONS FOR MODELS -1 AND -2 Front View Side View 3" (76 mm) 8.13" (207 mm) 10" (254 mm) 9.6" (244 mm) 1.6" (41 mm) 6.38" (162 mm) 2.63" (67 mm) 8.5"...
- Page 32 INSTALLATION Piping: Drain water tempering STEP-BY-STEP INSTALLATION INSTRUCTIONS 1. Verify that maximum flow of hot water into the device does not exceed 6 U.S. gallons per minute (gpm) (22.7 L/m). 2. Note that there are three connections to be made: •...
- Page 33 INSTALLATION Piping: Drain water tempering • Locate a union as close to the connection as possible (hard pipe remote) • For hard pipe remote, run 1" (DN25) pipe as directly as possible from the humidifier to the mechanical tempering device. If the piping to the hot water inlet has a horizontal run, maintain a pitch to the device of at least 1/8"/ft (1%).
-
Page 34: Condensate Return
INSTALLATION Condensate return Piping: FIGURE 30-1: RX SERIES CONDENSATE RETURN FIELD PIPING (-1 AND -2 STAGE UNITS) Optional condensate return piping from dispersion unit, ¾" pipe thread (DN20) fitting at humidifier Air vent tube 6" (150 mm) minimum vent height Access by others Use union for tank removal... - Page 35 INSTALLATION Condensate return Piping: FIGURE 31-1: RX SERIES CONDENSATE RETURN FIELD PIPING (-3 AND -4 STAGE UNITS) Optional condensate return piping from dispersion unit, ¾" pipe thread (DN20) fitting at humidifier Air vent tube 6" (150 mm) minimum vent height Access by others Use union for tank removal...
-
Page 36: Wiring
INSTALLATION Wiring FIGURE 32-1: SHIELDED/SCREENED CABLE DRAIN WIRE CONNECTION TO LUG Table 32-2: European breaker requirements Humidifier side view I max . A Breaker size Vapor-logic 0 - 8.0 display 8.1 - 10.4 10.5 - 12.8 12.9 - 16 16.1 - 20 20.1 - 25.6 Microprocessor board... - Page 37 INSTALLATION Wiring HUMIDIFIER FIELD WIRING WARNING All wiring must be in accordance with all governing codes, and with the humidifier wiring diagrams. The diagrams are located inside the removable Electric shock hazard subpanel cover on the right side of the humidifier cabinet. Power supply wiring Only qualified electrical personnel must be rated for 220 °F (105 °C).
-
Page 38: Outdoor Enclosure
(-1 and -2 stage units only). control cabinet to be cooler than the Properly sized curbs are available from DriSteem. rest of the enclosure. • Knockouts are located in various locations for electrical and plumbing connections. - Page 39 INSTALLATION Outdoor enclosure: Overview FIGURE 35-1: OUTDOOR ENCLOSURE TYPICAL INSTALLATION OVERVIEW Steam outlet to rooftop AHU dispersion -1 and -2 models Pipe chase Optional connection access on back Enclosure drain Electrical connections Drain Fill OM-8083 -3 and -4 models Steam outlet to rooftop AHU dispersion Pipe chase Optional connection access on back Enclosure...
-
Page 40: Operation
INSTALLATION Outdoor enclosure: Operation If the ambient temperature in the enclosure is below 50 ºF (10 ºC), the heater is powered up. The heater remains powered up until the enclosure reaches 60 ºF (15.5 ºC). When there is no call for humidity, an aquastat maintains tank temperature at the factory default of 50 ºF (10 ºC). -
Page 41: Location
INSTALLATION Outdoor enclosure: Location • The following information is not intended to supersede any requirements of federal, state, or governing codes having jurisdiction; prior to locating the unit, authorities having jurisdiction should be consulted. • The RTS humidifier must be level and located so there is enough clearance for opening the access panels (see recommended clearances on Page 42 and 43). -
Page 42: Dimensions
INSTALLATION Outdoor enclosure: Dimensions FIGURE 38-1: OUTDOOR ENCLOSURE DIMENSIONS -3 and -4 models -1 and -2 models Exit for steam outlet Ventilation Heater Ventilation Airflow Exit for steam outlet humidifier humidifier Control cabinet Exit for steam outlet (through Control pipe chase) cabinet Heater Pipe chase... - Page 43 • DriSteem rooftop curbs are shipped knocked down for ease of transporting to the roof. The curb is manufactured out of 14-gauge galvanized steel and is shipped with all hardware for bolt-together assembly, a curb gasket for sealing between the curb and the unit, and an installation drawing.
-
Page 44: Mounting
INSTALLATION Outdoor enclosure: Mounting FIGURE 40-1: OUTDOOR ENCLOSURE MOUNTED FLUSH FIGURE 40-2: OUTDOOR ENCLOSURE MOUNTED ON A CURB Steam outlet 14" - 36" in (356 - 914 mm) 2" (51 mm) increments OM-8087 OM-8088 FIGURE 40-3: OUTDOOR ENCLOSURE WALL MOUNTED DIMENSIONS •... - Page 45 INSTALLATION Outdoor enclosure: Mounting FIGURE 41-1: OUTDOOR ENCLOSURE MOUNTED FLUSH FIGURE 41-2: OUTDOOR ENCLOSURE MOUNTED ON A CURB Steam outlet 14" - 36" in (356 - 914 mm) 2" (51 mm) increments OM-8090 OM-8091 DIMENSIONS • For outdoor unit weights, see pages 8 - 9. •...
-
Page 46: Clearances
INSTALLATION Outdoor enclosure: Clearances FIGURE 42-1: RTS SERIES CLEARANCE RECOMMENDATIONS FOR -1 AND -2 MODELS Maintain these clearances for service and maintenance. Top : 6" (152 mm) Left side: 6" (152 mm) • External steam outlet: (18" (457 mm) • Internal steam outlet: (6"... - Page 47 INSTALLATION Outdoor enclosure: Clearances FIGURE 43-1: RTS SERIES CLEARANCE RECOMMENDATIONS FOR -3 AND -4 MODELS Top: 6" (152 mm) Left side: 6" (152 mm) • External steam outlet: (16" (406 mm) • Internal steam outlet: (6" (152 mm) Front 36" (915 mm) Right side electrical controls: 30"...
- Page 48 INSTALLATION Outdoor enclosure: Piping FIGURE 44-1: RTS OUTDOOR ENCLOSURE STEAM OUTLET OPTIONS FOR -1 AND -2 MODELS Steam outlet Steam outlet External steam outlet RTS RX humidifier Ventilation fans RTS RX humidifier Ventilation fans Pipe chase Ventilation Two center ones fans are dual size (1-3/8"...
- Page 49 INSTALLATION Outdoor enclosure: Piping FIGURE 45-1: RTS OUTDOOR ENCLOSURE STEAM OUTLET OPTIONS FOR -3 AND -4 MODELS External steam outlet Ventilation fans RTS RX humidifier Pipe chase Emergency drain Side view OM-8100 Internal steam outlet Ventilation fans Ventilation RTS RX fans humidifier 1-1/2"...
-
Page 50: Freeze Protection Piping
Note 2. 6. DriSteem is not responsible for any freeze related damage to the humidifier or lines leading to the humidifier. 7. If mechanical tempering device is relocated outside of the enclosure, an air gap or vacuum breaker is required to be installed within 6 vertical inches (152 mm) of the drain port on the tank. -
Page 51: Operation
Additional copies can be viewed, printed, or ‰ Piping (steam, drain, supply water)—Verify that all piping connections have ordered on our website: www.dristeem.com been completed as recommended and that water pressure is available. ‰ Electrical—Verify that all wiring connections have been made in accordance with all governing codes and the RTS wiring diagrams. -
Page 52: Start-Up Commissioning Checklist
Vapor-logic Installation and Operation Manual shipped Program code ___________________________________________ with your humidifier. If you do not have this manual, go to DriSteem rep ____________________________________________ www.dristeem.com to download or order a copy. Supply water ‰ Required clearances (see page 14 and 20) ‰ RO Steam pipe ‰... - Page 53 OPERATION Start-up commissioning checklist Dispersion Additional comments ‰ Ultra-sorb __________________________________________________ ‰ Rapid-sorb __________________________________________________ ‰ Single tube ‰ Single tube with drain __________________________________________________ ‰ Space distribution unit __________________________________________________ Condensate/drain piping __________________________________________________ __________________________________________________ Water seal height of dispersion system __________________________________________________ ________________________________ ‰ Air gap, open drain, or vacuum breaker within __________________________________________________ 6"...
- Page 54 11. If you experience difficulties, have the display information available along with the serial number and humidifier Model, and call DriSteem Technical Support at 800-328-4447. 12. See page 3 for continuous operation of the RTS humidifier.
-
Page 55: Maintenance
Thermal cut-out component is critical to schedule, as will water quality. the safety of this equipment: use only DriSteem replacement part. WATER QUALITY AND MAINTENANCE Maintenance requirements vary with water quality, because tap and softened water carry a variety of minerals and other materials in a mix that varies from location to location. -
Page 56: Preparing For Maintenance
MAINTENANCE Preparing for maintenance Before performing any maintenance, allow the tank to cool down. WARNING • Insulated and uninsulated tanks will have hot surfaces. • Verify that there is no call for humidity and that the aquastat set point SHUTDOWN PROCEDURE (adjusted using the display screens in Settings/Water Management) is less To prevent severe personal injury than room temperature (default setting is 50 °F [10 °C]) so the heaters do... -
Page 57: Inspection And Maintenance
When installing, torque probe assembly to 120 • Clean probe rods using steel wool or similar mild abrasive material. in-lbs (10 ft-lbs; 13.6 N-m). Probe tools can be ordered from your DriSteem representative (Part No. 185101). RTS HUMIDIFIER RX SERIES INSTALLATION, OPERATION, AND MAINTENANCE MANUAL... - Page 58 To keep • Replace probe assembly gasket. humidifiers operating as efficiently as possible, remove scale with DriSteem's Humidifier De- • Replace heater plate/tank gasket. scaling Solution, available for purchase from your DriSteem representative.
- Page 59 MAINTENANCE Inspection and maintenance OFF-SEASON SHUT-DOWN PROCEDURE 1. Switch off electrical power. 2. Remove the enclosure panels. 3. Shut off the water supply to the makeup valve. 4. Drain the evaporating chamber, and clean if necessary following the instructions in this manual. 5.
-
Page 60: Component Replacement
MAINTENANCE Component replacement HEATER REPLACEMENT Disassembly 1. Fully drain tank and ensure tank is cool. All power sources must be turned OFF. 2. If housed in an enclosure, remove the front door(s). Disconnect display cable if applicable. 3. Disconnect the heater cable(s) from the bottom of the control cabinet. 4. - Page 61 MAINTENANCE Component replacement 8. Reconnect the heater cable(s) to the connectors at the bottom of the control cabinet. 9. Reconnect the plug at the temperature sensor on the heater plate. 10. Ensure all tools and cleaning utensils are removed. Install front door(s) and reconnect display if applicable.
- Page 62 MAINTENANCE Component replacement 10. Disconnect supply line cables from terminal block and remove from control cabinet. 11. If applicable, remove ducting assembly from bottom of cabinet (4 screws). 12. Remove four (4) bolts securing control cabinet to tank. Cabinet can then be removed.
-
Page 63: Replacement Parts
REPLACEMENT PARTS RTS Humidifier RX Series (-1 & -2) FIGURE 59-1: RTS HUMIDIFIER REPLACEMENT PARTS OM-8048 RTS HUMIDIFIER RX SERIES INSTALLATION, OPERATION, AND MAINTENANCE MANUAL... - Page 64 Qty . Part No . the safety of this equipment: use only PANEL FRONT TANK DOOR SM RTS RX 600773 DriSteem replacement part. PANEL FRONT TANK DOOR MEDIUM RTS 600838 PANEL FRONT ELEC W/ DISPLAY SM RTS RX 600774 PANEL FRONT ELEC W/ DISPLAY MEDIUM RTS RX...
- Page 65 REPLACEMENT PARTS RTS Humidifier RX Series (-1 & -2) Table 61-1: RTS humidifier replacements parts No . Description Qty . Part No . TANK WELDMENT 304SST 1.5" TUBE SM RTS RX 600590-015 TANK WELDMENT 304SST 1.5" NPT SM RTS RX 600590-016 TANK WELDMENT 304SST 1.5"...
- Page 66 REPLACEMENT PARTS RTS Humidifier RX Series (-1 & -2) Table 62-1: RTS humidifier replacements parts No . Description Qty . Part No . 16 SENSOR TEMP DRAIN WATER RTS 600973 VALVE FILL DUAL FLOW .26 GPM (GRY) RTS 600568-001 VALVE FILL DUAL FLOW .53 GPM (BLU) RTS 600568-002 HOSE 3/8"...
-
Page 67: Rts Humidifier Rx Series (-3 & -4)
REPLACEMENT PARTS RTS Humidifier RX Series (-3 & -4) FIGURE 63-1: RTS HUMIDIFIER REPLACEMENT PARTS OM-8105 RTS HUMIDIFIER RX SERIES INSTALLATION, OPERATION, AND MAINTENANCE MANUAL... - Page 68 Qty . Part No . the safety of this equipment: use only PANEL DOOR FRONT INDOOR ENCL LG RTS RX 600665-299 DriSteem replacement part. PANEL RIGHT FRONT W/ DISPLAY LG RTS RX 600880-299 PANEL LEFT LG INDOOR ENCL RTS RX 600642-299...
- Page 69 REPLACEMENT PARTS RTS Humidifier RX Series (-3 & -4) Table 65-1: RTS humidifier replacements parts No . Description Qty . Part No . 11 PROBE ASSY RTS RX BLACK SHORT 406303-116 12 PROBE PLUG ASSY W/COVERED CABLE 36" LONG 406050-200 13 HOSE 3/4"...
-
Page 70: Heaters
REPLACEMENT PARTS Heaters Table 66-1: RTS heaters Heater quantity and part number Maximum Power steam capacity Single-phase Three-phase RTS model lbs/hr kg/h 120V 208V 240V 277V 480V 600V 208V 240V 380V 480V 600V RX-6-1 1-001 1-002 1-003 1-017 1-006 1-007 RX-12-1 2-001 1-008... - Page 71 REPLACEMENT PARTS Heaters Table 67-1: RTS heaters (continued) Heater quantity and part number Maximum Power steam capacity Single-phase Three-phase model lbs/hr kg/h 120V 208V 240V 277V 480V 600V 208V 240V 380V 480V 600V RX-63-3 28.6 6-008 RX-75-3 34.0 3-022 3-023 6-017 3-009, 3-002,...
-
Page 72: Subpanel For -1 And -2 Models
REPLACEMENT PARTS Subpanel for -1 and -2 models FIGURE 68-1: RTS HUMIDIFIER SUBPANEL WITH SSR OM-8049 RTS HUMIDIFIER RX SERIES INSTALLATION, OPERATION, AND MAINTENANCE MANUAL... - Page 73 REPLACEMENT PARTS Subpanel for -1 and -2 models Table 69-1: RTS humidifier replacements parts No . Description Qty . Part No . MAIN CONTROLLER VL6 183504-014 TERMINAL BLOCK 3 POLE PRESSURE CONTACT 408300-002 BLOCK POWER 115A 600V MARATHON 3 POLE 407603 CONTACTOR 40 AMP SIEMENS 3RT-23 407010-202...
-
Page 74: Subpanel For -3 And -4 Models
REPLACEMENT PARTS Subpanel for -3 and -4 models FIGURE 70-1: RTS HUMIDIFIER SUBPANEL WITH SDU OM-8106 RTS HUMIDIFIER RX SERIES INSTALLATION, OPERATION, AND MAINTENANCE MANUAL... - Page 75 REPLACEMENT PARTS Subpanel for -3 and -4 models Table 71-1: RTS humidifier replacements parts No . Description Qty . Part No . MAIN CONTROLLER VL6 183504-014 BLOCK POWER 175A 600V MARATHON 3 POLE 407600 BLOCK POWER 335A 600V MARATHON 3 POLE 407920 CONTACTOR 40 AMP SIEMENS 3RT-23 407010-202...
-
Page 76: Warranty
Eden Prairie, MN 55344 breach of contract, negligence, strict liability in tort, or any other legal theory, even if DriSteem has 800-328-4447 or 952-949-2415 notice of the possibility of such damages.
Need help?
Do you have a question about the R-1 Series and is the answer not in the manual?
Questions and answers
Is there a piping schematic diagram for the humidifier RX-12-1 being installed above the dispersion tube?