DriSteem HUMIDI-TECH Installation, Operation And Maintenance Manual
Electric humidifier
Hide thumbs
Also See for HUMIDI-TECH:
- Installation, operation and maintenance manual (52 pages) ,
- Installation instructions and maintenance operations manual (24 pages) ,
- Service kit manual (18 pages)

Related Manuals for DriSteem HUMIDI-TECH


Summary of Contents for DriSteem HUMIDI-TECH
- Page 1 READ AND SAVE THESE INSTRUCTIONS HUMIDI-TECH ® Electr ic Hu midifier Installation, Operation, and Maintenance Manual...
-
Page 2: Warnings And Cautions
To avoid severe burns, follow the cool-down procedure in this manual before performing service or maintenance procedures on any part of the system. DRISTEEM HUMIDI-TECH ELECTRIC HUMIDIFIER INSTALLATION, OPERATION, AND MAINTENANCE MANUAL... - Page 3 To prevent such damage from humidifi ers without water tempering, allow the tank to cool before draining. Humidifi ers equipped with a water tempering device such as a DriSteem Drane-kooler need fresh make-up water in order to function properly. Make sure the water supply to the water tempering device remains open during draining.
-
Page 4: Table Of Contents
Rapid-sorb ......... 26 DRISTEEM HUMIDI-TECH ELECTRIC HUMIDIFIER INSTALLATION, OPERATION, AND MAINTENANCE MANUAL... - Page 5 DI/RO water option ........41 downloaded, printed, and ordered from our web site: www.dristeem.com DRISTEEM HUMIDI-TECH ELECTRIC HUMIDIFIER INSTALLATION, OPERATION, AND MAINTENANCE MANUAL...
-
Page 6: Overview
WATER TYPE CONVERSION Humidi-tech tap/softened water humidifi ers can be converted in the fi eld for use with DI/RO water, and Humidi-tech DI/RO water humidifi ers can be converted in the fi eld for use with tap/softened water. Contact your DriSteem representative or distributor for parts and instructions. - Page 7 FIGURE 3-3: SDU MOUNTING OPTIONS In addition to single tube dispersion, shown in Figure 2-3, the dispersion Remote from humidifi er options shown on this page are available for Humidi-tech humidifi ers. See the installation instructions beginning on Page 19. FIGURE 3-1: ULTRA-SORB DISPERSION OM-56-1 Directly above humidifi...
-
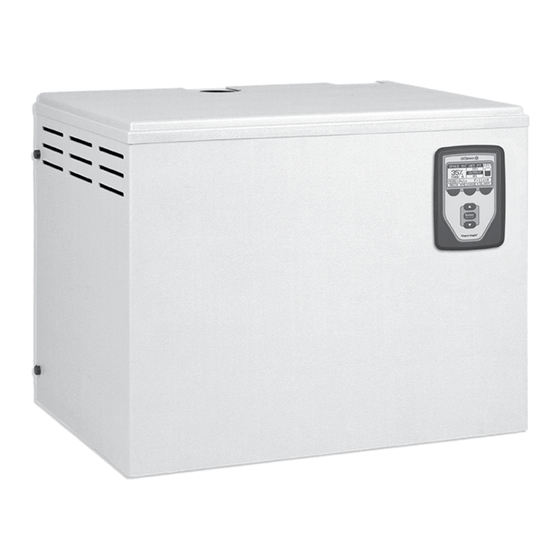
Page 8: Capacities, Electrical Specifications, And Weights
• SDU-E is available for all models, except Model HT-2 and Models HT-16 through HT-34. • Models with the SDU option have additional electronic components in the Humidi-tech cabinet. If adding an SDU, add the following to the Humidi-tech shipping and operating weights: SDU-E: 5.5 kg... -
Page 9: Dimensions
13 mm hole in base for water fi ll line 19 mm 57 mm 16 mm Power wiring knockout 38 mm 146 mm Control or SDU wiring knockout 614 mm DC-1167 DRISTEEM HUMIDI-TECH ELECTRIC HUMIDIFIER INSTALLATION, OPERATION, AND MAINTENANCE MANUAL... -
Page 10: Installation
Install the humidifi er on an exterior wall only if the wall is properly insulated. DISPERSION CONTROL DEVICES See Figure 14-1 for recommended installation locations for the dispersion assembly and associated control devices. DRISTEEM HUMIDI-TECH ELECTRIC HUMIDIFIER INSTALLATION, OPERATION, AND MAINTENANCE MANUAL... -
Page 11: Mounting The Humidifier
Humidi-tech): 460 mm To dispersion assembly Right side electrical Secured to supporting controls: 915 mm wall Supporting wall Left side: 305 mm Front 915 mm Floor: 610 mm DC-1201 DRISTEEM HUMIDI-TECH ELECTRIC HUMIDIFIER INSTALLATION, OPERATION, AND MAINTENANCE MANUAL... -
Page 12: Piping
• Install a union in water supply and drain lines as shown to allow tank removal. • Damage caused by chloride corrosion is not covered by your DriSteem warranty. DRISTEEM HUMIDI-TECH ELECTRIC HUMIDIFIER INSTALLATION, OPERATION, AND MAINTENANCE MANUAL... -
Page 13: Di/Ro Water Option
• Install a union in the water supply and drain lines as shown to allow tank removal. • Damage caused by chloride corrosion is not covered by your DriSteem warranty. DRISTEEM HUMIDI-TECH ELECTRIC HUMIDIFIER INSTALLATION, OPERATION, AND MAINTENANCE MANUAL... -
Page 14: Supply Water And Drain Piping
For other Drane- kooler mounting options or for more information, contact your DriSteem representative/distributor, or view the Drane-kooler product data sheet in the literature section at www. dristeem.com OM-7398 DRISTEEM HUMIDI-TECH ELECTRIC HUMIDIFIER INSTALLATION, OPERATION, AND MAINTENANCE MANUAL... -
Page 15: Drane-Kooler
DC-1138 Note: Use a condensate pump rated for your application. Pumps are rated by fl uid temperature, head (pressure), and fl ow (gpm). Contact your local DriSteem representative for pump selection. DRISTEEM HUMIDI-TECH ELECTRIC HUMIDIFIER INSTALLATION, OPERATION, AND MAINTENANCE MANUAL... -
Page 16: Wiring
• Do not use chassis or safety grounds as current-carrying commons. Never use a safety • Do not ground shield at the device end. ground as a conductor or neutral to return circuit current. DRISTEEM HUMIDI-TECH ELECTRIC HUMIDIFIER INSTALLATION, OPERATION, AND MAINTENANCE MANUAL... - Page 17 51.1 - 66.7 75.8 - 93.7 66.8 - 82.5 93.8 - 113.2 82.6 - 100.5 113.3 - 144 100.6 - 128.2 144.1 - 174 128.3 - 155.2 174.1 - 201.7 155.3 - 179.2 DRISTEEM HUMIDI-TECH ELECTRIC HUMIDIFIER INSTALLATION, OPERATION, AND MAINTENANCE MANUAL...
-
Page 18: Humidistat And Transmitter Placement
Steam dispersion assembly Turning vanes DC-1084 Window Doorway Temperature compensation option: Place a temperature compensation sensor on the lower corner of the inside surface of double-pane window glass on north- or northeast-facing window. DRISTEEM HUMIDI-TECH ELECTRIC HUMIDIFIER INSTALLATION, OPERATION, AND MAINTENANCE MANUAL... -
Page 19: Dispersion
Dispersion: Selecting the dispersion assembly location FIGURE 15-1: ULTRA-SORB WITH THE DriSteem humidifi ers operate with several types of dispersion assemblies for HIGH-EFFICIENCY TUBE OPTION open spaces and for ducts and air handling units. Dispersion assemblies in ducts and air handling units must be positioned where the water vapor being discharged is carried off with the airstream and is absorbed before it can cause condensation or dripping. -
Page 20: Interconnecting Piping Requirements
• Support vapor hose to prevent sags, or low spots, and to maintain a minimum pitch of 15% back to the humidifi er. • Use DriSteem vapor hose. Other manufacturers of vapor hose may use Important: unacceptable release agents or material mixes that can affect humidifi er Reducing the inside diameter of the system performance adversely. -
Page 21: Interconnecting Piping Requirements
RH level in the duct is too high. Failure to install these • Steam supply adapters are available from DriSteem. These adapters devices can result in excessive moisture convert a tubing outlet on the humidifi er to threaded pipe, allowing a pipe in the duct, which can cause bacteria connection. -
Page 22: Drip Tee Installation
Refer to governing codes for drain pipe size and maximum discharge water temperature. • Support steam hose so there are no sags or low spots. • Dashed lines indicate provided by installer. DC-1450 DRISTEEM HUMIDI-TECH ELECTRIC HUMIDIFIER INSTALLATION, OPERATION, AND MAINTENANCE MANUAL... -
Page 23: Sdu-I And Sdu-E
WHEN PERFORMING HUMIDI-TECH MAINTENANCE right side view If the SDU-E or SDU-I is installed immediately above the Humidi-tech, VLC-OM-031 disconnect both hose clamps on the steam hose, grip the hose and rotate it to break it loose from the tubing, and then slide the hose up onto the SDU steam tube until suffi... - Page 24 Keyhole for M10 fasteners SDU chassis 406 mm OM-55-1 76 mm 406 mm 458 mm 406 mm 51 mm 76 mm Keyhole for M10 470 mm fasteners Humidi-tech chassis OM-282-7 610 mm DRISTEEM HUMIDI-TECH ELECTRIC HUMIDIFIER INSTALLATION, OPERATION, AND MAINTENANCE MANUAL...
- Page 25 Amps at 120V Horsepower model capacity weight (50/60 Hz) SDU-I 13.6 kg/h 31 kg 3.20 0.36 SDU-E 46.3 kg/h 28 kg 2.07 0.26 * Measurement taken 2 m in front of SDU cabinet. DRISTEEM HUMIDI-TECH ELECTRIC HUMIDIFIER INSTALLATION, OPERATION, AND MAINTENANCE MANUAL...
- Page 26 See Warning below. 7. The dispersion box is constructed with a pitch toward the drain; however, the SDU-E frame must be installed plumb and level for the dispersion box to drain properly. DRISTEEM HUMIDI-TECH ELECTRIC HUMIDIFIER INSTALLATION, OPERATION, AND MAINTENANCE MANUAL...
- Page 27 • Rise: The minimum nonwetting height above the steam outlet of the SDU-E. • Spread: The minimum nonwetting width from the steam outlet of the SDU-E. • Throw: The minimum nonwetting horizontal distance from the steam outlet of the SDU-E. DRISTEEM HUMIDI-TECH ELECTRIC HUMIDIFIER INSTALLATION, OPERATION, AND MAINTENANCE MANUAL...
-
Page 28: Single Tube
OM-351-1 Dashed lines indicate provided by installer. INSTALLATION NOTES • Use DriSteem’s hard pipe adapter kit to connect the steam outlet to hard WARNING pipe. Use a hose clamp to connect the steam outlet to steam hose. Use a Hot surface and steam hazard hose cuff and clamps to connect the steam outlet to tubing. - Page 29 10 – 16 DN50 hose kit 25.8 without drain DN50 21 – 25 hose kit 38.6 without drain These models require multiple 30 – 34 tube assemblies and cannot use a hose kit. DRISTEEM HUMIDI-TECH ELECTRIC HUMIDIFIER INSTALLATION, OPERATION, AND MAINTENANCE MANUAL...
-
Page 30: Rapid-Sorb
Hot surface and steam hazard • Unpack shipment and verify receipt of all Rapid-sorb components Dispersion tube, steam hose, tubing, with packing list. Report any shortages to DriSteem immediately. The or hard pipe can contain steam, and components typically include the following: surfaces can be hot. - Page 31 Horizontal toward condensate plumb drain DN40 Tubing or pipe DN50 toward Rapid-sorb DN40 Vapor hose DN50 toward Rapid-sorb Vertical toward condensate toward header drain DN40 Tubing or pipe DN50 toward Rapid-sorb DRISTEEM HUMIDI-TECH ELECTRIC HUMIDIFIER INSTALLATION, OPERATION, AND MAINTENANCE MANUAL...
- Page 32 Dispersion tube escutcheon plates – 1% when using tubing or pipe 2 Use DriSteem’s hard pipe adapter kit to connect steam outlet to hard Dimension A: pipe. Use a hose clamp to connect steam outlet to steam hose. Use a •...
- Page 33 • Dispersion tubes to L-bracket • Hose clamps on DN50 tubes 9. Secure and seal the dispersion tube escutcheon plate and condensate drain tube escutcheon plate around the respective tubes, if applicable. DRISTEEM HUMIDI-TECH ELECTRIC HUMIDIFIER INSTALLATION, OPERATION, AND MAINTENANCE MANUAL...
- Page 34 90° . Typically, due to the condensate drain piping re quire ments, the header can be set on the fl oor of the air handler, assembled in the vertical position, and then raised and mounted in place. DRISTEEM HUMIDI-TECH ELECTRIC HUMIDIFIER INSTALLATION, OPERATION, AND MAINTENANCE MANUAL...
- Page 35 • L-bracket to duct • Dispersion tubes to L-bracket • Hose clamps on DN50 tubes • Header support bracket fastener 9. Secure and seal the header escutcheon plate around the header. DRISTEEM HUMIDI-TECH ELECTRIC HUMIDIFIER INSTALLATION, OPERATION, AND MAINTENANCE MANUAL...
- Page 36 fl ash steam, or condensing on nearby surfaces may occur. All drain lines must be installed and sized according to governing codes. ULTRA-SORB For Ultra-sorb steam dispersion panel instructions, see the installation, operation, and maintenance manual shipped with the Ultra-sorb. DRISTEEM HUMIDI-TECH ELECTRIC HUMIDIFIER INSTALLATION, OPERATION, AND MAINTENANCE MANUAL...
-
Page 37: Start-Up Procedure
(see the Vapor-logic Installation and Operation Manual). not contain water and the heaters are energized, turn main power off. At start-up, DriSteem recommends initially running the humidifi er with the Operation of the heaters without water factory default setting for skim time. See “Maintenance," beginning on will cause damage to the humidifi... -
Page 38: Start-Up Checklist
☐ If you experience diffi culties, have the keypad/display information available along with the serial number and humidifi er Model, and call DriSteem Technical Support at 800-328-4447. DRISTEEM HUMIDI-TECH ELECTRIC HUMIDIFIER INSTALLATION, OPERATION, AND MAINTENANCE MANUAL... -
Page 39: Tap/Softened Water
Both humidifi er cleaning and heated water fl owing to the drain are operational until the unit has had suffi cient time to costs. DriSteem recommends that the user observe and adjust the skim duration cool, or serious injury can occur. - Page 40 • All safety devices in the control circuit should be cycled on and off to verify they are functioning. These include: – High limit switch – Airfl ow proving switch – Low water level probe. Pull out probe plug; fi ll valve should energize. DRISTEEM HUMIDI-TECH ELECTRIC HUMIDIFIER INSTALLATION, OPERATION, AND MAINTENANCE MANUAL...
- Page 41 – When sliding probe housing into bracket from which it hangs, orient housing so neither water fl ow slot directly faces tank wall at back end of bracket. DRISTEEM HUMIDI-TECH ELECTRIC HUMIDIFIER INSTALLATION, OPERATION, AND MAINTENANCE MANUAL...
-
Page 42: Ultra-Sorb
• Perform complete inspection and cleaning of the following: – Heaters – Probe rods – Skimmer port and water seal – Humidifi er tank • After cleaning, the humidifi er should remain empty until humidifi cation is required. Ultra-sorb DRISTEEM HUMIDI-TECH ELECTRIC HUMIDIFIER INSTALLATION, OPERATION, AND MAINTENANCE MANUAL... - Page 43 4. Drain the evaporating chamber, and clean if necessary following the instructions in this manual. 5. Replace the enclosure. 6. Leave the evaporating chamber dry, the power off, and the water shut-off valve closed until the next humidification season. DRISTEEM HUMIDI-TECH ELECTRIC HUMIDIFIER INSTALLATION, OPERATION, AND MAINTENANCE MANUAL...
-
Page 44: Di/Ro Water Option
• Disconnect the drain union on the back left corner of the frame. • Disconnect the steam supply hose from the top of the tank. • Lift the tank foot above the frame fl ange and slide the tank assembly forward to remove. DRISTEEM HUMIDI-TECH ELECTRIC HUMIDIFIER INSTALLATION, OPERATION, AND MAINTENANCE MANUAL... -
Page 45: Di/Ro Water Option
Vapor-logic Installation and Operation Manual. 5. Replace the enclosure. 6. Leave the evaporating chamber dry, the power off, and the water shut-off valve closed until the next humidification season. DRISTEEM HUMIDI-TECH ELECTRIC HUMIDIFIER INSTALLATION, OPERATION, AND MAINTENANCE MANUAL... - Page 46 REPLACEMENT PARTS Humidifi er FIGURE 42-1: HUMIDI-TECH HUMIDIFIER REPLACEMENT PARTS Tap/softened water Humidi-tech DI/RO water Humidi-tech OM-768 DRISTEEM HUMIDI-TECH ELECTRIC HUMIDIFIER INSTALLATION, OPERATION, AND MAINTENANCE MANUAL...
- Page 47 160695-001 167787 HT-2 through HT-4 Tube weld, low water, long, Cover, tank gasket, HT-6 through HT-34 160695-002 167788 HT-6 through HT-34 * Specify humidifi er model and serial numbers when ordering. DRISTEEM HUMIDI-TECH ELECTRIC HUMIDIFIER INSTALLATION, OPERATION, AND MAINTENANCE MANUAL...
- Page 48 Screw, 8-32 × 1½" Phillips, black 700170-007 Nut retainer, 8-32 409593-001 Dispersion chamber for SDU with 1½" outlet 160445-003 Dispersion chamber for SDU with 2" outlet 160445-004 * This is an assembly of multiple parts. DRISTEEM HUMIDI-TECH ELECTRIC HUMIDIFIER INSTALLATION, OPERATION, AND MAINTENANCE MANUAL...
- Page 49 Blower, SDU external assembly Switch, airfl ow 406190 Screw, 8-32 × 1½" Phillips, black 700170-007 Nut retainer, 8-32 409593-001 Tubelet, 0.375" × 0.375" molded 310280-006 * This is an assembly of multiple parts. DRISTEEM HUMIDI-TECH ELECTRIC HUMIDIFIER INSTALLATION, OPERATION, AND MAINTENANCE MANUAL...
- Page 50 Contactor, 55A Siemens 407010-002 SSR, 1-pole, Carlo Gavazzi, 480V 408677-002 SSR, 1-pole, Carlo Gavazzi, 480V/63A 408677-005 SSR, 2-pole, Carlo Gavazzi, 480V/50A 408677-003 * Refer to model for correct selection and quantity. DRISTEEM HUMIDI-TECH ELECTRIC HUMIDIFIER INSTALLATION, OPERATION, AND MAINTENANCE MANUAL...
- Page 51 DRISTEEM HUMIDI-TECH ELECTRIC HUMIDIFIER INSTALLATION, OPERATION, AND MAINTENANCE MANUAL...
- Page 52 DriSteem, or if the products have visit our Web site: been modifi ed or altered without the written consent of DriSteem, or if such products have been www.dristeem.com subject to accident, misuse, mishandling, tampering, negligence or improper maintenance.
Need help?
Do you have a question about the HUMIDI-TECH and is the answer not in the manual?
Questions and answers