Table of Contents
Advertisement
Advertisement
Table of Contents

Related Manuals for Cotek SK700-112


Summary of Contents for Cotek SK700-112
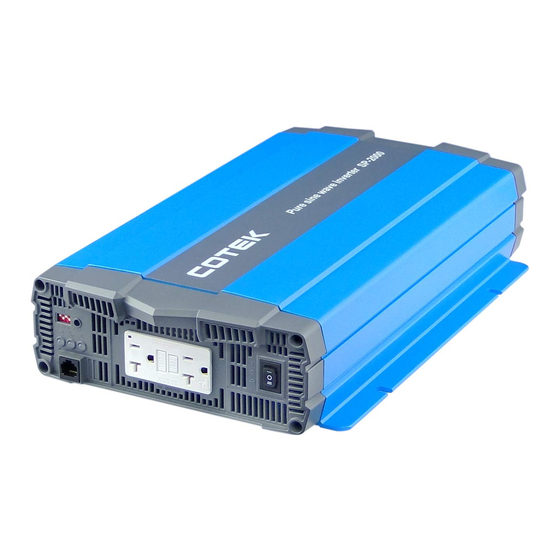
- Page 1 SK Series Pure Sine Wave Inverter User’s Manual...
-
Page 3: Table Of Contents
Table of Contents 1. Important Safety Information.……………………………………………… General Safety Precautions…………………………………………… Battery Precautions………………………..……………………….….. 2. Features………………………………………………………………………... Application………………………………………………………………. Electrical Performance………………………………………………… Mechanical Drawings………………………………………………….. 3. Introduction……………………………………………………….…………… Front Panel ….………………………………………………………….. Rear Panel.……………………………………………………………… Protections Features…………………………………………………… Installation………………………………………………………………. DC Wiring Connections ……………………………………………….. AC Safety Grounding………………………………………………….. Inverter Operation……………………………………………………… 4. Troubleshooting…………………………………….………………………… 5. -
Page 4: Important Safety Information
1. Important Safety Information WARNING! Before using the Inverter, read and save the safety instructions. 1-1. General Safety Precautions 1-1-1. Do not expose the Inverter to rain, snow, spray, bilge or dust. To reduce risk of hazard, do not cover or obstruct the ventilation openings. -
Page 5: Features
2. Features DC input socket availability is suitable for different user scenarios Power ON / OFF remote control E13 / CE / FCC approved Pure sine wave output (THD < 3%) Output frequency 50 / 60Hz selectable by DIP switch Input &... -
Page 6: Electrical Performance
2-2. Electrical Performance Specification Model No. Item SK700-112 SK700-124 SK700-148 SK700-212 SK700-224 SK700-248 Rated Power 700W Load 101 ~ 115% (3min.) Surge Power 1400W (3 sec; resistive) Input voltage 100 / 110 / 120V +/- 5% 220 / 230 / 240V... - Page 7 Specification Model No. Item SK1000-112 SK1000-124 SK1000-148 SK1000-212 SK1000-224 SK1000-248 Rated Power 1000W Load 101 ~ 115% (3min.) Surge Power 2000W (3 sec; resistive) Input voltage 100 / 110 / 120V +/- 5% 220 / 230 / 240V +/- 3% Output Voltage Frequency 50 / 60Hz +/- 0.05% (Selectable by DIP switch)
- Page 8 Specification Model No. Item SK1500-112 SK1500-124 SK1500-148 SK1500-212 SK1500-224 SK1500-248 Rated Power 1500W Load 101 ~ 115% (3min.) Surge Power 3000W (3 sec; resistive) Input voltage 100 / 110 / 120V +/- 5% 220 / 230 / 240V +/- 3% Output Voltage Frequency 50 / 60Hz +/- 0.05% (Selectable by DIP switch)
- Page 9 Specification Model No. Item SK2000-112 SK2000-124 SK2000-148 SK2000-212 SK2000-224 SK2000-248 Rated Power 2000W Load 101 ~ 115% (3min.) Surge Power 4000W (3 sec; resistive) Input voltage 100 / 110 / 120V +/- 5% 220 / 230 / 240V +/- 3% Output Voltage Frequency 50 / 60Hz +/- 0.05% (Selectable by DIP switch)
- Page 10 Specification Model No. Item SK3000-112 SK3000-124 SK3000-148 SK3000-212 SK3000-224 SK3000-248 Rated Power 3000W Load 101 ~ 115% (3min.) Surge Power 6000W (3 sec; resistive) Input voltage 100 / 110 / 120V +/- 5% 220 / 230 / 240V +/- 3% Output Voltage Frequency 50 / 60Hz +/- 0.05% (Selectable by DIP switch)
-
Page 11: Mechanical Drawings
2-3. Mechanical Drawings... -
Page 13: Introduction
3. Introduction This power inverter series is one of the most advanced line of mobile AC power systems. To get the most effective power inverter, it must be installed and used properly. Please read the instructions of this manual before you install and operate this model. - Page 14 3-1-3. Input Level:Display Input Voltages LED Status DC 12V DC 24V DC 48V RED Slow Blink 10.3~10.6 20.5~21.2 40.8~42.4 10.6~11.0 21.2~21.8 42.4~43.5 ORANGE 11.0~12.1 21.8~24.1 43.5~48.1 GREEN 12.1~14.2 24.1~28.6 48.1~56.3 ORANGE Blink 14.2~15.0 28.6~30.0 56.3~59.6 OVER RED Blink 15.0 30.0 59.6...
- Page 15 3-1-6. Status:Display Power & Fault Status Green LED LED Signal Status Solid Power OK Slow Blink Power Saving Red LED LED Signal Status Fast Blink Slow Blink Intermittent Blink Solid 3-1-7. Power Saving Mode: Power Saving Mode is adjustable and set by the Dip Switches, S1, S2 and S3 on the front panel.
- Page 16 3-1-8. AC outlets (available):...
-
Page 17: Rear Panel
3-2. Rear Panel: 3-2-1. Remote Port: The SK Series Inverter is compatible with any of the remote controllers, CR-6, CR-8. Before using the remote unit, you need to ensure the main switch is in the “ REMOTE” position and the input voltage of the power inverter is the same as it of the remote unit. -
Page 18: Protections Features
3-2-3. DC Input Terminal: Connect DC input terminal to 12V / 24V / 48V battery or the other power sources. 【+】represents positive, and【-】represents negative. Reverse polarity connection will blow the internal fuse and may damage the inverter permanently. DC Input Voltage Model Minimum Maximum... -
Page 19: Installation
3-4. Installation: The power inverter should be installed in an environment that meets the following requirements: 3-4-1. Dry – Do not allow water to drip on or enter into the inverter. 3-4-2. Cool – Ambient air temperature should be between 0℃ and 40℃, the cooler the better. -
Page 20: Dc Wiring Connections
Increasing DC cable size helps improve the situation. We recommends the following cables for optimum inverter performance. (Apply both 120V and 230V versions ) Model No Wire AWG Inline Fuse SK700-112 / 212 100 A SK700-124 / 224 50 A SK700-148 / 248 30 A... - Page 21 3-5-1. Connect the cables to the power input terminals on the rear panel of the inverter. The red terminal is represents positive (+) and black terminal represents negative (-). Insert the cables into the terminals and tighten the screw to clamp the wires securely. WARNING! Ensure all the DC connections are tight (torque to 9 –...
-
Page 23: Ac Safety Grounding
UL standards requires us to test and recommend specific GFCI. Cotek has tested the following GFCI – protected 20A receptacles and found that they functioned properly when connected to the output of the Inverter. -
Page 24: Inverter Operation
3-7. Inverter Operation: To operate the power inverter, use the ON / OFF switch on the Front panel to turn the power on. Then the power inverter is ready to deliver AC power to your loads. If there is several loads use, turn them on separately after the inverter is “ON”... -
Page 25: Troubleshooting
4. Troubleshooting: WARNING! Do not open or disassemble the Inverter. Attempting to service the unit yourself may cause the risk of electrical shock or fire. Problems and Symptoms Possible Cause Solutions “No AC Power Output” STATUS illuminates the red LED a. -
Page 26: Maintenance
24 months from the date of purchase and will repair or replace any defective power inverters if you directly returned them to us with postage paid. Please note that Cotek is only responsible for ensuring our products are operational before delivering. This warranty will be considered void if the unit has been misused, altered, or accidentally damaged.
Need help?
Do you have a question about the SK700-112 and is the answer not in the manual?
Questions and answers