
Subscribe to Our Youtube Channel
Related Manuals for Boston Whaler 37 Justice Series


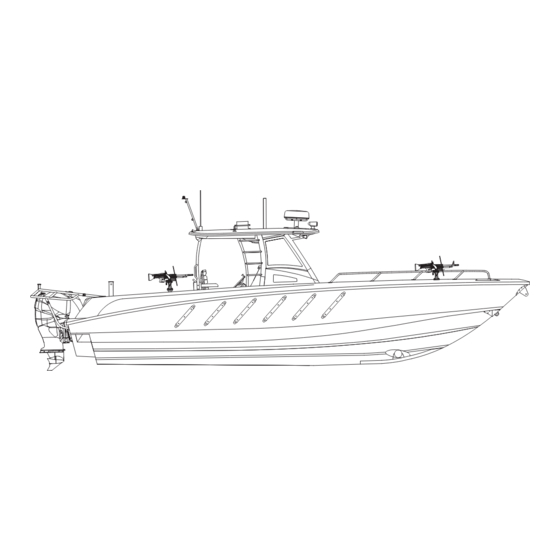
Summary of Contents for Boston Whaler 37 Justice Series
- Page 1 Operation & Maintenance Manual Part Number 2081409 ® Boston Whaler 37 Justice Series ® Fast Patrol Boat © 2012 Brunswick Commercial & Government Products. All rights reserved. 420 Megan Avenue, Edgewater, FL 32132 USA...
-
Page 2: About This Manual
Brunswick Commercial & Government Prod- Safety Notices ucts reserves the right to make changes at any time, without notice, to features, specifica- This manual uses three levels of notification for tions, and model availability. The right is also safety-related information. reserved to change any specification, part, or system without incurring any obligation to up- The signal words CAUTION, WARNING, and... -
Page 3: Table Of Contents
T ABL E O F CO NT ENT S Section 1: Safety O p erator Resp onsib ilities ....1- 1 Giving Assistance ........1- 1 Personal F lotation Devices....1- 2 Ex haust Emissions.......1- 3 Carb on Monox ide Detector ....1- 3 F ire Ex tinguishers ........1- 4 F ire Sup ression System.......1- 4 F ires ............1- 5... - Page 4 T ABL E O F CO NT ENT S Section 2: Boat O p eration Pre- O p eration Checklist.......2- 1 Ignition Shutoff Switch ......2- 2 Starting the Engines ......2- 4 Battery Selector Switches ....2- 4 Main Ignition K ey Switches ....2- 5 Push- to- Start Panel ......2- 5 Automatic Charging Relays ( ACR) ..2- 6 Starting Procedure .......2- 7...
- Page 5 T ABL E O F CO NT ENT S Section 3 : F uel System General Descrip tion ......3 - 2 Generator F uel System ......3 - 2 Generator F uel F ilter ......3 - 2 Gasoline F uel System ......3 - 3 Diesel F uel System Diagram ....3 - 4 Gasoline F uel System Diagram ...3 - 5 F uel T ank Bonding System ....3 - 6...
- Page 6 T ABL E O F CO NT ENT S Section 4 : Boat Systems General Descrip tion ......4 - 1 F eature O verview........4 - 2 H elm L ayout .........4 - 4 Switch Panel .........4 - 5 T hru- H ull F ittings ........4 - 6 Bow T hruster ........4 - 7 Navigation L ights .........4 - 8 O p eration ..........4 - 8...
- Page 7 T ABL E O F CO NT ENT S Section 4 : Boat Systems ( continued) V anity ...........4 - 23 Coffee Maker ........4 - 23 Microwave ...........4 - 23 Cab in Refrigerator ......4 - 23 Sky L ights ...........4 - 24 H anging L ocker &...
- Page 8 T ABL E O F CO NT ENT S Section 4 : Boat Systems ( continued) Shore Power........4 - 4 4 EL CI .............4 - 4 4 T esting & T roub leshooting ....4 - 4 5 Dual Shore Power ......4 - 4 6 Single Cord w/ Generator ....4 - 4 7 Single Cord, No Generator ....4 - 4 7 Battery Charging...
- Page 9 T ABL E O F CO NT ENT S Section 5 : Electrical Systems DC O verview .........5 - 1 Batteries ..........5 - 2 Battery Charger ........5 - 3 Battery Switches........5 - 4 Automatic Charging Relays ( ACR) ..5 - 5 Manual Control O verride ......5 - 5 Grounding and Bonding ......5 - 6 e nitions ..........5 - 6...
- Page 10 T ABL E O F CO NT ENT S Section 5 : Electrical Systems ( continued) DC Distrib ution Panel ......5 - 29 DC Wiring Schematic Cab in ....5 - 3 0 H ardtop Schematic ......5 - 3 1 120V / 6 0H z Shore Power .....5 - 3 2 AC Distrib ution Panel ......5 - 3 3 220V / 5 0H z Shore Power .....5 - 3 4 AC Distrib ution Panel ( 220V / 5 0H z) .5 - 3 5...
- Page 11 T ABL E O F CO NT ENT S Section 6 : Boat Maintenance Speci cations ........6 - 1 ull Identi cation Number IN ..6 - 2 H ull Maintenance ........6 - 3 Washing ..........6 - 3 Wax ing ..........6 - 4 Comp ounding ........6 - 4 Gelcoat &...
- Page 12 T ABL E O F CO NT ENT S Section 6 : Boat Maintenance ( continued) Maintenance ........6 - 22 Raw Water Washdown Pump ....6 - 22 F resh Water System ......6 - 23 F illing the T ank ........6 - 23 Water H eater ........6 - 24 Maintenance ........6 - 25 V acu- F lush®...
-
Page 13: O P Erator Resp Onsib Ilities
Safety Section 1 O p erator Resp onsib ilities It is expec t ed by B runswic k Commerc i al & Government P roduc t s ( B CGP ) that the personnel authoriz e d to operate this boat are experienc e d boat handlers familiar with high-performanc e boating. -
Page 14: Personal F Lotation Devices
Section 1 Safety Personal F lotation Devices P ersonal F lotation D evic e s ( P F D ’ s) are designed to save lives. It is your responsibility to ensure that the boat has a sufficient number of P D’s for your crew. It is your responsibility to ensure that non-swimmers wear P F D ’... -
Page 15: Ex Haust Emissions
Safety Section 1 Ex haust Emissions Gasoline and diesel-powered engines produc e c a rbon monoxide when they are running. Carbon monoxide is a c o lorless and odorless gas. It is extremely toxic . aware of the threat and respond ac c o rdingly. Always be aware of operating c o nditions that might allow c a rbon monoxide to c o llec t in oc c u pied spac e s on your boat. -
Page 16: F Ire Ex Tinguishers
Section 1 Safety F ire Ex tinguishers Y our boat is eq uipped with three United S tates Coast Guard approved Type ABC fire e tinguishers. Each extinguisher is UL Rated 1 -A: 1 0 -B C. This rating indic a tes that each e tinguisher can be used to fight Class A, B, and C fires. -
Page 17: F Ires
Safety Section 1 F ires Most marine fires result from spilled fuel or oil accumulating in the bilge. Careful use of on board fire e tinguishers should control small fires. Direct the fire e tinguisher output toward the base of the ames in a sweeping motion. -
Page 18: Cap Sizing
Section 1 Safety Cap sizing Y our boat might c a psiz e due to improper loading, improper operation, or severe weather c o nditions. F ormulate a c a psiz i ng plan in advanc e that inc l udes the following ac t ions: • Try to turn off the engines to avoid injury and additional damage... -
Page 19: Swamp Ing
Safety Section 1 Swamp ing Swamping or ooding the interior of the boat can occur for a number of reasons, inc l uding severe weather c o nditions, improper operation, and improper loading. Consider the following: • K now the safe loading limits for this boat under normal conditions. -
Page 20: Ignition Shutoff Switch
Section 1 Safety Ignition Shutoff Switch This vessel is eq uipped with an emergenc y engine stop switc h . The switc h is loc a ted on the c o nsole, below the shift/ throttle c o ntrol. The ignition shutoff safety switc h inc o rporates a shut- off switc h , switc h c l ip, lanyard and lanyard c l ip, whic h is c l ipped to the operator when running. - Page 21 Safety Section 1 roposition In ormation The following information is inc l uded in this manual as rec o mmended by California’ s Safe Drinking Water and T ox ic Enforcement Act of 19 8 6 , amended through P roposition 6 5 . WARNING A wide variety of comp onents used on this b oat contain or emit chemicals known to the State...
-
Page 22: Deck O Ccup Ancy Chart
Section 1 Safety Deck O ccup ancy Chart Working Decks: D o not allow passengers on these dec k s while the boat is underway. These dec k s c an only be used when you are at the doc k , mooring, or anc h oring. -
Page 23: Warning L Ab Els
Safety Section 1 Warning L ab els WARNING, SEC RE D ESSEL CERTI ICATI N CAPACITY EL REC MMENDATI N CTANE S EPA E AP EMISSI NS BCGP PRE ENT DISCHARGE P LL TANT WARNING, LEA ING PR P HANG TAG MA IM M ENGINE WEIGHT DANGER, TRANS M D R SEC RE... - Page 24 Section 1 Safety O p erator’ s Notes 1-12...
-
Page 25: Pre- O P Eration Checklist
Boat O p eration Section 2 Pre- O p eration Checklist Review all the items on this c h ec k l ist eac h time you prepare for a departure. Resolve any issues before you leave the doc k . D rain plug( s) installed in hull V erify trip routing and navigational information Chec k... -
Page 26: Ignition Shutoff Switch
Section 2 Boat O p eration Ignition Shutoff Switch Y our boat is eq uipped an ignition shutoff switc h . The ignition shutoff switc h is loc a ted on the lower c o nsole fac e , below the throttles. The ignition shutoff switc h is designed to shut off the vessel’... - Page 27 Boat O p eration Section 2 Understand this important information about your ignition shutoff switc h : • It is your responsibility to dec i de when to attac h the switc h lanyard, but we strongly rec o mmend that you use the shutoff switc h anytime you are operating the boat.
-
Page 28: Starting The Engines
Section 2 Boat O p eration Starting the Engines B efore you attempt to start the engines, ensure the lower units are in water of sufficient depth for operation and that there are no people or objec t s in the vic i nity subjec t to injury or damage. -
Page 29: Main Ignition K Ey Switches
Boat O p eration Section 2 Main Ignition K ey Switches The main ignition k e y switc h es are loc a ted on the bottom of the main break e r panel behind an ac c e ss door on the port aft wall of the c a bin. -
Page 30: Automatic Charging Relays ( Acr)
Section 2 Boat O p eration Automatic Charging Relays ( ACR) The engine/ house batteries are automatic a lly c o nnec t ed in parallel through the use of ACRs ( Automatic Charging Relay) when a sufficient charging source is present. The battery bank s are automatic a lly separated when the c h arging sourc e falls below 1 3 .5 volts for a predetermined... -
Page 31: Starting Procedure
Boat O p eration Section 2 Starting Procedure Use the following c h ec k l ist eac h time you start the engines. Additional detailed information about these systems is c o vered in the engine operator’ s manual. DANGER Never start or op erate the engines when p eop le are in the water near your b oat. -
Page 32: Shift And T Hrottle Control
Section 2 Boat O p eration Shift and T hrottle Control B oat direc t ion, boat speed, c l ose-q uarter maneuvering are c o ntrolled by the c o ntrols. The optional dual-lever D TS c o ntrol inc l udes gear selec t ion, engine speed, and engine trim angle func t ions for the engines. -
Page 33: Sp Eed Control
Boat O p eration Section 2 Sp eed Control • M ove the shift lever forward from the F ORWARD gear detent to inc r ease engine speed in forward gear. • M ove the shift lever bac k w ard from the RE V E RS E gear detent to inc r ease speed in reverse gear. -
Page 34: Docking
Section 2 Boat O p eration Docking P ressing the “ D OCK ” button initiates doc k i ng mode. D oc k i ng mode reduc e s throttle c a pac ity to approximately 5 0 % of normal throttle. -
Page 35: Engine T Rim
Boat O p eration Section 2 Engine T rim The power trim & tilt system allows you to raise and lower the engines for optimum performanc e in the water and for trailering, launc h ing and beac hing. The switc h es are a momentary type switc h ;... - Page 36 Section 2 Boat O p eration Y ou must determine the c o rrec t engine trim adjustments through experimentation or experienc e , based on your mission loads and operating c o nditions. The trim switc h es are loc a ted on a c o ntrol pad at the c enter of the c o ntrol c o nsole.
-
Page 37: Smartcraft V Essel V Iew System
Boat O p eration Section 2 ® SmartCraft V essel V iew System Y our boat is eq uipped with the S martCraft V essel V iew boat and engine information system. The V essel V iew c o lor L CD display is mounted on the c o ntrol c o nsole fac e , above D TS c o ntrols. -
Page 38: Prop Ellers
Section 2 Boat O p eration Prop ellers Y our outboard engines are eq uipped with propellers of a tested siz e and design to provide best engine and boat performanc e . Refer to the engine operator’ s manual for detailed information about propeller designs and the c o rrec t propeller selec t ion method. - Page 39 Boat O p eration Section 2 Reducing p rop eller p itch and diameter will inc r ease ac c e leration and load c a rrying c a pability, with a slight dec r ease in top speed. It will also increase the engine’ s full-throttle RP M at a rate of about 1 5 0 RP M per inc h of...
-
Page 40: Maneuvering
Section 2 Boat O p eration Maneuvering M aneuvering this boat req uires experienc e and a high level of sk i ll. Always operate any boat within the limits of your experienc e . If you do not have this experienc e , ask someone to instruc t you or gain experienc e through experimentation under c o ntrolled c o nditions. - Page 41 Boat O p eration Section 2 At idle speed, you c a n c o ntrol boat direc t ion and position by engine gear selec t ion alone. With both outboard engines fac i ng straight ahead: • Y ou c a n rotate the boat to p ort by shifting the starboard engine into F ORWARD and the port engine into RE V E RS E .
-
Page 42: L Oad Distrib Ution
Section 2 Boat O p eration L oad Distrib ution P lac e ment and c o nc e ntration of non-permanent loads in a boat c a n affec t boat performanc e and c r ew safety. Refer to Boat L oad Cap acities in Section 1 of this manual for additional information. -
Page 43: Boat T Rim T Ab S
Boat O p eration Section 2 Boat T rim T ab s ® Y our boat is eq uipped with L enc o elec t romec h anic a l trim tabs. The trim tab c o ntrol switc h es and L E D indic a tor lights are loc a ted on the c o ntrol c o nsole fac e , port of the D TS engine c o ntrols. - Page 44 Section 2 Boat O p eration The trim tab switc h panel is labeled and wired to mak e tab operation simple. When operating the trim switc hes, think of how you want the b ow of the b oat to move to properly trim the boat.
-
Page 45: Bow T Hruster
Boat O p eration Section 2 Bow T hruster B e sure you thoroughly understand the operation and safety req uirements of the thruster before using. The thruster should not be operated in c l ose proximity to swimmers, as a powerful suc t ion is c r eated when in use. This vessel is eq uipped with a 4 k W bow thruster with a dedic a ted battery bank and c h arging system. - Page 46 Section 2 Boat O p eration When the desired boat movement has been ac h ieved, return the joystic k to the c e nter position ( spring return) . The bow thruster motor is eq uipped with an internal thermally-ac t ivated break e r.
-
Page 47: Stop P Ing Procedure
Boat O p eration Section 2 Stop p ing Procedure Use the following c h ec k l ist at the end of eac h mission to verify that the appropriate boat systems are configured for a short period of non-use at the doc k . If you are not going to use the boat for a long period of time, refer to O ff- Season Storage in S ec t ion 6 . -
Page 48: T Railering
Section 2 Boat O p eration T railering If B CGP supplied the trailer for your boat, it is designed specifically for your boat and it is commercial grade. The trailer c o nstruc t ion is heavy-duty and it exc e eds the c a pac i ty req uirements for your boat. -
Page 49: Safety Checklist
Boat O p eration Section 2 CAU T IO N T ransp orting your b oat on a sub - standard trailer can cause serious, p ermanent damage to the hull. T his typ e of hull damage is considered “ i mp rop er storage”... -
Page 50: Securing Boat To T Railer
Section 2 Boat O p eration Securing Boat to T railer Y ou must be c e rtain that your boat is c o rrec t ly sec u red to the trailer before you begin any over-the-road transportation. Use the following c h ec k list to sec u re your boat before any over-the-road transportation: • All loose gear must be sec u red or removed... - Page 51 Boat O p eration Section 2 When maneuvering on streets or highways, always remember that the boat and trailer have at least doubled the effec t ive length and weight of your tow vehic l e. F ollow these guidelines when towing: • Always use c o mmon sense when trailering a boat • Operate your tow vehic l e well within the existing traffic regulations...
-
Page 52: Backing
Section 2 Boat O p eration Backing B ac k i ng a trailer req uires experienc e and sk i ll. Always operate a towing vehic l e within the limits of your experienc e . If you do not have this experienc e , ask someone to instruc t you or gain experienc e through... -
Page 53: L Ifting And Slinging
Boat O p eration Section 2 L ifting and Slinging WARNING V erify that the lifting eq uip ment, sp reader b ars, slings, and attaching hardware are p rofessionally certi ed to a working load o at least 1 , 00 pounds kg with a sa ety actor o F ailure of any lifting comp onent could cause... -
Page 54: Slings
Section 2 Boat O p eration Slings Y ou c a n use a spreader bar and slings to lift your boat. The system must be professionally certified to a working load of at least 1 7 ,5 0 0 pounds ( 7 9 3 8 k g ) with a safety factor of five. -
Page 55: F Orklift
Boat O p eration Section 2 F orklift Y ou c a n use a large marine fork l ift to move your boat. The fork l ift must be professionally rated to a work i ng load of at least 1 7 ,5 0 0 pounds ( 7 9 3 8 k g ) with a safety factor of five. - Page 56 Section 2 Boat O p eration O p erator’ s Notes 2-32...
- Page 57 F uel System Section 3 WARNING Insp ect the fuel system and fuel tank b efore each mission. Correct the cause of any gasoline or diesel leak immediately. V entilate the area to eliminate vap ors b efore energizing any electrical circuits, starting the generator, or starting the outb oard engines.
-
Page 58: General Descrip Tion
Section 3 F uel System General Descrip tion This boat is eq uipped with both a diesel fuel system for the generator and a gasoline fuel system to power the outboard engines. P lease tak e time to read and understand all the fuel related information and warnings regarding gasoline and your boat, in the engine operator’... -
Page 59: Gasoline F Uel System
F uel System Section 3 Gasoline F uel System The Gasoline F uel System Diagram in this sec t ion shows locations of the fuel tank, fuel fill, fuel tank vent, fuel level sending unit, fuel withdrawal tubes, fuel shutoff valves, and the fuel filters. -
Page 60: Diesel F Uel System Diagram
Section 3 F uel System Diesel F uel System Diagram F O RWARD... -
Page 61: Gasoline F Uel System Diagram
F uel System Section 3 Gasoline F uel System Diagram... -
Page 62: F Uel T Ank Bonding System
Section 3 F uel System F uel T ank Bonding System WARNING Do not allow any liq uid gasoline to enter the bilge. Liquid gasoline is a re and e plosion ha ard. asoline vapor is e tremely ammable and highly e plosive under certain conditions. The fuel tank is inc l uded in the boat’... - Page 63 F uel System Section 3 DANGER T here is a danger that static electricity can ignite gasoline vap ors that have not b een ventilated outside an enclosed area. Use e treme caution when fueling your b oat with gas or diesel from a source outside the regular venues ( e.g.
-
Page 64: Static Electricity
Section 3 F uel System Static Electricity A disc h arge of static elec t ric i ty c a n ignite gasoline vapor that has ac c u mulated during the fueling proc e ss. Use extreme c a ution when fueling your boat under unusual c i rc u mstanc e s suc h as when the boat is suspended in a boatlift. -
Page 65: General Guidelines
F uel System Section 3 General Guidelines Also follow these imp ortant guidelines during fueling op erations: CAU T IO N T his fuel system is not designed to sup p ort an automatic “ h ands free” fuel nozzle. Never use an automatic uel no le to ll this tank and never leave a fueling p rocess unattended. -
Page 66: H Ose Routing
Section 3 F uel System H ose Routing The F uel S ystem D iagram in this sec t ion shows loc a tions of the fuel tank, fuel fill, fuel tank vent, fuel level sending unit, fuel withdrawal tubes and the fuel shutoff valves. F ill H ose Rep lacement Removal Loosen the two hose clamps and remove the fill hose... -
Page 67: Ent H Ose Rep Lacement
F uel System Section 3 V ent H ose Rep lacement Removal The fuel tank is vented through the fuel fill fitting and fuel c a p. L oosen the two hose c l amps and remove the vent hose from the elbow at the fuel tank . -
Page 68: Contaminated Gasoline
Section 3 F uel System Contaminated Gasoline Water from c o ndensation sediment from c o ntaminated gasoline c a n c o llec t in the fuel tank . Contaminated gasoline c a n damage boat fuel system components, corrode fuel tanks, clog fuel filters, and damage the engines’... -
Page 69: Ethanol- Blended F Uels
F uel System Section 3 Ethanol- Blended F uels E thanol is an oxygenated hydroc a rbon c o mpound that has a high oc t ane rating and therefore is useful in inc r easing the oc t ane level of unleaded gasoline. The fuel-system c o mponents of these engines have been tested to perform with the maximum level of ethanol- blended gasoline ( 1 0 %... - Page 70 Section 3 F uel System Automotive gasoline has c o ntained various oxygenated hydroc a rbon c o mpounds as replac e ments for lead since . These compounds boost the octane rating of gasoline. Two familiar c o mpounds are M TB E ethanol.
- Page 71 F uel System Section 3 If E -1 0 gasoline absorbs enough moisture, it c a n suffer phase separation. The ethanol and water mixture will fall out of suspension and c o llec t in the lowest parts of the fuel system. The ethanol and water mixture can damage engines, clog fuel filters, and corrode metal fuel system parts.
-
Page 72: Storage
Section 3 F uel System Storage L ong periods of storage and/ or non-use, c o mmon to boats, c r eate uniq ue problems. When preparing to store a boat for extended periods— two months or more— is best to c o mpletely remove all fuel from the tank . If it is not possible to remove the fuel, maintaining a full tank of fuel with a fuel stabiliz e r added to provide fuel stability and c o rrosion protec t ion is rec o mmended. -
Page 73: General Descrip Tion
Boat Systems Section 4 General Descrip tion This sec t ion c o ntains general theory and func t ional information about the boat systems. This information is intended to give you an idea about how eac h boat system is configured and how it should be used. The information in this sec t ion is not meant to be a detailed servic e manual. - Page 74 Section 4 Boat Systems...
- Page 75 Boat Systems Section 4...
- Page 76 Section 4 Boat Systems...
- Page 77 Boat Systems Section 4...
- Page 78 Section 4 Boat Systems...
-
Page 79: Switch Panel
Boat Systems Section 4 Bow T hruster This boat is eq uipped with a 4 k W bow thruster with a dedic a ted battery bank and c h arging system. The elec t ric a lly driven bow thruster gives the operator more maneuverability of the bow when doc k i ng or maneuvering the vessel in narrow c h annels or where spac e is at a premium. -
Page 80: Navigation L Ights
Section 4 Boat Systems Navigation L ights CAU T IO N Installing after- market accessories such as radar domes, arches, and strob e lights can ob struct the navigation lights and decrease their effectiveness. It is your resp onsib ility to comp ly with regulations regarding the normal op eration of the navigation lights. -
Page 81: Magnetic Comp Ass
Boat Systems Section 4 Magnetic Comp ass WARNING All magnetic comp asses are sub ject to magnetic interference, which can p roduce errors called deviation. Comp ass deviation can contrib ute to inaccurate course plotting and position p lacing your crew, your b oat, and others at risk. Deviation The loc a tion of your c o mpass has been selec t ed to minimiz e deviation c a used by other eq uipment installed... -
Page 82: Signal H Orn
Section 4 Boat Systems Signal H orn This boat is eq uipped with a signal horn. The signal horn is mounted on the hard top. The horn button is on the c o ntrol c o nsole, to the left of the steering wheel on the helm switch panel. -
Page 83: Map L Ights
Boat Systems Section 4 Map L ights There are two dual lamp ( red & white) map lights direc t ly above the c o nsole. The map lights are powered by the “ M AP L IGH TS ” switc h on the helm switc h panel and are protec t ed by the “... -
Page 84: Sp Reader L Ights
Section 4 Boat Systems Sp reader L ights The aft spreader lights are powered by the “ AF T S P D R L IGH TS ” switc h on the helm switc h panel. They are protec t ed by the “ S P RE AD E R L IGH TS ” break e r on the helm break e r panel loc a ted on the port side of the c o ntrol station. -
Page 85: Electric Windshield V Ent
Boat Systems Section 4 Electric Windshield V ent The windshield vent at the top of the windshield is elec t ric a lly ac t uated. A switc h labeled “ V E NT” is loc a ted on the helm switc h panel. B y depressing the top of the switc h , you c a n open the vent. -
Page 86: Bilge Pump S
Section 4 Boat Systems Bilge Pump s This boat is eq uipped with three ( 3 ) automatic bilge pumps: one forward ( 7 5 0 GP H / 2 ,8 3 9 L P H ) , one aft ( 2 0 0 0 GP H / 7 ,5 7 1 L P H ) and one high water emergenc y pump ( 2 0 0 0 GP H / 7 ,5 7 1 L P H ) . -
Page 87: Access To The Pump S
Boat Systems Section 4 Access to the Pump s The aft pump and high water pump c a n be ac c e ssed through the eq uipment hatc h in the aft cockpit oor. The forward pump can be accessed through a hatch under the cushion on the c a bin berth. -
Page 88: F Uel & O Il Sp Illage
Section 4 Boat Systems F uel & O il Sp illage Regulations prohibit disc h arging fuel or oily waste in navigable waters. Discharge is defined as any action which causes a film, sheen or discoloration on the water surfac e , or c a uses a sludge or emulsion beneath the water surfac e . - Page 89 Boat Systems Section 4 The hose should be dedicated to filling use only and should be stored in a clean, dry place. It is a good prac t ic e to c o ver the ends of the hose to ensure the inside stays c l ean. e ore you ll the reshwater system or the rst time, it is vital that it be properly...
-
Page 90: F Resh Water System Maintenance
Section 4 Boat Systems F resh Water System Maintenance V ery little maintenanc e is req uired for the fresh water system, other than annual disinfec t ing and winteriz i ng. P eriodic a lly c h ec k the entire system to assure that the hose connections, tube fittings, electrical connections and mounting bolts are properly sec u red, and free of... -
Page 91: Deck Showers
Boat Systems Section 4 Deck Showers This boat is eq uipped with two dec k showers: one is loc a ted on the starboard side, aft of the transom door and the other is loc a ted forward of the dive door on the port side of the c o c k p it. -
Page 92: Water H Eater
Section 4 Boat Systems Water H eater CAU T IO N Make sure the fresh water tank is full b efore op erating the water heater. O p erating the water heater emp ty will cause damage to the system. 1 . -
Page 93: Maintenance
Boat Systems Section 4 The water heater is eq uipped with a temperature and pressure relief valve that c o mplies with the standard for Relief V alves & Automatic Gas S hut off D evic e s for H ot Water S ystems, ANS I Z 2 1 .2 2 H ydrogen gas may form in the tank if the system has not been used for more than two week s. -
Page 94: Shower Curtain
Section 4 Boat Systems Turn off the water heater, wait for the water to c o ol then mak e c e rtain that the system is c o mpletely drained before laying up for the winter season. rain and ush the reshwater tank with a non to ic anti ree e b efore winter storage. -
Page 95: Anity
Boat Systems Section 4 V anity The vanity in the c a bin features a large sink and fresh water fauc e t. Additional amenities inc l ude a toothbrush holder and storage shelf. On the forward side of the c a binet is task lighting, a 1 2 0 V GF I rec e ptac l e and a 1 2 V rec e ptac l e. -
Page 96: Sky L Ights
Section 4 Boat Systems Sky L ights FWD FISH RAW WATER LIVEWELL LIVEWELL LIVEWELL LIVEWELL BOX PUMP PUMP PUMP LIGHTS PUMP AFT LIGHTS AFT The c a bin on this boat has a set of sk y lights in the aft c e iling. -
Page 97: Maintenance
Boat Systems Section 4 Maintenance M aintenanc e of the raw water system req uires periodic inspection of the raw water intake strainer and all fittings and hoses for system integrity to prevent leak s . Clean away debris and/ or tighten hose c o nnec t ions as req uired. The system should be run at least every other month to k e ep the pump’... - Page 98 Section 4 Boat Systems The waste system inc l udes a V ac u -F lush® toilet, a 1 0 gallon ( 3 7 .8 L ) holding tank with vac u um pump and a thru-hull vent. Waste from the head is direc t ed into the 1 0 gal. ( 3 7 .8 L ) holding tank located in the bilge.
-
Page 99: Acu- F Lush® H Ead
Boat Systems Section 4 V acu- F lush® H ead The foot pedal at the base of the toilet opens a mec h anic a l seal whic h allows a vac u um to forc e waste through the opening in the bowl to the vac u um generator, through the vac u um pump and then to the holding tank . -
Page 100: Macerator & Dockside Discharge
Section 4 Boat Systems Macerator & Dockside Discharge The system c a n be emptied by two methods: The preferred method is via doc k s i de pumpout through the “ Waste” dec k plate on the port transom. Alternatively, the system also provides for overboard disc h arge by way of a mac e rator &... -
Page 101: Maintenance
Boat Systems Section 4 Lakes and Intercoastal waterways, freshwater lakes and impoundments accessible through locks and other flowing waters that are navigable interstate by vessels EMPTY FULL subject to this regulation. (40CFR 140.3) DISCHARGE The mac e rator disc h arge pump draws solid and liq uid PUMP ON waste from the holding tank and proc e sses it prior to START... -
Page 102: Waste System V Ent
Section 4 Boat Systems Waste System V ent The waste system vents odors assoc i ated with waste operations through the starboard midship thru hull fitting. Avoid over owing the holding tank. If the LL light is lit on the disc h arge c o ntrol panel loc a ted in the head, you M ST empty the holding tank before the system will func t ion properly. -
Page 103: Gray Water Sump
Boat Systems Section 4 Gray Water Sump Y our boat is eq uipped with a gray water sump loc a ted under a hatc h beneath the c u shion of the berth in the c a bin. Gray water from the shower, vanity, water heater drain and the forward c o nsole storage c o mpartment drain c o llec t in the sump. -
Page 104: Air Conditioning
Section 4 Boat Systems Air Conditioning This boat is equipped with an , BT air conditioner which supplies cool air and heat to the c a bin. The system c a n be regulated by a c ontrol panel on the aft port side of the c a bin. The unit c a n be ac c e ssed through the c o ld air return panel on the aft port side of the c a bin. -
Page 105: Windshield Defogging V Ents
Boat Systems Section 4 Windshield Defogging V ents The A/ C vents loc a ted on the top of the c o nsole visor c a n be rotated degrees and opened to direct air ow to the oc c u pants or to defog the windshield of c o ndensation ac c u mulation. -
Page 106: Generator
Section 4 Boat Systems Generator The F isc h er P anda 8 K W diesel generator on this boat provides 1 2 0 V olt Alternating Current, ( AC) to the boat’ s elec t ric a l system through the AC M ain B reak e r P anel. Connec t ions to the AC elec t ric a l system are made through the slide selec t or switc h on the AC panel. - Page 107 Boat Systems Section 4 F O RWARD 4-35...
- Page 108 Section 4 Boat Systems The generator draws fuel from its own tank loc a ted on the starboard aft side of the mac h inery c o mpartment. The fuel system has its own fuel and water separating filters. The exhaust from the generator passes through a high efficiency marine lift type water cooled muf er and is discharged by a e ible hose via an aft starboard through hull fitting.
-
Page 109: Starting T He Generator
Boat Systems Section 4 WARNING EX PL O SIV E F U EL V APO RS can cause SEV ERE IN U EAT . Use e treme care when handling, storing and using fuels. WARNING MO V ING PART S can cause SEV ERE INJ U RY DEAT H . - Page 110 Section 4 Boat Systems S everal k e y points are indic a ted below: L oc a te the blower switc h on the AC B reak e r P anel and operate the blower for four minutes. M anually c h ec k the bilge for fuel or fuel vapor.
-
Page 111: Stop P Ing T He Generator
Boat Systems Section 4 Stop p ing T he Generator M ak e sure that AL L break e rs on the AC P anel are switc h ed OF F . To S TOP the generator, press the S tart/ S top button. P ress the On/ Off button to de-ac t ivate the panel. -
Page 112: O P Erating The Generator In
Section 4 Boat Systems The F isc h er P anda operations manual has a c o mplete maintenanc e sc h edule to k e ep the generator in peak operating c o ndition. Inspec t the parts often and perform req uired servic e at the presc r ibed intervals. -
Page 113: F Uel F Ilter Maintenance
Boat Systems Section 4 F uel F ilter Maintenance Rep lacing the F ilter Replace filter according manufacturer’s rec o mmendations or if a power loss is detec t ed. 1 . E nsure engine is not running. 2 . Remove bottom c a sing. 3 . -
Page 114: Power Steering
Section 4 Boat Systems Power Steering The V erado four-strok e engine option uses an enc l osed hydraulic pump unit. The pump is elec t ric a lly operated to provide hydraulic pressure to the steering system. The pump is loc a ted in the aft portside of the bilge and c a n be ac c e ssed by lifting the eq uipment hatc h in the aft c o c k p it dec k . - Page 115 Boat Systems Section 4 Maintenance P roper maintenanc e of this system will ensure worry-free usage for the life of this vessel. S teering system integrity is imperative. S pec i al c a re and attention must be tak e n to ensure proper performanc e of the steering system and should inc l ude the following: After the first few hours of operation and at regular intervals, check all fasteners and the c o mplete steering system for sec u rity and integrity.
-
Page 116: Shore Power
Section 4 Boat Systems Shore Power The dual 1 2 0 v/ 3 0 a shore power system provides doc k side power to operate all of the boat’ s elec t ric a l system and to charge the boat’s batteries. se the supplied power c o rds to c o nnec t your boat to a doc k s i de power sourc e . - Page 117 Boat Systems Section 4 T esting and T roub leshooting Before Each U se Normal O p erating State - S ensing devic e GRE E N L E D is ON and c i rc u it break e r is at ON position. 1 .
-
Page 118: Dual Shore Power
Section 4 Boat Systems Dual Shore Power B efore mak i ng shore power c o nnec t ions, mak e sure SHORE SHORE your boat is properly moored. GENERATOR BRIDGE POWER 2 POWER 1 1 . S lide the c o vers on the panel to expose S H ORE P OWE R # 1 &... - Page 119 Boat Systems Section 4 Single Cord Shore Power with Generator In some c a ses you may be limited to operating your SHORE SHORE boat’ s eq uipment using only a single shore power c o rd. GENERATOR BRIDGE POWER 1 POWER 2 The following procedure will provide the most efficient power to the boat.
-
Page 120: Battery Charging
Section 4 Boat Systems Battery Charging In addition to supplying AC power to your boat, shore power hook u p gives you the ability to c h arge your batteries without running the engines. The 1 2 V c h arger is loc a ted in the mec h anic a l hatc h near the engine starting batteries while the 2 4 V c h arger is under the c a bin berth near the 2 4 V batteries. -
Page 121: Isolation T Ransformers
Boat Systems Section 4 Isolation T ransformers This boat is eq uipped with isolation transformers. The boat’ s elec t ric a l system and grounding c o nduc t or are not ac t ually c o nnec t ed to the doc k s i de system. The isolation transformers transfer power from the doc k s i de elec t ric a l system to the boat’... -
Page 122: F Ire Sup P Ression System
Section 4 Boat Systems F ire Sup p ression System DANGER O NOT handle the e tinguisher actuator. The re suppression system is under pressure 1 p si.) . Accidental discharge may result in death or serious injury. This boat’s SCG approved automatic fire suppression system is loc a ted in the port bilge by the battery trays and c a n be ac c e ssed by lifting the hatc h in the aft c o c k p it... - Page 123 Boat Systems Section 4 DANGER NEV ER attemp t to modify or disassemb le any comp onents of this system. If the system has been discharged, have a quali ed technician NORMAL OVERRIDE rep lace it. CHARGED DISCHG. There is an engine shutdown/ override switc h loc a ted on the c o ntrol station, below the steering wheel whic h indic a tes the c o ndition of the system.
-
Page 124: Manual O Verride System
Section 4 Boat Systems Onc e the system has been disc h arged, the power to the diesel generator and the blower fan will be c u t. This ensures that the c o mpartment will be “ soak e d” with e tinguishant. -
Page 125: Dive Door
Boat Systems Section 4 Dive Door This boat has a portside door for ease of transition to and from the water or doc k . The door opens wide and features a swivel grab handle to assist persons entering or exiting the water. To use the grab handle, lift up and swivel into plac e . -
Page 126: T Ransom Door
Section 4 Boat Systems T o remove the dive ladder from the b racket: 1 . P ull up and hold the release ring. 2 . P ull dive ladder brac e inboard and lift up out of the dec k brac k e t. -
Page 127: In- Deck Storage With Pump O Ut
Boat Systems Section 4 In- Deck Storage with Pump O ut This boat has five ( ) deep insulated storage c o mpartments eq uipment. There c o mpartments to port, two to starboard, and one ( 1 ) in the forward dec k . -
Page 128: Adjustab Le H Elm Seat
Section 4 Boat Systems F orward Console Storage Within the c o nsole storage c o mpartment there is a large, loc k a ble, lighted area for storage of eq uipment and personal gear. Storage Comp artment L ock The manual push/ pull k n ob loc a ted on the forward wall of the D C distribution c a binet in the starboard c a bin is link e d direc t ly to the loc k i ng pin in the c o nsole storage... -
Page 129: Anchoring
Boat Systems Section 4 Anchoring This boat is eq uipped with a windlass, anc h or, rode and an anc h or roller davit. S tow the anc h or in the davit when not in use. NOTE : B efore using the anc h or, be sure the safety hook is removed and the anc h or is sec ured to the windlass c h ain. -
Page 130: Anchor Windlass
Section 4 Boat Systems Anchor Windlass The anc h or windlass loc a ted at the bow gives you a mec h anic a l means of raising and lowering the anc h or. The anc h or windlass is c o ntrolled by switc h es loc ated on the helm switc h panel or by a hand held remote loc a ted in the bow loc k e r. -
Page 131: O P Eration
Boat Systems Section 4 O p eration B efore operating the windlass be sure that the safety hook is removed from the anc h or c h ain and is c l ear of the rode as it pays out or is retrieved. The windlass is protec t ed by a 1 0 0 -amp c i rc u it break e r loc a ted on the battery switc h panel. -
Page 132: Windlass Remote
Section 4 Boat Systems Windlass Remote The windlass remote is protec t ed by a 1 0 -amp manual reset break e r loc a ted on the battery switc h panel. If there is a loss of power to the windlass remote, c h ec k the “... -
Page 133: O P Erating T He Windlass Manually
Boat Systems Section 4 O p erating T he Windlass Manually In the event that there is a loss of power to the windlass, the anc h or c a n be raised and/ or lowered manually by using the emergenc y handle loc a ted in the anc h or loc k e r. There are two star soc k e ts on the top of the windlass used for manual deployment of the anc h or. - Page 134 Section 4 Boat Systems O p erator’ s Notes 4-62...
-
Page 135: Dc O Verview
Electrical Systems Section 5 General Descrip tion This boat inc l udes both D C and AC elec t ric a l systems. DC O verview This boat’ s D C elec t ric a l system operates on 1 2 / 2 4 V power supplied by four marine batteries in the aft mec h anic a l c o mpartment. -
Page 136: Batteries
Section 5 Electrical Systems Batteries CAU T IO N Batteries should always b e secured in the b attery trays p rovided with this b oat. T he trays will contain any sp illed acid and will p rotect the b attery terminals from damage or shorting due to contact with metal ob jects. -
Page 137: Battery Charger
Electrical Systems Section 5 Battery Maintenance P eriodic battery maintenanc e is important to ensure that this boat will be ready for operation when needed. B attery maintenanc e should inc l ude: Inspec t the batteries and c h arging systems before eac h mission for loose or c o rroded c o nnec t ions and damaged wiring. -
Page 138: Battery Switches
Section 5 Electrical Systems Maintenance The c h arger is fully automatic and req uires no maintenanc e . H owever, the battery terminals should be c l eaned periodic a lly with bak i ng soda and all c o nnec t ions tightened to provide trouble free operation. -
Page 139: Automatic Charging Relays ( Acr)
Electrical Systems Section 5 Automatic Charging Relays ( ACR) The three battery bank s on this boat are automatic a lly c o nnec t ed in parallel through the use of ACRs (Automatic Charging Relay) when a sufficient charging source is present. The battery bank s are automatic a lly separated when the c h arging sourc e falls below a c e rtain voltage level for a predetermined amount of time. -
Page 140: Grounding And Bonding
Section 5 Electrical Systems Grounding and Bonding e nitions The terms grounding and bonding are often inc o rrec t ly used interc h angeably. They are different systems that c a n work together to provide solutions to c o mmon problems and risk s on the water. -
Page 141: Grounding
Electrical Systems Section 5 Grounding The negative terminals of all batteries and the negative c a bles from the outboard engines are all c o nnec t ed together at two negative buss bars loc a ted inside the c o ntrol c o nsole. These negative buss bars serve as the negative return points for the entire 1 2 V D C elec t ric a l system. -
Page 142: Bow T Hruster Batteries
Section 5 Electrical Systems Bow T hruster Batteries There are battery trays for the two ( 2 ) batteries whic h provide the 2 4 volts nec e ssary to operate the bow thruster, along with a battery switc h , loc a ted under the bunk in the forward c a bin. -
Page 143: T Hruster Battery Charging
Electrical Systems Section 5 Bow T hruster Battery Charging If the bow thruster batteries bec o me run down be sure to rec h arge them as soon as possible. Over c h arging a battery c a n be just as detrimental to its life as running it down too far. -
Page 144: 120 V Olt Recep Tacles
Section 5 Electrical Systems 120 V olt Recep tacles This boat is equipped with three ( ) volt receptacles whic h c a n be used while the generator is running or while c o nnec t ed to shore power. The first in the series is a G I outlet found on the interior aft wall of the forward c o nsole storage c o mpartment. -
Page 145: Main Dc Breaker Panel
Electrical Systems Section 5 Main DC Breaker Panel 5-11... -
Page 146: Main Ac Breaker Panel
Section 5 Electrical Systems Main AC Breaker Panel 5-12... -
Page 147: Comp Onent Breakers
Electrical Systems Section 5 Comp onent Breakers This boat utiliz e s manual reset break e rs for the various c o mponents aboard the boat. The break e rs c a n be found on panels loc a ted in various plac e s throughout the vessel. -
Page 148: H Elm Breaker Panel
Section 5 Electrical Systems H elm Breaker Panel 5-14... -
Page 149: L Eaning Post Breaker Panel
Electrical Systems Section 5 L eaning Post Breaker Panel 5-15... -
Page 150: Battery Switch Breaker Panel
Section 5 Electrical Systems Battery Switch Breaker Panel 5-16... -
Page 151: F Use Blocks
Electrical Systems Section 5 F use Blocks There are up to three ( 3 ) fuse bloc k s for ac c e sories on this boat. These are for non-standard elec t ronic s options specific to the vessel. One fuse bloc k is loc a ted behind the ac c e ss panel on the port side of the forward c a bin. -
Page 152: Ground F Ault Interrup Ter ( Gf I)
Section 5 Electrical Systems Ground F ault Interrup ter Recep tacle ( GF I) This boat is equipped with a Ground ault Interrupter ( GF I) rec e ptac l e loc a ted on the aft wall of the forward c o nsole storage c o mpartment. -
Page 153: Rigging
Electrical Systems Section 5 Rigging This boat has a rigging tube above the fuel tank and below the oor to allow the user to run new wiring for elec t ronic s . There is a pull c o rd installed in the tube with the ends bundled and tied at either end of the tube. -
Page 154: Iring Identi Cation Chart
Section 5 Electrical Systems Electrical Schematics & H arnesses The following pages c o ntain sc h ematic s pertaining to the elec t ric a l system in this boat. These sc h ematic s were generated by elec t ric a l engineers and are for referenc e and to be used by qualified electrical service technicians. -
Page 155: Battery System Diagram
Electrical Systems Section 5 Battery System Diagram 5-21... -
Page 156: Battery Switch Panel Diagram
Section 5 Electrical Systems Battery Switch Panel Diagram 5-22... -
Page 157: H Elm Breaker Panel Diagram
Electrical Systems Section 5 H elm Breaker Panel Diagram 5-23... -
Page 158: H Elm Switch Panel Diagram
Section 5 Electrical Systems H elm Switch Panel Diagram 5-24... -
Page 159: L Eaning Post Switch Panel
Electrical Systems Section 5 L eaning Post Switch Panel Diagram 5-25... -
Page 160: L Ighting Schematic Deck
Section 5 Electrical Systems L ighting Schematic ( Deck) 5-26... -
Page 161: Windlass Schematic
Electrical Systems Section 5 Windlass Schematic 5-27... - Page 162 Section 5 Electrical Systems O verb oard Discharge Panel and H olding T ank Schematic 5-28...
-
Page 163: Dc Distrib Ution Panel
Electrical Systems Section 5 DC Distrib ution Panel 5-29... -
Page 164: Dc Wiring Schematic Cab
Section 5 Electrical Systems DC Wiring Schematic ( Cab in) 5-30... -
Page 165: H Ardtop Schematic
Electrical Systems Section 5 H ardtop Schematic 5-31... - Page 166 Section 5 Electrical Systems Shore ower Schematic 5-32...
-
Page 167: Ac Distrib Ution Panel
Electrical Systems Section 5 AC Distrib ution Panel 5-33... - Page 168 Section 5 Electrical Systems Shore ower Schematic 5-34...
- Page 169 Electrical Systems Section 5 AC istribution anel 220 5-35...
-
Page 170: Bow T Hruster Schematic
Section 5 Electrical Systems Bow T hruster Schematic 5-36... -
Page 171: Bilge Wiring Schematic
Electrical Systems Section 5 Bilge Wiring Schematic 5-37... -
Page 172: Stereo Schematic
Section 5 Electrical Systems Stereo Schematic 5-38... -
Page 173: Dc Wiring H Arness
Electrical Systems Section 5 DC Wiring H arness TO RAW WATER PUMP TO STBD FISHBOX PUMPOUT PUMP TO MACERATOR PUMP TO GEN. FUEL TO GEN TANK SENDER TO BATTERY SWITCH FUEL PUMP PANEL TO STBD TRIM TAB TO BILGE COURTESY TO HELM LIGHT (DECK) -
Page 174: Dc Wiring H Arness ( Continued)
Section 5 Electrical Systems DC Wiring H arness ( continued) CONSOLE BILGE TO CABIN BILGE PUMP FWD STORAGE PUMP TO SHOWER SUMP CTSY. LIGHT CTSY. LIGHT CTSY. LIGHT CTSY. LIGHT CONSOLE CTSY. LIGHT BATTERY SWITCH PANEL TOP VIEW 5-40... - Page 175 Electrical Systems Section 5 DC Wiring H arness ( continued) LED LIGHTS CABIN LIGHT CABIN LIGHT POINT OF CONSOLE BEGINNING TO WIPER MOTOR TO 12V OUTLET 5-41...
-
Page 176: Dc Wiring H Arness ( Continued)
Section 5 Electrical Systems DC Wiring H arness ( continued) WINDLASS CENTER ENGINE POST AFT GROUND H ardtop Wiring H arness CONSOLE TO MAP TO LED TO HORN LIGHTS TO NAV SPEAKER LIGHT SPEAKER TO LED TO FUSE BLOCK FLOOD LIGHT SPOT LIGHT FLOOD LIGHT ALL AROUND... -
Page 177: Ac Wiring H Arness
Electrical Systems Section 5 AC Wiring H arness TO MDP TO BOW THUSTER BATTERY SWITCH TO BOW THUSTER TO BOW THRUSTER BATTERY CHARGER TO AC & BATTERY CHARGER CONTROL BOX BILGE TO BOW THUSTER BATTERIES TRANSFORMERS BREAKER PANEL WATER HEATER AC HARNESS INSTALLATION (SOLID LINE) AC HARNESS INSTALLATION 24V THRUSTER HARNESS (DOTTED LINE) - Page 178 Section 5 Electrical Systems O p erator’ s Notes 5-44...
-
Page 179: Speci Cations
Maintenance Section 6 ustice Speci cations O verall b oat length 3 7 ft. 6 in. 11 , 4 m Beam 11 ft. 6 in. 3 , 5 m Boat weight, dry, no engines 1 3 , 5 00 l b s. 6 12 3 kg Bridge clearance , with hardto p 1 8 9 in. -
Page 180: Ull Identi Cation Number In
Record all significant numbers for HIN, keys, engines, capital equipment, and electronics on this page for quick reference and keep a copy somewhere safe on shore. E UI MENT I ENTIFIE MAK E MO DEL Boat Boston Whaler 3 7 J ustice Engine Engine Engine... -
Page 181: H Ull Maintenance
Maintenance Section 6 O p tions Brunswick Commercial & Government Products (BCGP) designs, engineers, and manufactures each boat for your specific mission. We add e tra Phenolic plate, aluminum plate, and fiberglass material during the molding process to reinforce attachment points for the various options. or this reason, many options cannot be added after the boat leaves the factory. -
Page 182: Wax Ing
Section 6 Maintenance Wax ing A NIN Gelcoat surfaces are always slip p ery when wet. U se ex treme caution when walking on wet sur aces to avoid slipping or alling. Never wa p ortions of the b oat that have a non- skid p attern. The interior and e terior fiberglass parts of the hull should be wa ed a minimum of twice per year to protect the gelcoat from salt, dirt, and ultraviolet degradation. -
Page 183: Trim Care
Maintenance Section 6 iberglass repairs should only be done by an e perienced fiberglass repair facility. If the damage penetrates the hull, call Brunswick Commercial & Government Products Customer Service Department for the correct repair procedures. The repair must be done following BCGP’s recommendations. -
Page 184: Cutwater & Chafe Plates
Section 6 Maintenance Cutwater & Chafe Plates This option helps protect the fiberglass keel against debris while underway and reduces the risk of possible damage while beaching. If the boat is equipped with an optional cutwater, inspect the cutwater monthly for tears, large gaps, or other signs of damage. -
Page 185: Drains & Scup P Ers
Maintenance Section 6 Drains & Scup p ers Check all compartment drains, scuppers, and bilge discharge drains at least once a month. Inspect for gaps in sealant, tightness, cracks, and damage. Inspect scupper aps for deterioration. If any drains or thru hull fittings are damaged, have them serviced or replaced immediately. -
Page 186: Storage
Section 6 Maintenance Damage caused by blistering is not covered under your hull warranty. There are a number of important things that you can do to avert hull blistering. They include: Storage Store your boat out of the water when not in use. Store your boat on a trailer, in a boatlift, or on a cradle. - Page 187 Maintenance Section 6 CAUTION Some comp ound of cop p er is the active ingredient in most conventional b ottom p aints. Do not ap p ly any cop p er- b ased b ottom p aints to the engine b racket or the engines.
-
Page 188: F Uel System
Section 6 Maintenance Preparation is the key to successful hull painting. If the hull is bare, the gelcoat will have to be de wa ed before sanding can begin. After de wa ing is complete, light sanding with grit sandpaper is recommended. Proper ventilation and dust collection is essential. - Page 189 Maintenance Section 6 This boat is equipped with a standard fuel water separator for the generator and may have optional filters for the engines. Check the fuel water separators before and after every mission for signs of moisture and particulate contamination.
-
Page 190: Steering System
Section 6 Maintenance Steering System This boat is equipped with a hydraulic steering system that is associated with the engine package option selected. The erado four stroke engine option uses an enclosed hydraulic pump unit. The pump is electrically operated to provide hydraulic pressure to the steering system. - Page 191 Maintenance Section 6 Check the operation of the steering system before each mission. Turn the steering wheel from hard port to hard starboard while watching the engines for any unusual movement. If any unusual movement is detected, have the steering system serviced before operating the boat. It is good boating practice to rinse off your steering cylinder thoroughly with fresh, clean water after each use.
-
Page 192: Bilge Pump
Section 6 Maintenance Bilge Pump s The bilge pumps and water level sensors are sealed units and do not require any periodic maintenance. Check the bilge regularly to make sure there is no debris or sludge that could foul the water level sensors or clog the pumps. CAUTION Test your bilge pumps and water level sensors b efore each mission. -
Page 193: Maintenance
Maintenance Section 6 Maintenance To clean the pump strainer, depress the lock tabs on both sides of the pump and lift the pump motor. If water does not come out of the discharge hose: Remove the motor module to see if the impeller rotates with the power on. -
Page 194: Batteries
Section 6 Maintenance Batteries CAUTION Batteries should always b e secured in the battery trays provided with this boat. The trays will contain any sp illed acid and will p rotect the b attery terminals from damage or shorting due to contact with metal ob ects. -
Page 195: Cap Acities
Maintenance Section 6 Cap acities BCGP recommends for the standard engine house batteries you use four group heavy duty marine batteries rated at SAE marine cranking amps. THE TW B W THR STER BATTERIES M ST BE A DEEP CYCLE, SEALED DESIGN. ailure to do so will result in an increased and dangerous presence of battery discharge gases accumulating in the forward cabin. -
Page 196: Cleaning
Section 6 Maintenance You must not allow your batteries to become completely discharged. As a battery discharges, the active material on both positive and negative plates changes to lead sulfate, causing the plates to become similar in chemical composition. The battery electrolyte becomes weaker and the voltage drops. -
Page 197: Battery Charging
Maintenance Section 6 Battery Charging In addition to supplying AC power to your boat, shore power hookup gives you the ability to charge your batteries without running the engines. The system is automatic and little or no maintenance is required. However, the breakers must be in the position in order for the systems to automatically charge. -
Page 198: O Ff- Season Storage
Section 6 Maintenance O ff- Season Storage All boat and engine systems must be carefully prepared for long periods of non use. This preparation is particularly important in regions where you e perience e treme changes in temperature or where the temperature is consistently below freezing. -
Page 199: F Uel System
Maintenance Section 6 F uel System You must take appropriate steps to protect your boat’s fuel system and engines during periods of non use. Situations where fuel isn’t being consumed and e posure to e treme changes in temperature will cause condensation to accumulate in your fuel system. -
Page 200: Maintenance
Section 6 Maintenance ater System The raw water system includes a pump, one seacock and a raw water hose connection. The seacock and raw water pump can be accessed through the equipment hatch in the aft cockpit deck. Inspect the raw water strainer regularly and remove any debris. -
Page 201: F Resh Water System
Maintenance Section 6 F resh Water System Be sure to fill the water tank from a source known to provide safe, pure drinking water. If you do not use the freshwater system for long periods of time or only use it seasonally it is recommended that you follow the disinfecting practice before using it. -
Page 202: Water H Eater
Section 6 Maintenance Before you fill the freshwater system, it is vital that it be properly disinfected. The following procedure is recommended to disinfect the freshwater system: lush the entire system thoroughly by allowing potable water to ow through it. Drain the system completely. -
Page 203: Maintenance
Maintenance Section 6 Maintenance Inspect the water heater connections regularly. Access the water heater through a plate on the starboard wall of the mid cabin bunk. Manually operate the pressure relief valve at least once a year. This must be done when the water in the storage tank is cool. -
Page 204: Acu- F Lush® H Ead
Section 6 Maintenance V acu- F lush® H ead Waste from the head is directed into the gal. ( . L) holding tank located in the bilge. A holding tank uid level indicator is located on the overboard discharge panel which is located on the starboard wall of the cabin. -
Page 205: Air Conditioning Maintenance
Maintenance Section 6 Thru ull ischarge ose Access The port and starboard aft thru hull drains can be accessed through the aft cockpit deck hatch. The starboard midship thru hull drains can be accessed by removing the microwave from the vanity in the cabin and removing the panel on the back wall of the vanity. -
Page 206: Generator
Section 6 Maintenance Generator The generator has a built in cooling pump which draws cooling water through a seacock located in the aft machinery compartment. The raw water passes through a strainer before entering the engine cooling manifold. The seacock M ST be open in order for the generator to function. - Page 207 Maintenance Section 6 WARNING ACCIDENT AL ST ART ING can cause severe injury or death. Disconnect the b attery cab les b efore working on the generator set. Disconnect the negative, cable rst when removing and reconnect it last when rep lacing. Y our F isc her P anda operations manual has a c o mplete maintenanc e sc h edule that you must follow to k e ep your generator in peak operating c o ndition.
-
Page 208: Generator F Uel F Ilter
Section 6 Maintenance Generator F uel F ilter A fuel filter located on the starboard wall of the bilge, forward of the diesel fuel tank provides clean fuel to the generator. A ma or cause of poor starting or power loss is the result of a clogged filter element or a fuel system air leak. -
Page 209: Shore Power
Maintenance Section 6 Shore Power The dual a shore power system provides dockside power to operate all of the boat’s electrical system and to charge the boat’s batteries. Testing and Troubleshooting e ore Each Use Normal Operating State Sensing device GREEN LED N and circuit breaker is at N position. -
Page 210: F Ire Sup P Ression System
Section 6 Maintenance F ire Sup p ression System There is an engine shutdown override switch located on the control station, below the steering wheel which indicates the condition of the system. The switch has two indicator lights that need to be monitored. - Page 211 Maintenance Section 6 AN E Inhalation of high concentrates of the contents o the re suppression tank may cause sudden death without warning. A NIN Skin contact will require ushing o the area with water for at least 15 minutes. Seek immediate medical assistance.
- Page 212 Section 6 Maintenance Operator s Notes 6-34...
- Page 213 This ac c essory warranty is not transferable from the original owner. None of these warranties ap p lies to any Boston Whaler hull, accessory, or p art that has b een structurally altered or sub jected to unreasonab le use, imp rop er storage, lack of reasonab le and p rop er maintenance, negligence, or accident.
Need help?
Do you have a question about the 37 Justice Series and is the answer not in the manual?
Questions and answers