
Subscribe to Our Youtube Channel
Related Manuals for MacroAir Technologies AirEco


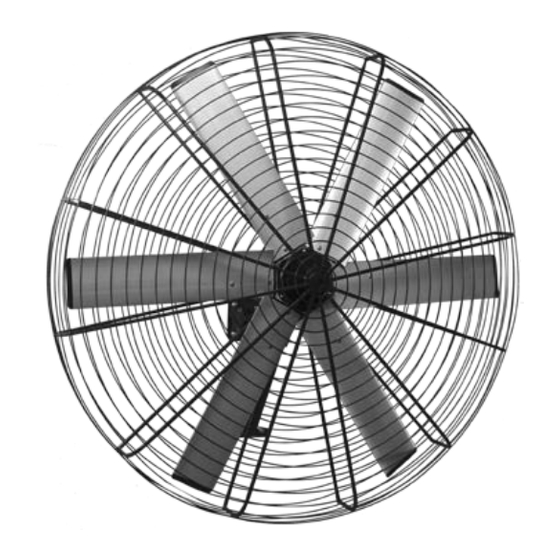
Summary of Contents for MacroAir Technologies AirEco
- Page 1 Rev. Date 111714 © 2014 MacroAir Technologies Toll Free: 866 668 3247 Fax: 909 890 2313 w w w.macroairfans.com...
- Page 2 © 2014 MacroAir Technologies Toll Free: 866 668 3247 Fax: 909 890 2313 w w w.macroairfans.com Rev. Date 111714...
-
Page 3: Table Of Contents
Control Panel Overview ....................................27 Control Panel Schematics ..................................28 Touchpad Remote Installation .................................29 Guy Wire Installation (Ceiling Mount) ..............................33 Technical Support .....................................37 Warranty Information ....................................39 Rev. Date 111714 © 2014 MacroAir Technologies Toll Free: 866 668 3247 Fax: 909 890 2313 w w w.macroairfans.com... - Page 4 Technical department for guidance. The fan installation should follow the recommendations outlined in this manual. MacroAir is not responsible for any injury or damage to people or property as a result of not complying with the recommendations outlined in this manual.
-
Page 5: Caution & Safety
“outdoor” installations where high wind conditions may occur. The safety cable, if installed per MacroAir specifications, will prevent the fan from falling in the unlikely event that the mounting system should fail. A MacroAir fan should never be run without a properly installed safety cable, which is supplied with every fan along with all required hardware. -
Page 6: Fan Components
Note: All of the components listed to the left are in the power unit crate. If the fan is ordered with screens, they will be on a separate pallet. Blades will be on a separate pallet. © 2014 MacroAir Technologies Toll Free: 866 668 3247 Fax: 909 890 2313 w w w.macroairfans.com... -
Page 7: Fan Placement - General Information
3 feet away from any area where a person may be able to extend outward to reach them. Rev. Date 111714 © 2014 MacroAir Technologies Toll Free: 866 668 3247 Fax: 909 890 2313... -
Page 8: Fan Placement - Umh
Diameter Recommended Extension Length Clearance Radius 6 feet 5’’ AirEco not pictured. Installation methods are the same. AirEco Dimensions 2'-7" WARNING: FANS ARE NOT MEANT TO BE OPERATED IN WINDY CONDITIONS. The goal of this diagram is to determine the proper extension length to maintain a minimum blade clearance of 15% of the fan’s diameter. -
Page 9: Umh Components
COMPONENTS (CEILING MOUNTING) Guy Wire Kit Universal Mount Extension Universal Mount Rev. Date 111714 © 2014 MacroAir Technologies Toll Free: 866 668 3247 Fax: 909 890 2313 w w w.macroairfans.com... -
Page 10: Fan Mounting
MOUNTING © 2014 MacroAir Technologies Toll Free: 866 668 3247 Fax: 909 890 2313 w w w.macroairfans.com Rev. Date 111714... -
Page 11: Mounting Assembly - Wall
Be sure that you use bolts long enough to support the weight of the fan. Tighten the bolts securely, but do not over-tighten them. Rev. Date 111714 © 2014 MacroAir Technologies Toll Free: 866 668 3247 Fax: 909 890 2313... -
Page 12: Mounting Assembly - Pole
• Attach the fan to the bracketing: Insert 1/2” bolts with 1 washer each into the brackets. Slide the mount assembly over the bolts and attach using nylon lock nuts and flat washers. © 2014 MacroAir Technologies Toll Free: 866 668 3247 Fax: 909 890 2313 w w w.macroairfans.com... -
Page 13: Ceiling Installation - I-Beam
CEILING INSTALLATION - I-BEAM Safety Cable I-beam Clamps AirEco not pictured. Installation methods are the same. Fan Unit Guy Wire Cable Control Panel Motor Cable (25 feet provided) Rev. Date 111714 © 2014 MacroAir Technologies Toll Free: 866 668 3247 Fax: 909 890 2313 w w w.macroairfans.com... - Page 14 • Attach the extension to the bottom of the Universal Mount and attach the top of the fan unit to the bottom of the extension with the provided hardware pack. © 2014 MacroAir Technologies Toll Free: 866 668 3247 Fax: 909 890 2313 w w w.macroairfans.com...
-
Page 15: I-Beam Mounting Assembly - Ceiling
Safety Cable I-beam Mounting Clamps Guy Wire with Turnbuckle Guy Wire Attachment Points AirEco not pictured. Installation methods are the same. Rev. Date 111714 © 2014 MacroAir Technologies Toll Free: 866 668 3247 Fax: 909 890 2313 w w w.macroairfans.com... -
Page 16: Ceiling Installation - Glulam
CEILING INSTALLATION - GLULAM Glulam Brackets Safety Cable AirEco not pictured. Installation methods are the same. Guy Wire Cable Motor Cable (25 feet Control Panel Fan Unit provided) • The Safety Cable needs to be fed through a hole in the Glulam, preferably above the center line of the Glulam. - Page 17 • Attach the glulam brackets to the glulam via 1/2’’ grade 5 bolts (long enough to go through the entire beam with nylon lock nuts). Rev. Date 111714 © 2014 MacroAir Technologies Toll Free: 866 668 3247 Fax: 909 890 2313...
-
Page 18: Glulam Mounting Assembly - Ceiling
GLULAM MOUNTING ASSEMBLY - CEILING AirEco not pictured. Installation methods are the same. Glulam Mounting Brackets Safety Cable Guy Wire Attachment Points Guy Wire with Turnbuckle • Attach the glulam brackets to the glulam and attach the top of the fan frame to the bottom of the extension with the provided hardware. - Page 19 Glulam Safety Cable Mounting Brackets Guy Wire with Turnbuckle Guy Wire Attachment Points AirEco not pictured. Installation methods are the same. Rev. Date 111714 © 2014 MacroAir Technologies Toll Free: 866 668 3247 Fax: 909 890 2313 w w w.macroairfans.com...
-
Page 20: Motor Assembly & Connections
• For variable-speed fans, set up the Motor Control Panel and Remote Switchbox according to the diagrams and schematics. • For single-speed fans, wire up the included circuit breaker/starter according to the instructions printed on the inside of the box. © 2014 MacroAir Technologies Toll Free: 866 668 3247 Fax: 909 890 2313 w w w.macroairfans.com... -
Page 21: Rear Safety Screen
• Securely attach the screen to the motor mount plate using the supplied bolts, washers, and nylon lock nuts, being sure to put the bolts in from the front. Refer to the image above for reference. Rev. Date 111714 © 2014 MacroAir Technologies Toll Free: 866 668 3247 Fax: 909 890 2313... -
Page 22: Blade Strut Attachment
• Repeat the two steps above for all 6 blade holders. • Securely tighten all 12 bolts as shown in the images above. Torque each to 45 ft-lbs. © 2014 MacroAir Technologies Toll Free: 866 668 3247 Fax: 909 890 2313 w w w.macroairfans.com... -
Page 23: Blade & Safety Link Assembly
BLADE & SAFETY LINK ASSEMBLY AirEco not pictured. Installation methods are the same. Safety Retainer Link Blade Strut Blade • Note: Safety Retainer Links are required to be installed on fans without guards. • Slide the blades onto the blade struts and align the holes in the blade and the blade struts. - Page 24 BLADE & SAFETY LINK ASSEMBLY AirEco not pictured. Installation methods are the same. The image above represents the correct installation of the blade and safety retainer links. © 2014 MacroAir Technologies Toll Free: 866 668 3247 Fax: 909 890 2313 w w w.macroairfans.com...
-
Page 25: Front Safety Screen & Safety Cable
• Thread the safety cable through the center hole on the motor mount and pivot below the gearbox/motor and attach securely to a nearby wall or ceiling. MacroAir recommends using an eyebolt securely attached to the wall or ceiling to anchor the safety cable; this is not included with the fan. - Page 26 Electric Code (NEC) 2005, ANSI/NFPA 70-1999, and all local codes. This fan control should only be installed by qualified technicians familiar with the requirements of the NEC and local codes. Note: MacroAir Technologies has a policy of continuous product improvement and reserves the right to change the design and specifications without notice.
-
Page 27: Control Panel Overview
• The Motor Cable Gland does not come pre-installed. A unibit is required to drill the holes and install them. • 25 feet of shielded motor cable is provided and must be used with no additional cable to maintain factory warranty. Rev. Date 111714 © 2014 MacroAir Technologies Toll Free: 866 668 3247 Fax: 909 890 2313... -
Page 28: Control Panel Schematics
CONTROL PANEL SCHEMATICS © 2014 MacroAir Technologies Toll Free: 866 668 3247 Fax: 909 890 2313 w w w.macroairfans.com Rev. Date 111714... - Page 29 200 feet of cable can be ordered. 200 feet is the maximum distance allowed. Reverse Forward Decrease Speed Increase Speed Speed % Rev. Date 111714 © 2014 MacroAir Technologies Toll Free: 866 668 3247 Fax: 909 890 2313 w w w.macroairfans.com...
-
Page 30: Touchpad Remote Installation
5. Lock the provided bezel into place via the plastic tabs. 6. Plug the provided CAT5E cable from the fan into the RJ45 on the outside of the enclosure. © 2014 MacroAir Technologies Toll Free: 866 668 3247 Fax: 909 890 2313 w w w.macroairfans.com... - Page 31 TOUCHPAD REMOTE LCD DISPLAY Front View Rear View Bottom View Top View Right View Left View Rev. Date 111714 © 2014 MacroAir Technologies Toll Free: 866 668 3247 Fax: 909 890 2313 w w w.macroairfans.com...
- Page 32 TOUCHPAD REMOTE ENCLOSURE Left View Right View Front View Rear View Top View Bottom View © 2014 MacroAir Technologies Toll Free: 866 668 3247 Fax: 909 890 2313 w w w.macroairfans.com Rev. Date 111714...
-
Page 33: Guy Wire Installation (Ceiling Mount)
WIRE INSTALLATION (CEILING MOUNT) Rev. Date 111714 © 2014 MacroAir Technologies Toll Free: 866 668 3247 Fax: 909 890 2313 w w w.macroairfans.com... - Page 34 WIRE INSTALLATION (CEILING MOUNT) Guy Wire Turnbuckle Cable Clamps AirEco not pictured. Installation methods are the same. Quick Links • Attach the turnbuckle end of the guy wires to the guy wire loops located on the fan frame with the provided quick links.
- Page 35 WIRE TIGHTENING (CEILING MOUNT) AirEco not pictured. Installation methods are the same. Turnbuckle Jam Nut • With the aid of a level placed against the fan unit, tighten the turnbuckles by hand in a criss-cross pattern while periodically checking to ensure that the fan is level.
- Page 36 Picture 2 Picture 5 THE CABLE IS CUT TO A PREDETERMINED LENGTH AND TENSION. DO NOT EXCESSIVELY STRETCH THE BUNGIE CORD. © 2014 MacroAir Technologies Toll Free: 866 668 3247 Fax: 909 890 2313 w w w.macroairfans.com Rev. Date 111714...
-
Page 37: Technical Support
For installation assistance, application questions, technical sales support & any other inquiries, please contact our technical support team at (866) 668-3247. Rev. Date 111714 © 2014 MacroAir Technologies Toll Free: 866 668 3247 Fax: 909 890 2313 w w w.macroairfans.com... - Page 38 © 2014 MacroAir Technologies Toll Free: 866 668 3247 Fax: 909 890 2313 w w w.macroairfans.com Rev. Date 111714...
-
Page 39: Warranty Information
INFORMATION Please reference page 39 for the full 12-year limited warranty. Then, please fill out the bottom portion and send to MacroAir. The address is on the back of this page. Keep the top portion of this page for your records. - Page 40 WARRANTY INFORMATION Please fill out the bottom portion and send to MacroAir. Keep the of this page and keep the top portion for your records. MacroAir Technologies, Inc. 794 South Allen Street San Bernardino, CA 92408 © 2014 MacroAir Technologies...
- Page 41 The End-User will be allowed a credit against the MacroAir’s list price of equivalent equipment at the time of return of the Product to MacroAir, in proportion to the percentage of Twelve-Year Service Life remaining at the time of return...
- Page 42 © 2014 MacroAir Technologies Toll Free: 866 668 3247 Fax: 909 890 2313 w w w.macroairfans.com Rev. Date 111714...
Need help?
Do you have a question about the AirEco and is the answer not in the manual?
Questions and answers