Table of Contents
Advertisement
Quick Links
Advertisement
Table of Contents
Troubleshooting

Related Manuals for Douwe Egberts Gallery 310


Summary of Contents for Douwe Egberts Gallery 310
- Page 1 OPERATING INSTRUCTIONS Gallery 310 75535400 10.2010...
- Page 2 The symbol indicates that the machine may not be disposed of as ordinary waste; it must be disposed of in accordance with the provisions of the European directive 2002/96/CE (Waste Electrical and Electronics Equipments - WEEE) and of any resulting national laws, for preventing any possible adverse effects on the environment and on human health.
-
Page 3: Table Of Contents
Preparing for filling of canisters ............ 31 Cleaning inside and outside............53 Filling the instant ingredient canisters .......... 31 Mounting cleaned parts ............... 54 Ingredient canister located in side ..........32 Rinsing and last check..............54 Filling the freshbrew ingredient canister ........34 10.2010 Gallery 310... - Page 4 Setting of free vend and key discount .......... 75 Time Discount ................76 Setting time discount..............78 Energy saving periods..............79 Setting energy saving periods............81 Display messages and trouble shooting Display messages ................ 82 Trouble shooting ................84 Gallery 310 10.2010...
-
Page 5: Introduction
All communication with the machine, Before putting the machine into op- such as drink selection, rinsing functions, da- eration, read the chapter “safety”. ta retrieval and settings, is carried out by us- ing the direct selection buttons. 10.2010 Gallery 310... -
Page 6: Safety
We recommend to install a fault current required prior to reconnecting the safety switch. The connections must be vending machine and he should made using an earthed safety plug socket additionally carry out a functional test. complying with valid regulations. Gallery 310 10.2010... - Page 7 When cleaning, take care of sharp machine. edges. There is danger of injuries! The door can be closed only after removing the key from the door switch. If power is turned on, be careful not to touch moving parts and electrical components. 10.2010 Gallery 310...
-
Page 8: Technical Data
Connect the water network with the 3/4” gas union of the water inlet solenoid valve by means of a tube that can support the network pressure and of a type suitable for foodstuffs (min. inner diameter 6 mm). Gallery 310 10.2010... - Page 9 Solid waste container: Approximately 18 l Drip tray: Approximately 1 l Standard Freshbrew ingredient canister: Approximately 9.5 l Instant ingredient canister: 80 mm = 3 l, 60 mm = 2 l Jug dimensions Ø 80 mm Ø 170 mm 10.2010 Gallery 310...
- Page 10 Technical data Further system require- Ambient temperature. Min. 4°C - max. 36°C (-2/+0) at 80% RH ments Acoustic emission: The A-weighted sound pressure level is below 70 dB. Subject to changes. Gallery 310 10.2010...
-
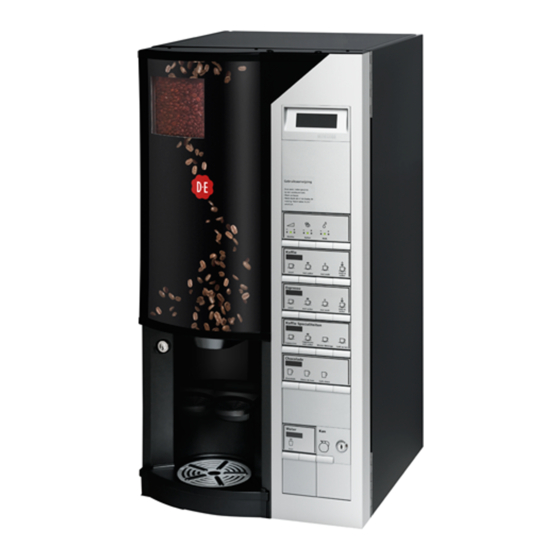
Page 11: Product Presentation
4 Advertising poster 5 Operating panel 6 Door lock 7 Cup carrier 8 Jug platform Operating panel (fig.2): 1 Display 2 Payment panel 3 Selection panel 4 Jug panel/Discount key 5 Optical interface 6 Coin return cup 10.2010 Gallery 310... -
Page 12: Machine Cabinet
Mixing funnel hoods Mixing funnels with whipper housings Cup catcher Retaining pin for cup carrier 10 Main switch 11 Base tray 12 Door switch 13 Drip grid 14 Drip tray 15 Jug platform 16 Solid waste container Gallery 310 10.2010... -
Page 13: Operation
The display steps back one number each glass. time a portion is dispensed, or if ‘optimised multibrew’ is active a progressive bar is shown. • Remove the jug when the drinks have been dispensed. 10.2010 Gallery 310... -
Page 14: Discount Lock
• Finish vend at a discount by turning and • After dispensing, remove the jug. count: removing the key. • Finish vend at a discount by turning and • Insert key in discount lock and turn removing the key. clockwise. Gallery 310 10.2010... -
Page 15: Navigation Buttons
(See also diagram “Overview of Operator and *Total number Total turnover Technicians functions” on page 14.) • jump to the top of a row, e.g. from “Turnover per drink” to “Total turnover”. 10.2010 Gallery 310... - Page 16 Press this button to Reset cash audit confirm an action, e.g. Continue? resetting of counters. *Reset counters ‘Esc’ button Press this button to exit a Reset cash audit function without activating Continue? it, e.g. avoid resetting a *Reset counters counter. Gallery 310 10.2010...
-
Page 17: Settings Buttons
Press this button to Price: [Drink] continue to the next digit, *Set price: xx.xx e.g. in price setting -> functions. ‘OK’ button Press this button to save Price: [Drink] changes to settings in the *Set price: xx.xx system. -> 10.2010 Gallery 310... -
Page 18: Overview Of Operator And Technicians Functions
Turn. p. group,res Card audit (See explanation on previous pages). No. per drink, nres No. per drink, res Turn. p. drink,nres Turn. p. drink,res Own cup audit No. per drink, nres No. per drink, res Continued on next page Gallery 310 10.2010... - Page 19 No. per group, res MB. discount audit MB. number, nres MB. turnover, nres MB. number, res MB. turnover, res Discount key audit D.Key number ,nres D.Key turnov. ,nres D.Key number ,res D.Key turnov. ,res Continued on next page 10.2010 Gallery 310...
- Page 20 Cash action Cash collected Dispense coins Manual filling Reset tube contents Basic operations Change prices Global price Price per cup Price per drink Step prices Change quantities Drink On/Off Change group Second sel. On/Off Continued on next page Gallery 310 10.2010...
- Page 21 Set Install. Date Energy saving Save Energy On/Off Set Day(s) Set Time Set Temperature Set Doorlight Set counters on/off Selfcheck setting Gr. counters on/off 100% discount mode Use EVA-DTS events Test Complete selections Continued on next page 10.2010 Gallery 310...
- Page 22 Set Rinse Timeout Brewer assembly chk Clogged filter chk Global dr. scaling Use both canisters Reset relationship Change Comm. route Closed door Serial XModem Serial EDDCMP IR XModem IR EDDCMP Back to terminal Continued on next page Gallery 310 10.2010...
- Page 23 Zero vend mode Zero vend index Revalue Immediate change Currency code(auto) Currency code(man) Coin validator Decimal point pos. Freevend count.mode Delayed Paymentmode Set Cash Sale Sess. Complete Mode Autom Cashaudit Res Pricelist Start Nr. Continued on next page 10.2010 Gallery 310...
- Page 24 Full dispense test Test vend Cup handling Sensor test Cup drop test Run Cup tower User interface Button/Key test Display test Pre. sel. led test Door light toggle Test Init.text Coin return motor Continued on next page Gallery 310 10.2010...
- Page 25 Sigma brewer 1 Brewer positions Move piston forward Move piston back Change password GSM settings GSM On/Off PIN Code Pre-Alarms Set GSM Thresholds Reset Pre-Al. cnt Bank ID's Reset GSM relations DaylightSaving UP KEY Utility Setup files Statistics files 10.2010 Gallery 310...
-
Page 26: Shortcuts
.. Perform a rinse function Step 5 Perform a test vend Step 7 Read the counters Step 8 Proceed to the menu functions Step 9 1. This short cut is not present in all machines. Gallery 310 10.2010... - Page 27 From here you can select one of the available test vend functions. Press “3” ----SALES AUDIT--- *Total number, nres Total turnover,nres and, if open, close the door to go directly to reading the counters. From here you can select one of the available counters. 10.2010 Gallery 310...
- Page 28 Operation Step Action Display Press “4” --MENU SELECTION-- *Operator Technician and, if open, close the door to go directly to the menu selections. From here you can select one of the menus Gallery 310 10.2010...
-
Page 29: Additional Features
• The machine can be set to enable selection of several drinks, one after the other, from only one payment action by coins or card. Single-vend • The machine can be set to return coins / release payment card after each drink selection. 10.2010 Gallery 310... -
Page 30: Cleaning And Maintenance
- nylon coffee filter has a neutral Make sure that all components are white seal. installed correctly after the clean- ing procedure. Clean the inside and outside of the vending machine by using a clean damp cloth, and do not splash it. Gallery 310 10.2010... -
Page 31: Maintenance Routines
Soft clean cloths or paper towels Filling the freshbrew ingredient canister Ingredients Cleaning the drip tray Removing and emptying the solid waste container Cleaning the cup carrier Cleaning the machine interior and exterior Mounting the cleaned parts Rinsing the machine Last check 10.2010 Gallery 310... -
Page 32: Schedule For Deep And Occasional Maintenance Routines
Cleaning machine interior and exterior the instant ingredient canisters are dishwasher- Mounting cleaned parts proof. (max. 30 minutes at 60°C, max. 30 seconds at 80°C). Rinsing and last check Gallery 310 10.2010... - Page 33 Cleaning and maintenance Interval Type of work / Check Exchange kit (hygiene kit) Occasional Cleaning the instant ingredient canisters Once a month Cleaning the coffee canister Replacing the brewer filter and gasket Rinsing / descaling the brewer 10.2010 Gallery 310...
-
Page 34: Regular Cleaning
If power is turned on, be careful not suitable for the use in vending ma- to touch moving parts and electri- chines may be used. cal components! • Activate the locking clip of the cup dispenser and tilt the dispenser forwards (fig. 10). Gallery 310 10.2010... -
Page 35: Preparing For Filling Of Canisters
((fig. 14) to The instant ingredient canisters prevent pollution. should be labelled to avoid ingredi- • Draw off plastic bag. ents being poured into wrong can- isters. • Put lid back on and tilt back cup dispenser (fig. 12). 10.2010 Gallery 310... -
Page 36: Ingredient Canister Located In Side
(fig. 17) and remove outlet spout of the canister (fig. 15). canister (fig. 16). the canister. 1. This is an option and may not be present in your machine. Gallery 310 10.2010... - Page 37 Place canister on a plain, clean surface. • Do not relocate this canister in place until all the cleaned parts are remounted. • Fill the canister with instant ingredient, press lid slightly down and push back / relocate canister in place. 10.2010 Gallery 310...
-
Page 38: Filling The Freshbrew Ingredient Canister
(fig. 22). • Close the lid. Fill according to use of ingredient. Do not use pressure to force more coffee / tea into the canister as this could damage the dosing system. Gallery 310 10.2010... -
Page 39: Cleaning The Drip Tray
(C) in hot water with cleaning Check to make sure that the canis- agent, and finally wipe parts dry (fig. 26). ter is locked in place. Wipe sensors in lid for drip tray dry (D)(fig. 26). 10.2010 Gallery 310... -
Page 40: Removing And Emptying The Solid Waste Container
• Push base tray back in place (fig. 28). your left hand remove the corresponding • Remove plastic bag from container, and retaining pin (A), situated on the rear side insert a new liner. of the cup station. (fig. 29). Gallery 310 10.2010... -
Page 41: Cleaning Inside And Outside
• Lift up the bracket with canister and swing washer-proof. it back on proper place. • Push the outlet tube downwards to open the outlet spout of the above mentioned canister. 1. This is an option and may not be present in your machine. 10.2010 Gallery 310... - Page 42 • Locate the drip tray back in place. Ensure that the sensors in lid are located under the corresponding contact springs when drip tray is relocated. Ensure that the solid waste con- tainer is relocated correctly. Front side facing forward! • Close the door. Gallery 310 10.2010...
-
Page 43: Rinsing The Machine
Wait until the program *Operator Rinse total machine has finished. Technician Gallery 310 Rinsing the machine • Have an empty jug (min.1,5 l) ready to place on the jug platform (fig. 33) • Turn to the display and follow the diagram to perform a machine rinse. -
Page 44: Last Check
Technician 'Wiener Melange' dispensed, remove cup Open and close door Gallery 310 Last check • Clean the machine with a damp cloth on the outside (fig. 34). • Perform a test dispensing by pressing - the selection button for coffee with sugar or tea with sugar, or - using the ‘Dispensing Test’... -
Page 45: Deep Cleaning
• Load cups (fig. 36). See “Loading cups” - dispense head with outlets and hoses on page 30. - brewer cylinder with mixing funnel, mixing funnel hood and valve - filter and support for filter - scraper - cup carrier. 10.2010 Gallery 310... -
Page 46: Preparing For Filling Of Canisters
(A) (fig. 38). • push the outlet tube upwards to close the outlet spout of the canister (fig. 39). • and base tray (B)(fig. 38). 1. This is an option and may not be present in your machine Gallery 310 10.2010... - Page 47 (fig. 42). canister (fig. 40). canister (fig. 41). • Fill canister, see “regular cleaning”. • Do not relocate this canister in place until all the cleaned parts are remounted. 10.2010 Gallery 310...
-
Page 48: Filling The Instant Ingredient Canisters
• Pull and take out the freshbrew ingredient (fig. 43). • Wipe clean the shelf under the instant canister. (fig. 45). ingredient canisters with a clean and moist cloth. • Leave the outlet spouts closed, and push canisters back in place. Gallery 310 10.2010... -
Page 49: Disconnecting Machine
(fig. 42. Do not use pressure to force more coffee / tea into the canister as this could damage the dosing system. 1. For cleaning: refer to the HACCP guidelines (see Quick Reference Guide). 10.2010 Gallery 310... -
Page 50: Cleaning The Instant Ingredient Dispensing System Components
(fig. 49). • Rinse parts in clean hot water, dry and relocate items in reverse order. Gallery 310 10.2010... -
Page 51: Cleaning The Diffuser
• Pull off the whipper wheel (fig. 53) and the • Remove the lower sealing ring. lower sealing ring. • Soak all removed parts in hot water with The machine is fitted with a diffus- er or a coffee mixer. cleaning agent. 10.2010 Gallery 310... -
Page 52: Removing The Dispense Head
Deep cleaning Removing the dispense head • Unclip and remove the drip tray with drain • Turn the wing head stud and lift off the hose under the dispense head (fig. 55). dispense head (fig. 56). Gallery 310 10.2010... -
Page 53: Cleaning The Freshbrew Unit
1 - Mixing funnel hood 2 - Mixing funnel 3 - Upper valve 4 - Air cylinder 5 - Brewer cylinder 6 - Cylinder grip 7 - Filter 8 - Filter gasket 9 - Filter support spring 10 - Scraper 10.2010 Gallery 310... -
Page 54: Disassembling The Freshbrew Unit
Deep cleaning Disassembling the freshbrew unit The parts to be cleaned are disassembled in the sequence indicated below: The illustrations to be read row by row 1) from left to right, 2) from top to bot- tom. Gallery 310 10.2010... -
Page 55: Reassembling The Freshbrew Unit
Deep cleaning Reassembling the freshbrew unit The parts of the freshbrew unit are reassembled in the sequence indicated below: The illustrations to be read row by row 1) from left to right, and 2) from top to bottom. 10.2010 Gallery 310... -
Page 56: Cleaning The Drip Tray
(fig. 58). machine (fig. 59). • Clean the drip tray and its parts ((fig. 57)) (see regular cleaning). Always wipe the sensor (A) in the lid dry (fig. 57). Gallery 310 10.2010... -
Page 57: Cleaning The Cup Carrier
(see regular cleaning). outside, and finally the bottom with a clean, damp cloth (fig. 62). • Flush all parts which have been soaking thoroughly with clean and warm water. • Dry all parts with a dry cloth. 10.2010 Gallery 310... -
Page 58: Mounting Cleaned Parts
(fig. 63). - by using the “Dispensing Test”- funktionen, see “Last check” on page 40. 1. This is an option and may not be present in your machine. Gallery 310 10.2010... -
Page 59: Occasional Routines
• Take the canister by the handle and pull it canister and remove the outlet spout (fig. 67). forwards (fig. 66) until end stops in guiding rail. Lift the canister upwards and pull forwards over the end stops. The lid is automatically triggered open. 10.2010 Gallery 310... - Page 60 Allé parts of the instant ingredient Ensure that the outlet tube points canisters are dishwasher-proof, • Reassemble instant ingredient canister in the open end downwards. except the felt disc. reverse order. The canisters must always be re- turned to their original position. Gallery 310 10.2010...
-
Page 61: Cleaning The Coffee Canister
• Place the canister upside down on a • Wipe the inside of the canister with a soft, rails (fig. 71) table. clean and dry brush. Take care not to damage the mixing wires. The canister and canister parts are not dishwasher-proof. 10.2010 Gallery 310... - Page 62 • Unscrew locking nuts on back side of (fig. 75) and carefully remove the dosing reinsert in machine. canister(fig. 74). systems. Take care not to damage the mixing wires. Do not use a brush. • Clean the canister in hot water. Gallery 310 10.2010...
-
Page 63: Replacing Brewer Filter And Gasket
- Nylon filter for coffee: every 25.000 dispensings - Gasket for metal filter: every 50.000 dispensings. 10.2010 Gallery 310... -
Page 64: Rinsing / Descaling The Brewer
*Empty pot Rinse with stop *Reposition FB canister *Repeat if necessary *Close door Gallery 310 Rinsing / descaling the brewer Do not stop the rinsing before the There is a risk of scalding from hot full four cycles are completed as water. -
Page 65: Additional Routines
Technician Sales turnover and numbers Total turnover, nres Total: 00000.00 of items sold are available as Sales Audit Gallery 310 totals as well as by individual types of drink selections. Total number, res Total: xxxxxxx Total turnover, res Total: 00000.00 No. - Page 66 Total: 000.00 MB per drink, nres Coffee black Total: xxxxxx Total: 000.00 Coffee w sugar MB per drink, res Coffee black Total: xxxxxx Total: 000.00 Coffee w sugar No. per group, nres Cash audit Continued on next page Gallery 310 10.2010...
- Page 67 Group 1 Total: xxxxxx Group 2 Total: 000.00 Turn. p. group,nres Group 1 Total: xxxxxx Group 2 Total: 000.00 Turn. p. group,res Group 1 Total: xxxxxx Group 2 Total: 000.00 Card audit Cash audit Continued on next page 10.2010 Gallery 310...
- Page 68 Coffee with milk Total: 000.00 Own cup audit No. per drink, nres Coffee Total: 0000000 Coffee with milk Total: 0000000 No. per drink, res Coffee Total: 0000000 Cash audit Coffee with milk Total: 0000000 Continued on next page Gallery 310 10.2010...
- Page 69 Number: 0000000 Collected money Amount: 00000.00 Manually filled Amount: 00000.00 Manually delivered Amount: 00000.00 Value overpay Amount: 00000.00 Cashless audit Dispensed change Amount: 00000.00 * Applicable only to BDV and MDB/ ICP coin mechanisms. Continued on next page 10.2010 Gallery 310...
- Page 70 No. per drink, nres Cofee black Total: xxxxxx Coffee w sugar Total: 000.00 No. per drink, res Coffee black Total: xxxxxx Coffee w sugar Total: 000.00 MB. discount audit No. per group, res Continued on next page Gallery 310 10.2010...
- Page 71 Number: xxxxx MB. turnover, res Amount: 00000.00 Discount key audit D.Key number, nres Number: xxxxx D.Key turnover, nres Amount: 00000.00 D.Key number res Number: xxxxx D.Key turnover, res Amount: 00000.00 Time Discount audit Continued on next page 10.2010 Gallery 310...
- Page 72 Additional routines Discount key audit Diagram continued Time Discount audit T.Disc number ,nres Number xxxxxxx T.Disc turnov., nres Number xxxxxxx T.Disc number ,res Number xxxxxxx T.Disc turnov., res Number xxxxxxx Step price audit Continued on next page Gallery 310 10.2010...
- Page 73 Reset of sales Reset counters Reset sales audit Continue ? audit finished Reset of cash Reset cash audit Continue ? audit finished Reset of test Reset test audit Continue ? audit finished Printing Continued on next page 10.2010 Gallery 310...
- Page 74 Please wait Printing audit Printing Cash Audit Continue? in progress Please wait Printing audit Test Audit Printing Continue? in progress Please wait Printing audit Printing Group Counters Continue? in progress Resettable Continued on next page Gallery 310 10.2010...
- Page 75 Printing audit Errors Printing Continue? in progress Please wait Printing audit Printing Cash Audit Continue? in progress Please wait Printing audit Printing Test Audit Continue? in progress Please wait Printing audit Group Counters Printing Continue? in progress 10.2010 Gallery 310...
-
Page 76: Emptying The Cash Box
3=Counter (2)=Test 4=Menu --MENU SELECTION--- *Operator Filling / Clean Technician Counters Gallery 310 Press < OK> if Cash audit is Cash action Cash collected cash was collected now adjusted Emptying the cash box • Open the door of the vending machine. -
Page 77: Adding Change Manually
*Operator Filling / Clean Technician Follow the diagram to electronically register the inserted amount as change. Counters Gallery 310 The inserted amount is registered under “Manually filled” (See “Calling and Cash action Cash collected resetting counters” on page 61) Dispense coins Press <... -
Page 78: Changing Prices
(2)=Test 4=Menu Technician See the section Settings buttons on Counters page 13 for an explanation of how to Gallery 310 use the Plus (+), Minus (-), Next (->) and Save (OK) buttons. Cash action Price per cup Set value: 0000.00... -
Page 79: Setting Of Free Vend And Key Discount
*Operator (2)=Test 4=Menu Follow this diagram to Technician Counters • turn free vend on or off Gallery 310 Cash action • set or change key discount rates Basic operations Service information Machine settings Set freevend, global (Off = 0, On = 1):1... -
Page 80: Time Discount
• A period cannot have a ‘start time’ later than the ‘end time’, see Non Example next page. • The same time period cannot include days from different weeks, i.e. a period cannot be set from Monday to Monday. Gallery 310 10.2010... - Page 81 Set end time 14:00 Period 2 Set start day Su=6 Set start time 10:00 Set end day Su=6 Set end time 14:00 Result: Time discount is given on Saturdays and Sundays between 10:00 a.m. and 2:00 p.m. 10.2010 Gallery 310...
-
Page 82: Setting Time Discount
--MENU SELECTION--- If the discount key is used *Operator Technician during an active Time discount period, the higher of the two discount rates will Gallery 310 apply. Machine settings Set freevend, global Set Time discount Time discount Set Time discount (0-100) :20 ->... -
Page 83: Energy Saving Periods
The temperature during the energy saving period is set in ‘set Set end day All=7 set end time 07:00 temperature’ Result: The machine is not ‘shut down’ as the end time must not be earlier than the start time for the same day or the setting ‘ALL’. 10.2010 Gallery 310... - Page 84 When the selection buttons have been left untouched for more than 10 minutes after the last drinks dispensing, and an energy saving period is still in force, the machine returns to the energy saving mode. Gallery 310 10.2010...
-
Page 85: Setting Energy Saving Periods
*Operator seven periods). (2)=Test 4=Menu Technician • Setting a period means scheduling Gallery 310 the machine to reduce the temperature for the boiler heating to Machine settings Set freevend, global the temperature set in ‘Set temperature’ and to switch off the door light, if ‘Set doorlight’... -
Page 86: Display Messages And Trouble Shooting
• Remove jug from jug platform. Please remove pot • Wait until machine has finished automatic rinse function. Rinse in progress.. • Clean the brewer unit. SB Piston error • Clean the brewer unit. SB Scraper error Gallery 310 10.2010... - Page 87 • Remove impurities from water filter. Replace if necessary. • Remove impurities from water supply connection. • Switch machine off and on. Branch pipe error • Remove blocking cup • Clean branch pipe system, i.e. dispense head, hoses and mixing funnels 10.2010 Gallery 310...
-
Page 88: Trouble Shooting
• Ensure that solid waste container, trays, canisters, mixing Liquid escaping from machine funnels and dispensing hoses are positioned correctly. • Check if sensor for drip tray lid is soiled. Clean as necessary. Gallery 310 10.2010... - Page 89 • Ensure that canister coupling is fitted in canister. • Check if the mixing funnels are blocked. Clean and relocate. • Replace or clean clogged components. Install hose of correct Quantity of drink is inadequate or dispensing hose has a kink length. 10.2010 Gallery 310...
- Page 90 • Cup sensor glasses are soiled, wipe dry. Drinks dispensed, but no cups and no display messages • Check if sensors in drip tray are soiled. Clean as necessary. Machine does not shut down when drip tray is full. Gallery 310 10.2010...
Need help?
Do you have a question about the Gallery 310 and is the answer not in the manual?
Questions and answers