Table of Contents
Advertisement
Quick Links
Advertisement
Table of Contents

Subscribe to Our Youtube Channel
Related Manuals for Edision mini-triton 2 HD


Summary of Contents for Edision mini-triton 2 HD
- Page 1 DIGITAL TERRESTRIAL RECEIVER MPEG-4 mini-triton 2 HD User’s Guide...
- Page 3 User’s Guide mini-triton 2 HD...
-
Page 4: Table Of Contents
Contents GENERAL INFORMATION Main Featur ........................P1 For your Safety ....................... P2 Unpacking ........................P3 General Operation ......................P3 RCU ..........................P4 Front / Rear Panel ......................P5 INSTALLATION WELCOME PAGE MAIN MENU 1. Edit Channel ......................P8 2. Picture ........................P10 3. -
Page 5: General Information
GENERAL INFORMATION This Digital Terrestrial Receiver (DTR) mini triton 2 HD, will take you to the new and exciting world of Digital Television. A world of crystal clear widescreen pictures, digital sound, more information and new services. All this and more on «Free to Air» Digital Television. To make full use of your new DTR please take the time to familiarize yourself with the extensive features of the unit detailed in this User’s Guide. -
Page 6: For Your Safety
GENERAL INFORMATION For Your Safety • To avoid electric-shock hazards, do not • Keep the receiver away from flower open the cabinet, refer servicing to quali- vases, tubs, sinks, etc., in order to avoid fied personnel only. damaging the equipment. •... -
Page 7: Unpacking
GENERAL INFORMATION Unpacking (optional) • Remote Control • Batteries • User’s manual General Operation • Throughout this manual you will notice that the everyday operation of the receiver is based on a series of user friendly on screen display and menus. These menus will help you get the most from your receiver, guiding you through installation, channel organizing, viewing and many other functions. -
Page 8: Rcu
GENERAL INFORMATION Function Turns power ON/OFF of the DTR When watching a program, mute the sound Enter number of the required menu item or select a program number to watch Switches between TV and Radio mode Switches back to previous program Pg- Pg+ Pg- Pg+ Pg- Pg+... -
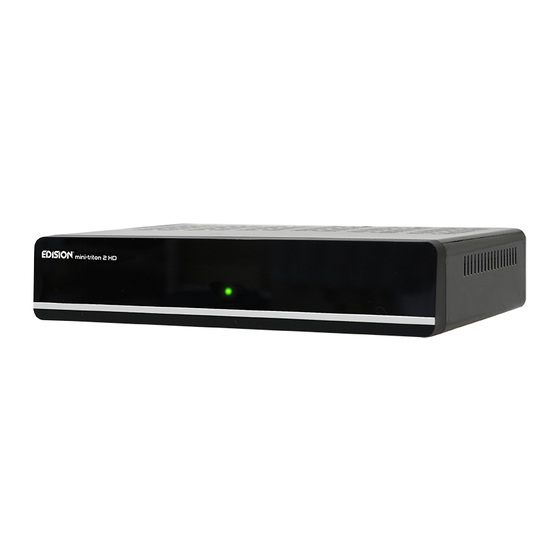
Page 9: Front / Rear Panel
GENERAL INFORMATION Front Panel Real Panel CONNECT TO digiTal aMPliFiER CONNECT TO TVUSiNg a SCaRT CaBlE CONNECT TO TV SET HdMi-OUT iNPUT CONNECT TO aNTENNa CONNECT TO aNOTHER RECEiVER Connecting to TV using SCART support ANTENNA SCART • The picture is only for reference, please make the object as the standard. - Page 10 ISTALLATION Connecting to Digital Amplifier ANTENNA DIGITAL AUDIO CONVERTOR SPDIF AMPLIFIER SPEAKER • The picture is only for reference, please make the object as the standard.
-
Page 11: Welcome Page
WELCOME PAGE • When power on first time, it will show welcome page like below. • Press CH+,CH- keys to move highlight to select Region, Display Mode, Aspect Mode and language. Press keys to move the cursor to choose your choice. •... -
Page 12: Main Menu
MAIN MENU • When you press [MENU] key, you can enter Main Menu. This menu consists of 7 major sub-menus as below. - Program - Picture - Channel Search - Time - Option - System - USB 1. Program This menu consists of 5 major sub-menus as follow. - Program Edit - EPG - Sort... - Page 13 MAIN MENU 4. Select the program and press green key to mark this program with the skip mark. You can cancel this mark by pressing green key once more. 5. Select the program and press blue key to pop up a warning dialogue:»...
- Page 14 MAIN MENU 2. Picture This menu consists of 5 major sub-menus as follow - Aspect Ratio - Resolution - TV Format - Video Output - 3D Output 2.1 Aspect Ratio Select among 16:9 Pillar Box, 16:9 Pan&Scan, 4:3 Letter Box, 4:3 Pan&Scan, 4:3 Full, 16:9 Wide Screen and Auto.
- Page 15 MAIN MENU 3.2 Manual Search Frequency channel: Press key to select the channel Frequency: Press number key to input. Bandwidth: Press keys to select among 6,7 and 8M After setting, press OK key to enter into the searching window. Through two colour dynamic bars at the bottom of the search window, users can know signal quality and strength of current therefore channel.
- Page 16 MAIN MENU 5. Option Dieses Menü besteht aus 4 Funktionen: - OSD Sprache - Untertitel Sprache - Audiosprache - Digitales Audio 5.1 OSD Sprache Drücken Sie die - Tasten um die Sprache des Receivers auszuwählen. 5.2 Untertitel Sprache - Tasten um die Sprache der Untertitel auszuwählen. Drücken Sie die 5.3 Audiosprache - Tasten um die Audiosprache auszuwählen.
- Page 17 MAIN MENU 6.2 Set Password Input old pass word: Input the pass word by pressing number keys 0-9. Input new pass word: Input the pass word by pressing number keys 0-9. Confirm new pass word: Press number key 0-9 to input new pass word again.
- Page 18 MAIN MENU 7. USB This menu has 4 sub-menus such as: Multimedia,Photo Configure, Movie Configure, PVR Configure and Record. 7. 1 Multimedia There are 4 sub-menus in this menu - Music - Photo - Movie - PVR These menus will be disabled when no USB device is plugged.
- Page 19 MAIN MENU In PVR menu you can see the program you recorded. Press red key to switch to full screen mode, and press exit key to back to preview mode. Press yellow key to delete the program. Press green key to rename the program. Press OK or key to play the program.
-
Page 20: Hot Key
MAIN MENU 8. Hot Key 8.1 Number Use the numeric keys (0-9) to input the number of the desired channel. If the inputted number is beyond the valid channel number, system will “Invalid number” and press OK key to close this message. 8.2 TV/RADIO In normal mode, press TV/RADIO key to switch between TV mode and Radio mode. - Page 21 MAIN MENU 8.9 Audio 1. Press AUDIO key to enter into the Audio window. 2. Press keys to select between Left-Left, Right-Right and Left-Right. 3. Changing the audio mode is only connected with the current channel, not all the channels. 4.
-
Page 22: Trouble Shooting
TROUBLE SHOOTING TROUBLE SHOOTING TROUBLE SHOOTING Problem Possible causes What to do The display on the front Check that the main cable is plugged into Main cable is not connected. panel does not light up. the power socket. No sound or picture, but the receiver is in standby mode. - Page 24 www.edision.gr...
Need help?
Do you have a question about the mini-triton 2 HD and is the answer not in the manual?
Questions and answers