
Related Manuals for Pantum P1000 Series


Summary of Contents for Pantum P1000 Series
- Page 1 User Guide P1000/P2000 Series Monochrome Laser Printer It is recommended that you read this Guide carefully before using the printer...
-
Page 2: Legal Notices
Legal notices Trademark Pantum and Pantum logo are registered trademarks of Zhuhai Seine Technology Co., Ltd. Microsoft, Windows, Windows server and Windows Vista are either registered trademarks of Microsoft Corporation in the United States and other countries. The ownerships of software names related to this User Guide in accordance with corresponding license agreement belong to their respective owned companies. -
Page 3: Safety Precautions
Safety precautions Laser safety statement The device has a Class IIIB laser diode in the laser unit. You should not open the laser unit under any circumstances to avoid exposure to the laser beam. Since radiation emitted inside the device is completely confined within protective housings and external covers, the laser beam cannot escape during any phase of normal user operation. -
Page 4: Safety Information
Safety information These warnings and precautions are included in order to prevent injury to you and others, as well as preventing any potential damage to your machine. Be sure to read and understand all of these instructions before using the machine. Use common sense for operating any electrical appliance and whenever using your machine. - Page 5 2. Comply with all notices, cautions and instructions accompanied with the equipment. 3. If the operating instructions conflict with the safety information, please refer back to the safety information. If you cannot resolve the conflicts, please contact Pantum Customer Services for help.
-
Page 6: Regulatory Information
REGULATORY INFORMATION This symbol indicates that, at the end of your product life, it must not be discarded as domestic waste. Instead, you should dispose of your used equipment to a designated collection point for the recycling of waste electrical and electronic equipement. -
Page 7: Table Of Contents
TABLE OF CONTENTS 1. Product information ........................1-2 1.1. What’s in the box ........................1-2 1.2. Product features ........................1-3 1.3. Overview ..........................1-4 1.3.1. Front view ..........................1-4 1.3.2. Rear view ...........................1-5 1.4. Printer installation ........................1-6 1.4.1. Power supply ........................1-6 1.4.2. Environment ........................1-6 2. About paper ............................2-2 2.1. - Page 8 3.9.3. To restart printing a document ..................3-27 3.9.4. To change the printing priority of a document ..............3-28 3.9.5. Other changes to documents in the print queue ..............3-29 4. Installation and removal of the driver....................4-2 4.1. Driver installation ........................4-2 4.2. Driver removal .........................4-9 5.
-
Page 9: Product Information
Product information CHAPTER 1. Product information ...........................2 1.1. What’s in the box ........................2 1.2. Product features .........................3 1.3. Overview .............................4 1.3.1. Front view ..........................4 1.3.2. Rear view ..........................5 1.4. Printer installation ........................6 1.4.1. Power supply ........................6 1.4.2. Environment ..........................6... -
Page 10: What's In The Box
1. Product information 1.1. What’s in the box Ensure the following parts are included in the box: Parts Name Quantity Printer 1pcs Toner cartridge 1pcs USB interface cable 1pcs Power cord 1pcs CD-ROM 1pcs Quick setup guide 1pcs Pantum warranty 1pcs... -
Page 11: Product Features
1.2. Product features 1) Long life Pantum printers offer as much as four times the duty cycle of comparable products, and an incredible 100,000 page average engine life providing many years of satisfying use. 2) Exceptional print quality Using Pantum original toner and printing with 1200x600 dpi resolution your Pantum printer will deliver crisp, clear lines and text plus solid blacks for impressive images. -
Page 12: Overview
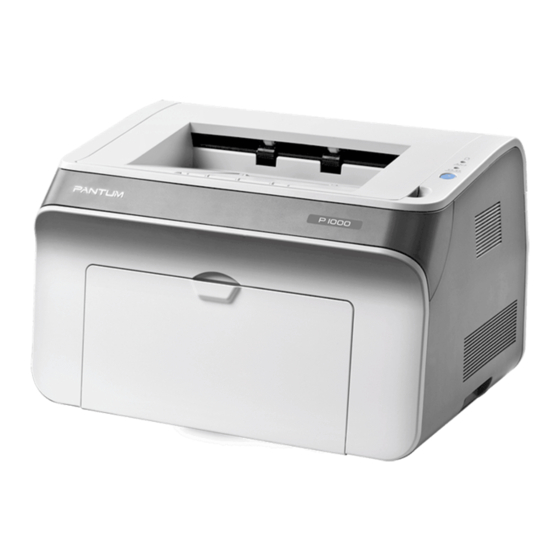
1.3. Overview 1.3.1. Front view Output bin / Cartridge cover Control panel Paper output support Manual feed guide Automatic feed guide Paper stop Manual feed slot Automatic paper tray... -
Page 13: Rear View
1.3.2. Rear view USB interface connector Power supply socket Power switch... -
Page 14: Printer Installation
1.4. Printer installation 1.4.1. Power supply • The power voltage must be in the range of 100~127 VAC or 220~240 VAC depending on the model (See Rating power specifications at chapter 8.1.1.). Power voltage may vary according to different power standards in different countries. •... -
Page 15: About Paper
About paper CHAPTER 2. About paper ............................2 2.1. Paper types and sizes ........................2 2.2. Loading paper ..........................2 2.3. Paper options ..........................4 2.4. Printing on envelopes and transparencies .................. 4 2.4.1. Printing on envelopes ......................4 2.4.2. Printing on transparencies ....................5 2.5. Printable area ..........................5... -
Page 16: Paper Types And Sizes
2. About paper 2.1. Paper types and sizes Paper may be fed automatically from the paper tray or manually through the manual feed slot. The following media types, supported trays and their respective driver settings are shown in the table below. Driver settings are accessed under the Paper tab using the Properties function in the driver. - Page 17 Note: When loading paper 1) Envelopes, card stock, labels and transparencies should be fed from the manual feed tray. 2) Before loading the paper into the automatic paper tray, fan, jiggle and smooth the stack so that it will lay flat in the tray. The Tray capacity is 150 sheets of 20lb bond / 80g/m paper.
-
Page 18: Paper Options
2.3. Paper options Your printer supports various types and weights of print media, such as plain paper, envelopes, labels, transparencies and other special media listed in the paper type and weight tables above. Please ensure you only use a print medium in accordance with the tables in this User Guide. -
Page 19: Printing On Transparencies
Warning The printer may get damaged if you use any type of envelopes described above. Damage caused by improper envelopes will void the warranty. Please remove the printed output immediately because stacked sheets of special media can lead to paper jams or paper stacking problems. 2.4.2. -
Page 20: Printing
Printing CHAPTER 3. Printing ..............................2 3.1. Printing Methods .........................2 3.2. Basic printing with Windows .......................3 3.2.1. To print a document with Windows ..................3 3.2.2. Setting the printing parameters in the Print dialog box ............4 3.3. Advanced printing using the printer driver settings ..............6 3.3.1 Priority of printer settings .......................7 3.3.2. -
Page 21: Printing Methods
3. Printing 3.1. Printing Methods There are two ways of printing, one is by feeding paper from the automatic paper tray, and the other is by printing from the manual feed slot one page at a time. To print from the automatic paper tray: Load paper in the automatic paper tray and make sure there is no media in the manual feed slot, then print the document. -
Page 22: Basic Printing With Windows
3.2. Basic printing with Windows 3.2.1. To print a document with Windows 1) Open the document using the application program you want to print from if it is not already open. 2) From the File menu select Print and the Print dialog box appears. 3) Select the printer you want to print to using the Name: drop down box or the Find Printer button in the Printer area. -
Page 23: Setting The Printing Parameters In The Print Dialog Box
3.2.2. Setting the printing parameters in the Print dialog box Note: • Each operating system and each application program may have their own unique Print dialog box. The following example describes how to use the print parameters in the Print dialog box using Microsoft Office Word 2003© and Windows XP©. - Page 24 Using the Page range area functions The Page range area allows you to print partially or all of your document. The default is the All button that will print all the pages in your document. The Current button will print just the page on your screen.
-
Page 25: Advanced Printing Using The Printer Driver Settings
• Right-click on any item in the driver. 3.3. Advanced printing using the printer driver settings Your Pantum printer comes with software for Windows that allows the computer to communicate with the printer. This software is called a printer driver. Printer drivers provide access to product features, such as printing on custom-sized paper, resizing documents, and inserting watermarks. -
Page 26: Priority Of Printer Settings
3.3.1 Priority of printer settings Within the application program that created the document, such as Microsoft Word or Adobe Illustrator basic print functions can also be easily changed. These settings are unique to the application program and the document and do not change the default settings of the printer driver. -
Page 27: To Change Printer Driver Settings For Windows
3.3.2. To change printer driver settings for Windows Change the settings for all Change the default settings Change the printer print jobs until the software for all print jobs configuration settings program is closed 1. On the File menu in the 1. -
Page 28: Using The Basic Printer Driver Settings
3.4. Using the Basic printer driver settings This section assumes you have opened the Properties or Printing Preferences dialog box as described in the beginning of Section 3.3. The Basic tab in the printer driver settings allows you to access and save Current Settings, change the number of copies to be printed and the order the pages will print, change the orientation of the page to the paper and change the print resolution. -
Page 29: To Print Multiple Copies Of A Document
3.4.1. To print multiple copies of a document 1) In the Copies area, use the arrow buttons to adjust the number of copies or type the number of copies in the box in the range 1 - 99. The default setting is 1. 2) Click the Collate check box to collate the copies. -
Page 30: To Set The Orientation Of The Page On The Paper
3.4.3. To set the orientation of the page on the paper 1) In the Orientation area click the Portrait or Landscape button. The Portrait button will print the pages upright to the direction of the paper feed. This orients the pages vertically the way a typical portrait is shown with the up and down being the long dimension of the paper. -
Page 31: Using The Paper Printer Driver Settings
3.5. Using the Paper printer driver settings This section assumes you have opened the Properties or Printing Preferences dialog box as described in the beginning of Section 3.3. The Paper tab in the printer driver settings allows you to access and save stored Current Settings, change the size and the type of media printed on and perform manual duplex printing. -
Page 32: To Define And Manage Custom Paper Sizes
2) Click the OK button to close the Properties dialog box, then OK again (or Print from some applications) to print the document. 3.5.2. To define and manage custom paper sizes The Customize button allows you to select, create and save a custom paper size in the range of 75mm (3”) wide by 148mm (5.8”) tall to 218mm (8.5”) wide by 360mm (14”) tall. -
Page 33: To Print On Different Media Types
3.5.3. To print on different media types 1) In the Type box of the Paper Options area select the desired media type from the available options using the drop down list. The list contains different type of medias. Please refer to section 2.1 to identify the driver setting depending on your media. This will adjust printing parameters and ensure optimal output quality. - Page 34 The printer will print all the back pages of the document first. When it has finished printing the back pages the printer will show a Status Alert on the computer screen as shown below: 4) Remove the documents from the output bin then put them into the automatic paper tray with the back side up and the leading edge (top of the page) feeding into the printer first.
- Page 35 Using the manual feed slot 1) Load the appropriate media into the manual feed slot before printing. The printer will start in manual feed mode automatically when you complete this step. 2) Check the Manual Duplex Printing box in the Duplex area. The default setting is unchecked.
-
Page 36: Using The Layout Printer Driver Settings
6) Remove the documents from the output bin then put the first sheet from the stack into the manual feed slot with the back side up and the leading edge (top of the page) feeding into the printer first. 7) Click Continue on the Status Monitor. 8) Continue feeding each sheet of paper one page at a time with the back side up and the leading edge (top of the page) feeding into the printer first. -
Page 37: Printing Multiple Pages On One Sheet Of Paper
For a description of the Current Settings function see Section 3.8 below. 3.6.1. Printing multiple pages on one sheet of paper 1) Select the number of pages to be printed on one sheet (1UP, 2UP, 4UP or 9UP) from the Page drop-down list in Multi page area. -
Page 38: To Print A Poster (One Page On Four Sheets Of Paper)
4) Click the OK button to close the Properties dialog box, then OK again (or Print from some applications) to print the document. Note: • When printing multiple pages on one sheet of paper the image of the page will be reduced in size in order to fit the number of page images you specify on a single sheet. -
Page 39: Using The Background Printer Driver Settings
The Rotate 180° check box will rotate the page image 180° along the horizontal axis, effectively flipping the page from top to bottom. The default is unchecked. 3.7. Using the Background printer driver settings This section assumes you have opened the Properties or Printing Preferences dialog box as described in the beginning of Section 3.3. -
Page 40: Printing A Watermark
3.7.1. Printing a watermark Watermarks are images or text placed on the page before the document is printed, providing a background to the page. Watermarks can be bitmap images or text. The steps for printing a watermark are: 1) For a text watermark either select an existing watermark from the drop down list or create a new watermark. -
Page 41: Creating And Managing Text Watermarks
3.7.2. Creating and managing text watermarks To create a new text watermark 1) Click New in the Text Watermark area and the Edit Text Watermark dialog box appears. 2) Type the text for the watermark in the Text box in the Watermark area. The text for the watermark will be used as the title of the watermark. -
Page 42: Using The Current Settings Function
6) In the Density box in the Watermark area select the density of the text from the drop down list. This is how heavy the text will appear from the Lightest (very light grey) through to the Darkest (solid black). The default is Light. 7) Click the OK button to close the Edit Text Watermark dialog box and save your new text watermark in the text watermark drop down list. -
Page 43: To Use A Previously Saved Current Settings
3.8.1. To use a previously saved Current Settings 1) In the box in the Current Settings area select a previously saved setting. Clicking on the name of the setting will change all the tabs settings to those saved under that name. Note: •... -
Page 44: To Save A New Set Of Current Settings
3.8.2. To save a new set of Current Settings 1) Make all the changes you want to make to all four tabs of the printer driver tabs. 2) Enter the name you want to give to this set of printer driver settings into the box in the Current Settings area of any of the printer driver tabs. -
Page 45: To View Documents Waiting To Print
The print queue can typically be accessed in one of two ways. If there are documents in the print queue a printer icon is usually opened in the Quick Launch area of the task bar. Rolling the cursor over the icon will show the number of documents pending for all the printers connected to the computer. -
Page 46: To Restart Printing A Document
3) Do one of the following: • To pause printing, click Pause. The document will not print until you resume printing. • To resume printing, click Resume. The document will begin printing. However, if higher priority documents are waiting to print, they will print first. Note: •... -
Page 47: To Change The Printing Priority Of A Document
3.9.4. To change the printing priority of a document Documents sent to the print queue are given a priority of 1 out of 1 through 99 by default, where 1 is the lowest priority and 99 is the highest priority. Since all documents have the same priority by default they are printed in the order they are sent to the printer. -
Page 48: Other Changes To Documents In The Print Queue
Note: • Once a document has started printing, any printing priority changes you make will not affect that document. • In addition to a document’s priority you may also set up time restrictions on when a document will print using the Only from and To boxes drop down lists. The default is no time restrictions. -
Page 49: Installation And Removal Of The Driver
Installation and removal of the driver CHAPTER 4. Installation and removal of the driver....................2 4.1. Driver installation ........................2 4.2. Driver removal ..........................9... - Page 50 When you see the User account control prompt, click Allow or Yes. b) If the PANTUM P1000/P2000 Installation screen does not appear click My Computer, open the installation CD-ROM and double click Setup.exe then follow the installation steps on the screen.
- Page 51 (2) Select the printer type. If you select a printer type different than the printer being installed the driver installation will fail. (3) Select the language from the drop down list then click Next. Before clicking Next you can click the Installation Information button to see the printer’s User Guide and Quick Setup Guide.
- Page 53 (4) The End User License Agreement window will appear. Please read and accept the agreement by choosing I Agree and Next. If you choose I Disagree the installation will terminate.
- Page 54 (5) The installation will begin copying files to your computer. Do not turn off the computer or run other operations while the driver is copying files to your computer. (6) When all the files have been copied you will be prompted to plug in the power cord, connect the USB cable between the printer and the PC, and then switch on the printer.
- Page 55 (7) When you have powered on and have connected the printer click Next.
- Page 56 (8) Click Done to exit set-up, or select Register product online to go the product registration website. We recommend registering your product in order to be notified about the latest driver updates and any other alerts to keep your printer up to date. If you want to reinstall or update the driver, remove the old driver first.
-
Page 57: Driver Removal
4.2. Driver removal When installing a new or updated driver remove the old driver first. To remove the old driver: (1) Click Start then All Programs, select Pantum P1000 Series or Pantum P2000 Series, then select Uninstall as illustrated below. - Page 58 (4) After removal, please restart your computer. 4-10...
-
Page 59: Control Panel Operation
Control panel operation CHAPTER 5. Control panel operation ........................2 5.1. Control panel instructions ......................2 5.2. The meaning of the LED indicators ....................3... - Page 60 5. Control panel operation 5.1. Control panel instructions The control panel includes an ATTENTION multi-colored LED indicator (LED indicator will display red, green and orange), a PAPER OUT red LED light and a Cancel/Continue button as shown in the figure below. 1) The Cancel/Continue button The Cancel/Continue button is used to cancel a print job or to continue a job that may have been interrupted due to a paper out condition or other similar reasons, or to resume the...
-
Page 61: The Meaning Of The Led Indicators
5.2. The meaning of the LED indicators State Data/toner cartridge Description Paper (the red (the multi-color LED LED indicator) indicator) print Ready Printer warming up Standby mode. Press the key to change the printer from Standby mode to Warming up mode. After warm up the printer is in the Ready state. -
Page 62: Routine Maintenance
Routine maintenance CHAPTER 6. Routine maintenance.........................2 6.1. Consumables ..........................2 6.1.1. Toner cartridge maintenance ....................2 6.1.2. How to replace the toner cartridge ..................2 6.2. Cleaning the printer ........................4... -
Page 63: Consumables
6. Routine maintenance 6.1. Consumables 6.1.1. Toner cartridge maintenance (1) Use only genuine Pantum toner cartridges in your PANTUM printer. (2) Do not refill toner cartridges. Damage caused by the use of a refilled toner cartridge will void the printer warranty. - Page 64 (3) Open the new toner cartridge package, hold the toner cartridge handle, and rock it gently side to side 5 or 6 times to make sure the toner in the cartridge is dispersed evenly. (4) Remove the protective cover (transport lock) on the bottom of the cartridge. (5) Use the guides along the sides inside the printer to insert the new toner cartridge.
-
Page 65: Cleaning The Printer
6.2. Cleaning the printer (1) Close the automatic paper tray. (2) Use a soft cloth with mild detergent to wipe the outside of the printer clean. (3) Open the cartridge cover and remove the toner cartridge. Place the toner cartridge on a piece of paper in a shady location to avoid direct sunlight or bright room light. - Page 66 Warning When cleaning the inside of the printer some components may still be hot. When you open the cartridge cover to clean the parts in the printer, please do not touch the grey shaded parts in the following pictures. (4) Wipe the surface of the laser scanning unit’s dustproof surface gently with a dry lint-free cotton swab or soft cloth with a little alcohol.
- Page 67 Warning Please use a mild detergent. Do not use strong corrosive cleaners such as benzene as it may damage the surface. Do not use cleaning materials with ammonia. Do not use isopropyl alcohol to clean any area but the laser scanning surface.
-
Page 68: Troubleshooting
Troubleshooting CHAPTER 7. Troubleshooting ..........................2 7.1. Identification ..........................2 7.2. Indicators ............................2 7.3. Common troubleshooting tips .....................2 7.3.1. Common trouble resolution ....................2 7.3.2. Trouble shooting the driver installation ................. 4 7.3.3. Troubleshooting image defects .....................5 7.4. Clearing paper jams ........................8... -
Page 69: Identification
7. Troubleshooting You can correct most problems by yourself. If you need additional help, Pantum Customer Services provides the latest answers to frequently asked questions and troubleshooting tips. 7.1. Identification First, check that: • The power cord is connected correctly and the printer is powered on;... - Page 70 Status Check and Causes Solutions Unplug and reconnect the printer cable. Try to print a previously printed document you know prints The printer cable is loose or correctly. Next, try a different USB broken. cable. Then, if possible, connect the printer to another computer The printed output is and attempt to print a previously incorrect, it appears...
-
Page 71: Trouble Shooting The Driver Installation
Installation files may be damaged. After completing the driver Remove the driver as described above; download the installation the printer still does not latest driver corresponding to the printer from www. work. pantum.com, then install the new driver as described above. -
Page 72: Troubleshooting Image Defects
7.3.3. Troubleshooting image defects State Suggest Solutions There is an area of lightly exposed If there is vertical bar or area on the page where it is image on the page faded: • Toner is low. Change to a new toner cartridge. •... - Page 73 State Suggest Solutions Black background If the shade of the background is poor: • If the paper has an off color shade, choose a brighter paper. • Check the printer’s operating environment. Operating outside of the specified operating conditions can result in a poor background.
- Page 74 State Suggest Solutions The back of the sheet is dirty Check whether toner is leaking from the toner cartridge and clean the internal parts of the printer as described in Section 6.2. Whole page dark • The toner cartridge may be installed incorrectly or not properly seated.
-
Page 75: Clearing Paper Jams
7.4. Clearing paper jams To clear paper jams remove any paper in the paper tray or manual feed slot, raise the cartridge cover and remove any jammed paper inside the printer, then re-insert the toner cartridge into the printer, close the cartridge cover and reload the paper. The printer should recover and automatically begin printing. - Page 76 (3) Remove the jammed paper slowly in the feed direction to avoid tearing the paper. (4) After removing the jammed paper reinstall the toner cartridge as directed in Section 6.1.2. (5) Replace the paper in the automatic paper tray and continue printing. ii.
-
Page 77: Product Specifications And Safety Information
Product specifications and safety information CHAPTER 8. Product specifications and safety information ...................2 8.1. Product specifications .........................2 8.1.1. Common specifications ......................2 8.1.2. Media specifications ......................3 8.1.3. Printings specifications ......................3 8.1.4. Consumables ........................4 8.2. Safety specification information ....................4 8.2.1. Radio interference .........................4 8.2.2. -
Page 78: Common Specifications
8. Product specifications and safety information 8.1. Product specifications 8.1.1. Common specifications Print technology Monochrome electro photographic laser Maximum printing size 75mm x 148mm to 216mm x 356mm (3” x 5.8” to 8.6” x 14.2”) Memory 8MB (Can not be extended) Rated power Model depends on the country of purchase : 110-Volt Model: 100~127 VAC,60Hz,6.0A. -
Page 79: Media Specifications
8.1.2. Media specifications Media type Plain, Preprinted Letter, A4, A5, A6, JISB5, ISOB5, B6, Executive, Statement, Folio, Oficio, Legal, Big 32k, Big16k, 32k, Media size 16k, Custom (105mm x 148mm to 216mm x 356mm Automatic paper tray (4.1” x 5.8” to 8.6” x 14.2”) Media weight 60~105g/m (16lb bond ~ 28lb bond) -
Page 80: Consumables
• The consumable capacity will vary depending on the content of the pages, the printing density and other usage and environmental factors. Note: • Use only Genuine Pantum Supplies with your Pantum printer. Damages caused by not using Genuine Pantum Supplies are not covered by warranty. 8.2. Safety specification information 8.2.1.
Need help?
Do you have a question about the P1000 Series and is the answer not in the manual?
Questions and answers