Table of Contents
Advertisement
Quick Links
Advertisement
Table of Contents

Subscribe to Our Youtube Channel
Related Manuals for Air Live WHA-5500CPE


Summary of Contents for Air Live WHA-5500CPE
- Page 1 WHA-5500CPE 802.11a Multi-Function Outdoor CPE Version 2.0 User’s Manual...
- Page 2 OvisLink Corp. has made the best effort to ensure the accuracy of the information in this user’s guide. However, we are not liable for the inaccuracies or errors in this guide. Please use with caution. All information is subject to change without notice All Trademarks are properties of their respective holders. AirLive WHA-5500CPE User’s Manual...
-
Page 3: Table Of Contents
2.1 Before You Start .................10 2.2 Package Content ................11 2.3 Hardware Installation .................11 2.3.1 Mounting Configuration ..................14 2.3.2 Antenna polarization ....................15 3. Configuring the WHA-5500CPE ..............16 3.1 Important Information.................16 3.2 Prepare your PC ................17 3.3 Management Interface ...............17 Web Management (HTTP):....................17 Secured Web Management (HTTPS):................ - Page 4 Table of Contents 3.5.5 Change System Management................... 27 3.5.6 Change Password ..................... 28 4. Web Management: Wireless and WAN Settings ........29 4.1 About WHA-5500CPE’s Menu Structure..........29 4.2 Operation Modes (Wireless and WAN Settings) ........30 4.2.1 Regulatory Domain....................31 4.2.2 Network SSID......................31 4.2.3 Site Survey .......................
- Page 5 8. Application Example 2: Bridge Network ..........111 8.1 Preparation for Building Outdoor Bridge Networks ......111 8.2 WDS Bridge vs. Bridge Infrastructure ..........113 8.3 WDS Bridge Network Example ............115 9. Application Example 3: Router and Repeater ........121 9.1 Application Environment ..............121 AirLive WHA-5500CPE User’s Manual...
- Page 6 Table of Contents 9.2 WHA-5500CPE in WISP Router Mode ..........122 9.2.1 WISP Router: Wireless Settings................122 9.2.2 WISP Router: WAN Port and Virtual Server ............124 9.3 WHA-5500CPE in Repeater Mode ..........127 9.3.1 Repeater Router: Wireless Settings................ 127 10. Emergency Firmware Recovery ............130 10.1 How Emergency Upgrade Works...........130...
-
Page 7: Introduction
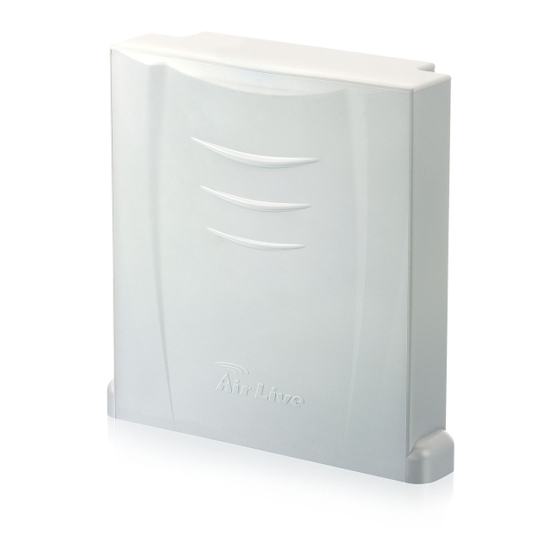
Introduction 1.1 Overview The WHA-5500CPE is a wireless outdoor multi-function device based on IEEE 802.11a 5-GHz radio technologies. When installed in upright position, it is rain and splash proof. It features an integrated 18dBi patch antenna and 802.3af to simplify the installation. . - Page 8 When WHA-5500CPE can’t get a response from remote devices, it will attempt to re-establish the connection. WHA-5500CPE’s PING watchdog goes the extra step to allow 2 sets of IP to avoid false alarm. 5.1.7 Configuration Save and Restore: You should always backup your configurations so you can restore in the event of system crash.
-
Page 9: Firmware Upgrade And Tech Support
Chapter 11: Frequent Asked Questions If you have a question about WHA-5500CPE that is not found on other part of this guide, you might find your answer here. Including how to make connection with Mikrotik AP, how to save password settings on the browser...etc. -
Page 10: Features
Limit Bandwidth of HTTP, FTP, Torrent, and eDonkey traffic in router mode Site Survey, RSSI signal Survey, and RSSI LED indicator. Multi-SSID, TAG VLAN, WMM, TOS ACK Timeout Adjustment for long distance connection. Emergency firmware recovery mode Web, HTTPS, and Telnet AirLive WHA-5500CPE User’s Manual... -
Page 11: Wireless Operation Modes
The WHA-5500CPE can be configured to operate in the following wireless operation modes: 1.5.1 Access Point Mode When operating in the Access Point mode, the WHA-5500CPE becomes the center hub of the wireless network. All wireless cards and clients connect and communicate through WHA-5500CPE. -
Page 12: Wds Bridge Mode
This mode is also known as “WDS Pure MAC mode”. When configured to operate in the Wireless Distribution System (WDS) Mode, the WHA-5500CPE provides bridging functions with remote LAN networks in the WDS system . The system will support up to total of 8 bridges in a WDS network (by daisy chain). -
Page 13: Client Infrastructure Mode
WHA-5500CPE acts as if it is a wireless adapter to connect with a remote Access Point. Users can attach a computer or a router to the LAN port of WHA-5500CPE to get network access. This mode is often used by WISP on the subscriber’s side. Please see Chapter 8 for step-by-step application example of this operation mode. -
Page 14: Client Ad Hoc Mode
1.5.6 Client Ad Hoc Mode In Client Ad Hoc mode, WHA-5500CPE can connect to other wireless adapters without access point. Users can attach a computer or a router to the LAN port of WHA-5500CPE to get network access. 1.5.7 WISP Router Mode In WISP Router Mode, WHA-5500CPE connects to the remote Access Point as in Client Infrastructure Mode. -
Page 15: Ap Router Mode
1. Introduction 1.5.8 AP Router Mode In AP Router Mode, the WHA-5500CPE behaves like a wireless router. The LAN port of the WHA-5500CPE will become WAN port. The wireless network of WHA-5500CPE becomes the LAN side. Please note when this mode is used, the only way to manage the WHA-5500CPE is through the wireless side unless remote management is opened. -
Page 16: Installing The Wha-5500Cpe
Ethernet cable (shielded with anti-UV) according to the length you need. The WHA-5500CPE must be installed in the upright position if the unit is located in outdoor or wet environments. The use of 5GHz spectrum, Turbo modes, and 5/10MHz channel bandwidth might be prohibited in some countries. -
Page 17: Package Content
The WHA-5500CPE package contains the following items: One WHA-5500CPE main unit One 48V 0.4A DC power adapter with a splitter Wall Mounting kit One CD of the WHA-5500CPE Quick Star Guide WHA-5500CPE Mounting Kits PoE Kits Regarding to the specification of each application, the PoE Ethernet cable is not included in the package. - Page 18 2. Install the WHA-5500CPE Turn the WHA-5500CPE to another 4. Plug one side of RJ-45 cable into the side, the RJ-45 jack is at the middle of Ethernet port. LEFT side of main board. Put the Ethernet cable along the module, Make sure that the other side of Ethernet till the exit (at the bottom of Housing).
- Page 19 2. Install the WHA-5500CPE Scroll up 4 screws well. Be careful, this is Plug the Ethernet to the PoE “P + DATA very important; it could protect your OUT” jack of injector. device against the water. Plug the power cord of adaptor into the Plug the Data Ethernet cable to the port injector “POWER IN”...
-
Page 20: Mounting Configuration
2. Install the WHA-5500CPE 2.3.1 Mounting Configuration Your WHA-5500CPE comes standard with 2 plastic straps for pole mounting. Please follow the procedure below to install: Antenna body - 1pc M6 washer(φ ) - 4 pcs 16mm M6 S/W - 6 pcs... -
Page 21: Antenna Polarization
2. Install the WHA-5500CPE 2.3.2 Antenna polarization Pease install the CPE in the UP RIGHT position only. Do not put the CPE into water. Pease do not tilt the CPE more than 15 degree angle from vertical. AirLive WHA-5500CPE User’s Manual... -
Page 22: Configuring The Wha-5500Cpe
The default wireless mode is : Client mode After power on, please wait for 2 minutes for WHA-5500CPE to finish boot up Please remember to click on “Apply” for new settings to take effect When you set the “Regulatory Domain” to “All Channels”, the WHA-5500CPE will display all the available channels. -
Page 23: Prepare Your Pc
3. Configuring the WHA-5500CPE 3.2 Prepare your PC The WHA-5500CPE can be managed remotely by a PC through either the wired or wireless network. The default IP address of the WHA-5500CPE is 192.168.1.1 with a subnet mask of 255.255.255.0. This means the IP address of the PC should be in the range of 192.168.1.2 to 192.168.1.254. -
Page 24: Secured Web Management (Https)
But all the data transactions are securely encrypted using SSL encryption. Therefore, it is a safe and easy way to manage your WHA-5500CPE. We highly recommend WISP and service provider to use HTTPS for management. To begin, simply enter https://192.168.1.1... -
Page 25: Command Line Interface (Telnet)
The only difference is HTTPS are encrypted for extra security. Therefore, we will discuss them together as “Web Management” on this guide. If you are placing the WHA-5500CPE behind router or firewall, you might need to open virtual server ports to WHA-5500CPE on your firewall/router... -
Page 26: Getting Into Web Management
PC and WHA-5500CPE. 3.4.1 Getting into Web Management Normal Web Management (HTTP) To get into the Normal Web Management, simply type in the WHA-5500CPE’s IP address (default IP is 192.168.1.1) into the web browser’s address field. Secured Web Management (HTTPS) To get into the Secured Web Management, just type “https://192.168.1.1 ”... - Page 27 3. Configuring the WHA-5500CPE Firefox: Select “or you can add an exception” Click on “Add Exception” Click on “Get Certificate”. Then, please enter WHA-5500CPE’s IP address. Finally, please click on “Confirm Security Exception.” AirLive WHA-5500CPE User’s Manual...
-
Page 28: Welcome Screen And Login
Access Point and AP Router mode. Therefore, the function will only appear in these 2 modes. For this reason, the first step to configure the WHA-5500CPE is to select the wireless mode. The router mode specific functions are also in this menu category. - Page 29 You can choose any menu categories to begin; you can switch to other menu later When you choose one of the menu categories, the WHA-5500CPE will require you to enter the username and password. Please enter “airlive” (all lower cases) for both username and password.
-
Page 30: Initial Configurations
3.5.1 Choose the wireless Operation Modes The wireless settings of WHA-5500CPE are dependant on the wireless operation mode you choose. Therefore, the first step is to choose the operation mode. For explanation on when to use what operation mode, please refer to Chapter 1 When you click on the “Wireless Settings”... -
Page 31: Change The Device's Ip Address
3.5.2 Change the Device’s IP Address The default IP address is at 192.168.1.1. You should change it to the same subnet as your network. Also, if you want to manage WHA-5500CPE remotely, you have to set the Gateway and DNS server information. -
Page 32: Change The Country Code
3. Configuring the WHA-5500CPE 3.5.3 Change the Country Code The legal frequency and channels in 5GHz spectrum varies between countries. The default country code is United Kingdom which should require no changes If you are living in Europe. If you are living outside EU, you should change the country code accordingly. -
Page 33: Set The Time And Date
3. Configuring the WHA-5500CPE 3.5.4 Set the Time and Date It is important that you set the date and time for your WHA-5500CPE so that the system log will record the correct date and time information. Please go to “System Configuration”... -
Page 34: Change Password
3. Configuring the WHA-5500CPE 3.5.6 Change Password You should change the password for WHA-5500CPE at the first login. To change password, please go to “System Configuration” -> “Password Settings” menu. AirLive WHA-5500CPE User’s Manual... -
Page 35: Web Management: Wireless And Wan Settings
Chapter 5. 4.1 About WHA-5500CPE’s Menu Structure The WHA-5500CPE’s web management menu is divided into 3 main menus: Operation Modes, System Configurations, and Device Status. The main menus are displayed in “Top Menu Bar”. Within each main menu category, there are sub-menu options which are displayed on the “Side Menu Bar”... -
Page 36: Operation Modes (Wireless And Wan Settings)
4.2 Operation Modes (Wireless and WAN Settings) The wireless settings of WHA-5500CPE are dependant on the wireless operation mode you choose. Therefore, the first step is to choose the operation mode. For explanation on when to use what operation mode, please refer to Chapter 1. -
Page 37: Regulatory Domain
The SSID is the network name used to identify a wireless network. The SSID must be the same for all devices in the same wireless network. In WHA-5500CPE; it is possible to create more than one SSID in AP and AP Router mode, please check the “Multiple SSID &... -
Page 38: Site Survey
Please make sure you enter the correct encryption key, the WHA-5500CPE will not check whether the encryption key is correct. RSSI: RSSI is a value to show the Receiver Sensitivity of the WHA-5500CPE. In general, remote APs with stronger signal will display higher RSSI values. For RSSI value, the smaller the absolute value is, the stronger the signal. -
Page 39: Signal Survey
This function is applicable only to Client mode, Bridge Infrastructure, and WISP Router mode. When this function is enables, the WHA-5500CPE will put priority to associate with AP on the list. If “Force connect with AP added below” is selected, the WHA-5500CPE will only connect with AP on the list. -
Page 40: Supera Option
For example, Channel 149 to 161 are available only to United States and a few other countries. If you are living outside EU, please change the country from the “Regulatory Domain” option in this page. Below is the table list of channels and frequency. AirLive WHA-5500CPE User’s Manual... - Page 41 “20MHz” for channel width, check this option will display channels “36,37,38, 39, 40….” Instead of “36, 40, 44…etc). This allow you to use a non-standard channel to avoid interference or for privacy purpose. AirLive WHA-5500CPE User’s Manual...
-
Page 42: Channel Width
Security settings allow you to use encryption to secure your data from eavesdropping. You can select different security policy to provide association authentication and/or data encryption. The WHA-5500CPE features various security policies including WEP, 802.1x, WPA, WPA-PSK, WPA2, WPA2-PSK, WPA-Auto, and WPA-PSK-Auto. Please note not all security policies are available in all operation modes. - Page 43 WEP Key 1. The length of key is dependant on the Key Length and Key type you choose. Key Length: The WHA-5500CPE offers 64bit, 128 bit, and 152 bit for WEP key length. The longer the Key Length, the more secure the encryption is.
- Page 44 CCMP (AES Encryption). The WPA-AUTO tries to authenticate wireless clients using WPA or WPA2. All 3 requires a RADIUS server available in order to do authentication (same as 802.1x), thus there is no shared key required. AirLive WHA-5500CPE User’s Manual...
- Page 45 The encryption key is generated automatically and dynamically. WPA2-PSK adds CCMP and AES encryption for even better security. WPA-PSK-AUTO tries to authenticate wireless clients using WPA-PSK or WPA2-PSK. AirLive WHA-5500CPE User’s Manual...
-
Page 46: Distance
4.2.12 Transmit Power Operation Mode -> Setup -> Transmit Power You can adjust the transmit output power of the WHA-5500CPE’s radio from 10dBm to 24dBm. The higher the output power, the more distance WHA-5500CPE can deliver. However, it is advised that you use just enough output power so it will not create excessive interference for the environment. -
Page 47: Advance Settings (Wireless)
Operation Mode -> Setup -> Advance Settings This page includes all the wireless settings that change the RF behaviors of WHA-5500CPE. It is important to read through this section before attempting to make changes. Beacon Interval: Beacon Interval: The device broadcasts beacon frames regularly to announce its existence. - Page 48 The easiest way to enter AckTimeOut value is by entering the distance in “Operation Mode -> Setup -> Distance”. The WHA-5500CPE will then calculate and enter the correct value for you. Enable Radio eXtended Range: XR is Atheros eXtended technology to increase range.
-
Page 49: Access Control (Acl)
4.2.14 Access Control (ACL) Operation Mode -> Setup -> Access Control The WHA-5500CPE allows you to define a list of MAC addresses that are allowed or denied to access the wireless network. This function is available only for Access Point and AP Router modes. -
Page 50: Multiple Ssid
This function is available only for Access Point and AP Router modes. Multiple SSID allows WHA-5500CPE to create up to 4 different wireless networks (SSID). It is also known as “Virtual AP” function. Each SSID can have its Encryption type, VLAN Tag, and TOS settings. - Page 51 SSID How to add a SSID You can add up to 4 SSID in WHA-5500CPE. Please follow the procedure below: Enter the SSID name (i.e. BridgeNet) Select the Security Policy (i.e. WPA2-PSK) Enter the Security Key (i.e. BridgeNetKey).
- Page 52 Click on “APPLY” to complete the modification Or click on “Delete Selected” to delete the SSID Configure the VLAN and DiffServ Markings When you check the Enable VLAN for All SSIDs and/or Enable DiffServ Marking, the following screen will appear: AirLive WHA-5500CPE User’s Manual...
- Page 53 VLAN IP: Each SSID can be given with different VLAN IP group. Please notice that the management IP in the VLAN will also be changed. For example, if you define the VLAN IP to be 192.168.2.X subnet, then the WHA-5500CPE’s management IP in the group will change to 192.168.2.1.
-
Page 54: Wmm Qos
WMM Settings is to specify parameters on multiple data queue for better performance of differentiated wireless traffic like Voice-over-IP (VoIP), other types of audio, video, and streaming media as well as traditional IP data over the AP. AirLive WHA-5500CPE User’s Manual... - Page 55 Each access point waits some random period of time between retries. The wait time (initially a random value within a range specified as the Minimum Contention Window increases exponentially up to a specified limit Maximum AirLive WHA-5500CPE User’s Manual...
- Page 56 The value specified in the Maximum Contention Window is the upper limit for this doubling of the random backoff. This doubling continues until either the data frame is sent or the Maximum Contention Window size is reached. AirLive WHA-5500CPE User’s Manual...
-
Page 57: Radius Settings
RADIUS servers can be defined: one acts as a primary, and the other acts as a secondary backup. If you choose to use 802.1x, WPA, or WPA2 as security policy, you might need to set the RADIUS server settings. AirLive WHA-5500CPE User’s Manual... -
Page 58: Bandwidth Control
Operation Mode -> Setup -> Bandwidth Control Bandwidth Control can limit the maximum speed of entire wireless interface or individual device. It is also known as Traffic Shaping. The WHA-5500CPE provides both Total Bandwidth and Per-User Bandwidth Control for both uplink and downlink speed. - Page 59 Total Bandwidth: Total Bandwidth control limit the bandwidth between Wireless and Ethernet interface. Therefore, it is most suitable for Client Infrastructure Mode, Bridge Mode, and WISP Router Mode. For WISP operator who use WHA-5500CPE as the client side device; setting the Total Bandwidth control on the WHA-5500CPE will easy the loading on the AP for bandwidth management.
- Page 60 Uplink Max: Enter the speed you wish to limit the upload traffic in kbps units Example 1: Total Bandwidth Control In this example, the WHA-5500CPE is in Client Infrastructure mode connecting to a remote AP. We want to limit the Bandwidth of the link to 2048Kbps download and 512kbps Upload.
- Page 61 Total Uplink Speed. Click “Apply” to finish Example 2: Per User Bandwidth Control In this example, the WHA-5500CPE is Access Point mode. There is a wireless client connecting to WHA-5500CPE with MAC address of 00:04:6F:11:11:11. We want to limit the bandwidth of the wireless client to 1024 downstream and 512K upstream using WHA-5500CPE’s Per-User Bandwidth Control.
- Page 62 Step 4. Enter the downlink speed as “1024” and uplink speed as “512”. Step 5. Click on “Add” button to add the bandwidth policy Step 6. This new policy should appear on the button. You can enable/disable it. AirLive WHA-5500CPE User’s Manual...
-
Page 63: Wds Settings
Up to 4 entries are possible WEP Key: You can set up to 4 keys, each key can have different Key Length and Key type. When you add an entry to the WDS setting and select WEP AirLive WHA-5500CPE User’s Manual... - Page 64 It is necessary to enter the same set of keys in the same WDS network. When you select WEP, the WHA-5500CPE will ask you to select from one of the 4 keys. Please be sure to select the same key on both side of the link.
-
Page 65: Router Mode Settings
4.4.2 AP Router Mode In AP Router mode, the POE port of the WHA-5500CPE will turn into the WAN port. The wireless interface will become the LAN side. It will turn WHA-5500CPE into a wireless router. Since the Ethernet interface becomes WAN; if your PC is connected to the POE port, the management IP will change to the WAN IP (192.168.2.1). -
Page 66: Wan Port Settings
4.4.3 WAN Port Settings Operation Mode -> Setup -> WAN Port Settings The WHA-5500CPE support different authentication and IP assignment standards for the WAN port. It includes fixed IP, DHCP, PPPoE and PPTP protocols. Please consult with your ISP about what authentication type is used for the WAN port conection. -
Page 67: Dynamic Dns Settings
HTTP Port No: The default port for HTTP is Port 80, you can change the value here Timeout: The default management timeout is 10 minutes. After timeout, the WHA-5500CPE will ask you to login again. You can change the timeout value here. AirLive WHA-5500CPE User’s Manual... -
Page 68: Ip Routing Settings
HTTP Web Server Access: You can enable or disable HTTP service from WAN side HTTPS Web server Access: You can enable or disable HTTPS Web Server Access from WAN side Response to WAN ping: You can disable or enable whether WHA-5500CPE will response to PING command. 4.4.6 IP Routing Settings Operation Mode ->... -
Page 69: Dhcp Server
Operation Mode -> Setup -> IP Routing Settings DHCP Server Settings is to assign private IP address to the devices in your local area network (LAN). The default LAN IP address of WHA-5500CPE is 192.168.1.1, changing WHA-5500CPE’s IP address will also change the DHCP server’s IP subnet. -
Page 70: Multiple Dmz
Advanced Settings >> Multiple DMZ Multiple DMZ opens all TCP/UDP ports to particular IP address on the LAN side. It allows setting up servers behind the WHA-5500CPE. Select a DMZ type and then enter the local DMZ IP address. A DMZ server is a common term used to describe the default virtual server. If the DMZ server is selected, Internet traffic not destined for a valid virtual server is redirected to this privately addressed LAN client. -
Page 71: Special Applications
Note: You can use up to 3 sets of opened ports for a specific application. The opened ports can be separated by a comma and no spaces are allowed (e.g. 2300-2305, 4300-4305, 5300-5305). AirLive WHA-5500CPE User’s Manual... -
Page 72: Ip Filtering Settings
You can also define IP filtering rule, such as: Name; IP Protocol; Apply to either Outbound to the Internet or Inbound from the Internet; Source IP Address and Dest. (Destination) IP Address. To grant or deny IP address, select ADD or Delete Selected. AirLive WHA-5500CPE User’s Manual... -
Page 73: Web Management 2: System Configuration, Tools And Status
The Device IP Settings screen allows you to configure the IP address and subnet of the device. Although you can rely on a DHCP server to assign an IP address to the WHA-5500CPE automatically, it is recommended that you configure a static IP address manually in most applications. - Page 74 Click APPLY to go to the next screen. Use DHCP Client Protocol to Get IP automatically If you choose to use a DHCP Server to acquire an IP address for the WHA-5500CPE automatically, enable the checkbox “Use the DHCP client protocol to automatically get the IP address for this device”.
-
Page 75: Time Settings
5.1.2 Time Settings System Configuration ->Time Settings It is important that you set the date and time for your WHA-5500CPE so that the system log will record the correct date and time information. We recommend you choose “Enable NTP” so the time will be keep even after reboot. If your WHA-5500CPE is not connected to Internet, please enter the time manually. -
Page 76: System Management
HTTP Port No: The default port for HTTP is Port 80, you can change the value here Timeout: The default management timeout is 10 minutes. After timeout, the WHA-5500CPE will ask you to login again. You can change the timeout value here. HTTP Web Server Access: You can enable or disable HTTP service from WAN side... -
Page 77: Ping Watchdog
CPE will ping every 2 minutes, after the second failure, it will reconnect. Actions: Reconnect: the WHA-5500CPE will attempt to re-establish the connection. It is recommend to use this option for WDS Bridge connection. Reboot: the WHA-5500CPE will do a power recycle. -
Page 78: Firmware Upgrade
WHA-5500CPE (the software that controls your WHA-5500CPE’s operation). Normally, this is done when a new version of firmware offers new features that you want, or solves problems that you have encountered with the current version. -
Page 79: Factory Default
5.1.8 Factory Default System Configuration -> Factory Default You can reset the configuration of your WHA-5500CPE to the factory default settings. Step 1 Select Factory Default from the System Configuration menu. Step 2 Click YES to go ahead and restore the configuration to the factory default. -
Page 80: Tools
5. Web Management2: System Configuration, Tools and Status 5.2 Tools 5.2.5 Network Ping Please assign a IP address or a domain name for ping function. 5.2.2 Network Traceroute Please assign a IP address or domain name for traceroute function. AirLive WHA-5500CPE User’s Manual... - Page 81 5. Web Management2: System Configuration, Tools and Status AirLive WHA-5500CPE User’s Manual...
-
Page 82: Device Status
Wireless MAC: This is the wireless MAC address (BSSID) of this AiMax5. This is the address to enter on the remote WDS Bridge for the WDS link. Uptime: This is the time that the WHA-5500CPE has been running since last power ARP Table Display the corresponding IP and MAC address Table. -
Page 83: Wireless Information
RSSI, Remote device’s BSSD, connecting State, channel, and encryption used. 5.3.3 Internet Information This page shows the information about WAN port of the WHA-5500CPE. It includes the type of WAN port authentication used and the IP address information about the WAN port. AirLive WHA-5500CPE User’s Manual... -
Page 84: Wireless Client Table
5.3.5 System Log The System Log displays the system activities, login, and system error report. If you need to report a problem to Air Live, please be sure to send us the System Log information also. AirLive WHA-5500CPE User’s Manual... -
Page 85: Command Line Interface
Command Line Interface In this chapter, we will explain commands that are available through Telnet interface. We will provide descriptions for the commands, example settings and the WHA-5500CPE’s response. The purpose for this chapter is to introduce available CLI commands only. - Page 86 Please wait a moment for site survey... ESSID MAC Address Conn Mode Channel Turbo Super XR WME Signal Strength(dbm) Security Network ===================================================================================== airlive 00:4f:79:90:00:27 -- * None airlive 00:4f:69:52:a1:ca -- * None WHA-5500CPE-ap 00:4f:69:90:00:01 -- * None AirLive WHA-5500CPE User’s Manual...
-
Page 87: Debugging Commands
SSID. We recommend to use the following commands instead: add ssid <ssidname> broadcast (enable/disable) to add a new SSID set ssid <ssidname> to replace the current ssid name with a new one AirLive WHA-5500CPE User’s Manual... -
Page 88: Show Commands
<mode value>: set radio mode to 11a | supera_no_turbo | supera_static_turbo.| supera_dynamic_turbo Example: Command> z_debug set port radio1 11a air2 64 6.3 Show Commands Show Commands are command that show the settings and status of WHA-5500CPE show arp table Purpose: Show ARP Table Example: Command> show arp table... - Page 89 Example: Command> show upnp UPnP is disabled show mac Purpose: show the MAC address table in MAC filter mode. This might change to show the wireless MAC address of WHA-5500CPE in future firmware release Example: Command> show mac Filter Name...
- Page 90 Command> show log level Log level is 8 show telnet / system Purpose: show telnet management information and system status Example: Command> show telnet Telnet session timeout: 0 minutes Telnet port number: 23 Telnet state: enable AirLive WHA-5500CPE User’s Manual...
- Page 91 Purpose: Show wireless settings Example: Command> show wireless setting Radio[1] operation mode: access point ssid name : air2 wireless state : enable ssid broadcast : enable radio[1] mode : 11a radio[1] channel : 64 AirLive WHA-5500CPE User’s Manual...
- Page 92 Purpose: Show whether the AirMax is using 5MHz, 10MHz, or 20MHz channel width Example: Command> show ratemode Ratemode is Full(20Mhz); show noise immunity Purpose: Show the noise immunity setting Example: Command> show noise immunity Noise immunity is enable AirLive WHA-5500CPE User’s Manual...
-
Page 93: Set Commands
6. Command Line Interface 6.4 Set Commands The Set Commands are to make changes to the WHA-5500CPE’s settings set http timeout <timeout value in minutes, 1-999> Purpose: Set the timeout value for HTTP management Example: Command> set http timeout 10 HTTP timeout: 10 minutes set system <contact |location>... - Page 94 Purpose: Enable or Disable WMM QoS Example: Command> set wmm qos disable set wmm qos disable successful! set log level <1-7> Purpose: Set the log level Example: Command> set log level 7 set log level 7 successful AirLive WHA-5500CPE User’s Manual...
- Page 95 Purpose: set LAN IP address such as IP, Subnet mask, gateway, and DNS server Example: Command> set lan ip 192.168.1.1 sm 255.255.255.0 gw 192.168.1.254 dns 168.95.1.1 killall: dnsmasq: no process killed LAN IP address : 192.168.1.1 Netmask 255.255.255.0 Gateway 192.168.1.254 AirLive WHA-5500CPE User’s Manual...
- Page 96 Command> set enable Radio1 enabled set ssid <ssidname> Purpose: Replace current main SSID name with a new one Example: Command> set ssid WHA-5500CPE set ssid remotessid <remote ssidname> Repeater Mode Only Purpose: Set the remote SSID name for repeater mode Example: Command>...
- Page 97 <range:1-100> Purpose: To set the user limit for wireless interface Example: Command> set user limitation 100 Radio1 user limitation: 100 set age out time <range:1-1000> Purpose: To set the age timeout for wireless clients. Example: AirLive WHA-5500CPE User’s Manual...
- Page 98 Purpose: To enable diffserv marking function in multiple SSID & VLAN configuration. Example: Command> set diffserv marking enable set security <ssid> none Purpose: To remove security policy from a SSID Example: Command> set security airlive none Set Radio1 no security ! AirLive WHA-5500CPE User’s Manual...
- Page 99 <defaultkey> Purpose: To set the WEP security policy Example: Command> set security WHA-5500CPE wep 1 64 hex 1234567890 Radio1 authentication type : wep ! set security <ssid> <wpa|wpa2> <tkip|aes|both> interval <0~300> Purpose: to set the WPA or WPA2 security policy Example: Command>...
-
Page 100: Enable/Disable Commands
Syslogd is disabled <enable | disable> radius server <primary | secondary> Purpose: To enable or disable primary/secondary radius server Example: Command> enable radius server primary Invalid configuration specified. Command> enable radius server secondary Invalid configuration specified. AirLive WHA-5500CPE User’s Manual... -
Page 101: Add/Delete Commands
Command> delete mac filter aaa /etc/wlan/ap_service: 17: uname: not found killall: wpa_supplicant: no process killed /etc/wlan/ap_service: 17: uname: not found Using /lib/modules/2.4.25-LSDK-5.1.0.42/wlan/ath_hal.o Using /lib/modules/2.4.25-LSDK-5.1.0.42/wlan/ath_rate_atheros.o Using /lib/modules/2.4.25-LSDK-5.1.0.42/wlan/ath_dfs.o Using /lib/modules/2.4.25-LSDK-5.1.0.42/wlan/ath_ahb.o <mapping sub-ioctl turbo to cmd 0x8BE0-1> <mapping sub-ioctl set_installmode to cmd 0x8BE0-75> AirLive WHA-5500CPE User’s Manual... - Page 102 <mapping sub-ioctl set_threslower to cmd 0x8BE0-76> <mapping sub-ioctl set_threslow to cmd 0x8BE0-77> <mapping sub-ioctl set_thresbetter to cmd 0x8BE0-78> <mapping sub-ioctl set_thresbest to cmd 0x8BE0-79> <mapping sub-ioctl maccmd to cmd 0x8BE0-17> <mapping sub-ioctl authmode to cmd 0x8BE0-3> AirLive WHA-5500CPE User’s Manual...
- Page 103 RTNETLINK answers: No such file or directory RTNETLINK answers: No such file or directory add radius server secondary successfully add wds <comment> <mac> Purpose: to add a WDS Link Example: Command> add wds bridge 00-4f-60-52-12-34 add wds <comment> <mac> successful! AirLive WHA-5500CPE User’s Manual...
- Page 104 <ssid name> broadcast <enable | disable> Purpose: to add a new ssid (AP and AP Router mode) to the multiple SSID list. Example: Command> add ssid air03 broadcast enable Add R1 ssid <air03> broadcast enable successful! AirLive WHA-5500CPE User’s Manual...
-
Page 105: Application Example: Infrastructure
SSID and bandwidth control. 7.1 Application Environment In this application example, an WHA-5500CPE in Access Point mode is in the center of an infrastructure topology with two virtual wireless networks. The first wireless network is the AP-Client network and the second network is the Bridge network. -
Page 106: Device A: Access Point Mode
7. Application Example: Infrastructure Device B: WHA-5500CPE in Bridge Infrastructure Mode Using Total bandwidth Control to limit the Bridge traffic to 10Mbps both way. Use Site Survey wizard to make the connection in a simple one stop process. Device C: WHA-5500CPE in Client Infrastructure Mode Connect to the Access Point using Client Infrastructure Multiple User mode. -
Page 107: Device A Wireless Settings
7.2.1 Device A Wireless Settings Step 1 Click on “setup” button on the “Operation Mode” page Step 2 On the wireless setting page, please enter the SSID, Channel, and distance. Then press “Apply” to make changes. 2000 AirLive WHA-5500CPE User’s Manual... - Page 108 Step 5 Follow the procedure below to create a new SSID “bridgeinf” 1. Enter the SSID name “bridgeinf” 2. Select WPA-PSK as the security policy 3. Enter the pre-share key as “bridgeinfkey” 4. Click on “Apply” to add AirLive WHA-5500CPE User’s Manual...
-
Page 109: Device A Bandwidth Management
Set the uplink as 512kbps, downlink as 2048mbps Step 1 Select the “Bandwidth Control” from the “Operation Mode->Setup” menu Step 2 Once you have entered the Bandwidth Control menu, please follow the steps below Enable Bandwidth Control Select “Per-User Bandwidth Control. AirLive WHA-5500CPE User’s Manual... - Page 110 IP address of Ethernet side to have a larger IP scope so it will not be limited by the IP segment policy. In this example, please set the devices on the Ethernet side to have subnet mask of 255.255.255.0. AirLive WHA-5500CPE User’s Manual...
-
Page 111: Device B: Bridge Infrastructure Mode
Use “Site Survey” function to associate and connect with the Device A. Set “Total Bandwidth Control” to limit the bandwidth to 10Mbps both upstream and downstream 7.3.1 Device B Wireless Settings Step 1 Select “Bridge Infrastructure” mode and Click on “change mode” button AirLive WHA-5500CPE User’s Manual... - Page 112 Step 3 Click on “Site Survey” in wireless settings page and the following screen will appear. Select “Bridgeinf”, then press “ASSOCIATE” button to connect. Step 4 The WHA-5500CPE will prompt you to enter security policy information. Select WPA2-PSK and enter “bridgeinfkey” for Pre-Shared Key.
-
Page 113: Device B Total Bandwidth Control
7.3.2 Device B Total Bandwidth Control Step 1 Select “Bandwidth Control” from the wireless setting page. Step 2 Enable Bandwidth Control, then select Total Bandwidth Control. Enter 10000Kbps (10Mbps) for both downlink and uplink bandwidth. Click on Apply to finish. AirLive WHA-5500CPE User’s Manual... -
Page 114: Device C: Client Infrastructure Mode
Encryption: WPA-PSK2 Distance: 2000m Device C: WHA-5500CPE in Client Infrastructure Mode Set device IP to 192.168.1.100 with subnet mask of 255.255.255.248 Connect to the Access Point using Client Infrastructure Multiple User mode. Use Site Survey to connect and associate with the AP. -
Page 115: Device C Wireless Settings
Step 1 Go to “Operation Mode” menu. Select “Client Infrastructure”, and then click on “Change Mode” button. Step 2 Press “Setup” to enter the wireless settings page. Enter the distance information and click on “APPLY” button. AirLive WHA-5500CPE User’s Manual... - Page 116 Press “Site Survey” button, the following page should appear. Select “airliveclient” and press “Associate” button to connect Step 4 The WHA-5500CPE will prompt you to enter security policy information. Select WPA-PSK and enter “airliveclientkey” for Pre-Shared Key. Step 5 Click on “Apply”. After a few seconds, the following screen will appear to show successful connection.
-
Page 117: Application Example 2: Bridge Network
Bring Long Distance Walkie-Talkie System There are hi-powered offering that can work over distance of 5km or more. Communication is absolutely necessary on both sides during installation. You need a clear Line of sight AirLive WHA-5500CPE User’s Manual... - Page 118 Super-A with Dynamic Turbo: Dynamic Turbo mode will be turn on only when • adjacent channel is not used. It is also know as intelligent turbo mode. This mode might not be allowed in countries that prohibit channel binding (i.e. some EU countries). AirLive WHA-5500CPE User’s Manual...
-
Page 119: Wds Bridge Vs. Bridge Infrastructure
-105dB. However, when this mode is used, the performance may be reduced greatly. 8.2 WDS Bridge vs. Bridge Infrastructure When you want to build a bridge connection, there are 2 choices with WHA-5500CPE: WDS Bridge (Pure MAC): WDS Bridge mode can make Point-to-Point and Multi-Point connections. - Page 120 When you making point-to-point connection. For example, when you build wireless bridge network between office and warehouse. When you require fast performance When you require multiple star topologies. Bridge Infrastructure When you are connection both Bridge network and wireless client to the remote Access Point AirLive WHA-5500CPE User’s Manual...
-
Page 121: Wds Bridge Network Example
Adding the first WDS Link to WDS Bridge 3 Name: WDS3 SSID: airlive1-3 MAC address: you should enter the MAC address of WDS Bridge 3: 00-4f-79-90-00-23 Select Security Policy: Select “WEP” encryption. The WHA-5500CPE will ask AirLive WHA-5500CPE User’s Manual... - Page 122 MAC address: please enter the MAC address of WDS Bridge2: 00-4f-79-90-00-14 Select Security Policy: Select “WEP” encryption. The WHA-5500CPE will ask you to select which key to use. The Link between Bridge 1 and 3 is using Key2. Click on “Add” to add the WDS Link.
- Page 123 The following table will be displayed to show the added WDS links: Setup the PING watchdog. Ping watchdog will reboot or reconnect the WHA-5500CPE when the remote device does not respond to PING command. It helps maintain the WDS Link. Please setup the PING watchdog according to graphic below: AirLive WHA-5500CPE User’s Manual...
- Page 124 MAC address: you should enter the MAC address of WDS Bridge 1: 00-4f-79-90-00-0b Select Security Policy: Select “WEP” encryption. The WHA-5500CPE will ask you to select which key to use. You can select same key or different key for different WDS link (however, both side of the same link must use the same key).
- Page 125 MAC address: you should enter the MAC address of WDS Bridge 1: 00-4f-79-90-00-0b Select Security Policy: Select “WEP” encryption. The WHA-5500CPE will ask you to select which key to use. You can select same key or different key for different WDS link (however, both side of the same link must use the same key).
- Page 126 8. Application Example2: Bridge Network Setup the PING watchdog. Please setup the PING watchdog according to graphic below: After the above settings, the 3 WDS bridges should connect properly. Be sure to set the Distance parameter for long distance connection. AirLive WHA-5500CPE User’s Manual...
-
Page 127: Application Example 3: Router And Repeater
9.1 Application Environment In the following application, the network is consisted of an Outdoor AP in the center, an WHA-5500CPE in WISP Router mode on the left, and a WHA-5500CPE in Repeater mode on the right. 192.168.1.1 192.168.1.254... -
Page 128: Wha-5500Cpe In Wisp Router Mode
9. Application Example3: Routers and Repeater 9.2 WHA-5500CPE in WISP Router Mode The following is the configuration procedure for the WHA-5500CPE in WISP Router Mode: Change the WHA-5500CPE to WISP Router Mode Change the LAN IP subnet to 192.168.2.X Change the WAN port IP... - Page 129 “192.168.2.1”. Changing this IP address will also change the DHCP IP range to 192.168.2.x subnet. Note: Please make sure your PC’s IP address is also changed to 192.168.2.x subnet in order to configure the WHA-5500CPE. Step 3 Go to “Operation Mode -> Setup” to enter the wireless settings. Select “Outdoor AP”...
-
Page 130: Wisp Router: Wan Port And Virtual Server
1. Change WAN port’s IP address to 192.168.1.100 2. open a virtual server port to the FTP server at 192.168.2.100. Step 1 Go to “Operation Mode” menu, click on “Setup” button. On the wireless settings page, selecct “WAN port” button. AirLive WHA-5500CPE User’s Manual... - Page 131 9. Application Example3: Routers and Repeater Step 2 On the WAN port setting pave, Enter the Static IP information as bellowed: Step 3 Go to “Operation Mode” menu, click on “Setup” button. On the wireless settings page, choose “Virtual Server” button. AirLive WHA-5500CPE User’s Manual...
- Page 132 Step 4 Select “FTP” for Service Name. Enter 192.168.2.100 for the FTP server’s IP address. Then click on “Add” to finish Step 5 Once the virtual server is added, it will be displayed in the boxed area. AirLive WHA-5500CPE User’s Manual...
-
Page 133: Wha-5500Cpe In Repeater Mode
9. Application Example3: Routers and Repeater 9.3 WHA-5500CPE in Repeater Mode The following is the configuration procedure for the WHA-5500CPE in Repeater: Change the WHA-5500CPE to Repeater Mode Use “Site Survey” function to find remote AP with SSID “OutdoorAP”, then establish connection The local wireless network’s SSID is airlive. - Page 134 Click on Site Survey button, the following screen will appear. Choose “OutdoorAP”, and then click on “Associate” button to connect. Step 4 WHA-5500CPE will prompt you to enter the security policy. Select “WPA-PSK” and enter “outdoorapkey” for the Pre-Shared Key. AirLive WHA-5500CPE User’s Manual...
- Page 135 9. Application Example3: Routers and Repeater Step 5 Click on “Apply”. After a few seconds, the following screen will appear to show successful connection. Now you should have established successful WISP Router and Repeater connections. AirLive WHA-5500CPE User’s Manual...
-
Page 136: Emergency Firmware Recovery
AP in case of a firmware crashed. When you can’t access the WHA-5500CPE, please first try to repower the CPE or restore the settings to default. You should find the CPE at 192.168.1.1. If it still can not solve the problem, you can try to recover the CPE using the method described in this chapter. - Page 137 To check if the file is available in the tftpd32 folder, please click in tftpd32 main page “Show Dir”. Fig. “Show Dir” to check available files in tftp server folder AirLive WHA-5500CPE User’s Manual...
- Page 138 10. Emergency Firmware Recovery Power on the WHA-5500CPE again. If firmware crashed, the device will scan the 192.168.1.254 for TFTP server and read the tftp upload file. Wait for about 20 seconds, a pop-up window shows the firmware repair progress screen.(Shown as Fig.
-
Page 139: Frequent Asked Questions
11. Frequent Asked Questions Frequent Asked Questions In this chapter, we will address some frequent asked questions about WHA-5500CPE Question: I forgot my password or the IP address of WHA-5500CPE. Answer: Please restore your settings to default by press the reset button for more than 5 seconds. - Page 140 Type “WHA-5500CPE” at the support search. ==================================================================== Question: When I plug in the POE cable and power adapter, the WHA-5500CPE’s power LED is not on? Answer: Please make sure you have connected the PoE cable to the correct port on the DC injector.
- Page 141 PC, or WISP router. MAC address: When you want to limit the bandwidth of a remote AP/CPE in Client mode. For example, another WHA-5500CPE in client mode IP Segment:: When you want to limit the bandwidth of an entire IP range.
-
Page 142: Specifications
12. Specifications Specifications The specification of WHA-5500CPE is subject to change without notice. Please use the information with caution. 12.1 Hardware Features 12.1.1 General Hardware Feature Atheros AR-2313 + AR-5112 chipset 802.11a/Super A/Turbo-A mode support (Atheros Proprietary) 4MB Flash, 32MB SDRAM... -
Page 143: Radio Specifications
36 Mbps @ 19 dBm 6, 9, 12, 18, 24 Mbps @ 20 dBm 12.2.4 Receiver Sensitivity 54Mbps@-71 dBm 12Mbps@-88 dBm 6Mbps@-90 dBm 12.2.5 Supported WLAN Mode 11a mode SuperA without Turbo SuperA with Dynamic Turbo SuperA with Static Turbo AirLive WHA-5500CPE User’s Manual... -
Page 144: Software Feature
Site Survey with RSSI Signal Survey Total Bandwidth and Per-User Bandwidth Management Noise Immunity Multiple SSID and Tag VLAN QoS (802.11e WMM) Wi-Fi, WPA compatible interoperability WPA with PSK/TKIP/AES support ,WPA2 support Privacy Separator support Support adjustable output power AirLive WHA-5500CPE User’s Manual... - Page 145 12. Specifications 152-bit WEP support (Atheros Proprietary) ACK Timeout Adjustment Bootloader Protection and Emergency Firmware Upload Code Radius Supported Firmware upgrade and configuration backup via Web AirLive WHA-5500CPE User’s Manual...
-
Page 146: Wireless Network Glossary
Spanning Tree Protocol. It is an algorithm to prevent network from forming. The STP protocol allows net work to provide a redundant link in the event of a link failure. It is advise to turn on this option for multi-link bridge network. AirLive WHA-5500CPE User’s Manual... - Page 147 When a supplicants request a service, the authenticator will pass the request and wait for the authentication server to grant access and register accounting. The 802.1x is the most widely used method of authentication by WISP. AirLive WHA-5500CPE User’s Manual...
- Page 148 This is especially true for 802.11a and 802.11g networks. Setting the correct ACK timeout value need to consider 3 factors: distance, AP response time, and interference. The WHA-5500CPE provide ACK adjustment capability in form of either distance or direct input. When you enter the distance parameter, the WHA-5500CPE will automatically calculate the correct ACK timeout value.
- Page 149 Wireless (usually an AP with built-in Antenna) that receive wireless broadband access from the WISP. The opposite of CPE is CO. Clear To Send. A signal sent by a device to indicate that it is ready to receive data. DDNS AirLive WHA-5500CPE User’s Manual...
- Page 150 Many DoS attacks, such as the Ping of Death and Teardrop attacks, exploit limitations in the TCP/IP protocols. Encryption Encoding data to prevent it from being read by unauthorized people. The common wireless encryption schemes are WEP, WPA, and WPA2. AirLive WHA-5500CPE User’s Manual...
- Page 151 In the global Internet network, the gateways are core routers that connect networks in different IP subnet together. In a LAN environment with an IP sharing router, the gateway is the router. In an office environment, gateway typically is a multi-function device that AirLive WHA-5500CPE User’s Manual...
- Page 152 Transport mode encrypts only the data of each packet, but leaves the header untouched. The more secure Tunnel mode encrypts both the header and the payload. On the receiving side, an IPSec-compliant device decrypts each packet. AirLive WHA-5500CPE User’s Manual...
- Page 153 The IP that a router gets from the ISP side is called Real IP, the IP assigned to PC under the NAT environment is called Private IP. Node A network connection end point, typically a computer. AirLive WHA-5500CPE User’s Manual...
- Page 154 Windows PPTP client, the remote VPN server must support MPPE (Microsoft Point-To-Point Encryption Protocol) encryption. PPTP is also used by some ISP for user authentication, particularly when pairing with legacy Alcatel / Thomson AirLive WHA-5500CPE User’s Manual...
- Page 155 RJ-11 telephone connectors, RJ-45 connectors can have up to eight wires, whereas telephone connectors have only four. Router An IP sharing router is a device that allows multiple PCs to share one single broadband AirLive WHA-5500CPE User’s Manual...
- Page 156 The browser then sends a randomly generated secret key back to the server in order to have a secret key exchange for that session. SSL VPN is also known as Web VPN. The HTTPS interface use SSL for data encryption. AirLive WHA-5500CPE User’s Manual...
- Page 157 Transmit Output Power. The TX output power means the transmission output power of the radio. Normally, the TX output power level limit for 2.4GHz 11g/b is 20dBm at the antenna end. The output power limit for 5GHz 802.11a is 30dBm at the antenna end.. AirLive WHA-5500CPE User’s Manual...
- Page 158 A WAN port on the network device means the port (or wireless connection) that is connected to the Internet side of the network topology. Wired Equivalent Privacy. A wireless encryption protocol. WEP is available in 40-bit (64-bit), AirLive WHA-5500CPE User’s Manual...
- Page 159 Wi-Fi Multimedia (WMM) is a standard to prioritize traffic for multimedia applications. The WMM prioritize traffic\ on Voice-over-IP (VoIP), audio, video, and streaming media as well as traditional IP data over the AP. Wireless Management System. An utility program to manage multiple wireless AP/Bridges. AirLive WHA-5500CPE User’s Manual...
- Page 160 The WPA-PSK utilizes pre-share key for encryption/authentication. WPA2 Wi-Fi Protected Access 2. WPA2 is also known as 802.11i. It improves on the WPA security with CCMP and AES encryption. The WPA2 is backward compatible with WPA. WPA2-PSK utilizes pre-share key for encryption/authentication. AirLive WHA-5500CPE User’s Manual...
Need help?
Do you have a question about the WHA-5500CPE and is the answer not in the manual?
Questions and answers