Air Live WL-5450AP User Manual
Hide thumbs
Also See for WL-5450AP:
- Quick setup manual (79 pages) ,
- Quick setup manual (43 pages) ,
- Manual (4 pages)
Table of Contents
Advertisement
Advertisement
Table of Contents

Related Manuals for Air Live WL-5450AP


Summary of Contents for Air Live WL-5450AP
- Page 1 WL-5450AP & WL-5460AP Wireless Access Point User’s Guide...
- Page 2 FCC Certifications This equipment has been tested and found to comply with the limits for a Class B digital device, pursuant to Part 15 of the FCC Rules. These limits are designed to provide reasonable protection against harmful interference in a residential installation. This equipment generates uses and can radiate radio frequency energy and, if not installed and used in accordance with the instructions, may cause harmful interference to radio communications.
-
Page 3: Table Of Contents
Introduction................................4 ...................................4 EATURES ................................5 PPLICATION ..........................6 ARTS AMES AND UNCTIONS ..........................8 ACTORY EFAULT ETTINGS WL-5450AP & WL-5460AP..................8 Hardware Connection............................9 Check the LEDs:....................9 About the Operation Modes .........................10 .............................10 CCESS OINT WDS R ............................11 EPEATER ) ........................12 LIENT NFRASTRUCTURE ) ............................13... -
Page 4: Introduction
INTRODUCTION AirLive WL-5450AP/WL-5460AP is an IEEE802.11b/g compliant 11 Mbps & 54 Mbps Ethernet Wireless Access Point. The Wireless Access Point is equipped with two 10/100 M Auto-sensing Ethernet ports for connecting to LAN and also for cascading to next Wireless Access Point. -
Page 5: Application
Application Example 1 Example 2... -
Page 6: Parts Names And Functions
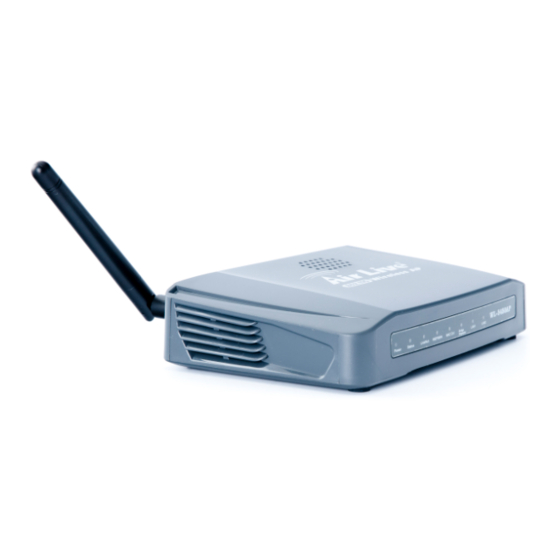
Parts Names and Functions 1. Front Panel: (LED Indicators) Status Indicator Color Solid Flashing Power Green Turns solid green when power is N/A. applied to this device. Status Turns solid red when the device is booting, after boot successfully, the light turn off. Link/Act. - Page 7 2. Rear Panel: Connection Ports Port/button Functions 12V DC Connects the power adapter plug LAN1 Connects to Ethernet LAN2 Connects to Ethernet (Factory) Press over 3 seconds to reboot this device. RESET Press for over 10 seconds to restore factory settings. Performing the Factory Reset will erase all previously entered device settings.
-
Page 8: Factory Default Settings
Factory Default Settings Setting Wireless Access Point Device Name WL-5460AP airlive SSID Default value: Channel Default value: Disabled IP Address 192.168.100. 252... -
Page 9: Hardware Connection
HARDWARE CONNECTION Note: Before you starting hardware connection, you are advised to find an appropriate location to place the Access Point. Usually, the best place for the Access Point is at the center of your wireless network, with line of straight to all your wireless stations. Also, remember to adjust the antenna; usually the higher the antenna is placed, the better will be the performance. -
Page 10: About The Operation Modes
ABOUT THE OPERATION MODES This device provides four operational applications with Access Point, Bridge, Client (Ad-hoc) and Client (Infrastructure) modes, which are mutually exclusive. This device is shipped with configuration that is functional right out of the box. If you want to change the settings in order to perform more advanced configuration or even change the mode of operation, you can use the web-based utility provided by the manufacturer as described in the following sections. -
Page 11: Wds Repeater Mode
WDS Repeater Mode Refer to the illustration below. While acting as Bridges, AP1 (with Station 1 being associated to) and AP2 (with Station 2 being associated) can communicate with each other through wireless interface (with WDS). Thus Station 1 can communicate with Station 2 and both Station 1 and Station 2 are able to access the Internet if only AP1 or AP2 has the Internet connection. -
Page 12: Client Mode (Infrastructure)
Client Mode (Infrastructure) If set to Client (Infrastructure) mode, this device can work like a wireless station when it’s connected to a computer so that the computer can send packets from wired end to wireless interface. Refer to the illustration below. This station (AP1 plus the connected computer 1) can associate to another Access Point (AP2), and then can have the Internet access if the other Access Point (AP2) has the Internet connection. -
Page 13: Client Mode (Ad-Hoc)
Client Mode (Ad-hoc) If set to the Client (Ad-hoc) mode, this device can work like a wireless station when it is connected to a computer so that the computer can send packets from wired end to wireless interface. You can share files and printers between wireless stations (PC and laptop with wireless network adapter installed). -
Page 14: Wds Bridge Mode
WDS Bridge Mode The WDS (Wireless Distributed System) function let this access point acts as a wireless LAN access point and repeater at the same time. Users can use this feature to build up a large wireless network in a large space like airports, hotels and schools …etc. -
Page 15: Configuration
CONFIGURATION Login Start your computer. Connect an Ethernet cable between your computer and the Wireless Access Point. Make sure your wired station is set to the same subnet as the Wireless Access Point, i.e. 192.168.100.252 Start your WEB browser. In the Address box, enter the following: HTTP://192.168.100.252 The configuration menu is divided into four categories: Status, Wireless, TCP/IP, and Other settings. -
Page 16: Status
Status In this screen, you can see the current settings and status of this Access Point. You can change settings by selecting specific tab described in below. System System Uptime The time period since the device was up. Firmware Version The current version of the firmware installed in this device. Wireless Configuration Wireless Mode There are four modes supported, Access Point, Client (Ad-hoc and... - Page 17 unique SSID. An SSID is also referred to as a network name because essentially it is a name that identifies a wireless network. Channel Number The number of channels supported depends on the region of this Access Point. All stations communicating with the Access Point must use the same channel.
-
Page 18: System Log
System Log This page display log events with time when events happened, log events’ types, log sources and the description for events themselves. System manager can use the system log to trace when problems occur. Statistics The Statistics table shows the packets sent/received over wireless and ethernet LAN respectively. -
Page 19: Wireless
Wireless Basic Settings This page includes all primary and major parameters. Any parameter change will cause the device to reboot for the new settings to take effect. Disable Wireless LAN Check the box to disable the Wireless LAN Interface, by so doing, Interface you won’t be able to make wireless connection with this Access Point in the network you are located. - Page 20 SSID The SSID differentiates one WLAN from another; therefore, all access points and all devices attempting to connect to a specific WLAN must use the same SSID. It is case-sensitive and must not exceed 32 characters. A device will not be permitted to join the BSS unless it can provide the unique SSID.
-
Page 21: Advanced Settings
Advanced Settings It is not recommended that settings in this page to be changed unless advanced users want to change to meet their wireless environment for optimal performance Authentication Type To provide a certain level of security, the IEEE 802.11 standard has defined two types of authentication methods, Open System and Shared Key. - Page 22 mode. Fragment Threshold Fragmentation mechanism is used for improving the efficiency when high traffic flows along in the wireless network. If your 802.11g Wireless LAN PC Card often transmit large files in wireless network, you can enter new Fragment Threshold value to split the packet.
- Page 23 Before a station enters power save mode, the station needs the beacon interval to know when to wake up to receive the beacon (and learn whether there are buffered frames at the access point). Data Rate By default, the unit adaptively selects the highest possible rate for transmission.
-
Page 24: Security
Security Here you can configure the security of your wireless network. Selecting different method will enable you to have different level of security. Please note that by using any encryption, by which data packet is encrypted before transmission to prevent data packets from being eavesdropped by unrelated people, there may be a significant degradation of the data throughput on the wireless link. - Page 25 Click the Set WEP Keys will prompt you a window to set 64bit or Set WEP key 128bit Encryption. Select HEX if you are using hexadecimal numbers (0-9, or A-F). Select ASCII if you are using ASCII characters (case-sensitive). Ten hexadecimal digits or five ASCII characters are needed if 64-bit WEP is used;...
- Page 26 change automatically. The default is 86400 seconds. Enable The two most important features beyond WPA to become standardized Pre-Authentication through 802.11i/WPA2 are: pre-authentication, which enables secure fast roaming without noticeable signal latency. Preauthentication provides a way to establish a PMK security association before a client associates.
-
Page 27: Access Control
Access Control When Enable Wireless Access Control is checked, only those clients whose wireless MAC addresses listed in the access control list can access this Access Point. If the list contains no entries with this function being enabled, then no clients will be able to access this Access Point. Wireless Access Select the Access Control Mode from the pull-down menu. -
Page 28: Site Survey
Site Survey Site survey displays all the active Access Points and IBSS in the neighborhood. When you are in the client mode, you can select one AP to associate. Press Refresh to get the latest information. WDS Setting To enable WDS function will let this AP enter “Bridge Mode”. Two APs in bridge modes can communicate with each other through wireless interface. - Page 29 Add WDS AP MAC Address: Enter the MAC Address for the Access Point to establish Comment: You may enter up to 20 characters as a remark to the previous MAC Address. Apply Changes Press to save the new settings on the screen. Reset Press to discard the data you have entered since last time you press Apply Change.
-
Page 30: Tcp/Ip
TCP/IP Basic In this page, you can change the TCP/IP settings of this Access Point, select to enable/disable the DHCP Client, 802.1d Spanning Tree, and Clone MAC Address. IP Address This field can be modified only when DHCP Client is disabled. If your system manager assigned you static IP settings, then you will have to enter the information provided. - Page 31 DNS Server Enter the Domain Name Service IP address. 802.1d To enable 802.1d Spanning Tree will prevent the network from Spanning Tree infinite loops. Infinite loop will happen in the network when WDS is enabled and there are multiple active paths between stations. Clone You can specify the MAC address of your Access Point to replace the Address...
-
Page 32: Other
Other Upgrade Firmware 1. Download the latest firmware from your distributor and save the file on the hard drive. 2. Start the browser, open the configuration page, click on Other, and click Upgrade Firmware to enter the Upgrade Firmware window. Enter the new firmware’s path and file name (i.e. - Page 33 Save Settings to File: Click SAVE.. to save the current configuration to file. When prompted the upper left screen, select “Save this file to disk”, and the upper right screen will prompt you a dialog box to enter the file name and the file location. Load Settings From File: Click Browse…...
-
Page 34: Password
Password For secure reason, it is recommended that you set the account to access the web server of this Access Point. Leaving the user name and password blank will disable the protection. The login screen prompts immediately once you finish setting the account and password. Remember your user name and password for you will be asked to enter them every time you access the web server of this Access Point.
Need help?
Do you have a question about the WL-5450AP and is the answer not in the manual?
Questions and answers