Table of Contents
Advertisement
The solar energy system described in this manual, when properly installed and maintained, meets
the minimum standards established by the SRCC. This certification does not imply endorsement
or warranty of this product by the SRCC.
NOTICE: HTP reserves the right to make product changes or updates without notice and will not be held
liable for typographical errors in literature.
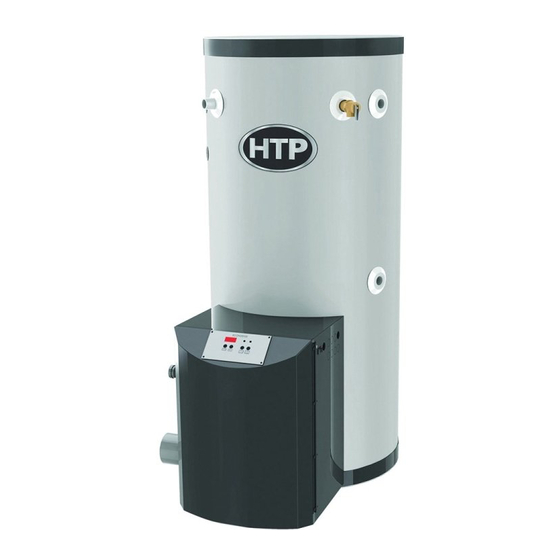
Phoenix Solar
Water Heater
Phoenix Water Heater Models
PH130-80S / 130-119S
PH199-80S / 199-119S
INSTALLATION
OPERATION
MAINTENANCE
Advertisement
Table of Contents

Related Manuals for HTP PH130-80S


Summary of Contents for HTP PH130-80S
- Page 1 SRCC. This certification does not imply endorsement or warranty of this product by the SRCC. NOTICE: HTP reserves the right to make product changes or updates without notice and will not be held liable for typographical errors in literature.
- Page 2 The following defined terms are used throughout this manual to bring attention to the presence of hazards of various risk levels, or to important product information. DANGER indicates an imminently hazardous situation which, if not avoided, will result in death or serious injury.
-
Page 3: For The Installer
FOR THE INSTALLER This manual must only be used by a qualified heating installer/service technician. Read all instructions in this manual before installing. Perform steps in the order given. Failure to comply could result in severe personal injury, death or substantial property damage. INSTALLATION OR SERVICE OF THIS SOLAR WATER TANK IS REQUIRED TO BE PERFORMED BY LICENSED PROFESSIONALS WHERE SOLAR, PLUMBING AND ELECTRICAL WORK IS REQUIRED. -
Page 4: Table Of Contents
TABLE OF CONTENTS PART 1: GENERAL SAFETY INFORMATION .................... 5 A. LOCAL INSTALLATION REGULATION ....................5 B. WATER TEMPERATURE ADJUSTMENT .................... 5 C. FREEZE PROTECTION/WINTERIZING ....................5 PART 2: GENERAL INFORMATION ......................6 A. PREFACE ............................. 6 B. INTRODUCTION ........................... 6 C. -
Page 5: Part 1: General Safety Information
HTP CUSTOMER INSTALLATION RECORD FORM ................ 31 PART 1: GENERAL SAFETY INFORMATION INSTALLER – Read all instructions in this manual before installing. Perform steps in the order given. USER – This manual is for use only by a qualified installer/service technician. Refer to user’s information manual for your reference. -
Page 6: Part 2: General Information
PART 2: GENERAL INFORMATION A. PREFACE By using the sun’s energy to heat water, solar hot water heating systems help reduce the nation’s dependence on polluting fossil fuels. This reliable, efficient solar water heater meets the certification requirements of SRCC-OG-300. B. -
Page 7: Inspection Of The Solar Water Heater
Figure 1 - Clearances F. INSPECTION OF THE SOLAR WATER HEATER When receiving your solar water heater, inspect it for possible damage. Check markings on the rating plate to be certain the power supply corresponds to that for which the water heater is equipped. G. -
Page 8: General Solar Panel Orientation
Depending on the controller model, the differential controller uses 10k ohm thermistors or 1k RTDs to monitor the temperature difference between the collector and the solar water heater. The controller turns on when the collector is 12-20 F above tank temperature and turns off when the differential drops to 4 H. -
Page 9: Collector Loop Pipe Insulation
Figure 3 - This detail is an example of a typical solar roof mount application. All equipment should be installed in accordance with all local codes and best practices as identified with National Roofing Contractors Association (NRCA) or other qualified body. J. -
Page 10: Collector Sensor Placement
The installation of all horizontal and vertical piping may not reduce the performance or rating of any structural member or fire rated assembly. Adhere to all applicable local codes and ordinances. L. COLLECTOR SENSOR PLACEMENT The collector sensor must be located on the hot water return line as close to the collector as possible. Some collectors have insertion areas to measure temperatures more accurately at the collector manifold. -
Page 11: Potable Water Piping
Solar Heat Exchanger to Solar Panel • Anti-freeze (if required) is added and rated as non-toxic with copy of MSDS sheet for homeowner • Solar heat exchanger completely purged of air • Expansion tank and pressure temperature gauge operating properly •... -
Page 12: Solar Heat Exchanger Piping
C. SOLAR HEAT EXCHANGER PIPING Figure 5 - This drawing is meant to demonstrate system piping concept only. Set up the primary balance of the system components following the piping detail in Figure 5. Run ½” type M or larger copper pipes, or flex line sets, to and from the collector following the direction of supports, penetrations, and other relative items. -
Page 13: Tank Sensor Placement
When making a connection to the heat exchanger, use Teflon Tape and joint compound to prevent leaks. The connections to the heat exchanger are 1” NPT. Do not apply heat directly to the heat exchanger thread connection when sweating fittings. Line pressure and temperature gauge shall be installed in the collector supply and return lines to allow for a simple diagnostic check of proper system operation. - Page 14 Pressure Relief Valve (for Solar System) Releases pressure in the solar loop when it exceeds 75psi. If the valve opens and releases fluids, contact your installation contractor immediately. System Fill Valve (Valve #8) Fills the system with heat transfer fluid. Also eliminates air from the system. Expansion Tank Pre-charged with air to allow for the expansion and contraction of heat transfer fluid.
- Page 15 downward to allow complete drainage. The end of the discharge piping should not be threaded or concealed and must be protected from freezing. No valve of any type, restriction or reducer coupling should be installed in the discharge line. Mixing Valve (Rated ASSE 1017) Automatically blends the hot and cold water feed lines to control discharge to an acceptable and safe temperature.
-
Page 16: Phoenix Solar Piping With Air Handler
F. PHOENIX SOLAR PIPING WITH AIR HANDLER Figure 6 - This drawing is meant to demonstrate system piping concept only. -
Page 17: Tank Control
G. TANK CONTROL Install the solar sensor onto the threaded stud provided in the front of the water heater (sensor not included). Additional equipment may be needed in order to wire the control to the existing system. Controls also have the ability to monitor and display solar collector temperature and upper and lower tank temperatures. -
Page 18: I.charging The System
I.CHARGING THE SYSTEM Closed Loop Glycol Solar Tank Fill the solar tank with water. Do this by opening the cold water isolation ball valve to the solar tank. Inspect all fittings for leaks. The solar collector loop should be pressure tested with air (25 lbs.) before you pressurize the solar collector loop with glycol. -
Page 19: Part 4: Maintenance
pump is running and the system is fully purged, set the control to the desired settings. It is recommended that the storage tank high limit set point is not set any lower than 160 F. A lower set point could lower the performance of the solar water heater and cause overheating of the collector system. -
Page 20: Estimated Life Of Components
C. ESTIMATED LIFE OF COMPONENTS Proper care and maintenance will determine the life expectancy of the individual components of the solar system. Refer to manufacturer’s warranty information to determine coverage of individual components. To obtain warranty service, call your local service or installing contractor. Following installation of the T&P Relief Valve, the valve lever MUST be operated AT LEAST ONCE A YEAR by the water heater owner to ensure that waterways are clear. - Page 21 Figure 9 – LP-204-L...
- Page 22 Figure 10...
- Page 23 Figure 11...
-
Page 24: Part 5: Troubleshooting
PART 5: TROUBLESHOOTING NATURE OF TROUBLE POSSIBLE CAUSE SERVICE No hot water 1. No power – blown fuse or a. **Replace or repair circuit breaker tripped b. **Provide adequate circuit or a. Shorted wiring reduce load b. Circuit overloaded c. **Rewire per diagram c. - Page 27 VISCOSITY: The HTF viscosity over the service temperature range is based on a specific gravity 15/15 (60/60 F) 1.053-1.063. DOWFROST inhibited glycol-based fluid has an effective operating temperature range of -50 F to 250 F. At temperatures below -50 F, increased viscosity (>1,000 centipoise) can make use of DOWFROST impractical unless larger pumps are installed.
- Page 28 FIRST AID: WASH OFF IN FLOWING WATER OR SHOWER INGESTION: Single dose oral toxicity is considered to be extremely low. No hazards anticipated from swallowing small amounts incidental to normal handling operations. FIRST AID: NONE REQUIRED INHALATION: At room temperature, vapors are minimal due to physical properties. Mists may cause irritation of upper respiratory tract (nose and throat).
-
Page 30: Maintenance Notes
MAINTENANCE NOTES... - Page 31 Customer: Please only sign after the installer has reviewed the installation, safety, proper operation and maintenance of the system. In the case that the system has any problems, please call the installer. If you are unable to make contact, please contact your HTP Sales Representative. Distributor/Dealer: Please insert contact details.
Need help?
Do you have a question about the PH130-80S and is the answer not in the manual?
Questions and answers
Does the model HTP Versa Hydro PHE130-80S have sacrificial anode rod that needs to be replaced?