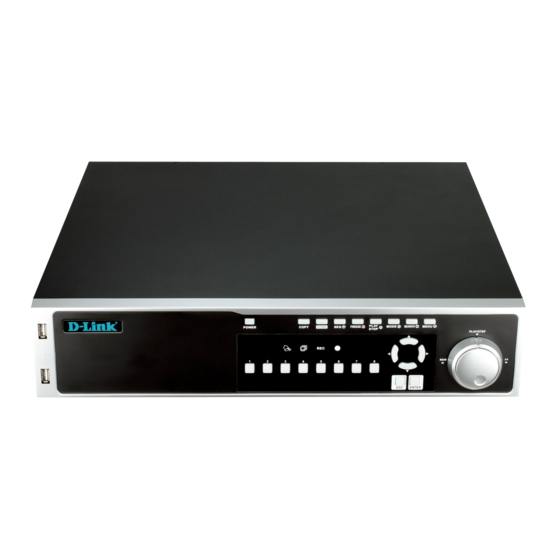
D-Link DNR-2060-08P User Manual
6 bay network video recorder
Hide thumbs
Also See for DNR-2060-08P:
- Quick installation manual (4 pages) ,
- Quick installation manual (4 pages)
Table of Contents
Advertisement
Quick Links
Advertisement
Table of Contents

Related Manuals for D-Link DNR-2060-08P


Summary of Contents for D-Link DNR-2060-08P
-
Page 1: User Manual
Version 1.0 | 04/25/2013 User Manual 6 Bay Network Video Recorder DNR-2060-08P... -
Page 2: Manual Revisions
Preface D-Link reserves the right to revise this publication and to make changes in the content hereof without obligation to notify any person or organization of such revisions or changes. Information in this document may become obsolete as our services and websites develop and change. -
Page 3: Table Of Contents
Pause, Playback and Single Step Forward .....24 Activated ................50 Search Recorded Video .............24 Status...................51 Search by Time ..............25 Copy Settings ..............51 Calendar Search ..............26 Record Menu ................52 Search and Playback with the Event List ....27 Record Schedule / Quality Setting ......53 D-Link DNR-2060-08P User Manual... - Page 4 Appendix A: Recommended HDDs ......96 Web UI Setup ................80 DI/DO Specifications ..............97 Change Internet Settings ..........80 Technical Specifications ............98 Install Web UI Browser Plugins ........82 Log in/Log off ...............83 Firmware Upgrades ............84 Web UI Basic Operation ............84 Live Video ................84 D-Link DNR-2060-08P User Manual...
-
Page 5: Product Overview
If any of the above items are missing, please contact your reseller. Note: Using a power supply with a different voltage than the one included with your product will cause damage and void the warranty for this product. D-Link DNR-2060-08P User Manual... -
Page 6: Introduction
IP-based security systems. The DNR-2060-08P enables simultaneous recording and remote access to recorded video as well as live viewing. Controlling the DNR-2060-08P is exceptionally easy using conventional front panel controls, with an optional keypad and mouse, or remote control handset. -
Page 7: Features
The NVR supports high resolution megapixel recording for vivid video with high clarity. Integrated 8 Channel PoE Switch: The DNR-2060-08P can be easily setup for internet access. It supports real-time monitoring and playback from everywhere via IE browser. The recording store in your own HDD with high privacy, not in the cloud. -
Page 8: Hardware Overview
In the OSD menu or selection interface, press this button to make the selection or save settings. Enter Button In live full-screen viewing mode, press this button to view zoom; press it again to return to normal. D-Link DNR-2060-08P User Manual... -
Page 9: Front Panel Led Indicators
The Recording icon blinks while the NVR is recording. Alarm The Alarm icon lights up when an alarm is triggered. PLAY POWER COPY DOME FREEZE MODE SEARCH MENU STOP PLAY/STEP IR Receiver The infrared receiver receives signals from the remote control. ENTER Alarm Network D-Link DNR-2060-08P User Manual... -
Page 10: Rear Panel
Internet by using Internet Explorer. e-SATA Port Users can connect an e-SATA storage device via this port. USB 2.0 Port Allows users to connect an external USB device to the unit, such as a USB Drive or a USB mouse. D-Link DNR-2060-08P User Manual... -
Page 11: Hard Disk Drive Installation
Use a screwdriver to remove the screws from the sides and top of the NVR, then lift the cover. Step 2 Locate the two 3-bay hard drive racks inside. Select the rack you would like to install your hard drive into, then slide the hard drive into the rack bay. D-Link DNR-2060-08P User Manual... - Page 12 Attach the other end of the SATA cable to a free SATA socket on the motherboard of the NVR. Step 4 Secure the hard drive in place with screws using the guide holes along the center of the sides. D-Link DNR-2060-08P User Manual...
-
Page 13: Connecting A Power Over Ethernet Ip Camera
Make sure the NVR is connected to a network via a router or a switch, or directly connected to a PC. Plug in cameras using the PoE ports on the rear panel. Step 2 The NVR will boot up and start to record automatically. Suggested Setup D-Link DNR-2060-08P User Manual... -
Page 14: Remote Control Operation
Section 2: System Setup Remote Control Operation A remote control is provided for the NVR. The operational function keys (on the left) and dome camera control keys (on the right) on the remote control are listed as below figure: D-Link DNR-2060-08P User Manual... -
Page 15: Usb Mouse Operation
Align Here from the pull-down menu. Note: Users can access the OSD menu with an authorized account and go to Monitor , Mouse Sensitivity to setup preferred sensitivity level of USB mouse. D-Link DNR-2060-08P User Manual... -
Page 16: Usb Keyboard Operation
Section 2: System Setup USB Keyboard Operation The following diagram shows the keys used to access and control the NVR from an attached USB keyboard. D-Link DNR-2060-08P User Manual... -
Page 17: Jog/Shuttle Control
Inside the shuttle ring is the jog disk. Once the video is paused, users can use the jog disk to playback video frame-by-frame. Clockwise rotation causes a one-step forward playback; and counterclockwise rotation causes a one-step backward playback. D-Link DNR-2060-08P User Manual... -
Page 18: Function Keys
In both Playback and Live mode, press SEARCH to enter the Search menu for searching and playing back recorded video by date / time, event, or text. MENU Press this key to enter the OSD setup menu. D-Link DNR-2060-08P User Manual... - Page 19 Please refer to Appendix F: Jog / Shuttle Control for further information. Note: If a USB mouse is present you can right click anywhere on screen to access a menu system replicating the features of the front panel function buttons. D-Link DNR-2060-08P User Manual...
-
Page 20: Basic Operation
Press a CHANNEL button to view the corresponding IP camera in full-screen mode. Press the MODE button to switch to the next available viewing modes. 1 x 1, Single Channel, Fullscreen View 2 x 2, Four Channel, Grid View 3 x 3 (9 -1), Eight Channel, Grid View D-Link DNR-2060-08P User Manual... - Page 21 If no user is logged in, the icon displayed will be a guest icon. When an account is logged in, its authority level number (1 to 8) will be shown. Move the cursor to any status bar icon and its description will be displayed. D-Link DNR-2060-08P User Manual...
-
Page 22: Digital Pan And Zoom
Note: The date and time information will not pause, the system clock will keep running. Press the FREEZE button again to resume Live monitoring in real time. D-Link DNR-2060-08P User Manual... -
Page 23: View Recorded Video
Press FREEZE to pause the video playback. When the recorded video is paused, press LEFT/ RIGHT to single step reverse/forward video playback respectively. Press FREEZE again to resume video playback. PLAY Press to start video playback or return to live mode. D-Link DNR-2060-08P User Manual... -
Page 24: Pause, Playback And Single Step Forward
In Live or Playback mode, press SEARCH to enter the Search menu. Note: Search By Text only functions when a POS machine is connected and text data is stored. D-Link DNR-2060-08P User Manual... -
Page 25: Search By Time
Note: The date/time information will be shown on the screen with a DST icon if the Daylight Saving Time function is enabled. S indicates summer time and W indicates winter time. D-Link DNR-2060-08P User Manual... -
Page 26: Calendar Search
The From and End buttons allow users to playback video from the beginning or end of the database. Note: Recorded events are displayed by colored time blocks. Select Begin Playback and press ENTER to start playing back selected video. D-Link DNR-2060-08P User Manual... -
Page 27: Search And Playback With The Event List
To exit the event list, press ESC. To playback video from the Event List: Press and hold UP/DOWN to select from the Event List. Press ENTER to play back the selected event recording. Press PLAY to return to Live mode. D-Link DNR-2060-08P User Manual... -
Page 28: Panorama Search
Press MODE a fourth time and the panorama search preview will be refreshed in 1 day intervals. Move the cursor to the preview frame and click on it to start playback the video from the selected frame. Press PLAY to return to Live mode. D-Link DNR-2060-08P User Manual... -
Page 29: Search By Text
Less Equal Than: Enter one number. Search for videos with data containing number(s) less than or equal to the specific number. Greater Equal Than: Enter one number. Search for videos with data containing number(s) greater than or equal to the specific number. Specific: Specify a number. Search for videos with data containing the specific number. D-Link DNR-2060-08P User Manual... -
Page 30: Dome Control
Live: Click on it to exit Dome Control mode and return to live full-screen viewing mode. Pan/Tilt Speed: Users can select preferred pan/tilt speed. D-Link DNR-2060-08P User Manual... - Page 31 Click on this button to automatically adjust focus of the dome camera. Note: The front panel keys can also perform the functions listed above. Please refer to "Front Panel Function Keys" on page 8 for further details of function keys. D-Link DNR-2060-08P User Manual...
-
Page 32: Set Preset Points
Click Preset on the dome control panel or press CH1 key to access the Set/Go Preset function. The numeric keyboard will be displayed. Input a desired preset number. Click on the Go Preset button to call the preset point. The selected dome camera will rotate to the preset position automatically. D-Link DNR-2060-08P User Manual... -
Page 33: Run Dome Camera Tour
Click Preset on the dome control panel or press CH1 key to access the Set/Go Preset function. The numeric keyboard will be displayed. Click on the Run Tour button to run the display of dome camera tour. Press any of the Direction keys to end the display of dome camera tour. D-Link DNR-2060-08P User Manual... -
Page 34: Quick Video Export Through Front Panel
Press ENTER to start the export of the event video to the connected device; or, press ESC to abort. If there is no exportable device connected to the NVR, then a warning message will be shown on the screen. D-Link DNR-2060-08P User Manual... -
Page 35: Advanced Operation
To enter the OSD menu system, press the MENU button and select an account to log in to and enter a corresponding password. The preset password for the administrator account admin is 1234. Note: It is strongly suggested to change the preset password to prevent unauthorized access to the unit. D-Link DNR-2060-08P User Manual... -
Page 36: User Management
Note: The Menu Access cannot be set to Disable. When the account does not have authority to access certain functions, an error message will be displayed on the screen. Load Default Setting Select Yes to restore the default settings. D-Link DNR-2060-08P User Manual... -
Page 37: System Date / Time Setting
Users can set the current date, time and other OSD parameters in Date/Time menu (under System setup menu). The login account should have authority to access the System setup menu. In OSD setup menu, select System and press ENTER, then select Date/Time to access the Date/Time menu. D-Link DNR-2060-08P User Manual... -
Page 38: Set Date/Time
Move to the date item you wish to change and press ENTER, the selected item will start blinking. Use UP/DOWN keys to change the setting. Time Display Mode User can set the time format to 12 HR or 24 HR. Use the UP/DOWN keys to change the format. D-Link DNR-2060-08P User Manual... -
Page 39: Daylight Saving Time
UP/DOWN to change the settings in the selected field. DST Bias This option enables you to offset the amount of time required for daylight saving time. The available options are in minutes. D-Link DNR-2060-08P User Manual... -
Page 40: Network Time Protocol Setup
After the time server is set, select Yes for Manually Time Sync to sync the time immediately. The time sync can also be updated periodically. Select On for Automatically Time Sync, and the time will be automatically synced once every hour. D-Link DNR-2060-08P User Manual... -
Page 41: Network Setup
Enter the username provided by your service provider. DDNS Password: Enter the password provided by your service provider. Submit/Update: Select yes to submit changes to the DDNS settings. EZDDNS: Enables users to register for the host name automatically. D-Link DNR-2060-08P User Manual... -
Page 42: Upnp Function
NVR in the same local area network. The advantage of this is that PCs can connect to the NVR via the remote control software by directly clicking on the icon representing the NVR in My Network Places folder. D-Link DNR-2060-08P User Manual... -
Page 43: Upnp Nat Traversal Function
PC. For each individual NVR, this setting would need to be done on an individual basis. Fortunately, if the NVR has UPnP NAT traversal function enabled, these settings can be made automatically. Select Yes in the UPnP setup menu to allow automatic UPnP NAT traversal. D-Link DNR-2060-08P User Manual... -
Page 44: Monitor Menu
Section 4: Advanced Configuration Monitor Menu The Monitor menu allows you to configure how the various display features appear. D-Link DNR-2060-08P User Manual... - Page 45 This setting will adjusts the speed which a connected USB mouse cursor will move across the screen. Hide Status Bar: Turn the Status Bar on or Off. Status Bar Size: Select the size of the Status Bar. D-Link DNR-2060-08P User Manual...
-
Page 46: Camera Menu
Section 4: Advanced Configuration Camera Menu This section details the options available for connecting and configuring IP cameras. D-Link DNR-2060-08P User Manual... - Page 47 LAN as the NVR. If the IP cameras are ONVIF compliant devices, Brand Name/Onvif will be shown under the Brand column. Hostname/IP Access this item to enter the hostname or IP address of the IP camera, for example 192.168.1.123. D-Link DNR-2060-08P User Manual...
-
Page 48: Connection Setup
Note: You will need to set Enable PnP to Off to access all the configuration options. Account/Password Use these two options to enter a valid account name and password of the connected IP camera. Management Port Use this option to set the default port of the IP camera. D-Link DNR-2060-08P User Manual... - Page 49 Yes next to Dual Streaming Recording. The remaining items are the same as in Main Stream Setup. Note: If the connected device is an IP DomeCamera, then select an appropriate IP Dome Protocol from the provided options and setup its Dome ID. D-Link DNR-2060-08P User Manual...
-
Page 50: Device Setup
Select Yes to activate the connection to the IP camera. To deactivate the connection, select No . Note: Once the connection to the IP camera is activated, menu items Device Search, Hostname/ IP,Connection Setup, and Copy Settings will be grayed out and cannot be accessed. D-Link DNR-2060-08P User Manual... -
Page 51: Status
IP cameras. Enter this menu and select one or more cameras to copy the settings to. Then select CONFIRM to apply the settings. Note: If an IP camera is already activated, it will be greyed out and cannot be selected. D-Link DNR-2060-08P User Manual... -
Page 52: Record Menu
Section 4: Advanced Configuration Record Menu The Record setup menu allows users to set the recording quality, recording schedules, and other recording parameters. In the Main menu, move the cursor to Record and press ENTER D-Link DNR-2060-08P User Manual... -
Page 53: Record Schedule / Quality Setting
Press ENTER to confirm the settings or ESC to cancel. If a weekend recording is required, select On to enable the Weekend Schedule in advance and then set the Weekend Start/End time. Press ESC to return to previous page. D-Link DNR-2060-08P User Manual... -
Page 54: Preset Record Configuration
Enter the OSD setup menu with an account with appropriate authority. In the OSD setup menu, select Record menu. Move the cursor to the item Preset Config, and select Event only. Refer to "Preset Record Configuration" on page 54, Section Preset Record Configuration for further information. D-Link DNR-2060-08P User Manual... -
Page 55: Data Lifetime Setup
When data lifetime mode is set to By Channel, this item will be accessible. Enter this menu and users can setup data lifetime of each channel independently. The value ranges from 1 to 365 days. Alternatively, select 0 to disable this function. D-Link DNR-2060-08P User Manual... -
Page 56: Pre-Alarm Recording
From the Record setup menu, move the cursor to Circular Recording and press ENTER, then select ON/OFF using the UP/DOWN keys. D-Link DNR-2060-08P User Manual... -
Page 57: Audio Recording
ENTER to select the item and UP/DOWN to adjust the value. Start To Purge After the videos to be deleted are selected, set this item to Yes to start the deletion or choose No to cancel. D-Link DNR-2060-08P User Manual... -
Page 58: Sequence Menu
This section describes sequence mode using the Main Monitor. The sequence functions can avoid manual backtracking and provides more flexibility while monitoring recordings. Automatic sequence functions can be used in any of the viewing modes. Select a viewing mode and press SEQ to toggle the automatic sequence. Press SEQ again to stop. D-Link DNR-2060-08P User Manual... - Page 59 Use this option to determine the order in which the main monitor will display the camera channels. The channel at the left of the top row is the first to be displayed. The channel on the right of the bottom row is the last. D-Link DNR-2060-08P User Manual...
-
Page 60: Event Menu
Section 4: Advanced Configuration Event Menu This section outlines the options of for event based recording, you can create up to 3 event sets with their own settings. D-Link DNR-2060-08P User Manual... - Page 61 Section 4: Advanced Configuration Internal Buzzer Use this option to toggle the NVR's internal Buzzer On or Off. Event Icon Use this option to toggle the Event Icon notification on the Status Bar On or Off. D-Link DNR-2060-08P User Manual...
- Page 62 Enter the IP address which will receive the event notification alert. Alert Port: Enter the Port at the IP address which will receive the event notification alert. Alive Interval: Use this option to determine how long a notification should remain active. D-Link DNR-2060-08P User Manual...
- Page 63 This option enables a user to specify parameters for event notifications in a granular fashion on an individual channel basis. Copy Event Settings This option to enables a user to copy the settings previously configured to another. D-Link DNR-2060-08P User Manual...
- Page 64 This feature enables you to configure automatic back up of recorded video to an FTP site. Event/Alarm Selection This option to enables a user to which type of events and alarms will be recorded to back up. D-Link DNR-2060-08P User Manual...
- Page 65 Section 4: Advanced Configuration E-mail Management This feature enables you to configure the parameters for automatic E-mail notification. SMTP Server Setup Enter the configuration for the target e-mail server account. D-Link DNR-2060-08P User Manual...
-
Page 66: Database Menu
Section 4: Advanced Configuration Database Menu This section outlines the user configurable options for the NVR's Disk and Data management. D-Link DNR-2060-08P User Manual... - Page 67 This option allows the user to manage externally attached disks. Data Protection: This option enables the user to manage the stored data records individually. Repair on Power Loss: See "Repair on Power Loss" on page 68 for more detail on this function. D-Link DNR-2060-08P User Manual...
-
Page 68: Repair On Power Loss
Enter the OSD setup menu via an authorized account and access Database. Then select Internal Disks and find the NG HDD from the list. Under Action column, select Format to format the NG HDD. Then select Add to add the formatted HDD to the database. D-Link DNR-2060-08P User Manual... -
Page 69: Configuration Menu
Section 4: Advanced Configuration Configuration Menu The Configuration setup menu enables you to review you current configuration and import or export settings as required. D-Link DNR-2060-08P User Manual... - Page 70 Also under the Configuration setup menu, set Operation Log to On and operation logs will begin to be recorded in the system log. Alternatively, set to Off and operation logs will not be part of the system log. Note: External disks must be formatted as FAT32. D-Link DNR-2060-08P User Manual...
-
Page 71: Export Menu
The following section will explain how to export video through the OSD setup menu and through the function keys on the front panel, respectively. Note: that the system log will keep records of all video exported, including duration, start time, and end time. D-Link DNR-2060-08P User Manual... -
Page 72: Export Video
HDD is EXT3. Device Name Shows the name of the available device. Available Shows the free space of the available device. Select Select Yes to set it as an export destination, or No to cancel. D-Link DNR-2060-08P User Manual... -
Page 73: Select Video For Exporting
The AVI files can be played back with Windows Media Player. Note that if multiple channels are exported for AVI files, each channel is exported to a separate file. D-Link DNR-2060-08P User Manual... -
Page 74: Digital Signature
This function is used to remove data found on a DVD+RW disk prior to exporting new information to the drive. Select Yes and press ENTER to start deleting data. Note: this option is only available when a re-writable DVD drive is attached. D-Link DNR-2060-08P User Manual... -
Page 75: Aux Menu
Section 4: Advanced Configuration Aux Menu The Aux menu enables user to configure PoE and UPS settings. D-Link DNR-2060-08P User Manual... - Page 76 Use this option to view and configure the NVR's PoE settings. Note: Setting the PoE Limitation too high or too low will result in unreliable performance. UPS Setup Use this option to configure the settings for your UPS. D-Link DNR-2060-08P User Manual...
-
Page 77: Shutdown Menu
Section 4: Advanced Configuration Shutdown Menu If the NVR must be shutdown for any reason, please follow the proper shutdown and power on procedures to avoid damaging the NVR. D-Link DNR-2060-08P User Manual... - Page 78 The NVR can be set to reboot automatically once a day/week at predetermined time for routine maitainence. Select Off to disable the auto rebooting function Rebooting Time If the auto rebooting function is enabled, select a desired time to perform the auto rebooting function. D-Link DNR-2060-08P User Manual...
-
Page 79: Using The Web Interface
20 MB for software installation Operating System Windows XP Web Browser Internet Explorer version 8.0 Monitor 1024×768 with 16-bit color Network Card 10/100 Mbps Suggested Specification Personal Computer Intel® Core™ i7-2600 3.4GHZ Network Card 10/100/1000 Mbps D-Link DNR-2060-08P User Manual... -
Page 80: Web Ui Setup
Internet Explorer provides the ActiveX component that is required when using the remote monitoring software. Select Tools from the main menu of the browser, then Internet Options, and then click the Security tab. Select Trusted sites and click Sites to specify its security setting. D-Link DNR-2060-08P User Manual... - Page 81 Under ActiveX controls and plug-ins, set all items to Enable or Prompt. Click OK to apply the setting and close the Security Settings screen. Click OK to close Internet Options dialog. Now the installation can continue to the next step. D-Link DNR-2060-08P User Manual...
-
Page 82: Install Web Ui Browser Plugins
NVR. This process may take up to 30 seconds. When the browser plugins are completely downloaded and installed, the Login Screen will be displayed. D-Link DNR-2060-08P User Manual... -
Page 83: Log In/Log Off
When the connection is made successfully, the main window will display live video of the attached cameras. When the web browser is closed, the remote system is logged out and disconnected from the NVR at the same time. D-Link DNR-2060-08P User Manual... -
Page 84: Firmware Upgrades
When a dome camera is connected and viewed in single channel full-screen mode, the dome camera control operation can be accessed. To choose desired display mode and to operate dome camera control,refer to the following sections. D-Link DNR-2060-08P User Manual... -
Page 85: Select Display Mode
Available selections are 4, and 8 (9-1) camera display grids. To view a specific feed in full-screen, either double-click on the preferred grid, or click on the corresponding CAMERA button in the left toolbar. Note: To maximize the video viewing area the main/top toolbar, and the left/side tool bar can be hidden. D-Link DNR-2060-08P User Manual... -
Page 86: Operate Cameras With Dome Control
Users are able to zoom-in or zoom-out using the adjusting buttons. Zoom-in to enlarge a certain area and zoom-out to view more area. Direction Button: This button is used to pan and/or tilt the dome camera. Click the arrows in the directions to be viewed. D-Link DNR-2060-08P User Manual... -
Page 87: Digital Zoom Of Camera Display
LEFT clicking and holding the mouse while moving. Note: This function will use up a lot of CPU resources. It is recommended not to open too many programs at the same time to avoid crash of CPU. D-Link DNR-2060-08P User Manual... -
Page 88: Manually Trigger Relay Output Devices
Follow the steps to playback a video recorded by Instant Recording. Click Play on main window toolbar and click Local Playback tab. Click Open to choose a recorded file. Click OK to start playing the recorded video. D-Link DNR-2060-08P User Manual... -
Page 89: Playback Video
The remote monitoring software allows users to either view recorded video from the NVR, or from the hard disk drive of the PC. To access the Playback screen, click the Play button on the main window toolbar. D-Link DNR-2060-08P User Manual... -
Page 90: Playback Local *.Drv Files
When the local or remote video is being played, the Web UI is in Playback Mode. The playback controls toolbar will appear in the main window. The Playback controls are described in "Key Usage in Playback" on page 23. D-Link DNR-2060-08P User Manual... -
Page 91: Verify Digital Signature
To view an event video, follow these steps: Click SEARCH button positioned in the main window toolbar. The Event List appears. Scroll through the Event List and highlight the interested events. Double-click on the desired event to view the event video. D-Link DNR-2060-08P User Manual... -
Page 92: Take A Snapshot
Total Size: This item indicates the total size of the HDD. State: This item indicates whether the HDD is active or non- active. Temperature: This item indicates the current temperature of the HDD in Celsius degree. D-Link DNR-2060-08P User Manual... -
Page 93: Normal And Dual Streaming
To select dual streaming, click on the bandwidth icon and the icon will change color. Then users can furthermore choose different bit rates to adjust for the best displaying quality. D-Link DNR-2060-08P User Manual... -
Page 94: Web Ui Advanced Operation
Execute button and locate the upgrade file “*.tar” or files “*.tgz & *.md5”to start remote software upgrade. Remotely Reboot Also from the Configuration window,access the Shutdown menu as shown below. Then click on the Execute button to remotely reboot the NVR. D-Link DNR-2060-08P User Manual... -
Page 95: Firmware Troubleshooting
Click the Delete Files button in the Temporary Internet Files field; the Delete Files screen displays as below. Check the Delete all offline content box and click OK. Enter the IP address of the NVR to make the connection again. D-Link DNR-2060-08P User Manual... -
Page 96: Appendix A: Recommended Hdds
NOTE: After a HDD is successfully installed, users will see a number shown in front of the device name when retrieving internal disks information in the OSD setup menu via Database, Internal Disks. The number represents the SATA port that the HDD is connected to. D-Link DNR-2060-08P User Manual... -
Page 97: Di/Do Specifications
Appendix A: DI/DO Specifications DI/DO Specifications D-Link DNR-2060-08P User Manual... -
Page 98: Technical Specifications
• IPV4, ARP, TCP, UDP, ICMP • HTTP Server • DHCP Client • PPPoE • DNS Client • RTP • SMTP Client (SSMTP support) • RTSP Security • Administrator and user group protection • Password authentication D-Link DNR-2060-08P User Manual... - Page 99 • Storage: 5% to 95% non-condensing Certifications • CE • FCC • CE LVD • C-Tick Dimensions 440.4 mm • (H) 90.4 mm (3.56 inches) • (w) 440.4 mm (17.34 inches) • (D) 450.9 mm (17.75 inches) D-Link DNR-2060-08P User Manual D-Link DNR-2060-08P User Manual...
Need help?
Do you have a question about the DNR-2060-08P and is the answer not in the manual?
Questions and answers