Table of Contents
Advertisement
Advertisement
Table of Contents

Related Manuals for G&D DL-Vision(M/S)-AR


Summary of Contents for G&D DL-Vision(M/S)-AR
- Page 1 G&D DL-Vision(M/S) Installation and Operation...
-
Page 2: About This Manual
About this manual This manual has been carefully compiled and examined to the state-of-the-art. G&D neither explicitly nor implicitly takes guarantee or responsibility for the qua- lity, efficiency and marketability of the product when used for a certain purpose that differs from the scope of service covered by this manual. -
Page 3: Table Of Contents
Contents Contents Safety instructions .................... 1 The DL-Vision(M/S) series ................3 Available device variants ................... 3 Package contents ....................4 Installation ....................... 5 Preparation ....................... 5 Installing the computer module ................6 Installing the user module ................10 Getting started ....................12 Start-up ...................... - Page 4 Contents Configuration settings (continued) Enabling or resetting a PS/2 mouse ............38 Resetting the default settings ............... 39 Background information ................. 40 Support of any graphics resolutions ..............40 DDC transmission with cache function ............. 40 Reading out the adjusted IP address ..............41 Pin assignment of the RS232 socket/interface ...........
-
Page 5: Safety Instructions
Safety instructions Safety instructions Please read the following safety instructions carefully before you start operating the G&D product. The instructions well help in avoiding damages to the product and in preventing possible injuries. Keep this manual handy for all persons who will be using this product. Follow all warnings or operating instructions which are on the device or stated in this user manual. - Page 6 Safety instructions Special instructions for laser technology The devices of the series use components with laser technology which DL-Vision comply with laser class 1 or better. They meet the requirements according to EN 60825-1:2007 and as well as EN 60825-2:2004+A1:2007 U.S.
-
Page 7: The Dl-Vision(M/S) Series
DL-Vision(M/S) series provides various devices that enable the transmission of additional signals and the usage of several monitors: Model Video Keyboard Audio & USB 2.0 channels & Mouse RS232 DL-Vision(M/S)-AR DL-Vision(M/S)-ARU DL-Vision(M/S)-MC2-AR DL-Vision(M/S)-MC2-ARU ... -
Page 8: Package Contents
Package contents Package contents Standard package contents of DL-Vision(M/S) series The KVM extender system consists of a computer module ( DL-Vision-CPU ) and a user module ( DL-Vision-CON Additionally, the devices’ package contents include the following accessories: 4 × power cable (PowerCable-2 Standard) ... -
Page 9: Installation
Installation Installation IMPORTANT: The devices use components with laser technology complying with laser class 1. They meet the requirements in accordance to , EN 60825-1:2007 EN 60825-2:2004+A1:2007 U.S. CFR 1040.10 1040.11 Mind the following safety instructions regarding laser technology: Avoid direct eye exposure to beam on page 2 ... -
Page 10: Installing The Computer Module
Installation Installing the computer module The computer, whose signals are transmitted to the remote console, is connected to DL-Vision-CPU computer module. A local console can optionally be connected to the computer module. ADVICE: Connect the cables to the computer module preferably from left to right. By doing so, you will avoid already connected cables blocking your view of the interfaces. - Page 11 Installation Connecting keyboard and mouse to the local computer NOTE: Mouse and keyboard signals of both consoles can be transmitted to the computer either through the USB CPU USB interface or through the Mouse CPU and Keyb. CPU PS/2 interfaces. Mouse CPU: Use the green plug of the twin PS/2 cable (Twin-PS/2-M/M-2) to con- nect the computer’s PS/2 mouse interface to this interface.
- Page 12 Installation Additional interfaces of expanded variants IMPORTANT: The interfaces listed in this paragraph are only provided at certain variants. RS232: Use the RS232-M/F-2 cable to connect one of the computer’s 9-pin serial interfaces to this interface. Line In: Use an Audio-M/M-2 cable to connect the computer’s Line-Out interface to this interface.
- Page 13 Installation Additional interfaces of multi-channel variants NOTE: The computer module provides Transmission x, DVI-D DL Out x, DVI-D DL CPU x, and RS232 x interfaces for each additional video channel. The interface designations indicate the channel number. Transmission x|Tx: Insert the LC plug of another fibre optic cable. Connect the other end of the cable to the Transmission 2|Rx interface of the user module.
-
Page 14: Installing The User Module
Installation Installing the user module The remote console is connected to the user module. The computer DL-Vision-CON connected to the computer module can be operated over this console. ADVICE: Connect the cables to the computer module preferably from left to right. By doing so, you will avoid already connected cables blocking your view of the interfaces. - Page 15 Installation Additional interfaces of the expanded variants: IMPORTANT: The interfaces listed in this paragraph are only provided at certain variants. Micro In: Connect a microphone to this interface if desired. Speaker: Connect the console speakers or another audio output device to this interface. RS232: Connect the serial end device to this interface.
-
Page 16: Getting Started
Getting started Getting started After the KVM extenders have been properly installed, they can be immediately put into operation. Mind the following activation sequence while initiating the extenders: 1. Switch on the user module DL-Vision-CON 2. Switch on the computer module DL-Vision-CPU 3. -
Page 17: Initial Configuration Of The Network Settings
Initial configuration of the network settings Initial configuration of the network settings Accessing the web application requires you to configure the network settings of the device on which the web application is operated. The following table lists the default settings of the Network A network interface: static IP allocation: 192.168.0.1... - Page 18 Initial configuration of the network settings 8. Use the paragraphs and/or to enter the following data: Interface A Interface B A or interface B in the Operational Select the operational mode of interface mode: pull-down menu: switches off network interface. ...
-
Page 19: Operation
Operation Operation The computer connected to the computer module can be operated at DL-Vision-CPU the remote console of the user module and at the local console of the computer module. After the start-up, both consoles can operate the computer. NOTE: The monitors of the remote and the local console of the KVM extender always display the same image at the same time. -
Page 20: Exclusive Operation Of The Kvm Extender
Operation Exclusive operation of the KVM extender Activate the right for permanent access to operate the KVM extender exclusively with one console. If this function is active, the extender’s exclusive operation can be activated by press- ing the hotkey (default: Hotkey+Print Ctrl Print... -
Page 21: Using The Reset Button
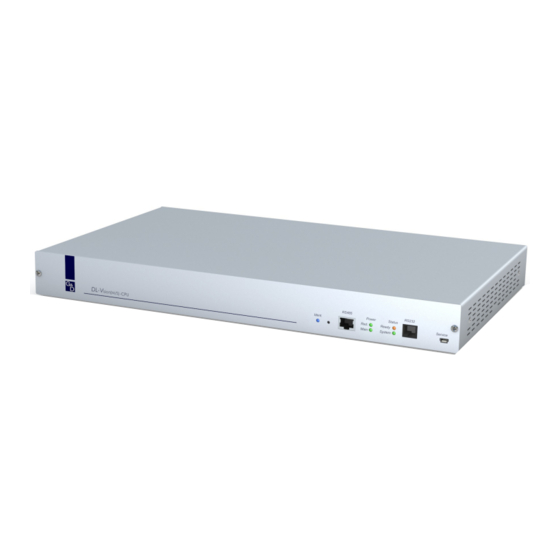
Using the Reset button Using the Reset button The Reset button is placed between the Identification LED and the RS 485 interface on the front panel of the computer module and the user module. The button enables you to reset the default settings and to temporarily deactivate the netfilter rules. -
Page 22: Temporarily Deactivating The Netfilter Rules
Using the Reset button Temporarily deactivating the netfilter rules In the default status of the KVM extender, all network computers have access to the extender’s IP address (open system access). The web application enables you to create netfilter rules to control the access to the extender. -
Page 23: Configuration
Configuration Configuration The KVM extender can be configured in the setup menu or via web appli- Config Panel cation: The Setup mode is activated through a console keyboard. The configuration can be changed by pressing special setup keys. The Config Panel web application provides a graphical user interface to configure and monitor the KVM extender via web browser. -
Page 24: Operating The Setup Mode
Configuration Operating the setup mode The configuration of the KVM extender can be changed in the setup mode and the Config Panel web application. Enable the setup mode using the console keyboard. After enabling, the configura- tion of the KVM extendercan be changed by using specialsetup keys. NOTE: Only one setup function can be performed after the calling up of the setup mode. -
Page 25: Basic Operation Of The Web Application
Configuration Basic operation of the web application web application provides a graphical user interface to configure and Config Panel monitor the KVM extender. The web application can be applied on a computer with installed Java Runtime Envi- ronment. Use one of the supported web browsers to run the application. NOTE: The separate manual provides information about system requirements, the required configuration of the network interfaces atthe... -
Page 26: User Authentication Against The Web Application
Configuration User authentication against the web application After the certificates have been authenticated, the login box opens. Config Panel How to log in to the web application: 1. Enter the following data in the login box: Username: Enter your username. Password: Enter your user account password. -
Page 27: Configuration Settings
Configuration Configuration settings Enabling/Disabling the setup mode NOTE: This function can only be enabled/disabled via web application. In the default settings of the KVM extender, the configuration can either be changed in the setup mode or via web application. If desired, you can deactivate the setup mode completely. How to enable/disable the setup mode: 1. -
Page 28: Enabling/Disabling The Hotkey Delay
Configuration Enabling/Disabling the hotkey delay Press the (default: ) key combination for seven sec- Hotkey+Backspace Ctrl+Backspace onds in order to start the setup mode. You can disable the hotkey delay if you want to start the setup mode directly after pressing the key combination. -
Page 29: Changing The Hotkey
Configuration Changing the hotkey If many application programs with key combinations are operated on a computer or if different devices are used in one cascade, the number of available key combina- tions might be restricted. If an application program or another device uses the same hotkey within the cas- cade, the hotkey can be changed. -
Page 30: Changing The Setup Key
Configuration Changing the setup key The hotkey to call the setup mode consists of at least one hotkey modifier (see Changing the hotkey on page 25) and an additional setup key which can be selected by the user. You can change the hotkey modifier as well as the setup key Ctrl Backspace... -
Page 31: Changing The »Permanent Access« Key
Configuration Changing the »Permanent Access« key After you have pressed the key combination to operate the extender exclusively, the input devices at the concurrent console are deactivated. Only after the key combination has been pressed again at the active console, both consoles can operate the KVM extender again. -
Page 32: Changing The Time Span Of The Input Lock
Configuration Changing the time span of the input lock NOTE: This function can only be (de)activated via the web application. If the user carries out keyboard or mouse inputs at a console, the KVM extender automatically locks the input devices of the concurrent console. The lock is lifted if no input is being made at the active console within the adjusted timing of the input lock (default: 1 second). -
Page 33: Right For Permanent Console Access
Configuration Right for permanent console access NOTE: This function can only be (de)activated in the web application. If no inputs are being made at the active console during the adjusted time span of the automatic input lock (default: 1 second), the default settings of the KVM extender permit the other console to operate the extender. -
Page 34: Changing The Console Video Mode
Configuration Changing the console video mode NOTE: This function can only be (de)activated in the web application. In the standard configuration of the KVM extender, the computer’s image is output at the monitor of the active console as well as at the monitor of the concurrent console. You can also define that the image of the other console is deactivated during con- sole inputs. -
Page 35: Selecting The Edid Mode Of The Kvm Extender
Configuration Selecting the EDID mode of the KVM extender NOTE: This function can only be (de)activated in the web application. The EDID information (Extended Display Identification Data) of a monitor inform the graphics card of a connected computer about different technical device features. The information are usually transmitted via Enhanced-DDC (Enhanced Display Data Chan- nel) from KVM extender to the computer without alteration. -
Page 36: Freeze Mode
Configuration Freeze mode If the cable connection between computer and user module fails during operation, the KVM extender no longer displays an image at the console monitor. Enable the Freeze mode if you want the last available image at the user module to be displayed after the connection was interrupted. -
Page 37: Support For Multimedia And Sun Special Keys
Configuration Support for Multimedia and Sun special keys NOTE: This function can only be (de)activated in the web application. Various manufacturers added special keys to their standard keyboards. Some keyboards are provided with multimedia keys which enable to user to easily operate special multimedia functions of the computer. - Page 38 Configuration If the console is provided with a Sun keyboard, use the Solaris Shortcut Keys of this keyboard after enabling. When using a standard keyboard, these functions can be performed by using the key combinations listed below: Key combination Solaris Shortcut Key of the Sun Keyboard Ctrl+Alt+F2 Again Ctrl+Alt+F3...
-
Page 39: Support For Special Keyboards
Configuration Support for special keyboards NOTE: This function can only be enabled/disabled in the web application. The KVM extender supports special functions of some special keyboards. If you want to apply such a keyboard at the console, enable its support in the KVM extender. -
Page 40: Changing The Scancode Set Of A Ps/2 Keyboard
Configuration Changing the scancode set of a PS/2 keyboard If a key is pressed on the PS/2 keyboard, the keyboard processor sends a data packet called scancode. There are two common scancode sets (sets 2 and 3) that contain different scancodes. In the standard configuration, the KVM extender interprets all PS/2 keyboard inputs with the scancode set 2. -
Page 41: Starting The User Module Without Keyboard
Configuration Starting the user module without keyboard NOTE: This setting can only be changed in the web application. The module stops the start-up and shows a message if no keyboard is connected a user module. Disable the keyboard support to start the module without keyboard. How to disable/enable keyboard support for the user module: 1. -
Page 42: Enabling Or Resetting A Ps/2 Mouse
Configuration Enabling or resetting a PS/2 mouse NOTE: These functions can only be perform in the setup mode. Unlike USB mouse devices, PS/2 mouse devices do not support the hot plug tech- nology. You can therefore insert the PS/2 plug during operation but it may be pos- sible that the computer does not detect the input device. -
Page 43: Resetting The Default Settings
Configuration Resetting the default settings NOTE: This function can only be carried out in the web application. This function resets the default settings of the KVM extender. By performing this func- tion, the default settings of the KVM extender listed on page 19 are reactivated. How to reset the default settings: 1. -
Page 44: Background Information
Background information Background information Support of any graphics resolutions The KVM extender basically supports all resolutions that can be transmitted accord- ing to the 1.0 DVI specification. This restriction mainly affects the pixel rate, which can reach from 25 MHz (single link) to 165 MHz (dual link) or from 165 to 330 MHz. During single link operation, the common VESA DMT and VESA SMT timing standards enable resolutions between 640 ×... -
Page 45: Reading Out The Adjusted Ip Address
Background information Reading out the adjusted IP address If the IP address of a copmuter module or a user module is unknown, a terminal emulator (for example HyperTerminal oder PuTTY) can be used to read it out. Use the supplied service cable tp connect the computer on which the terminal emu- lator is installed to the Service socket of the computer module and the user module. -
Page 46: Pin Assignment Of The Rs232 Socket/Interface
Background information Pin assignment of the RS232 socket/interface The following figures show the pin assignments of RS232 plug and RS 232 socket: User module Computer module RS232 plug RS232 plug The table shows how the different conduits of the data connection are assigned to the according pins: Pin no. -
Page 47: Status Displays
Status displays Status displays The LEDs on the front panel of the computer module and the user module enable you to control the KVM extender’s operating status at any time. Meaning of the LEDs on the front panels Range Status Meaning Ident. -
Page 48: Meaning Of The Leds On The Front Panels
Status displays Meaning of the LEDs on the front panels Range Status Meaning Transmission Link Communication with remote station has been established successfully. blinking No connection to the remote station. fast Crossed cable connection. blinking Check the cable connection and ensure that the interfaces with identical designation are con- nected. -
Page 49: Technical Data
Technical data Technical data General features DL-VISION(M/S) SERIES Graphics Colour depth: 24 Bit Max. resolution: 1920 × 1200 @ 60 Hz (single link) 2560 ×1600 @ 60Hz (dual link) Vertical frequency: 20 Hz to 120 Hz Horizontal frequency: 25 kHz to 130 kHz Pixel rate: max. -
Page 50: General Module Features
Technical data General module features DL-VISION-CPU | COMPUTER MODULE Interfaces Monitor: 1 × DVI-D socket for console per video channel Keyboard: 1 × PS/2 socket 1 × USB-A socket Mouse: 1 × PS/2 socket 1 × USB-A socket Interfaces Video: 1 ×... -
Page 51: Specific Variant Features
Technical data Specific variant features DL-VISION(M/S)-AR-CPU | COMPUTER MODULE Current consumption maximum: 100-240VAC/60-50Hz, 0.5-0.2A anodised aluminium; Casing Material: nickel-plated steel (bottom) Dimensions (W × H × D): 435 mm × 284,5 mm × 1 U Weight: approx. 2,2 kg Operating ... - Page 52 Technical data DL-VISION(M/S)-MC2-AR-CPU | COMPUTER MODULE Current consumption maximum: 100-240VAC/60-50Hz, 0.7-0.3A anodised aluminium; Casing Material: nickel-plated steel (bottom) Dimensions (W × H × D): 435 mm × 284,5 mm × 1 U Weight: approx. 2,3 kg Operating Temperature: +5 to +40 °C environment Air humidity:...
-
Page 53: Features Of The Transmission Modules
Technical data Features of the transmission modules MULTIMODE TRANSMISSION MODULE Data transmission Type: fibre optics (2 glass fibres) Interface type: LC duplex Cable length (max.) Multimode 50/125 μm, 2000 MHz*km, OM3: 300 metres Multimode 50/125 μm, 500 MHz*km, OM2: 82 metres Multimode 62,5/125 μm, 160 MHz*km, OM1: 33 metres Multimode 62,5/125 μm, 160 MHz*km,... - Page 54 Notes 50 · G&D DL-Vision(M/S)
- Page 55 Notes G&D DL-Vision(M/S) · 51...
- Page 56 Guntermann & Drunck GmbH Dortmunder Str. 4a 57234 Wilnsdorf Germany Phone +49 2739 8901-100 +49 2739 8901-120 http://www.GDsys.de sales@GDsys.de...
Need help?
Do you have a question about the DL-Vision(M/S)-AR and is the answer not in the manual?
Questions and answers