
Subscribe to Our Youtube Channel
Related Manuals for G&D CATVision


Summary of Contents for G&D CATVision
- Page 1 Guntermann & Drunck GmbH www.gdsys.de G&D CATVision Installation und Bedienung Installation and Operation A9100189-2.71...
- Page 2 Guntermann & Drunck GmbH Installations- und Bedienungsanleitung CATVision (MC) INWEISE Achtung M DAS ISIKO EINES TROMSCHLAGES ZU VERM EIDEN SOLLTEN ERÄT NICHT ÖFFNEN ODER BDECKUNGEN ENTFERNEN ERVICEFALL WENDEN IE SICH BITTE AN UNSERE ECHNIKER ESEN IE DIE EDIENUNGSANLEITUNG SORGFÄLTIG BEVOR IE DAS ERÄT IN...
-
Page 3: Table Of Contents
CATVision Inhaltsverzeichnis Beschreibung ....................... 6 Lieferumfang ......................7 Installationsanleitung ..................8 Installation der Sendeeinheit................ 8 3.1.1 Videoanschluss am CATVision-MC-CPU .......... 9 3.1.2 Optionale Anschlussmöglichkeiten ............ 9 Installation der Empfangseinheit ..............10 3.2.1 Videoanschluss am CATVision-MC-Con ......... 11 3.2.2 Optionale Anschlussmöglichkeiten ..........11 Stromversorgung .................... - Page 4 Guntermann & Drunck GmbH Installations- und Bedienungsanleitung CATVision (MC) Config......................35 6.2.1 IVT....................36 6.2.2 System Config .................. 37 6.2.2.1 Definition des ersten Hotkeys..........38 6.2.2.2 Festlegung des Doppel-HotKey ..........38 6.2.2.3 Set System Defaults (Supervisor-Funktion) ......39 6.2.2.4 Remote Video (Dunkelschaltung) .......... 39 6.2.2.5...
- Page 5 Lieferumfang ....................65 11.2 Installationsanleitung.................. 66 11.2.1 Einbau im PC ................... 66 11.2.2 Verbinden mit CATVision-CPU ............68 11.2.3 Verbinden des Tasters mit dem CATVision-CON ......68 Technische Daten ....................70 12.1 CATVision ....................70 12.2 CATVision-MC ................... 72 Anhang........................ 74 13.1 HotKey-Belegungstabelle................
-
Page 6: Catvision
Wert, auflösungs- und kabelabhängig) fern zu bedienen. Zusätzlich kann auch eine lokale Bedienstation am Sender angeschlossen werden. Die Bedienung kann wahlweise lokal oder remote durchgeführt werden. Setzten Sie ein CATVision-MC-System ein, kann der Rechner mit bis zu 4 Videoausgängen ausgestattet sein. Folgende Varianten stehen zur Verfügung (Unterscheidung nach den existierenden Videokanälen). -
Page 7: Lieferumfang
CPU-2 Anschlusskabel Video/Keyboard/Mouse PS/2 Zum Anschluss am CATVision-CPU (bzw. CATVision-MC-CPU): 1 x MDR-20 f. Monitor, Keyboard und Mouseanschluss Zum Anschluss des PC: 1 x PS/2 für Mouseanschluss (inkl. 9pol-Adapter für serielle Mouse) 1 x PS/2 (incl. AT-Adapter) für Keyboard-Anschluss 1 x HD-15 Stecker für VGA-Anschluss... -
Page 8: Installationsanleitung
Installations- und Bedienungsanleitung CATVision (MC) Installationsanleitung Die Installation der CATVision und CATVision-MC unterscheidet sich lediglich in der Anzahl der anzuschließenden Videoquellen. Daher wird in den folgenden Abschnitten nur die Installation des CATVision beschrieben. Der Anschluss zusätzlicher Videoquellen wird gesondert erläutert. -
Page 9: Videoanschluss Am Catvision-Mc-Cpu
Keyb PS/2. 12V DC/0,6A Transmission Monitor VGA Keyb. Mouse CPU Anschluss von RS232 Das Anschlusskabel RS232-M/F-x (x=2, 4, 6 od. 9 Meter) mit einer COM-Schnittstelle des Rechners und der Schnittstelle RS232 (optional) des CATVision-CPU verbinden (Belegung 1:1). Seite 9... -
Page 10: Installation Der Empfangseinheit
Hinweis zur Kompatibilität des transparenten USB-Anschlusses: Der USB-Anschluss entspricht den USB 1.1 Spezifikationen, welche das Design von USB full-speed Geräten regeln. Dennoch garantieren wir nicht, dass alle USB full-speed Geräte kompatibel zum CATVision sind. Installation der Empfangseinheit Anschluss von Keyboard/Mouse für remote Konsole... -
Page 11: Videoanschluss Am Catvision-Mc-Con
Das Verlängerungskabel K-C7-x in die Schnittstelle TRANSMISSION der Empfangseinheit CATVision-CON einstecken. Den Monitor an die Buchse MONITOR anschließen. Das PS/2-Keyboard an der Schnittstelle Keyb. am CATVision-CON anschließen. Die PS/2-Mouse an die Buchse MOUSE PS/2 anstecken. ... - Page 12 Anschluss von USB1.1 Zum Anschluss Ihrer USB-Geräte stecken Sie die USB-Geräte auf der Frontseite des CATVision-CON in eine der hier vier verfügbaren USB- A-Buchsen. Hinweis: Es handelt sich hier um die transparente Verlängerung von USB-Signalen an den angeschlossenen Rechner.
-
Page 13: Stromversorgung
Keyb. Mouse USB Trans 12V DC/0,9A Transmission Red. Power Keyb. PS/2 Mouse Service Monitor Anschluss der optionalen redundanten Stromversorgung Rückblende CATVision-CON Hinweis zum USB-Betrieb Beim Anschluss von USB-Geräten werden durch das CATVision-System high- Power-Geräte (bis 500 mA) unterstützt. Seite 13... -
Page 14: Inbetriebnahme
Nach diesem Startfenster erscheint das Bild des Rechners auf Ihrem Monitor. WICHTIG Wenn Sie das CATVision System starten, passt das System automatisch alle Parameter (z. B. Kabellänge, Laufzeitunterschiede, Dämpfung) an Ihr Umfeld an. Als Ergebnis sollte ein Bild auf Ihrem Monitor erhalten, welches keiner weiteren Anpassung bedarf. -
Page 15: Keyboard/Mouse Lokal Nicht Vorhanden
Bedienungsanleitung CATVision (MC) 5.2.1 Keyboard/Mouse lokal nicht vorhanden Sollte das lokale Keyboard und die Mouse nicht mit dem CATVision-CPU verbunden sein, erscheint auf beiden Monitoren (lokal und remote) folgender Warnhinweis: S Y S T E M S T A R T U P... -
Page 16: Fehlen Der Cat-X-Verbindung
Guntermann & Drunck GmbH Installations- und Bedienungsanleitung CATVision (MC) In diesem Fall bleibt das CATVision-System in diesem Zustand stehen. Um mit der Inbetriebnahme weiter fortfahren zu können, stellen Sie bitte erst die notwendigen CAT-x-Verbindungen her. Wenn diese Verbindungen hergestellt sind, wechselt das CATVision-System automatisch an beiden Konsolen (lokal... -
Page 17: Led Anzeigen
Guntermann & Drunck GmbH Installations- und Bedienungsanleitung CATVision (MC) LED Anzeigen Nach dem Anschluss des Steckernetzteils schalten Sie die CATVisions über die Kippschalter auf den Rückseiten der Geräte ein. Die LEDs auf der Frontseite der beiden Geräte haben folgende Bedeutung:... - Page 18 Guntermann & Drunck GmbH Installations- und Bedienungsanleitung CATVision (MC) CATVision CPU CATVision CON Active Leuchtet, wenn eine der beiden Konsolen aktiv ist. Status Leuchtet, wenn die Keyboard/Mouse-Emulation des CATVision-Systems arbeitet USB- Status Leuchtet, wenn eine CAT-x- Abschnitt Verbindung zwischen CV-CPU und CV-CON besteht.
-
Page 19: Ivt - Individuelles Video Tuning
Bedienungsanleitung CATVision (MC) IVT – Individuelles Video Tuning WICHTIG Wenn Sie das CATVision System starten, passt das System automatisch alle Parameter (z. B. Kabellänge, Laufzeitunterschiede, Dämpfung) an Ihr Umfeld an und ein Videoprofil wird angelegt. Als Ergebnis sollte ein Bild auf Ihrem Monitor erhalten, welches keiner weiteren Anpassung bedarf. -
Page 20: Aufruf Des Ivt-Modus
Guntermann & Drunck GmbH Installations- und Bedienungsanleitung CATVision (MC) 5.4.2 Aufruf des IVT-Modus Der IVT-Modus kann über drei Wege aufgerufen werden (Default-Werte): Über das Function-Menü CTRL & NUM Über den Keyboard-Hotkey CTRL & Rollen Es öffnet sich folgendes Fenster:... -
Page 21: Aufruf Über Das Function Menü
Guntermann & Drunck GmbH Installations- und Bedienungsanleitung CATVision (MC) 5.4.2.1 Aufruf über das Function Menü Zum Aufruf des IVT-Modus öffnen Sie das Function Menü über die Keyboardkombination (Default). CTRL + NUM F u n c t i o n C V M... -
Page 22: Einstellung Des Video Tuning
IVT-Submenü ohne Änderung speichert alle Änderungen und beendet das IVT-Submenü kopiert alle Einstellungen auf alle existierenden Kanäle 1/2/3/4 Wechsel zwischen den Videokanälen (nur bei CATVision-MC- Systemen) führt die automatische Videooptimierung für den aktiven Kanal durch führt die automatische Videooptimierung für alle Kanäle durch... -
Page 23: Videokanalwechsel
Kanal wird die automatische Videoanpassung durchgeführt. Mit der F6-Taste führen Sie die automatische Anpassung für alle Kanäle (nur bei CATVision-MC-Systemen) durch. In diesem Fall erscheint auf Ihrem Bildschirm folgende Meldung: I n f o C V M... -
Page 24: Manuelle Einstellung
Installations- und Bedienungsanleitung CATVision (MC) Während des automatischen Messvorgangs teilt Ihnen dieses Fenster den jeweiligen Messstatus mit. Hinweis: Die Kanäle 2 bis 4 gelten nur beim Einsatz eines CATVision-MC- Systems! Die Einträge hinter den Kanalangaben haben folgende Bedeutung: Messvorgang erfolgreich abgeschlossen... -
Page 25: Festlegung Der Videoverstärkung
Guntermann & Drunck GmbH Installations- und Bedienungsanleitung CATVision (MC) 5.4.4.3.1 Festlegung der Videoverstärkung Boost: Zur Veränderung der Videoverstärkung stehen Ihnen folgende Tasten zur Verfügung: subtrahiert den Wert 1 zur Videoverstärkung Taste addiert den Wert 1 zur Videoverstärkung Taste ... -
Page 26: Beseitigung Der Fahnenbildung
5.4.4.3.4 Einstellung der Laufzeitkompensation delay R delay G delay B 0 ns 0 ns 0 ns Die Delaykompensation kann beim CATVision-System für alle drei Farbsignale bis zu 46 ns durchgeführt werden. Bei 0 ns ist keine Delaykompensation (Verzögerung) vorhanden. Seite 26... -
Page 27: Kopieren Der Ivt-Einstellungen
Die für einen Videokanal getroffenen Einstellungen lassen sich über die Taste auf alle weiteren vorhanden Videokanäle kopieren. Das kann sinnvoll sein, wenn für diese weiteren Videokanäle die gleichen Rahmenbedingungen vorliegen. 5.4.6 Getestete Auflösungen Die maximale Auflösung des CATVision (bei aktiviertem IVT - Individuelles Video Tuning) beträgt 1920 1440... -
Page 28: Kabelempfehlung
200 Meter 800 x 600 85 Hz Diese Übersicht stellt keine Maximalwerte dar. 5.4.7 Kabelempfehlung G&D empfiehlt zum Einsatz mit dem CATVision System folgende Kabel: Patchkabel: AETWYLER (bis 100 Meter) UNINET 7702 flex 4P AWG26 S-STP Installationskabel: Kerpen MegaLine G12-150 S/F AWG22 (bis 300 Meter) -
Page 29: Konfiguration
Guntermann & Drunck GmbH Installations- und Bedienungsanleitung CATVision (MC) Konfiguration Das CATVision-System kann an Ihre Bedürfnisse angepasst werden. Die Konfiguration wird über AdonIS ausgeführt. CTRL (Default-Einstellung) öffnen Sie das AdonIS: F u n c t i o n C V M... -
Page 30: Console Setup
Der hier einzustellende ScreenSaver wird vom CATVision erzeugt und steht in keiner Verbindung zum ScreenSaver des Rechners. Da in der Regel nur eine indirekte Verbindung (über das CATVision) zwischen dem Rechner und dem Monitor besteht, sollten Sie die ScreenSaver der Rechner aus Gründen Ihrer Arbeitserleichterung abschalten. -
Page 31: Einstellung Des Autologout
Guntermann & Drunck GmbH Installations- und Bedienungsanleitung CATVision (MC) 6.1.2 Einstellung des AutoLogout Über diese Einstellung können Sie ein automatisches LOGOUT des Systems aktivieren. Der automatische LOGOUT führt, gleich dem manuellen (Taste F8), zurück zur LOGIN Maske. Das System wird damit gegen nicht autorisierten Zugriff geschützt und erst nach einer Passwort-Eingabe im LOGIN Fenster kann wieder auf den Rechner zugegriffen werden (nur gültig, wenn der OPEN ACCESS deaktiviert ist). -
Page 32: Aktivierung Der Kanalanzeige „Display
Guntermann & Drunck GmbH Installations- und Bedienungsanleitung CATVision (MC) 6.1.4 Aktivierung der Kanalanzeige „Display“ Hier besteht die Möglichkeit, die Anzeige der Systemzustandsmeldungen entweder Dauernd = > Perm oder Temporär => Temp (verschwindet ca. 5 Sek. nach Umschaltung) einzustellen. -
Page 33: Einstellung Der Menu-Position / - Size
6.1.7 Einstellung der erweiterten Mouseunterstützung Hier besteht die Möglichkeit, die Unterstützung der Sondertasten der Intelli- Explorer Mouse für die Arbeit mit dem CATVision zu aktivieren. Setzen Sie den Eintrag hier auf „Yes“, kann das AdonIS, zusätzlich zum Aufruf über das Keyboard, auch durch Betätigen der Taste 4 oder 5 der Explorer-Mouse (linke... -
Page 34: Osd Syncmod
Um die Einstellungen zu speichern, verlassen Sie dies Menü mit 6.1.9 Keyboard Layout Passen Sie hier den vom CATVision verwendeten Keyboard-Satz an das tatsächliche Layout des angeschlossenen Keyboards an. Sie sollten z. B. eine Umstellung vornehmen, wenn Sie eine Y/Z-Vertauschung feststellen (amerikanisch/deutsches Layout). -
Page 35: Config
In jedem Fall hat der SUPERVISOR immer eine Zugriffsberechtigung auf das Config Menü! Da das CATVision-System entweder im Systemzustand des Open Access (der Zugriff auf das System ist ohne Login-Name und Passwort möglich) oder durch angelegte User Accounts betrieben werden kann, ergeben sich dadurch unterschiedliche Konstellationen beim Aufruf des Config-Menüs:... -
Page 36: Ivt
Guntermann & Drunck GmbH Installations- und Bedienungsanleitung CATVision (MC) Angelegte User Accounts + Supervisor (OpenAccess ist deaktiv): Der Zugriff ist ohne Passwortabfrage möglich, da sich die Benutzer bereits angemeldet haben d.h. die Zwischenabfrage (über das Access Config Fenster) der Konfigurationsberechtigung entfällt. -
Page 37: System Config
Guntermann & Drunck GmbH Installations- und Bedienungsanleitung CATVision (MC) 6.2.2 System Config Steppen Sie im Config Menü auf den Eintrag System Config und drücken Sie die Taste Enter. Folgendes Fenster öffnet sich: S Y S T E M C O N F I G... -
Page 38: Definition Des Ersten Hotkeys
Guntermann & Drunck GmbH Installations- und Bedienungsanleitung CATVision (MC) 6.2.2.1 Definition des ersten Hotkeys Fahren Sie den Cursor auf den Eintrag HotKey. Durch Betätigen der SPACE -Taste können Sie dann zwischen folgenden Alternativen wählen: Ctrl, Alt, AltGr, Win, Shift Bitte beachten Sie, dass der hier eingestellte HotKey ferner auch als... -
Page 39: Set System Defaults (Supervisor-Funktion)
Guntermann & Drunck GmbH Installations- und Bedienungsanleitung CATVision (MC) 6.2.2.3 Set System Defaults (Supervisor-Funktion) Die Ausführung dieser Funktion versetzt das Gerät zurück in den Lieferzustand. Auch die eingestellten Passwörter und IVT-Einstellungen werden zurückgesetzt. Die jeweiligen Default-Einstellungen entnehmen Sie bitte der Darstellung der einzelnen Menü-Fenster in diesem Handbuch. -
Page 40: Local Video (Dunkelschaltung)
Permanent Access Möchten Sie, dass z. B. Ihre Konfigurationsarbeiten nicht von Dritten unterbrochen werden sollen, so besteht sowohl für die remote Konsole (CATVision-CON) als auch die lokale Konsole am CATVision-CPU die vgl. Kapitel 7.3) zu Möglichkeit, einen permanenten Zugriff (Haltefunktion;... -
Page 41: Festlegung Der Time-Out-Zeit
Guntermann & Drunck GmbH Installations- und Bedienungsanleitung CATVision (MC) 6.2.2.7 Festlegung der Time-Out-Zeit Mit der Festlegung der Time-Out-Zeit wird definiert, wie lange die inaktive Konsole gesperrt bleibt, nachdem an der aktiven Konsole die letzte Keyboard/Mouse-Aktivität getätigt wurde. Nach Ablauf dieser Time-Out-Zeit sind beiden Konsolen für Eingaben wieder freigeschaltet. -
Page 42: Keyb. Led Flash
6.2.2.10 Festlegung des Scancode-Satzes local Der Scancode bezeichnet die „Sprache“, in welcher das Keyboard mit dem Rechner kommuniziert. Das CATVision arbeitet im Scancode 2 (Default). Stellen Sie diese Einstellung nur nach Rücksprache mit unserem Service Fahren Sie den Cursor auf den entsprechenden Eintrag. -
Page 43: Usb Sun-Keyboard Mode
Installations- und Bedienungsanleitung CATVision (MC) 6.2.2.13 USB SUN-Keyboard mode Wird ein SUN-Rechner mit USB-Keyboard (und -Maus) an CATVision-CPU an- geschlossen, so wird dies dem System durch Änderung des Wertes dieser Einstellung auf „yes“ mitgeteilt. Im Auslieferungszustand ist die Unterstützung für USB SUN-Keyboards de- aktiviert (Wert steht auf „no“)! -
Page 44: Keyboard Type Local
OSD und Display zu wählen. Um die Einstellung zu speichern, verlassen Sie dies Menü mit 6.2.2.16 Keyboard Type Local Nach Anwahl dieses Menüpunktes können Untermenü Unterstützung der Tastaturen „PixelPower Clarity (blue)“ bzw. „SKIDATA1“ im CATVision für die lokale Konsole aktivieren. Seite 44... -
Page 45: Keyboard Type Remote
Separated H/V as input Wenn CATVision getrennte HV-Signale erkennt, wird Remote sync auf „Separated H/V“ gestellt und ist nicht veränderbar. Wenn keine HV-Signale erkannt werden, besteht die Möglichkeit diese über die Einstellung „Separated H/V“ trotzdem auszugeben. Bei Auswahl „as input“ wird das Signal so ausgegeben wie es vom Rechner in das CATVision-System gelangt. -
Page 46: User Account
Aufgrund der Besonderheiten des Supervisor sowie des Open Access Accounts, erscheinen diese gesondert im Menü. Supervisor: Diese Account können keine Rechte entzogen werden User: Benutzer, der wahlweise mit Konfigurationsrechten ausgestattet werden kann Open Access: Ist die offene Zugangsvariante zum CATVision-System und kein "echter" User. Seite 46... -
Page 47: Account Enable / Disable
Guntermann & Drunck GmbH Installations- und Bedienungsanleitung CATVision (MC) Derzeit können 8 User, der Supervisor sowie der Open Access-Zugang verwaltet werden. U s e r A c c o u n t C V M A c c o u n t N o . 1... - Page 48 Guntermann & Drunck GmbH Installations- und Bedienungsanleitung CATVision (MC) Wird der User Name geändert, erscheint automatisch ein Fenster, welches Sie auf die erfolgte Umstellung hinweist. Nachdem Sie eine beliebige Taste betätigt haben, erscheint das Eingabemenü für das User-Passwort: C H A N G E P A S S W O R D...
-
Page 49: Set Account Defaults
Guntermann & Drunck GmbH Installations- und Bedienungsanleitung CATVision (MC) 6.2.3.3 Set Account Defaults Set Account Defaults Diese Funktion setzt alle Änderungen des USER ACCOUNT zurück auf den Lieferzustand, der in diesem Kapitel jeweils am Ende eines Abschnitts als „default“ angegeben ist. -
Page 50: User Account Access
Guntermann & Drunck GmbH Installations- und Bedienungsanleitung CATVision (MC) 6.2.3.6 User Account Access User Account Access ... No/Yes Hier können Sie dem Inhaber dieses Accounts den Zugang zum Menü User Account gewähren oder entziehen. Steuern Sie das Feld an und gewähren Sie den Zugang zum User Account durch Eingabe von oder verwehren Sie diesen durch N. -
Page 51: Mouse Utility
Guntermann & Drunck GmbH Installations- und Bedienungsanleitung CATVision (MC) ENTER schließt die erste Eingabe ab und springt automatisch in das zweite Feld, wo das Passwort nochmals einzugeben ist. ENTER bestätigt das neue Passwort und führt zurück zum USER ACCOUNT. speichert die neue Einstellung und führt zurück zum SELECT ACCOUNT. - Page 52 Guntermann & Drunck GmbH Installations- und Bedienungsanleitung CATVision (MC) Enable Mouse (for Unix) Wählen Sie diese Funktion bei Nicht-Windows-Systemen (z. B. Linux), wenn der Rechner mit einem Standard-Mouse Treiber arbeitet. Reset Mouse Wählen Sie diese Funktion bei Windows-Betriebssystemen; unabhängig vom eingestellten Mouse-Treiber.
-
Page 53: Systembedienung
Im den nachfolgenden Kapiteln werden die einzelnen Zugriffsmöglichkeiten näher erläutert. 7.1.1 Zugriff über OpenAccess Beim Zugriff über OpenAccess kann jeder auf das CATVision-System und die angeschlossene CPU zugreifen. Der OpenAccess definiert sich im Lieferzustand folgendermaßen: Zugriff auf die angeschlossene CPU ohne vorherige Anmeldung mit ... - Page 54 Space-Taste den dortigen Eintrag auf NO. Speichern Sie Ihre Einstellung mit F1. Somit ist der OpenAccess deaktiviert und der Zugriff auf das CATVision- System nur noch über den Login möglich. Um den OpenAccess zu aktivieren, wiederholen Sie die zuvor beschriebene Verfahrensweise, ändern jedoch den Eintrag im Feld Account enabled von NO...
-
Page 55: Zugriff Über Definierte User
Guntermann & Drunck GmbH Installations- und Bedienungsanleitung CATVision (MC) 7.1.2 Zugriff über definierte User Beabsichtigen Sie, das System gegen unbefugten Zugriff zu schützen, ist es sinnvoll User anzulegen und diese User mit bestimmten Rechten auszustatten. Sobald durch den Supervisor im Menü UserAccount Benutzer angelegt worden sind, ist der Zugriff auf des System nur noch über einen Login-Namen... -
Page 56: Automatische Umschaltung
Installations- und Bedienungsanleitung CATVision (MC) Automatische Umschaltung Das CATVision-System erlaubt die wahlweise Bedienung des Rechners von beiden Konsolen aus (lokal und remote). Im Grundzustand ist die Bedienung für beide Konsolen freigechaltet. Sobald an einer der Stationen eine Eingabe über Keyboard oder Mouse durchgeführt wird, sind Keyboard/Mouse der anderen Station automatisch... -
Page 57: Manuelle Haltefunktion (Permanent Access)
Installations- und Bedienungsanleitung CATVision (MC) Manuelle Haltefunktion (Permanent Access) Durch das CATVision-System ist es möglich, dass entweder die lokale oder die entfernte (remote) Konsole exklusiv den Rechner bedienen kann. Dies verhindert, dass das System die andere Konsole nach dem voreingestellten Time-Out von ca. -
Page 58: Protected Mode
Konsole, welche weiterhin gesperrt ist, durch schnell blinkende Lock“, die ACTIVE LED LOCAL Keyboard-Led „Scroll (z. B. bei CATVision-CPU) erlischt und die ACTIVE LED CPU leuchtet auf beiden Monitoren erscheint folgende Anzeige PROTECTION ACTIVATED Die Protected Mode wird durch erneutes Drücken der Tastenkombination... -
Page 59: Dunkelschaltung Des Monitors
Installations- und Bedienungsanleitung CATVision (MC) Dunkelschaltung des Monitors Beim CATVision-System besteht die Möglichkeit, während des lokalen oder entfernten Zugriffs auf den Rechner, den Monitor der nicht zugreifenden Konsole dunkel zu schalten. Sie können somit z. B. als Supervisor Ihre Konfigurationseinstellungen gegen unbefugte Beobachter schützen. -
Page 60: Manueller Logout
Bedienungsanleitung CATVision (MC) Manueller Logout Durch Drücken der Taste im Function Menü führen Sie ein Logout durch. Diese Funktion hebt Ihre Anmeldung am CATVision auf. LOGIN Nach der Ausführung wechselt der CATVision zum Fenster: Sollten Sie sich noch im Modus OPEN ACCESS befinden, können Sie ... -
Page 61: Optionale Ausstattung
Guntermann & Drunck GmbH Installations- und Bedienungsanleitung CATVision (MC) Optionale Ausstattung Alle in diesem Kapitel erwähnten Ausstattungskomponenten sind als Zukaufoption erhältlich. Sollten Sie nachträglich einen der im folgenden genannten Komponenten benötigen, so setzen Sie sich bitte mit unserem Vertrieb in Verbindung. -
Page 62: Audio
Guntermann & Drunck GmbH Installations- und Bedienungsanleitung CATVision (MC) Audio Das CATVision bietet eine bidirektionale Stereo-Audio-Übertragung in nahezu CD-Qualität an. Dazu befinden sich am CATVision-CPU die Audioschnittstellen Line In Line Out Mouse PS/2 RS 232 Line In Line Out USB K/M USB 1.1... -
Page 63: Übertragung Von Usb 1.1 (Transparent)
Guntermann & Drunck GmbH Installations- und Bedienungsanleitung CATVision (MC) RS232 Mit der Schnittstelle RS232 lassen sich externe serielle Geräte am CATVision anschließen. Folgende Parameter müssen diese Geräte erfüllen: Übertragungsrate: 200 Meter max. 38400 bit/s 100 Meter max. 57600 bit/s ... -
Page 64: System-Update
Guntermann & Drunck GmbH Installations- und Bedienungsanleitung CATVision (MC) System-Update Mit dem CATVision haben Sie die Möglichkeit einen Firmware-Update über die Servicebuchse (2,5mm Klinke) durchzuführen. Diese Buchse finden Sie beim CATVision-CPU auf der Vorderseite des Gerätes. Servicebuchse für Firmwareupdate Beim CATVision-CON befindet sich diese Buchse auf der Rückseite des Gerätes. -
Page 65: Cv-Power-Erweiterung
PC. Dafür werden mit einer einfachen Slot-Blenden-Einsteckkarte in dem zu bedienenden PC die vorhandenen Taster mit den Steuersignalen des CATVision kombiniert. 11.1 Lieferumfang Zum Anschluss am CATVision-CPU 1 x CV-Power Slotkarte (ATX-Modul) zum Einbau im PC 2 x 2pol. Verbindungskabel-0,4 zur Verbindung zwischen Motherboard ... -
Page 66: Installationsanleitung
Guntermann & Drunck GmbH Installations- und Bedienungsanleitung CATVision (MC) 11.2 Installationsanleitung 11.2.1 Einbau im PC Die Verbindung des CV-Power (ATX-Modul) mit dem Motherboard des Rechners ermöglicht die Durchführung von RESET und Schalten der ATX-Stromversorgung Zum Schalten der ATX-Stromversorgung gehen Sie bitte folgendermaßen vor: Öffnen Sie die seitliche Verkleidung des PC... - Page 67 O2 RESET# (Pin 3) O2 ATXPWR# (Pin 1) Die Fernauslösung von Reset oder Ein-/Ausschalten des Rechners funktioniert nur bei eingeschalteten und verbundenen (über CAT-x Kabel) CATVision-CPU und CATVision-CON. Bei ordnungsgemäßer Verdrahtung funktionieren die Taster am PC ganz wie gewohnt auch weiterhin.
-
Page 68: Verbinden Mit Catvision-Cpu
ATX-Modul CV-Power. 11.2.3 Verbinden des Tasters mit dem CATVision-CON Bevor Sie Ihren Taster mit dem CATVision-CON verbinden, muss Ihr Taster mit der im Lieferumfang enthaltenen 3-poligen Kabelbuchse verbunden werden. Anhand der nachfolgenden Abbildungen ersehen Sie, welche Leitungen mit welchem PIN verbunden werden müssen. - Page 69 I1 SW1_ATXPWR# (Pin 1) I2 SW2_RESET# (Pin 3) - 0V (Pin 2) Nachdem Sie Ihren Taster mit der 3-poligen Kabelbuchse verbunden haben, stecken Sie diese in den 3-poligen Flanschstecker des CATVision-CON. Dieser ist auf der Rückseite des Gerätes angebracht. (3-poliger Flanschstecker) Seite 69...
-
Page 70: Technische Daten
Guntermann & Drunck GmbH Installations- und Bedienungsanleitung CATVision (MC) Technische Daten 12.1 CATVision Video: Auflösung: max. 1920 x 1440 Bildpunkte (abhängig von Kabel und Videosignal) Übertragungslänge: 10 bis max. 300 Meter (abhängig von Kabel, Auflösung und Video- signal) ... - Page 71 Guntermann & Drunck GmbH Installations- und Bedienungsanleitung CATVision (MC) Gehäusemaße: CATVision-CPU 210 x 44 x 210 ( 19“ / 1HE ) ( B x H x T in mm ) CATVision-CON 210 x 44 x 210 ( 19“ / 1 HE )
-
Page 72: Catvision-Mc
Guntermann & Drunck GmbH Installations- und Bedienungsanleitung CATVision (MC) 12.2 CATVision-MC Video Auflösung: max. 1920 x 1440 Bildpunkte (abhängig von Kabel und Videosignal) Übertragungslänge: 10 bis max. 300 Meter (abhängig Kabel, Auflösung Videosignal) übertragbare Signale: RGBHV, RGsB oder RsGsBs... - Page 73 Guntermann & Drunck GmbH Installations- und Bedienungsanleitung CATVision (MC) Gehäusemaße CATVision-MC 2 (3,4)-CPU; CATVision-MC 3 (4)-CON Twin CATVision-MC 2-CPU 435 x 44 x 210 (19“ / 1 HE) ( B x H x T in mm ) CATVision-MC2-CON 210 x 44 x 210 (19“ / 1 HE)
-
Page 74: Anhang
Guntermann & Drunck GmbH Installations- und Bedienungsanleitung CATVision (MC) Anhang 13.1 HotKey-Belegungstabelle Funktion Default-HotKey Persönlicher Seite im HotKey Handbuch Aufruf des Function- CTRL+ NUM Seite 29 Menüs Permanent Access CTRL + DRUCK Seite 40 Freischaltung der CTRL + DRUCK Bedienung im... -
Page 75: Passwort
Guntermann & Drunck GmbH Installations- und Bedienungsanleitung CATVision (MC) 13.3 Passwort Für den OpenAccess muss kein Name und Passwort eingegeben werden. Wollen Sie Konfigurationen am System vornehmen, müssen Sie sich als SUPVERVISOR anmelden! SUPERVISOR L O G I N C V M... - Page 76 Guntermann & Drunck GmbH Operating Instructions CATVision (MC) NFORMATION Warning N ORDER TO AV OID THE RISK OF AN ELECTRIC SHOCK THE DEVICE IS NOT TO BE OPENED OR THE COVERS NOT TO BE REMOVED N CASE OF AN ERROR PLEASE CONTACT OUR TECHNICIANS...
- Page 77 CATVision (MC) CATVision Table of Content Description ......................6 Scope of Delivery ....................7 Installation ......................8 Installing of the transmitting unit..............8 3.1.1 Videoconnection at CATVision-MC-CPU ..........9 3.1.2 Optional Connections ................9 Installation of the receiving unit..............10 3.2.1 Videoconnection at CATVision-MC-CON...........11 3.2.2 Optional Connections .................11 Power Supply .......................13...
- Page 78 Guntermann & Drunck GmbH Operating Instructions CATVision (MC) Config......................34 6.2.1 IVT......................35 6.2.2 System Config ..................36 6.2.2.1 Defining the first Hotkey ............37 6.2.2.2 Defining the Double-HotKey.............37 6.2.2.3 Set System Defaults (Supervisor Function) ......38 6.2.2.4 Remote Video (Dark-Switching) ..........38 6.2.2.5 Local Video (Dark-Switching) ...........39 6.2.2.6...
- Page 79 11.1 Scope of Delivery ..................62 11.2 Installation ....................63 11.2.1 Installation in the PC ................63 11.2.2 Conncetion with CATVision-CPU ............65 11.2.3 Connection of the key switch with CATVision-CON ......65 Specifications.......................67 12.1 CATVision ....................67 12.2 CATVision-MC .....................69 Appendix.......................71 13.1 HotKey Seizure ....................71 13.2...
-
Page 80: Description
Also a local console can be connected to the transmitter. You can choose between local and remote operation. If you use a CATVision-MC-System, your PC can be equipped with up to 4 Video-Outlets. Following products are available (differentiation by existing videochannel/s) -
Page 81: Scope Of Delivery
-> for connecting a serial terminal device 2 x Audio-M/M-2 -> for the audio port K-C7-x -> for transparent USB 1.1 transmission Additional Scope of Delivery for CATVision-MC: VGA-M/M-2 -> HD15 (jack/jack) Video connection cable; Number depends on existing videochannels page 7... -
Page 82: Installation
The installation of CATVision and CATVision-MC differs in the number of connectable video sources. As an installation example the manual focus is therefore on the CATVision. The connection of additional video sources will be explained separately. Installing of the transmitting unit... -
Page 83: Videoconnection At Catvision-Mc-Cpu
Transmission Monitor VGA Keyb. Mouse CPU Connection of RS232 Connect the RS232-M/F-x connecting cable (x=2, 4, 6 or 9 m) with a COM interface of the computer and the RS232 interface (optional) of the CATVision-CPU (seizure 1:1). page 9... -
Page 84: Installation Of The Receiving Unit
Connection of Audio Connect the Audio-M/M-2 connecting cable with the line-out interface of the computer (or another audio device) and the Line IN interface (optional) of the CATVision-CPU. Connection of USB1.1 Connect the jack USB - Typ B of the delivered USB-cabel to the interface CPU of the CPU unit. -
Page 85: Videoconnection At Catvision-Mc-Con
USB-interfaces Keyb. USB Mouse at the backside of CATVision-CON. Don´t use the USB-interfaces at the frontside of CATVision-CON for keyboard- mouse connection. The usage of these USB-interfaces is restricted to a usage as a transparent USB-transmission to the local 3.2.1... - Page 86 Connection of USB1.1 Connect your USB devices with one of the four available USB-A-ports on the frontside of the CATVision-CON. Note: The usage of these USB-interfaces is restricted to a usage as a transparent USB-transmission to the local PC.
-
Page 87: Power Supply
Red. Power Trans Keyb PS/2. 12V DC/0,6A Transmission Monitor VGA Keyb. Mouse CPU Connection for the optional redundant power supply Rear view of CATVision-CPU Connection for the main power supply RS 232 Line In Micro In Speaker Keyb. Mouse USB Trans 12V DC/0,9A Transmission Red. -
Page 88: Operation
CATVision (MC) Operation Switching on the CATVision-System After having switched on the CATVision system the following information appears on your monitor (local and remote): S Y S T E M S T A R T U P C V M... -
Page 89: Keyboard/Mouse Local Not Attached
Please wait… In this case the monitor at the CATVision-CON changes automatically to the next Information-Window (IVT-Information). To close this window or to start IVT you have to connect at least a keyboard to the system. -
Page 90: Missing Of The Cat-X-Connection And Local Keyboard/Mouse
Guntermann & Drunck GmbH Operating Instructions CATVision (MC) In this case the CATVision-System remains in this condition. To proceed with initial operation, establish first the needed CAT-x-connection. When this connection has been established, the CATVision-System automatically changes to IVT-Information window (local and remote). -
Page 91: Getting Into Operation / Leds
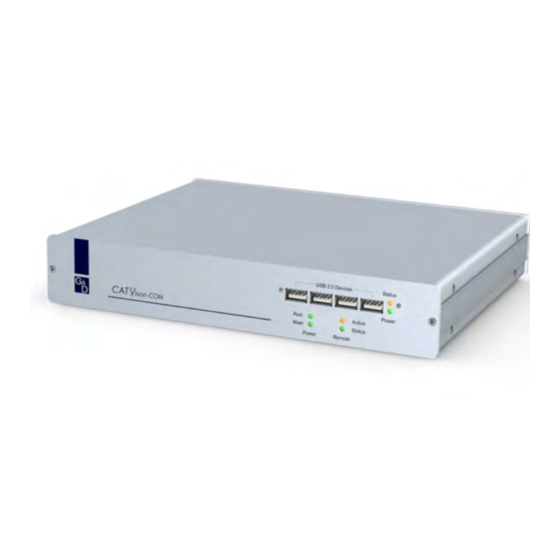
Guntermann & Drunck GmbH Operating Instructions CATVision (MC) Getting into Operation / LEDs After having connected the power set switch on the CATVisions via toggle switch on the rear. The LEDs on the front side mean the following: CATVision CPU... - Page 92 Permanent Access or Protected Mode is active plus the set time out. Power Local Red. Active ision -CPU Main Status Front view of CATVision-CPU Status USB 1.1 Devices Power Red. Active ision -CON Main Status...
-
Page 93: Ivt - Individual Video Tuning
The system covers a range of 0 – 190; adjustment can be done in increments of 1. The CATVision system offers the possibility of selecting the kind of cable used. Choose the corresponding mode for the kind of cable used most often. -
Page 94: Calling Up The Ivt Mode
Guntermann & Drunck GmbH Operating Instructions CATVision (MC) 5.4.2 Calling up the IVT Mode The IVT mode can be called up in two ways (Default): via function menu CTRL & NUM via hotkey CTRL & Scroll. The following window opens:... -
Page 95: Call Up Via Function Menu
Guntermann & Drunck GmbH Operating Instructions CATVision (MC) 5.4.2.1 Call up via Function Menu For calling up the IVT mode open the function menu with CTRL + NUM (Default). F u n c t i o n C V M... -
Page 96: Video Tuning Settings
Saves all changes and closes the IVT submenu copies all settings to all channels 1/2/3/4 Selecting the video channel (only with CATVision-MC- Systemen) Carries out automatic video optimization for the active channel Carries out automatic video optimization for all channels... -
Page 97: Changing Video Channels
3 seconds. With the key the settings will be established for all channels (only with CATVision-MC systems). In this case, following message appears on your monitor: I n f o C V M... -
Page 98: Manual Settings
Guntermann & Drunck GmbH Operating Instructions CATVision (MC) Note: Channel 2 to 4 are only available by the usage of an CATVision-MC- system! The entrys behind the channel have the following meaning: automatic measuring succesfully completed not connected: no video signal available at this channel... -
Page 99: Setting Noise Suppression
Guntermann & Drunck GmbH Operating Instructions CATVision (MC) If you want to make other changes within the IVT submenu, use the ARROW DOWN ARROW and/or keys to move to another entry. After establishing the video boost, confirm and save your selection by pressing or discard your changes by pressing ESC. -
Page 100: Fine Tuning
0 ns 0 ns 0 ns At the CATVision system the run time delay compensation can be set up to 46 At 0 ns there is no delay compensation. For compensating the delay the following keys can be used: minimizes the delay compensation for 2 ns. -
Page 101: Copy The Ivt Settings
1280 x 1024 max. 85 Hz This overview includes no maximum values. 5.4.7 Recommended Cables G&D recommends for the use of the CATVision system the following cables: Patch cable: AETWYLER (up to 100 meter) UNINET 7702 flex 4P AWG26 S-STP... -
Page 102: Configuration
Guntermann & Drunck GmbH Operating Instructions CATVision (MC) Configuration The CATVision system can be adapted to your needs. The configuration is done via AdonIS. With CTRL (Default) you open AdonIS: F u n c t i o n C V M... -
Page 103: Console Setup
F1:Save 6.1.1 ScreenSaver Settings The ScreenSaver to be set is started by CATVision and has nothing to do with the ScreenSaver of the computer. As in general there is only one indirect connection (via CATVision) between the computer and the monitor you should switch off the ScreenSaver of the computers for making work easier. -
Page 104: Autologout Setting
Guntermann & Drunck GmbH Operating Instructions CATVision (MC) 6.1.2 AutoLogout Setting With this setting you can activate the automatic LOGOUT of the system. The automatic LOGOUT, like the manual (F8), leads you back to the LOGIN mask. With this the system is protected against unauthorized access. You can only get access after entering your password in the LOGIN window. -
Page 105: Activating The Channel "Display
Guntermann & Drunck GmbH Operating Instructions CATVision (MC) 6.1.4 Activating the Channel “Display” With this you have the possibility to set the display of the selected computer or system informations either to permanent = > Perm or temporary =>... -
Page 106: Setting The Menu Position & Size
6.1.7 Settings of the extended Mouse Support With this the special keys of the Intelli Explorer Mouse for working with CATVision are activated. By setting the entry to “Yes” AdonIS can also be called up by pressing button 4 or 5 of the Explorer Mouse (left side buttons). -
Page 107: Osd Syncmod
Guntermann & Drunck GmbH Operating Instructions CATVision (MC) 6.1.8 OSD SyncMod Graphics cards are able to generate different sync signals (sync on Green, RGBHV etc.). Depending on the sync signal it has effect on the picture of AdonIS. AdonIS is designed for a RGB/HV-Sync signal. If the graphics card of the connected computer sends a different sync signal than RGB/HV the consequence would be a colour corruption of AdonIS. -
Page 108: Config
Anyway, the SUPERVISOR has always access authority on that Config Menu! Because the CATVision system is used either in the Open Access Mode (access to the system without Login-Name and Password) or by opened User Accounts different constellations occur when calling up the Config Menu:... -
Page 109: Ivt
Guntermann & Drunck GmbH Operating Instructions CATVision (MC) Opened User Accounts & Supervisor (OpenAccess is disabled): Access without password query is possible because the users are already logged in (the password query via Access Config window doesn´t apply). Every user, however, can have different configuration rights (e.g. only IVT and System Config). -
Page 110: System Config
Guntermann & Drunck GmbH Operating Instructions CATVision (MC) 6.2.2 System Config Move in the menu Config Menü to the entry System Config and press Enter. The following window will open: S Y S T E M C O N F I G... -
Page 111: Defining The First Hotkey
Guntermann & Drunck GmbH Operating Instructions CATVision (MC) 6.2.2.1 Defining the first Hotkey Move with the cursor to the entry HotKey. By pressing SPACE you can select between the following alternatives: Ctrl, Alt, AltGr, Win, Shift Please remember that the defined HotKey also is used as first key for... -
Page 112: Set System Defaults (Supervisor Function)
Guntermann & Drunck GmbH Operating Instructions CATVision (MC) 6.2.2.3 Set System Defaults (Supervisor Function) This function sets back this device to the default condition. Also the passwords and IVT settings are set back. The corresponding default settings can be found in the descriptions of the different menu windows in this documentation. -
Page 113: Local Video (Dark-Switching)
6.2.2.6 Permanent Access Whilst your e. g. configuration you don´t want to be interrupted. Therefor the remote console (CATVision-CON) as well as for the local console (CATVision- CPU) has the possibility of activating a permanent access (hold function, chapter 7.3). -
Page 114: Defining The Time Out
Guntermann & Drunck GmbH Operating Instructions CATVision (MC) 6.2.2.7 Defining the Time Out With this setting you define the delay time you define how long the blocked console stays inactive unless at the active console no Keyboard/Mouse action can be mentioned. The other console can have access to the system again, after the in this chapter defined time-out after the last keyboard/mouse action has exceeded. -
Page 115: Keyb. Led Flash
For saving the settings and closing the menu press F1. 6.2.2.13 USB SUN Keyboard mode If you connect a SUN computer with USB keyboard (and mouse) at CATVision- CPU, adjust this setting to yes. At default the support for USB SUN Keyboards is deactivated. -
Page 116: Usb Sun Keyboard Layout
At default modifying of this adjustment is not possible, because the support for USB SUN keyboards is deactivated. 6.2.2.15 Temperature Warning Both the user module (CATVision-CON) and the computer module (CATVision- CPU) provide temperature sensors. The temperature within the devices is permanently monitored. -
Page 117: Keyboard Type Local
Guntermann & Drunck GmbH Operating Instructions CATVision (MC) Decide whether you want the temperature warning to be displayed in the OSD or as display popup : OSD: In the defaults of the KVM extender, the warning is displayed in a separate OSD window. -
Page 118: Signal Type Input
Separated H/V as input When CATVision detects seperated HV signals, the value behind the entry „Remote sync“ changes to „Separated H/V“. This entry is not editable. When no seperated HV signals can be detected, you still have the possibilty to deliver seperated HV signals by choosing the value „Separated H/V“. -
Page 119: Account Enable / Disable
User, who optionally can be be provided with configuration rights Open Access: by enabling this account, you can access the CATVision- System without Login-Name and Passwort. Up to 8 users, SUPERVISOR + OpenAccess can be managed. U s e r A c c o u n t C V M A c c o u n t N o . - Page 120 Guntermann & Drunck GmbH Operating Instructions CATVision (MC) 6.2.3.2 er Name Defining the Us User name USER 01 Enter maximum 14 characters for the name of the user of this account. Current entries can be written over. Move the cursor to this array. Press...
-
Page 121: Set Account Defaults
Guntermann & Drunck GmbH Operating Instructions CATVision (MC) 6.2.3.3 Set Account Defaults Set Account Defaults This function sets back all changes of the USER ACCOUNT to the default values which can be found at the end of a chapter at “default”. -
Page 122: User Account Access
Guntermann & Drunck GmbH Operating Instructions CATVision (MC) 6.2.3.6 User Account Access User Account Access ... No/Yes Here you can give the owner of this account access to the menu User Account or not. Move to the array and give access to the User Account by entering or deny access by entering N. -
Page 123: Mouse Utility
Guntermann & Drunck GmbH Operating Instructions CATVision (MC) ENTER will close the first entry and automatically will lead you to the second array where you have to enter the password once again. With ENTER confirm the new password and go back to the USER ACCOUNT. - Page 124 Guntermann & Drunck GmbH Operating Instructions CATVision (MC) Enable Mouse (Standard Mouse) Select this function for non-Windows systems (e.g Linux) if the computer works with a standard mouse driver. Reset Mouse Select this function for Windows OS; independent from the set mouse driver.
-
Page 125: System Operation
In the following chapters these possibilities of access are described in detail. 7.1.1 OpenAccess At OpenAccess everybody has access to the CATVision system and the connected CPU. OpenAccess in default condition is defined as follows: Access to the connected CPU without necessary log-in with name and ... -
Page 126: Access Via Defined User
NO. Save your Space settings with F1. With this OpenAccess is disabled and access to the CATVision system is only possible with the log-in. For activating OpenAccess again repeat the last procedure and change the entry from NO to YES! 7.1.2... -
Page 127: Access As Supervisor
Please remove the SUPERVISOR password from the operating instructions for your own safety. Automatic Switching The CATVision system allows the selectable operation of the computers from both consoles (local and remote). In default operation at both consoles is possible. As soon as at one of the consoles there is keyboard or mouse action keyboard and mouse of the other station are disabled. -
Page 128: Manual Hold Function (Permanent Access)
CATVision (MC) Manual Hold Function (Permanent Access) The CATVision system makes it possible that either the local or the remote console has access to the computer. This prevents that the system enables the other console after a preset time out of approx 1 second. -
Page 129: Protected Mode
at the console which still is locked by the fast keyboard LED “Scroll Lock”, the ACTIVE LED LOCAL (e.g. at CATVision-CPU) is ACTIVE LED CPU switched off and the is lit. The display looks like the following: PROTECTION ACTIVATED... -
Page 130: Dark Switching Of The Monitor
Operating Instructions CATVision (MC) Dark Switching of the Monitor The CATVision-system offers the possibility that the monitor of the local or remote console can be switched of when a keyboard/mouse action is done at one of the attached consoles. The dark-switching can be carried out: ... -
Page 131: Manual Logout
Manual Logout Function By pressing in the Menu you log-out. This function deletes log-in to the CATVision. LOGIN window After execution CATVision opens the If you are still in the mode OPEN ACCESS you can directly log-in again with Enter. -
Page 132: Optional Equipment
Guntermann & Drunck GmbH Operating Instructions CATVision (MC) Optional Equipment All components mentioned in this chapter are available as options. If you need one of these components please contact our sales department. Delay Delay balances the run time delays in CAT-x cables. These run time delays are caused by the twisting of the core pairs. -
Page 133: Audio
Guntermann & Drunck GmbH Operating Instructions CATVision (MC) Audio CATVision offers a bidirectional Stereo-Audio transmission nearly in CD quality. For this CATVision-CPU has Line In Line Out. Mouse PS/2 RS 232 Line In Line Out USB K/M USB 1.1 Main Power Red. -
Page 134: Usb 1.1 Transmission
Due to the used technologie you overcome the transmitting limitation of the USB standard between the PC and the USB – device.(normally up to 5 meter). With the CATVision-System USB-devices can be connected up to 200 meter to the local PC. -
Page 135: System-Update
System Info In the window System Info which only can be called up via FUNCTION menu no settings can be made. Here you will find information about CATVision which is important for the service department. With you close the window. -
Page 136: Cv-Power-Expansion
Operating Instructions CATVision (MC) CV-Power-Expansion By the CV-Power functionality (GPIO= General Purpose Input Output) the CATVision system offers the possibility of transmitting electronic signals over long distances. A correct application for this is the remote control of RESET and ... -
Page 137: Installation
Guntermann & Drunck GmbH Operating Instructions CATVision (MC) 11.2 Installation 11.2.1 Installation in the PC The connection of the CV-Power (ATX module) with the motherboard of the computer allows RESET and switching of the ATX power supply. For switching the ATX power supply please proceed as follows: Open the side covers of the PC case ... - Page 138 O2 ATXPWR# (Pin 1) The remote activation of Reset or On/Off of the computer only works at switched on and (over CAT-x cable) connected CATVision-CPU and CATVision-CON. At a correct wiring the key switches at the PC still work as usual. page 64...
-
Page 139: Conncetion With Catvision-Cpu
11.2.3 Connection of the key switch with CATVision-CON Before connecting the key switch with CATVision-CON the key switch has to be connected with the delivered 3-pole cable jack. From the following illustration you can see which wire has to be connected with which PIN. - Page 140 I1 SW1_ATXPWR# (Pin 1) I2 SW2_RESET# (Pin 3) - 0V (Pin 2) After having connected the key switches with the 3-pole cable jack, plug these in the 3-pole flange connector of CATVision-CON on the back of the device. (3-pole flange connector) page 66...
-
Page 141: Specifications
Guntermann & Drunck GmbH Operating Instructions CATVision (MC) Specifications 12.1 CATVision Video Resolution: max 1920 x 1440 pixels (depending on cable and video signal) Transmitting distance: 10 to 300 m (max value, depending on resolution, cable and video signal) ... - Page 142 Guntermann & Drunck GmbH Operating Instructions CATVision (MC) Weight: CATVision-CPU CATVision-CON without USB 1,20 kg without USB 1,10 kg with USB 1,28 kg with USB 1,18 kg Power supply: Main: 100 – 240 V primary 50 – 60 Hz...
-
Page 143: Catvision-Mc
12 Mbits/s Transmitting cable: CAT-x cable or higher (x = 5, 6, 7) Size: CATVision-MC 2 (3,4)-CPU; CATVision-MC 3 (4)-CON Twin CATVision-MC 2-CPU 435 x 44 x 210 (19“ / 1 unit) (W x H x D in mm) CATVision-MC2-CON 210 x 44 x 210 (19“... - Page 144 Redundant: DC 12V Current consumption (max. values): at 100 V (Main) at 240 V (Main) at 12 V (red.) CATVision-MC-CPU 410 mA 200 mA CATVision-MC-CON 310 mA 160 mA 1,5 A Power consumption (max. values): at 100 V (Main) at 240 V (Main) at 12 V (red.)
-
Page 145: Appendix
Guntermann & Drunck GmbH Operating Instructions CATVision (MC) Appendix 13.1 HotKey Seizure Function Default HotKey Personal HotKey Chapter Calling up Function- CTRL+ NUM Menu Manual Hold function CTRL + PRINT Activating keyboard- mouse operation in CTRL + PRINT protected mode... -
Page 146: Password
Guntermann & Drunck GmbH Operating Instructions CATVision (MC) 13.3 Password For OpenAccess name and password are not necessary. If you want to configurate the system you have to log-in as SUPVERVISOR! SUPERVISOR L O G I N C V M... - Page 147 NOTES...
- Page 148 NOTES...
- Page 149 NOTES...
- Page 150 NOTES...
- Page 151 NOTES...
- Page 152 Das Handbuch wird fortlaufend aktualisiert und im Internet veröffentlicht. The manual is constantly updated and available on our website. http://gdsys.de/A9100189 Guntermann & Drunck GmbH Obere Leimbach 9 57074 Siegen Germany http://www.gdsys.de sales@gdsys.de...
Need help?
Do you have a question about the CATVision and is the answer not in the manual?
Questions and answers