Table of Contents
Advertisement
Advertisement
Table of Contents

Related Manuals for LeMond G-force rt


Summary of Contents for LeMond G-force rt
- Page 1 OW N E R ’S M A N UA L OW N E R ’S M A N UA L...
- Page 2 LeMond Fitness Inc. 15540 Woodinville-Redmond Road Building A, Suite 100 Woodinville, WA 98072 USA Telephone (+1) 425.482.6773 Fax: (+1) 425.482.6724...
- Page 3 America’s most famous cyclists. Our company founder, Greg LeMond, is the force (the g force) behind the inspiration and design of this remarkable indoor bike. Greg’s story is one of courage and heroic accomplishment. In 1986, Greg became the first American to win the longest and most physically demanding event in the world —...
- Page 4 • Telemetry Heart Rate equipped • No calibration required Challenging Workout Programs • Eleven different workout programs — enjoy using five traditional exercise programs and six Greg LeMond training programs specifically designed for a variety of training applications • Traditional Programs Manual Hill...
-
Page 5: Table Of Contents
Table of Contents BEFORE GETTING STARTED ..........6 IMPORTANT SAFETY INSTRUCTIONS . -
Page 6: Before Getting Started
1 BEFORE GETTING STARTED It is always important to consult a physician for a complete physical examination before starting any exercise program. Beyond identifying any risk factors you may have, your health professional can assist you in developing an exercise program which establishes the frequency and intensity appropriate for your age and current health status. -
Page 7: Important Safety Instructions
• Do not attempt to remove the side panels of the . Service should be completed by an authorized service provider. Please call the LeMond Fitness Customer Service Department at (+1) 425.482.6773 between the hours of 7:00 a.m. – 5:00 p.m. M – F Pacific time for assistance. -
Page 8: Assembly And Installation Instructions
3 ASSEMBLY AND INSTALLATION INSTRUCTIONS All equipment manufactured by LeMond Fitness, Inc. has been thoroughly inspected by the manufac- g•force RT turing facility prior to shipment. Proper installation and regular maintenance of the required to ensure the safety of the operators. -
Page 9: Getting Started
Contact the delivery carrier immediately if any damage is discovered. Contact the LeMond Fitness Customer Service Department at (+1) 425.482.6773 between 7:00 a.m. – 5:00 p.m., M-F, Pacific time to report any... - Page 10 3 ASSEMBLY AND INSTALLATION INSTRUCTIONS 3.3 Parts Contents of Large Cardboard Box Part Description Quantity Plastic bag with tools, hardware and instructions Front stabilizer with one wheel attached Front wheel Front wheel cap Rear stabilizer with one foot attached Rear leveling foot Seat frame Seat bottom Handlebar...
- Page 11 3 ASSEMBLY AND INSTALLATION INSTRUCTIONS M8x50 M6x15 flat washer M8x30 M5x25 star washer M8x20 M5x15 self-tapping screw Tools and Hardware List Part Number Description Quantity SA10525 M5x25 screw SC10830 M8x30 screw SC10615 M6x15 screw SC10515 M5x15 screw SC10820 M8x20 screw SC10850 M8x50 screw SL20515...
-
Page 12: Front Stabilizer
3 ASSEMBLY AND INSTALLATION INSTRUCTIONS 3.5.1 Body 1. Fold down the sides of the carton base and remove the packing material from around the bike. 2. Leave the body of the bike on the carton base while the remaining assembly is completed. CAUTION: Remove the staples completely to avoid injury. -
Page 13: Rear Stabilizer
3 ASSEMBLY AND INSTALLATION INSTRUCTIONS 3.5.3 Rear Stabilizer 1. Locate the rear stabilizer and the level- ing feet. 2. Slide the rear stabilizer into place at the rear of the body frame from the right side and rotate until the set screw is positioned in the alignment notch. -
Page 14: Attaching The Display Console
3 ASSEMBLY AND INSTALLATION INSTRUCTIONS Attaching the Display Console to the Console Mast Battery Installation CAUTION: Never use conventional alkaline batteries. You will damage your electronic parts and void your warranty. g•force RT The display console of the is powered by (4) rechargeable AA nickel-metal hydride (Ni-MH) batteries, which are included. - Page 15 3 ASSEMBLY AND INSTALLATION INSTRUCTIONS 3.5.5 Seat Attaching the Adjustment Handles to the Seat Carrier 1. Locate the seat adjustment handles. They can be found in the plastic bag contain- ing the tools and other hardware. 2. The shorter, L-shaped handle is attached to the left side of the bike and controls the seat angle adjustment.
- Page 16 3 ASSEMBLY AND INSTALLATION INSTRUCTIONS Attaching the Saddle to the Seat Assembly 1. Place the seat bottom on the rails of the seat assembly. 2. Attach the seat bottom to the seat assembly by sliding (4) star washers onto each of (4) M8x50 screws and tighten using the 6mm hex wrench.
- Page 17 3 ASSEMBLY AND INSTALLATION INSTRUCTIONS Connecting the Wiring for the Contact Heart Rate Grips Once the seat assembly has been at- tached to the seat carrier, connect the two wires on the handlebars to their corre- sponding wires on the seat carrier. The connection on each of the two wires is different.
- Page 18 The cranks of the have 9/16-20 threads, making the bike compatible with all standard pedal systems, including the LeMond® Dual-sided Indoor Cycling Pedal. 3.5.7 Cup Holders 1. Place one cup holder in each bend of the handlebars. The cup holders are marked as left (L) or right (R) on the underside of the holder.
-
Page 19: Setting Up And Operating The G•Force Rt
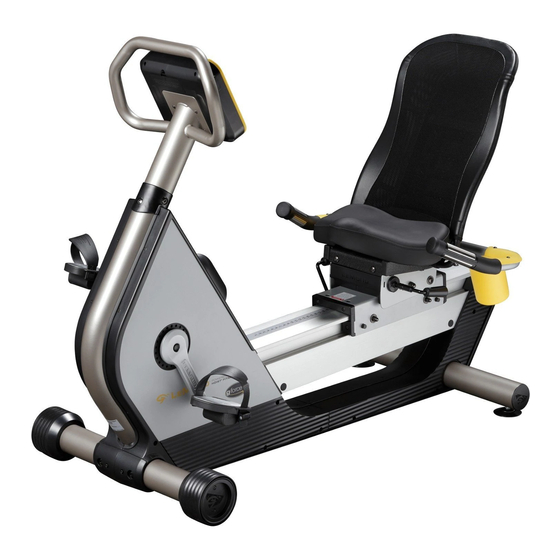
4 SETTING UP AND OPERATING THE g•force RT 4.1 Bike g•force RT Taking a moment to learn how to set up your correctly will make your workouts a more g•force RT pleasant experience. The design of the provides more seat adjustability than any other recumbent available. -
Page 20: Pedal Strap Adjustment
As you become more familiar with your new fitness bike, you may want to consider a strapless pedal system such as the LeMond® Dual-sided Indoor Cycling Pedal. This type of pedal has long been used by professional and serious recreational cyclists to maximize the efficiency of their pedal stroke and keep the foot in the correct position. -
Page 21: Display Console
4 SETTING UP AND OPERATING THE g•force RT 4.2 Display Console g•force RT The display console of the serves two purposes: to allow you to choose the bike’s functions, and to provide you with feedback about the progress of your current workout. Note: Always use a light touch when pressing keys on the console overlay. - Page 22 4 SETTING UP AND OPERATING THE g•force RT Profile Display: This 10x16 LED matrix screen has two functions. When setting up a program, the PROFILE DISPLAY will show values, such as age and weight, that you will be asked to modify. Use the + or - keys to increase or decrease the default value that is shown in the PROFILE DISPLAY.
- Page 23 Defined Programs: A variety of workouts that allow you keep your exercise program varied and inter- esting, including some of Greg LeMond’s favorite workouts (located in the Lemond Training Program) that he uses for race preparation which are located in the LEMOND TRAINING program.
-
Page 24: Guidelines For An Effective Exercise Program
5 GUIDELINES FOR AN EFFECTIVE EXERCISE PROGRAM Setting a Goal and Defining Objectives An important step in a successful exercise program is to set achievable goals and objectives. Regardless of your current physical condition, you need to establish a workable plan to reach your fitness goals. Begin by asking yourself a few basic questions. - Page 25 5 GUIDELINES FOR AN EFFECTIVE EXERCISE PROGRAM Guidelines for Exercising on the g•force RT Warming Up A good warm-up is one of the most important and most frequently overlooked part of an exercise regi- men. Without a proper warm-up, the muscles of the body are far more prone to injury. A good warm-up prepares the body for the stress you will place your muscles under during your workout and will de- crease your chances of becoming injured.
- Page 26 Keep in mind the story of Greg LeMond who came back from a near fatal injury to win the most famous bike race in the world - not just once but twice. He too had to start over...
-
Page 27: Program Profiles
For example, you can choose a challenging workout such as a RACE against Greg LeMond on a Tuesday, and then do a less intense, recovery ride with the CONSTANT HR workout on the following day. - Page 28 Test your fitness against Greg’s! The RACE program is a simulated competition between yourself and Greg LeMond. In the PROFILE DISPLAY a circle of lights represents your progress throughout the race. The inside circle of lights represents Greg and the outside circle of lights represents you. The flashing LED represents the ‘racer’...
- Page 29 200. 6 LeMond Training Within this program are six different workouts specifically designed by Greg LeMond, which he uses for race preparation. Each workout has a specific purpose in his, and in your, training plan. Use these workouts for your own race preparation, and then test your progress by challenging Greg in a RACE program.
- Page 30 6 PROGRAM PROFILES Setting Up and Running the Programs The easiest way to set up and run the programs in the display console, is to simply enter data as asked for by the MESSAGE DISPLAY. The prompts in the MESSAGE DISPLAY are simple messages that guide you through the program set up.
- Page 31 6 PROGRAM PROFILES Defining a USER PROFILE Entering data for a custom USER PROFILE can be accomplished at two different stages. The parameters can be entered before a DEFINED PROGRAM has been selected, or during the initial set-up of a DEFINED PROGRAM.
- Page 32 6 PROGRAM PROFILES Running the Defined Programs Once you have become comfortable with the DISPLAY CONSOLE, take the following steps to run a DEFINED PROGRAM and begin your exercise routine in earnest. Remember that the messages in the MESSAGE DISPLAY will quickly and easily get you started with your workout. 1.
- Page 33 The programs will be far easier to complete if your muscles are sufficiently prepared. Setting up and Running the LeMond Training Programs 1. To run one of the six workouts in the LeMond training program, first select LEMOND TRAINING at the SELECT WORKOUT prompt.
- Page 34 6 PROGRAM PROFILES The REV-IT-UP program is designed to increase your maximum power output. Low intensity, recovery segments are punctuated by short but extremely high intensity intervals. Designed to increase your top end, this workout will give you speed and power to spare! Pump the Power: This challenging workout is designed to develop greater strength and endurance.
- Page 35 6 PROGRAM PROFILES Bust Your Gut: This workout tests all aspects of your fitness. 60 second high intensity efforts are followed by three minute recovery periods of moderate intensity. Those three minutes might feel pretty short by the end of this 30 minute workout. This program will do wonders for your strength, power, endurance, and, of course, your waistline.
- Page 36 6 PROGRAM PROFILES Peak Power: In this program you will complete an ‘aerobic ladder’ . Starting at a low intensity, you will gradually climb to a moderate intensity level and then gradually work your way back down. This is a great program to alternate with STRONG AND STEADY to enhance fat metabolism and improve aerobic capacity.
- Page 37 6 PROGRAM PROFILES Race Day: A great workout for ‘active recovery’ rest days or as a warm up for races, ball games or a hard weightlift- ing session. With several bursts of hard efforts in the beginning, and finishing with an extended tempo segment, you’ll be ready for your next power workout.
- Page 38 6 PROGRAM PROFILES A Few Additional Tips about the Functions of the Display Console: • You can easily change the resistance level of a workout after the program is running. Using the + or – keys, increase or decrease the resistance to suit your needs. Doing so changes the resistance throughout all segments of the program.
-
Page 39: Maintenance Instructions
7 MAINTENANCE INSTRUCTIONS Maintenance Tips • Always use a soft, cotton cloth and dilute non-abrasive cleaner or a mild detergent for cleaning the exterior of the bike. • Never use ammonia, acid-based, or petroleum-based solvents on any portion of the bike as it may damage the finish. -
Page 40: Troubleshooting
TROUBLESHOOTING guide. Should the symptom not be resolved after consulting this section, please contact our LeMond Fitness Customer Service Department at (+1) 425.48256773 between the hours of 7:00 a.m. – 5:00 p.m. M–F, Pacific time for assistance. - Page 41 8 TROUBLESHOOTING SOLUTION: If using the contact heart rate sensor grips: Make sure that the connection for the sensor grips is secure. Refer to the Assembly Guide fo r specific connection instructions. Grasp the heart rate sensor grips with both hands and apply firm and even pressure to the grips.
-
Page 42: Limited Warranty
LeMond Fitness warrants that all parts of the are free of defects in material and workmanship. LeMond Fitness will repair or replace defective parts or equipment in accordance to the terms listed below. Warranty coverage begins from the date of original purchase and is for the original purchaser. - Page 43 To submit a warranty claim, LeMond Fitness requires a proof-of-purchase and the serial number of the equipment in question. LeMond Fitness will have the option of either repair or replacement at no charge for any defective prod- uct. Delivery of the product to and from the authorized LeMond Fitness dealer is the sole responsibility...
-
Page 44: Product Service
TROUBLESHOOTING section of this manual. In the event that review of these sections fails to pinpoint and solve the problem, please contact our LeMond Fitness Customer Service Department at (+1) 425.482.6773 between the hours of 7:00 a.m. – 5:00 p.m. M–F, Pacific time for assistance. -
Page 45: Specifications
11 SPECIFICATIONS Designed Use: Consumer or light commercial. Light Commercial is defined as: any application in which the equipment is used for less than four hours per day. Maximum User Weight: 300 pounds (136 kg) User Height Range: 58 in (147.3 cm) to 80 in (203.2 cm) tall Workload Range: 23 –... -
Page 46: Appendix
• Reorient or relocate the receiving antennae for your television, radio or other electronic equipment that is in the vicinity. • Consult LeMond Fitness Customer Service, your authorized dealer, or a qualified radio/television technician for help. This product has also been tested and certified to meet the following standards: •... -
Page 47: Warranty Registration
. You have just purchased the finest, most technologically ad- vanced piece of exercise equipment. To validate your product warranty, please have the primary user of the product complete the following information and return to LeMond Fitness within 60 working days from the date of equipment installation. - Page 49 Daily and Monthly Exercise Logs Week # Weekly Goals Date Distance Calories Time Comments Weekly Totals Week # Weekly Goals Date Distance Calories Time Comments Weekly Totals Week # Weekly Goals Date Distance Calories Time Comments Weekly Totals...
- Page 50 Week # Weekly Goals Date Distance Calories Time Comments Weekly Totals Week # Weekly Goals Date Distance Calories Time Comments Weekly Totals Week # Weekly Goals Date Distance Calories Time Comments Weekly Totals...
- Page 51 JANUARY Monthly Goals Week Distance Calories Time Monthly Totals FEBRUARY Monthly Goals Week Distance Calories Time Monthly Totals MARCH Monthly Goals Week Distance Calories Time Monthly Totals...
- Page 52 APRIL Monthly Goals Week Distance Calories Time Monthly Totals Monthly Goals Week Distance Calories Time Monthly Totals JUNE Monthly Goals Week Distance Calories Time Monthly Totals...
- Page 53 JULY Monthly Goals Week Distance Calories Time Monthly Totals AUGUST Monthly Goals Week Distance Calories Time Monthly Totals SEPTEMBER Monthly Goals Week Distance Calories Time Monthly Totals...
- Page 54 OCTOBER Monthly Goals Week Distance Calories Time Monthly Totals NOVEMBER Monthly Goals Week Distance Calories Time Monthly Totals DECEMBER Monthly Goals Week Distance Calories Time Monthly Totals...
- Page 56 LeMond Fitness Inc. 15540 Woodinville-Redmond Road Building A, Suite 100 Woodinville, WA 98072 USA www.Lemondfitness.com Telephone: (+1) 425.482.6773 Fax: (+1) 425.482.6724 Document #300205, Rev B...
Need help?
Do you have a question about the G-force rt and is the answer not in the manual?
Questions and answers
My gforce bike console won't turn on even after replacing the rechargeable batteries. How do I fix it? It's been a few years since last used, but always worked fine.
If the LeMond G-force RT bike console does not turn on after replacing the rechargeable batteries, follow these steps:
1. Begin pedaling the bike to light the console and recharge the batteries.
2. If the display console remains dim, press the power key to turn it on.
3. If the console still does not turn on, ensure you have used rechargeable AA nickel-metal hydride batteries, as conventional alkaline batteries can damage the electronics.
4. If the issue persists, contact customer support for further assistance.
This answer is automatically generated
What does the CR2032 Lithium battery on the motherboard do? There are three (3) Ni-Mh 1.2-volt cells in the battery compartment.