
Related Manuals for ATCOM IP-04


Summary of Contents for ATCOM IP-04
- Page 1 IP-04 User Manual 1/35...
- Page 2 Version Date Author Description 2008-April-19 Edwin Creation 2008-Jul-11 Edwin Interlink, backup 2/35...
-
Page 3: Table Of Contents
1. Introduce ........................ 5 Related Hardware and software ..................5 System set up ........................ 6 2. Install IP04 and make internal calls ..............7 Install IP04 ........................7 Ways to Access IP04 ..................... 7 Add extensions ......................8 Register SIP device ....................... 9 Add Zap extensions ..................... - Page 4 4/35...
-
Page 5: Introduce
Introduce This Article This article is a guide to use IP04 and ATCOM products to build a simple application on small office application. Through this article, we hope that readers can build the IP PBX solution via IP04 for small enterprise IP04 The IP04 is an open source embedded IP PBX system. -
Page 6: System Set Up
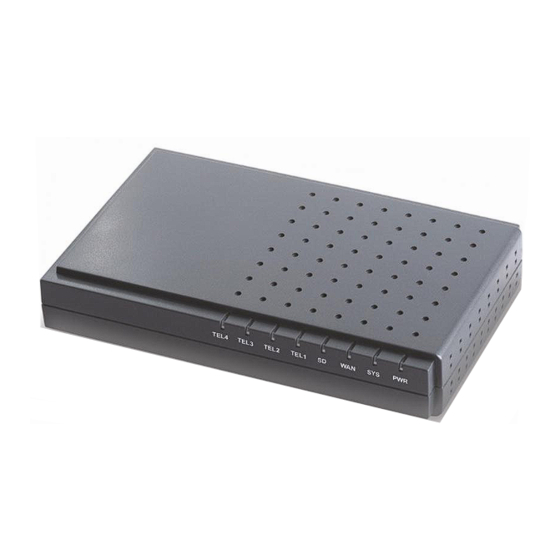
System set up Following devices are used in the structure: IP04 with 2 FXO 2 FXS port loaded: Port 1 and Port2 are configured to FXO ports. Port 3 and port 4 are configured as FXS port. The FXO port is used to connect to PSTN while FXS port is used to connect to your normal phone. -
Page 7: Install Ip04 And Make Internal Calls
Install IP04 and make internal calls Install IP04 Simply connect the power cable and Ethernet cable to IP04, make sure that the IP04 connects to your local network. The port configuration of IP04 are fxo for port1,2 and fxs for port3,4 as show... -
Page 8: Add Extensions
Add extensions At first, we need to add some extensions to make internal calls. Each extension acts as an internal number. There are many types of extensions, we will use SIP, IAX2 and ZAP extensions on this article. Before setting the extensions, we need to go to the option page and set the numbers of digit of each extension. -
Page 9: Register Sip Device
Use the same method add two other extensions Extension 8047 ; Phone number of this extension Name: Alice ; Caller ID Name Password: 8047 ; SIP Log on password Caller ID: 8047 ; Caller ID VM password: 8047 ; password of your mailbox... -
Page 10: Add Zap Extensions
Password: 8806 Authorization User Name: 8806 Domain: 192.168.1.100 (IP address of the IP04) 2. Register IP phone AT-530 Connect the AT-530‟s WAN port to the switch. And it can get the ip from your router. Press the “sysinfo” key on AT-530 to get the IP of AT-530. -
Page 11: Voice Mail Box
Voice Mail Box Voice mail box is enabled when we create the extensions. If somebody calls you on your extension and you are unavailable, he will hear the voice mail greeting message and leave voice message. Retrieve voice message To retrieve the voice message, we need to create a voicemail extension in voicemail page. -
Page 12: Make Outbound Call
Make outbound call To make an outbound call, we need to add trunk/service provider first. There are two types of service provider: Analog Ports: FXO ports of IP04, connect to local PSTN VoIP: SIP or IAX trunk, connect to remote SIP/IAX server In the IP04 i am using, the port 1 and port2 are configured as FXO ports, port 3 and port 4 are configured as FXS ports. - Page 13 In Calling Rules -> add a new calling rule as below Calling Rules We have now added a new calling rule “OUT_PSTN” in the “DialPlan1”. As we can see from the dialing rule of “OUT_PSTN”, all numbers start with 9 will be cut the first digit („9‟) and sent to PSTN (port1 or port2).
-
Page 14: Make Call Via Voip Trunk
Make call via VoIP trunk Add VoIP service provider Service Provider -> Add Service Providers: Add a voip service provider. Add Calling Rule In Calling Rules -> add a new calling rule as below Calling Rules We have now added a new calling rule “OUT_VOIPBUSTER” in the “DialPlan1”. -
Page 15: Add Incoming Call Operator
Add Incoming Call operator Multiple FXO incoming calls to one extension Purpose: Secretary phone to receive multiple FXO incoming calls , put 1st call on hold pickup 2nd call and then transfer or hang call. Be able to do this for 4 FXO. -
Page 16: Ring Another Extension If Operator Doesn"T Answer
Make an incoming pstn call to port 1 and you can see 6000 extension will ring. Use the eyebeam to answer the call. Make another incoming call to port 2 and you can see the line2 of 6000 is ringing. You can press LINE2 to answer the second call;... -
Page 17: Time Base Rule
Time Base Rule Purpose: set different rules for office time and close time. If there is incoming call in office time, the call will be route to operator as mentioned above. If there is incoming call in close time, the caller will hear that the company is close at this moment. - Page 18 We have added a new voice menu: Name: Greeting Extension 9999 Then we will need to add how this menu should work. We will set this menu as the greeting menu and when there is incoming call, the caller will hear: “thanks for your calling, if you know the extension of the part you wish to reach then dial now ”...
-
Page 19: Route Incoming Route To Greeting Menu
Route incoming route to greeting menu In the incoming calls menu, route the incoming calls to the greeting extension (9999). Record your voice. You may need also need to record your voice for greeting or other voice menu. Go to Record a Menu -> Record a new voice menu Then you will be prompted as below. - Page 20 The record files are stored in the /storage/sounds/record directory, if you have the voice files already, you can use the FTP server to put the files to this directory too. 20/35...
-
Page 21: Disa
DISA DISA (Direct Inward System Access) allows someone calling in from outside the telephone switch (PBX) to obtain an "internal" system dialtone and dial calls as if from one of the extensions attached to the telephone switch. Frequently the user calls a number DISA number with invokes the DISA application. -
Page 22: Ring Group
Ring Group In a ring group, you can have calls ring multiple user extensions at one time. The first user to pick up the call gets the call and all other phone stop ringing. First, we need to set up a ring group specify what extensions need to ring when the call enter this group. -
Page 23: Link Two Ip04 In Different Office
Link two IP04 in different office Purpose of this chapter: show how to link two IP04 in different location. With this function, we can link branches together with IP04. Link two IP04 in the same network. The simplest case to link two ip04 together is in the same network. We start from this and then try to expand it to different network. - Page 24 Steps to achieve above objects: 1) Set up a peer in IP04A for IP04B In IP04A Option --> Show advance option --> file Editor--> Edit the iax.conf file and add this context: Add a new context test: [test] //the name of this peer...
- Page 25 2) Set up a service provider in IP04B to link to IP04A via peer test. In IP04B, Service Provider --> Custom VoIP and set the service provide as per info from 1) 3) Set Calling Rule in IP04B, all calls start with 6 will be sent to IP04A In IP04B Calling Rules -->...
-
Page 26: Link Two Ip04 In Different Offices
Link two IP04 in different offices. The generally environment for two ip04 in different location is: two IP04 are both behind router and using the private IP. Since the IP04 doesn‟t have the public IP, so we need to do port forwarding in the router and make IP04 is reachable to others. - Page 27 2) Set up the service provider and calling rule in IP04B to make it register to IP04A. This method is almost the same as in Chapter 8.1 , EXCEPT you need to use the 202.8.16.98 as the service provider instead of 192.168.1.21.
-
Page 28: Faq
FAQ: HOWTO -- Do files transfer for IP04? There is a FTP server built in IP04, to transfer files to IP04, we can use a FTP client such as SmartFTP client to do the job. The FTP user name and password for IP04 is:... -
Page 29: Howto -- Set System Time
Also you need to set the opermode of IP04 according to the area you are. For example, if you are in USA, you need to set the opermode to FCC. If you are in Australia, you need to set the opermode to AUSTRALIA. - Page 30 Budapest, Hungary CET-1CEST-2,M3.5.0/02:00:00,M10.5.0/03:00:00 Copenhagen, Denmark CET-1CEST-2,M3.5.0/02:00:00,M10.5.0/03:00:00 Dublin, Ireland GMT+0IST-1,M3.5.0/01:00:00,M10.5.0/02:00:00 Geneva, Switzerland CET-1CEST-2,M3.5.0/02:00:00,M10.5.0/03:00:00 Helsinki, Finland EET-2EEST-3,M3.5.0/03:00:00,M10.5.0/04:00:00 Kyiv, Ukraine EET-2EEST,M3.5.0/3,M10.5.0/4 WET-0WEST-1,M3.5.0/01:00:00,M10.5.0/02:00:0 Lisbon, Portugal London, Great Britain GMT+0BST-1,M3.5.0/01:00:00,M10.5.0/02:00:00 Madrid, Spain CET-1CEST-2,M3.5.0/02:00:00,M10.5.0/03:00:00 Oslo, Norway CET-1CEST-2,M3.5.0/02:00:00,M10.5.0/03:00:00 Paris, France CET-1CEST-2,M3.5.0/02:00:00,M10.5.0/03:00:00 Prague, Czech Republic CET-1CEST-2,M3.5.0/02:00:00,M10.5.0/03:00:00 Roma, Italy CET-1CEST-2,M3.5.0/02:00:00,M10.5.0/03:00:00...
-
Page 31: Howto -- Change The Ip Address Of Ip04
Atlantic Time (New AST4ADT,M4.1.0/00:01:00,M10.5.0/00:01:00 Brunswick) Newfoundland Time NST+3:30NDT+2:30,M3.2.0/00:01:00,M11.1.0/0 (Updated DST for 2007) 0:01:00 Jakarta WIB-7 Asia Singapore SGT-8 Hong Kong HKT-8 Ulaanbaat ULAT-8ULAST,M3.5.0/2,M9 .5.0/2 Mongolia Brazil, Sã o Paulo BRST+3BRDT+2,M10.3.0,M2.3.0 Central Colombia UTC+5 and South Argentina UTC+3 America Central America... -
Page 32: Howto -- Backup The Files Of Ip04
HOWTO -- Backup the files of IP04? In Backup page Use „Take a Backup‟ to backup the configure files. The file is stored in /storage/gui_configbackups directory root:/storage/gui_configbackups> ls backup08071102__2008jul11.tar backup080711__2008jul11.tar Upload the backup files to your tftp server : root:~>... -
Page 33: Howto -- Upgrade The Kernel Of Ip04
(via IPKG) in future. We can use the RS232 console port to upgrade the kernel to a BAPS base kernel. 1/ Download the latest kernel from http://www.atcom.cn/down/uimage_r2.zip. set up a TFTP server and put the kernel on the TFTP server boot. - Page 34 In u-boot: ip04>set autostart ip04>setenv serverip your_tftp_server_address ip04>tftp 0x1000000 uImage_r2.ip08 ip04>nand erase clean ip04>nand erase ip04>nand write 0x1000000 0x0 0x300000 ip04>set bootargs ethaddr=your:mac:address console=ttyBF0,115200 root=/dev/mtdblock0 rw ip04>save ip04>bootm 0x1000000 (uClinux will boot..) NOTE: If Linux doesn't boot or you experience other problems reboot into uboot, type "print", and carefully check bootargs...
- Page 35 Then it will connect to owetel and VoIPtel website for the latest packages. Please make sure that your IP04 has the internet connection to download the packages. Don't worry if it seems to get stuck on downloading / installing the voiptel-sounds package, as it just needs some time due to it's size.
Need help?
Do you have a question about the IP-04 and is the answer not in the manual?
Questions and answers