Advertisement
Advertisement

Related Manuals for Pro Fitness 335/7729


Summary of Contents for Pro Fitness 335/7729
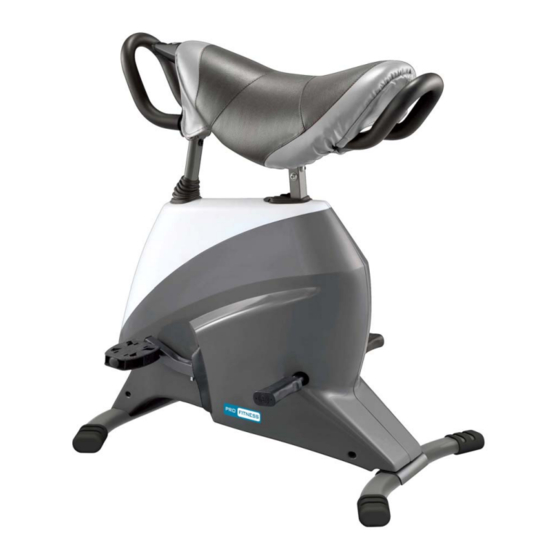
- Page 1 335/7729(D) MAGIC RIDER http://www.body--sculpture.com...
-
Page 2: Table Of Contents
CONTENTS IMPORTANT SAFETY INFORMATION EXPLODED-VIEW ASSEMBLY DIAGRAM PARTS LIST MAGIC RIDER PARTS CHECKING LIST ASSEMBLY EXERCISE INSTRUCTIONS EXERCISE COMPUTER TROUBLE SHOOTING EXERCISE SESSION... -
Page 3: Important Safety Information
IMPORTANT SAFETY INFORMATION Please keep this manual in a safe place for easy reference. 1. It is important to read this entire manual before not use the equipment until the problem has assembling and using the equipment. been rectified. Safe and effective use can only be achieved if the equipment is assembled, maintained and 9. - Page 4 EXPLODED-VIEW ASSEMBLY DRAWING - 2 -...
-
Page 5: Parts List
PARTS LIST PART DESCRIPTION QTY PART DESCRIPTION Main frame Screw (ST4.2*25) Saddle support Screw (ST4.2*5) Pedal support Screw (ST4.2*10) Front pedal support Screw (M6*16) Front connect tube Screw (M8*40) Middle connect tube Screw (ST4.2*25) Rear connect tube Flat washer (φ8) Bearing Big flat washer (φ6) Crank... -
Page 6: Magic Rider Parts Checking List
MAGIC RIDER PARTS CHECKING LIST REAR STABILIZER*1 MAIN FRAME*1 FRONT STABILIZER*1 LEFT FRONT PEDAL SET*1 RIGHT FRONT PEDAL SET*1 REAR PEDAL SET*2 COMPUTER*1 TOOL PACK*1 **Hardware might have already pre-assembled onto the components - 4 -... -
Page 7: Main
ASSEMBLY INSTRUCTIONS STEP 1 Attach the front stabilizer (pt.10) and rear stabilizer (pt.11) to the main frame using four screws (M8*40)(pt.48). REMARK: Please pay attention 4PCS screws fixed on the wood board are parts#48. STEP 2 Attach the front pedal support (pt.4) to the main frame using two pins (φ8*36) (pt.54). - Page 8 STEP 3 Attach the rear pedals (pt. 59) by screwing them into the corresponding crank arm. Note that the Right and Left pedal should be threaded on clockwise. STEP 4 Connect the computer wire with sensor wire (pt.75) and slide the computer down to the computer bracket.
-
Page 9: Exercise Instructions
EXERCISE INSTRUCTIONS Using your Magic Rider regularly will provide you with several benefits. It will improve your physical fitness, tone your muscles and, in conjunction with a calorie-controlled diet, help you lose weight. 1. The Warm-Up Phase This stage helps get the blood flowing around the body and the muscles working properly. It will also reduce the risk of cramp and muscle injury. -
Page 10: Exercise Computer
EXERCISE COMPUTER Functions and Operations Batteries Installation Please install 1 AAA 1.5V battery in the battery compartment on the back of counter. (Whenever battery is removed, all the functions values will be reset to zero.) Auto On/Off When the user starts to exercise, the Display will show the workout value automatically. Once user stops using the equipment for more than 256 sec, the Display will turn off. -
Page 11: Troubleshooting
TROUBLESHOOTING 1. Changing the battery. To change the computer battery, please slide the computer from the computer bracket, remove the battery cover and remove the battery. Replace with 1 x AAA battery. Finally put the cover back, and slide the computer back on the computer bracket. 2. -
Page 12: Exercise Session
EXERCISE SESSION Basic Position Sit astride the saddle as if on a horse. Grip the handles with your hands to help stability and also grip the saddle using your inner thighs. Your feet should rest on the pedals. To Start Gently using your thighs and abdominal muscles and keeping your back straight, begin to slowly rock forwards and backwards. - Page 13 Moving on Once you have gained confidence you may wish to ride with your thighs gripping the saddle more tightlly, allowing you to have your hands and arms free to increase the intensity of the ride. Another position Sitting ‘side saddle’ is another position that is worth trying , we only recommend this whilst holding quite firmly to the two handles.
- Page 14 Use this space to record your own exercise routine results - 12 -...
- Page 15 Dimensions (L*W*H) 720 x 630 x 890 mm Batteries 1 x AAA Class Rating Maximum User Weight 100KG Please note that the specifications are subject to change without notice. Retailer: Retailer address: 489-499 Avebury Boulevard Saxon Gate West Central Milton Keynes Bucks, MK9 2NW - 13 -...
Need help?
Do you have a question about the 335/7729 and is the answer not in the manual?
Questions and answers