Advertisement
NOTE:
Please ensure that you read
this instruction carefully
before attempting to
assembling or using this
product
Model :JX-206B
Cat No.# 9283495
Retain This
Manual for
Reference
OWNER'S
MANUAL
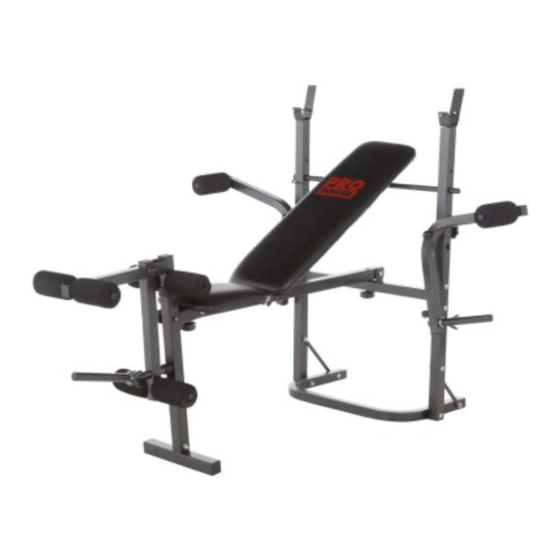
PRO FITNESS BENCH&FLY
Assembling &User Manual
RETAILER: ARGOS
ADDRESS: 489-499 Avebury Boulevard
Model : JX-206B
Saxon Gate West
Central Milton Keynes Bucks,
MK9 2NW
Advertisement

Related Manuals for Pro Fitness JX-206B


Summary of Contents for Pro Fitness JX-206B
- Page 1 NOTE: Please ensure that you read this instruction carefully before attempting to assembling or using this product PRO FITNESS BENCH&FLY Assembling &User Manual Model : JX-206B Model :JX-206B Cat No.# 9283495 Retain This Manual for Reference OWNER'S MANUAL RETAILER: ARGOS...
-
Page 2: Table Of Contents
TABLE OF CONTENTS TABLE OF CONTENTS.......................1 IMPORTANT SAFETY NOTICES..................2 GENERAL INFORMATION....................4 EXERCISE INFORMATION....................5 WEIGHT BENCH EXERCISE GUIDE…………………………………………………………..13 ASSEMBLY INSTRUCTIONS.....................16 FOLDING THE BENCH FOR STORAGE USE ……………………………………………..22 EXPLODED DIAGRAM …………………………………………………………………………..24 PARTS LIST........................25... -
Page 3: Important Safety Notice
IMPORTANT SAFETY NOTICE PRECAUTIONS This exercise machine is built for optimum safety. However, certain precautions apply whenever you operate a piece of exercise equipment. Be sure to read the entire manual before you assemble or operate your machine. In particular, note the following safety precautions: 1. - Page 4 19. This product conforms to: It’s (BS EN ISO 20957-1、EN957-2 and EN957-4) class (H) - Home Use- Class (C), NOT suitable for therapeutic purposes. WARNING: BEFORE BEGINNING ANY EXERCISE PROGRAM, CONSULT YOUR PHYSICIAN. THIS IS ESPECIALLY IMPORTANT FOR INDIVIDUALS OVER THE AGE OF 35 OR PERSONS WITH PRE-EXISTING HEALTH PROBLEMS.
-
Page 6: General Information
GENERAL INFORMATION QUALITY : This exercise product has been designed and manufactured to comply with the latest (BS EN 957) British and European Safety Standards . CARE AND MAINTENANCE 1. Lubricate moving parts with light oil periodically. 2. Inspect and tighten all parts before using the machine. 3. - Page 7 BEFORE YOU BEGINNING How you begin to exercise will vary from person to person, If you have not exercised for a long period of time, have been inactive for a while, or are severely overweight you MUST start slowly, increasing your exercise time gradually, by perhaps only a few minutes for each session per week.
- Page 8 To determine your target zone, see the chart below, if you are new to exercise and by definition unfit, refer to the left column, if you exercise regularly and have good aerobic fitness, refer to the right column. USERS AGE UNCONDITIONED CONDITIONED (Years)
- Page 9 A successful exercise session begins with warming up exercises and ends with exercises for cooling down and relaxing. These warming up exercises prepare your body for the subsequent demands made upon it. The cooling down / relaxation period after the exercise session ensures that you do not experience any muscular problems.
- Page 10 side. Repeat this exercise several times. EXERCISES FOR THE UPPER THIGH Support yourself by placing your hand on the wall, then reach down behind you and lift up your right or left foot as close to your buttocks as possible. Feel a comfortable tension in your front upper thigh. Maintain this position for 30 seconds if possible and repeat this exercise 2 times for each leg.
- Page 11 Bend your trunk slowly forwards and try to touch your feet with your hands. Reach down as far as possible to your toes. Maintain this position for 20-30 seconds if possible. EXERCISES FOR THE KNEES Sit on the floor and stretch out your right leg. Bend your left leg and place your foot on your right upper thigh.
- Page 12 For your basic Aerobic Exercise routine we suggest that you try the following, remember breathe correctly, exercise at your own pace and do not over-train as injury may result. Exercise 4 minutes at “A” Week 1 & 2 Warm Up 5—10Minutes Rest 1 minute Exercise 2 minutes at “A”...
- Page 13 You will achieve fast results, gaining a trimmer. Fitter body if you following these general rules. Exercise regularly—do not skip workouts as consistency is the first key to success. Do not be afraid perspire a little. This is a sign that you are working your body hard enough to give fast result.
-
Page 14: Weight Bench Exercise Guide
Your exercise pace should be MEDIUM to FAST This exercise programme should take you approximately 35--40Minutes. Following this exercise programme with 5 minutes of proper cool down exercise ADVANCED TRAINING This is an open-ended programme, ideally performed not more than 4 times during the week, preferably on alternate days. - Page 15 Lie on the bench and position arms under foam rollers on fly arm as shown. Raise arms until your two hands meet. Return to the starting position in a slow and controlled manner and repeat exercise. Only for JX-206B (Cat#9283495)
- Page 16 FLAT BENCH PRESS MUSCLE EMPHASIS: PECTORALIS Select a desired weight Adjust the seat back pad to the flat position and secure with brace bar. Lay on the seat pad with both feet securely onto floor Grasp the barbell with a shoulder width distance and carefully remove it from the bar catches.
- Page 17 Exercise Note ---------------------------------------------------------------------------------- -------------------------------------------------------------------------------------------------...
-
Page 18: Assembly Instructions
ASSEMBLY INSTRUCTION HARDWARE PACK... - Page 19 ACCESSORY PART LIST There are all accessories you will need to complete the assembly of your product. The following accessories are supplied in a pack and should be checked before attempting assembly...
- Page 20 ASSEMBLY INSTRUCTION Tools Required Assembling the Machine: Two Adjustable Wrenches, and one Philips Screw driver. NOTE: It is strongly recommended this machine to be assembled by two or more people to avoid possible injury. Carefully unpack each component, checking against the part list that you have all the necessary parts to complete the assembly of your product PLEASE NOTE that some of the parts may be pre-fitted to major components.
- Page 21 A. Attach rear of Seat Pad Support (#4) to the Cross Beam(#3), Align the side hole and secure with one M10*60MM Hex Bolt(#20), one Φ10MM Washer(#25) and one M10 Aircraft Nut(#29).Place an M8*85mm Carriage Bolt(#19) in the upper hole and secure in position using one Φ8mm Washer(#23),one Φ8mm Spring Washer(#24) and one M8 Triangle Knob(#28).
- Page 22 A. Attach the Backrest Support(#11) to the Backrest Pad(#41) align the hole and secure with four M6*38MM Hex Bolts(#16), and four Φ6mm Washers(#51). B. Attach the Backrest Support(#11) to the Main Frame(#4), Align the hole and secure with M10*130MM Hex Bolt(#21), two Φ10mm Washers(#25) and two Bushings(#32). Securely to remove all free-play but take care NOT too over tightened.
-
Page 23: Folding The Bench For Storage Use
A. Attach two Butterfly Frames(#43) to the two Barbell Upright Supports(#2), Align the hole and secure each of them with one M10×120MM Hex Bolt(#44), two Φ10mm Washers(#25) one Big Bushing(#45) and one M10 Knob (# 46). B. Slide two Butterfly Foam Roll Tubes(#47) into the side hole on the top of two Butterfly Frames(#43), Align the hole and secure each of them with one M8×45MM Carriage Bolt(#14), oneΦ8MM Washer(#23) and one M8 Aircraft Nut(#26). - Page 24 : Unscrew the rear M8 Triangle Knob(#28) and remove the M8*85MM Carriage Bolt(#19), Φ 8mm Washer(#23) and Φ8mm Spring Washer(#24). Lift the front of the main frame. Remove the Leg Extension Assembly by unscrewing the M8 Lock Knob (#27), Place this assembly to one side.
-
Page 25: Exploded Diagram
Now unscrew the FRONT M8 Triangle Knob(#28) along with the one Φ8mm Washer(#23) and Φ8mm Spring Washer(#24). And fold down the Front Upright Assembly. Please ensure that the Bench is securely stored in either an upright or full flat position away from children. -
Page 26: Parts List
PART LIST... - Page 27 Key No. Description Key No. Description Rear Stabilizer M8 Lock Knob Barbell Upright Support M8 Triangle Knob Cross Beam M10 Aircraft Nut Seat Pad Support Lock Pin Front Stabilizer Spring Collar Front Upright Support Bushing Leg Developer Support 口 25MM End Cap Leg Developer Φ19*1.0MM End Cap Foam Roll Tube...
- Page 28 RETAILER: ARGOS ADDRESS: 489-499 Avebury Boulevard Saxon Gate West Central Milton Keynes Bucks, MK9 2NW Customer Helpline: 0345 604 0105 http://www.argoshelpdesk.co.uk...
Need help?
Do you have a question about the JX-206B and is the answer not in the manual?
Questions and answers