Table of Contents
Advertisement
Quick Links
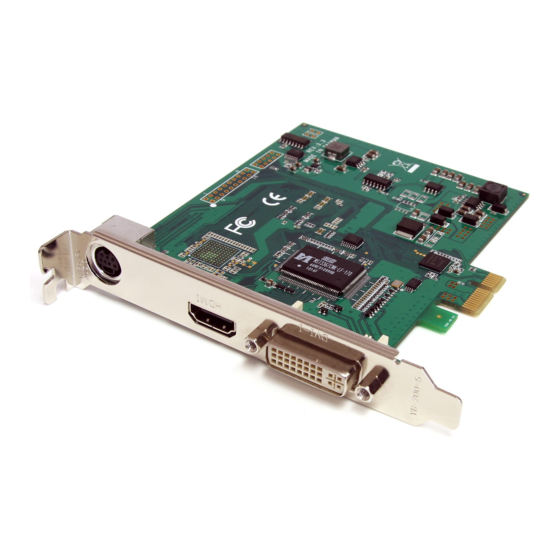
PCI Express Video Capture Card for HDMI®,
DVI and Component - 1080p
PEXHDCAP
*actual product may vary from photos
DE: Bedienungsanleitung - de.startech.com
FR: Guide de l'utilisateur - fr.startech.com
ES: Guía del usuario - es.startech.com
IT: Guida per l'uso - it.startech.com
NL: Gebruiksaanwijzing - nl.startech.com
PT: Guia do usuário - pt.startech.com
For the most up-to-date information, please visit: www.startech.com
Manual Revision: 03/28/2014
Advertisement
Table of Contents

Related Manuals for StarTech.com PEXHDCAP


Summary of Contents for StarTech.com PEXHDCAP
- Page 1 DE: Bedienungsanleitung - de.startech.com FR: Guide de l'utilisateur - fr.startech.com ES: Guía del usuario - es.startech.com IT: Guida per l'uso - it.startech.com NL: Gebruiksaanwijzing - nl.startech.com PT: Guia do usuário - pt.startech.com For the most up-to-date information, please visit: www.startech.com Manual Revision: 03/28/2014...
- Page 2 StarTech.com. Where they occur these references are for illustrative purposes only and do not represent an endorsement of a product or service by StarTech.com, or an endorsement of the product(s) to which this manual applies by the third-party company in question. Regardless of any direct acknowledgement elsewhere in the body of this document, StarTech.com hereby...
-
Page 3: Table Of Contents
Table of Contents Introduction ....................1 Packaging Contents ..........................1 System Requirements ..........................1 Installation ....................2 Hardware Installation ..........................2 Driver/Software Installation ........................2 How to Use ....................3 Stream Catcher............................3 Snapshot Files............................. 4 Record Files ..............................4 Schedule Recording ..........................5 Settings ................................. -
Page 4: Introduction
Introduction The PEXHDCAP PCI Express HD Video Capture Card enables you to capture high- definition video and audio from an HDMI®, DVI or Component (1080p) source to your computer through a PCI Express expansion slot. Support for full 1080p video input, as well as HDMI and RCA stereo audio makes this HD capture card the perfect solution for creating digital copies of your videos for editing and compiling. -
Page 5: Installation
Be sure that you are properly grounded before opening your computer case or touching your PCI Express card. StarTech.com recommends that you wear an anti-static strap when installing any computer component. If an anti-static strap is unavailable, discharge yourself of any static electricity build-up by touching a large grounded metal surface (such as the computer case) for several seconds. -
Page 6: How To Use
How to Use Connect the video/audio source to the video capture card using the appropriate cable(s). To connect a VGA source, use the included DVI to VGA adapter. If you wish to input audio from a source other than HDMI, make sure to connect the breakout cable and connect the audio source using stereo RCA cables (red/white). -
Page 7: Snapshot Files
Snapshot Files Clicking this button will open the folder location where all of the snapshot files are saved in Windows. Record Files Clicking this button will open the folder location where all of the recorded video files are saved in Windows. Instruction Manual... -
Page 8: Schedule Recording
Schedule Recording The software can be setup to start recording at a specific time and date and occur once or multiple times. Setup the schedule and click the “Add” button to save it. Multiple schedules can be maintained at the same time. To remove a schedule, simply select it from the list, and click the “Delete”... -
Page 9: Record Settings
Record Settings Contains settings related to video recording and snapshots. The location to save recorded video files as well as recording quality can be configured. The location to save the snapshot images and file format (JPG, BMP) are also set here. Video Streaming Streaming using RTMP Streaming Service Provider 1. - Page 10 3. Select My Channel from the left side menu, followed by INFO 4. In the lower section of this page, you will find Stream Key: Click Show, you will see the key. Instruction Manual...
- Page 11 For Twitch 1. a) Open your web browser, and browse to the following website: http://www.Twitch.tv b) Login and select Dashboard from your account drop down menu. c) In the top left select Streaming Apps. Instruction Manual...
- Page 12 d) Click the Show Key button, you will see the key. Instruction Manual...
- Page 13 2. Open the Stream Catcher Program, and then select RTMP 3. Obtaining the streaming URL from your Streaming service provider. Note: This is specific to your service provider and will likely contain the key located in the Step 1.) 4. In the field marked Streaming Public URL, type the Public URL for your streaming service followed by.
- Page 14 6. The video will now be streamed to your Streaming service. Instruction Manual...
-
Page 15: Streaming With Hls Using Appserve
Streaming with HLS using Appserve 1. Download and install appserv from the following URL: http://www.appservnetwork.com/ 2. Locate your IP address. Windows 8 a) Open Control panel b) Click Network and Sharing Center c) Click Local Area Connection 2 d) Click the Details button e) The IP Address is displayed. - Page 16 Note: Steps for obtaining IP address will vary from operating systems. Please contact your system administrator for further details 3. Open the Stream Catcher Program, and then select HLS 4. In the Streaming Public URL, type your IP address followed by: live/session0.m3u8 Instruction Manual...
- Page 17 5. Return the screen catcher home page and click the blue record dot (pictured below). 6. Using a different device on your network (Tablet, laptop, etc.) open a web browser and type the full URL used in step 5. The URL is built using your computer IP address with the following at the end: live/session0.m3u8 Instruction Manual...
- Page 18 Instruction Manual...
-
Page 19: Specifications
Specifications Host Interface PCI Express (x1 slot connector) Form Factor Standard (Full) Profile Chipset ID MStar MST3367CMK-LF-170 1 x 29-pin DVI-I female External Connectors 1 x HDMI type A female 5 x RCA female (via breakout cable) Audio Support Yes (Stereo) Video Systems NTSC-M, PAL-B/M/60 Video Encoding... -
Page 20: Technical Support
Limitation of Liability In no event shall the liability of StarTech.com Ltd. and StarTech.com USA LLP (or their officers, directors, employees or agents) for any damages (whether direct or indirect, special, punitive, incidental, consequential, or otherwise), loss of profits, loss of business, or any pecuniary loss, arising out of or related to the use of the product exceed the actual price paid for the product. - Page 21 StarTech.com is an ISO 9001 Registered manufacturer of connectivity and technology parts. StarTech.com was founded in 1985 and has operations in the United States, Canada, the United Kingdom and Taiwan servicing a worldwide market.
Need help?
Do you have a question about the PEXHDCAP and is the answer not in the manual?
Questions and answers