Table of Contents
Advertisement
Quick Links
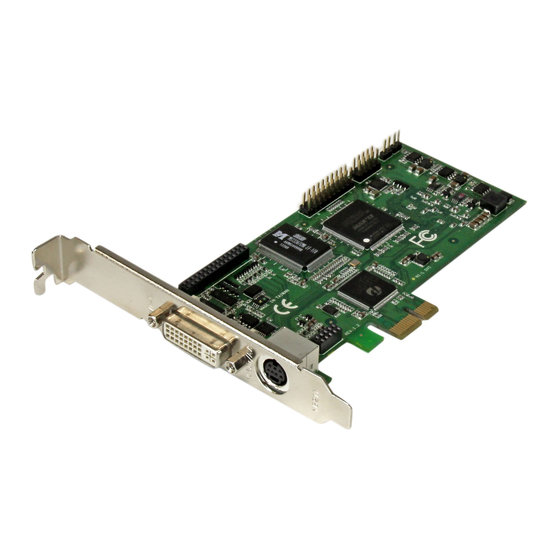
HDMI®/DVI/VGA/Component PCIe
Capture Card – 1080p/60fps
PEXHDCAP60L
DE: Bedienungsanleitung - de.startech.com
FR: Guide de l'utilisateur - fr.startech.com
ES: Guía del usuario - es.startech.com
IT: Guida per l'uso - it.startech.com
NL: Gebruiksaanwijzing - nl.startech.com
PT: Guia do usuário - pt.startech.com
For the most up-to-date information, please visit: www.startech.com
Manual Revision: 11/28/2014
*actual product may vary from photos
Advertisement
Table of Contents

Subscribe to Our Youtube Channel
Related Manuals for StarTech.com PEXHDCAP60L


Summary of Contents for StarTech.com PEXHDCAP60L
- Page 1 DE: Bedienungsanleitung - de.startech.com FR: Guide de l'utilisateur - fr.startech.com ES: Guía del usuario - es.startech.com IT: Guida per l'uso - it.startech.com NL: Gebruiksaanwijzing - nl.startech.com PT: Guia do usuário - pt.startech.com For the most up-to-date information, please visit: www.startech.com Manual Revision: 11/28/2014...
- Page 2 StarTech.com. Where they occur these references are for illustrative purposes only and do not represent an endorsement of a product or service by StarTech.com, or an endorsement of the product(s) to which this manual applies by the third-party company in question. Regardless of any direct acknowledgement elsewhere in the body of this document, StarTech.com hereby...
-
Page 3: Table Of Contents
Table of Contents Product Diagram ..................1 Introduction ....................2 Packaging Contents ..........................2 System Requirements ..........................2 Installation ....................3 Hardware Installation ..........................3 Software Installation ..........................8 Software Operation ................10 How to Use ....................11 Stream Catcher ..................11 Launch Application ..........................11 Technical Support ..................25 Warranty Information ................25 Instruction Manual... -
Page 4: Product Diagram
Product Diagram DVI input-port A/V breakout cable input-port (For component, S-Video, and composite video input + RCA audio input) Instruction Manual... -
Page 5: Introduction
Introduction Packaging Contents • PCIe capture card (PEXHDCAP60L) • HDMI to DVI adapter • VGA to DVI adapter • Component A/V breakout cable • S-video/Composite A/V breakout cable • Full-profile bracket (Attached) • Low-profile bracket • Software installation disc • Instruction manual Note: The USB3HDCAP product will not record digitally encrypted content. -
Page 6: Installation
Using a Philips head screw driver (not included), remove the screw located next to the internal side of the DVI-port on the circuit board. c) You can now remove the undesired bracket by pulling the bracket away from the PEXHDCAP60L. Instruction Manual... - Page 7 Line up your desired bracket so that the DVI input-port, and the A/V breakout cable input-port align with the port holes. Also ensure the screw hole is aligned with the underside of the PEXHDCAP60L. e) Using a Philips head screw driver (not included), replace the screw located next to the internal side of the DVI input-port on the circuit board.
- Page 8 DVI input-port. g) The bracket has now been replaced. 2. Install the PEXHDCAP60L in your computer system. a) Turn off your computer system and disconnect any peripheral devices (i.e. Printers, external hard drives, etc.). Unplug the power supply power cable from the rear of the computer system.
- Page 9 (See documentation included with your computer system for step by step instructions). Note: The PEXHDCAP60L will work in a PCI-Express slot with additional lanes (i.e. x4, x8 or x16 slots) d) Gently insert the card into the open PCI-Express slot and fasten the bracket to the rear of the case.
- Page 10 If your video source device is VGA or DVI, use the corresponding included HDMI to DVI adapter or VGA to DVI adapter to connect your audio/video source cabling to the DVI input-port on the PEXHDCAP60L. HDMI d. (Optional) If you would like to capture a 2-channel RCA audio source along with...
-
Page 11: Software Installation
Found New Hardware wizard upon boot. If this message is displayed click cancel. 1. Download the latest software from the StarTech.com website (recommended) Insert the included Driver and Software installation disc into your DVD-ROM drive. 2. Locate and run the Setup(.exe) application. This file will be located in the main file directory. - Page 12 3. The Driver installation program will being. If a Windows Security dialog window appears, click the “Run” or “Install this driver software anyway” option to proceed. 4. The installation wizard will now walk you through the installation steps for all drives and software installation as well as ask you to specifying your desired language.
-
Page 13: Software Operation
5. When prompted click Finish Note: You will be required to restart your computer. Software Operation 1. Upon starting Windows, if the “Found New Hardware” wizard appears on the screen, cancel/close the window and insert the included Driver CD into the computer’s CD/ DVD drive. -
Page 14: How To Use
How to Use Connect the video/audio source to the video capture card using the appropriatecable(s). To connect a VGA source, use the included DVI to VGA adapter. If you wish toinput audio from a source other than HDMI, make sure to connect the breakout cable and connect the audio source using stereo RCA cables (red/white). - Page 15 Menu Video Window Record/Stop Snapshot Volume Button Button Control Manually recording video can be done by simply pressing the “Record” button from the control menu along the bottom of the Stream Catcher window. The frame around the video window will turn red, while recording. When you would like to to stop recording, press the “Stop”...
- Page 16 Snapshot Files Clicking this button will open the folder location where all of the snapshot files are saved in Windows. Record Files Clicking this button will open the folder location where all of the recorded video files are saved in Windows. Instruction Manual...
-
Page 17: Schedule Recording
Schedule Recording The software can be setup to start recording at a specific time and date and occur once or multiple times. Setup the schedule and click the “Add” button to save it. Multiple schedules can be maintained at the same time. To remove a schedule, simply select it from the list, and click the “Delete”... - Page 18 Device Settings The Device Settings contains configuration options for the video capture hardware. Video and audio input source (HDMI, component, DVI/VGA), video system (NTSC/PAL), aspect ratio and video properties (sharpness, contrast, saturation, hue, brightness) can all be adjusted from this menu. Record Settings Contains settings related to video recording and snapshots.
- Page 19 Video Streaming Streaming using RTMP Streaming Service Provider 1. Obtain the RTMP settings for your video streaming service. The below steps show how to obtain these settings from Justin.TV and Twitch. Note: Steps may vary from different streaming service providers, please contact your service provider for specific details.
- Page 20 4. In the lower section of this page, you will find Steam Key: Show Click Show, you will see the key. Instruction Manual...
- Page 21 For Twitch Open your web browser, and browse to the following website: http://www.Twitch.tv Login and select Dashboard from your account drop down menu. c) In the top left select Streaming Apps. d) Click the Show Key button, you will see the key. Instruction Manual...
- Page 22 2. Open the Steam Catcher Program, and then select RTMP 3. Obtaining the streaming URL from your Streaming service provider. Note: This is specific to your service provider and will likely contain the key located in the Step 1.) 4. In the field marked Streaming Public URL, type the Public URL for your streaming service followed by.
- Page 23 5. Return the screen catcher home page and click the blue record dot (pictured below). 6. The video will now be streamed to your Streaming service.v Instruction Manual...
- Page 24 Streaming with HLS using Appserve 1. Download and install appserv from the following URL: http://www.appservnetwork.com/ 2. Locate your IP address. Windows 8 a) Open Control panel b) Click Network and Sharing Center c) Click Local Area Connection 2 d) Click the Details button Instruction Manual...
- Page 25 e) The IP Address is displayed. Note: Steps for obtaining IP address will vary from operating systems. Please contact your system administrator for further details. 4. Open the Steam Catcher Program, and then select HLS 5. In the Streaming Public URL, type your IP address followed by: live/session0.m3u8 Instruction Manual...
- Page 26 6. Return the screen catcher home page and click the blue record dot (pictured below). Instruction Manual...
- Page 27 7. Using a different device on your network (Tablet, laptop, etc.) open a web browser and type the full URL used in step 5. The URL is built using your computer IP address with the following at the end: live/session0.m3u8 Instruction Manual...
-
Page 28: Technical Support
Limitation of Liability In no event shall the liability of StarTech.com Ltd. and StarTech.com USA LLP (or their officers, directors, employees or agents) for any damages (whether direct or indirect, special, punitive, incidental, consequential, or otherwise), loss of profits, loss of business, or any pecuniary loss, arising out of or related to the use of the product exceed the actual price paid for the product. - Page 29 StarTech.com is an ISO 9001 Registered manufacturer of connectivity and technology parts. StarTech.com was founded in 1985 and has operations in the United States, Canada, the United Kingdom and Taiwan servicing a worldwide market.
Need help?
Do you have a question about the PEXHDCAP60L and is the answer not in the manual?
Questions and answers