
Related Manuals for Eneo NXD-1602M


Summary of Contents for Eneo NXD-1602M
- Page 1 NXD-1602M Full HD NETWORK CAMERA Please read this manual thoroughly before use and keep it handy for future reference.
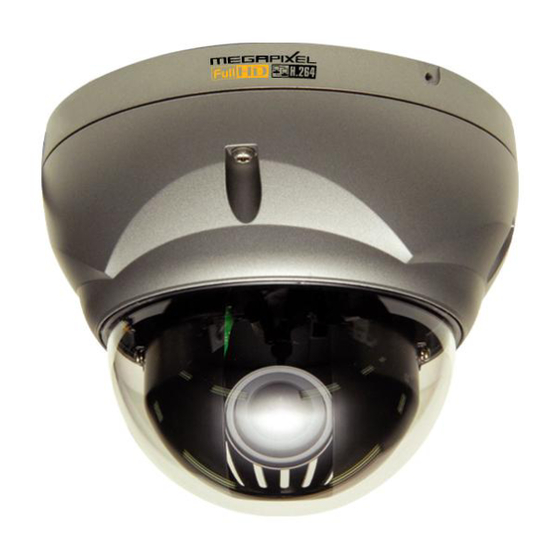
- Page 2 DESCRIPTION --------------------------------------------------------------------------------------------------------------------------- NXD-1602M vandal resistant dome is an internet protocol based megapixel network camera with a built-in web based viewer accessible by multiple browsers. The camera has a connection feature for third-party applications. It is supplied with Zelaris Elements utility software to search, configure, manage, live view, record and playback.
-
Page 3: Camera Layout
Camera Layout Top View Lens: 3-9mm vary-focal megapixel lens Connection Cable: 26pin camera extension cable Connection Cable Main POWER connection - RED; DC12V or AC24V - WHITE; GND or AC24V Heater POWER connection (Optional) - ORANGE ; DC12V or AC24V - BLACK;... - Page 4 ALARM connection - PINK; Alarm Input 1 - GREEN; GND - YELLOW; Alarm Input 2 - BROWN; GND - Light BLUE ; Alarm Out - GRAY; GND RJ-45 connection: Connect Ethernet cable or supplies power to the camera if PoE is available.
-
Page 5: Before Installation
INSTALLATION --------------------------------------------------------------------------------------------------------------------------- Before Installation Before installing the camera, thoroughly familiarize yourself with the information in this section of the manual. To ensure secure access to the IP camera, place the camera behind a firewall when it is connected to a network. Starting Installation Base Installation 1. -
Page 6: Heater Kit Installation (Optional)
3. Insert each cable through the cable hole, connect BNC cable and communication lines. 4. Unlock (4x) torx screws on the dome cover and fix the dome case firmly with supplied mounting screws (4x), plastic anchors (4x), O-Rings (4x). 5. Adjust desired focus and scene by turning and moving the hemisphere by hand. 6. -
Page 7: Operation
OPERATION --------------------------------------------------------------------------------------------------------------------------- Before starting the camera, installation must be complete. The camera completes a configuration sequence taking approximately 40 seconds from powering up. Once completed the amber LED will flash once a second. NOTE - If the DHCP is enabled but the camera is not connected to a DHCP server, the camera will be set default IP 192.168.30.220 and try to get IP from DHCP server about every two seconds. -
Page 8: Main Menu
Main Menu [Main Menu] The dialog box will be appears. - Type User ID and Password in the dialog box. The default User ID and Password are admin NOTE For security purposes, be sure to change the password after you log on for the first time. -
Page 9: Live View
LIVE VIEW ------------------------------------------------------------------------------------------------------------------------- The Live View page provides you to select the properties of video source. You can view the live image from this page and also access the Setup menu and operate the main functions. [Main Live View Page] Live Video Page Icons Hide Main Icons: Hides main icons in the live view page. - Page 10 Setup: Enters setup menu. Help: Shows helpful information. Source: Specify the viewable video stream source to display in live view page. View Size: Specify the viewable video size to display in live view page. Stream Type: Specify the internet protocol to display in live view page. ROI View: Specify the specially selected area to transfer using different stream feature in the primary video image.
-
Page 11: Upgrading The Firmware
Troubleshooting ---------------------------------------------------------------------------------------------------------------- If you suspect a problem is being caused by incorrect configuration or some other minor problem, consult the troubleshooting guide below. Upgrading the Firmware Firmware is software that determines the functionality of the network camera. One of your first actions when troubleshooting a problem should be to check the current firmware. - Page 12 → Check the Video & Image setting. 8. Blurred images. → Refocus the camera. 9. Poor image quality. → Increased lighting can often improve image quality. Check that there is sufficient lighting at the monitored location. Check all image and lighting settings. 10.
- Page 13 memo...
- Page 16 Videor E. Hartig GmbH Exclusive distribution through specialised trade channels only. Videor E. Hartig GmbH Carl-Zeiss-Straße 8 • 63322 Rödermark, Germany Tel. +49 (0) 6074 / 888-0 • Fax +49 (0) 6074 / 888-100 www.videor.com...
Need help?
Do you have a question about the NXD-1602M and is the answer not in the manual?
Questions and answers