Table of Contents
Advertisement
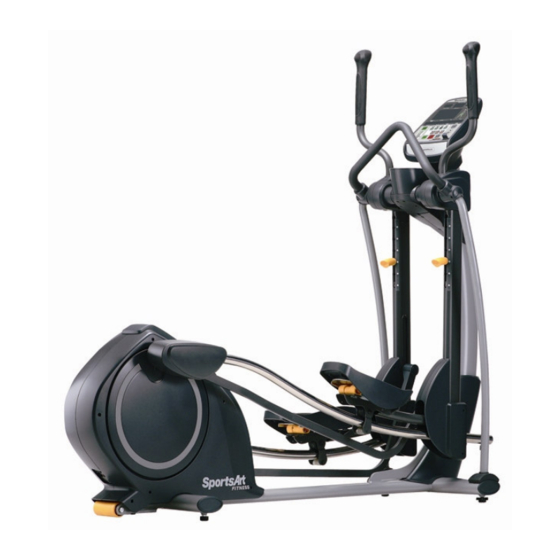
SPORTSART E822 ELLIPTICAL TRAINER
TABLE OF CONTENTS
1. INTRODUCTION...................................................................................................
2. SAFETY GUIDELINES .........................................................................................
List of parts............................................................................................................
Step by Step Instructions...................................................................................
Display Window.....................................................................................................
Display Function Overview....................................................................................
Display Setting Ranges.........................................................................................
Operating the E822 Bike.......................................................................................
5. PROGRAM Functions...........................................................................................
6. Internal Settings....................................................................................................
7. MAINTENANCE: LUBRICATING..........................................................................
Shoulder Joint.......................................................................................................
9. WIRING SCHEMATIC...........................................................................................
1
2
3
5
15
16
17
18
21
23
25
25
26
Advertisement
Table of Contents

Related Manuals for SportsArt Fitness E822


Summary of Contents for SportsArt Fitness E822
-
Page 1: Table Of Contents
TABLE OF CONTENTS 1. INTRODUCTION....................2. SAFETY GUIDELINES ..................3. ASSEMBLING YOUR ELLIPTICAL TRAINER List of parts......................Step by Step Instructions................... 4. UNDERSTANDING THE E822 DISPLAY Display Window..................... Display Function Overview..................Display Setting Ranges..................Operating the E822 Bike..................5. PROGRAM Functions................... -
Page 2: Introduction
Congratulations on purchasing one of the finest pieces of exercise equipment on the market today, the Sports Art E822. Constructed of high quality materials and designed for years of trouble-free use, the Sports Art E822 will be an integral part of your fitness regimen. -
Page 3: Safety Guidelines
Keep this owner s manual for future use and reference. ‧ Read this owner s manual and follow the instructions. ‧ Assemble and operate the Sports Art E822 Elliptical Trainer on a solid, level surface. ‧ Never allow children on or near the machine. -
Page 4: Assembling Your Elliptical Trainer
ASSEMBLING YOUR ELLIPTICAL TRAINER Thank you for purchasing this product. We go through great efforts to ensure the quality of each product. If you find this product to be defective in any way, please contact SportsArt or your dealer. Note that some parts may get mixed amongst packaging material during shipping. Please locate all the parts first before you discard the packaging material. - Page 5 1. One main frame 4. One Upright Front 2. One stationary Handle Bar 3. Two Glide Rail covers Enclosure 6. Two Support Tubes 5. Two Stationary Handle Bar covers 9. Rocking Bar Covers 7. Two Pedals 8. Tool kit (right + left)
-
Page 6: Step By Step Instructions
ELLIPTICAL ASSEMBLY Frame assembly STEP 1. Remove the upper box and all packing material but leave the unit in the lower box for support. STEP 2. The screw A is loosely attached before assembly. Raise the main post or pedestal into position. Secure the pedestal hardware in sequence, first D, then A, B and C. - Page 7 STEP 5. Slip the Glide Rail into place under the Pedal Carriage and also on the roller on the stride support Assembly. Unsecure the bolts from the Rocking Bars and then put the Rocking Bar Covers place and secure them as Fig. 2 shown below.
- Page 8 STEP 7. Secure stopper bolts on the front, bottom of both glide rails. Then remove the unit from the lower box. (See Fig. 4 ) Fig.4 STEP 8. (1) Loosely secure bolts A and B on both Side Supports. At this point, do not tighten these bolts.
- Page 9 Glide Rail Assembly STEP 1. Move the Glide Rail (A in the top right diagram of Figure 6) to the upper left part of the flywheel within the 90-degree indication. Hook the Park B onto the Glide Rail. STEP 2. Turn part B clockwise as shown to a nearly horizontal position, where it covers the Glide Rail.
- Page 10 Upright Enclosure Assembly Hold the upright enclosure in place. Use the screw driver provided to tighten each of the five self-tapping Phillips-head screws into the enclosure. (See Fig.7) Cross recessed raised head bolt tapping screw (m4). Fig.7...
- Page 11 FOOT PEDAL ASSEMBLY There are rubber pads on the footplates. Fold the rubber pad (indicated as A) up to access screws. Use a L shape wrench (4mm) to secure four raised-head allen screws B (two at front and two at back) onto the footplate. Do not remove screws D which attach to E.
-
Page 12: Footpad Installation Details
FOOTPAD INSTALLATION DETAILS STEP 1. Make sure the middle nibs on the footpad are firmly placed into the middle holes on the footplate. Pull the nibs through the footplate until they fit snugly in place. STEP 2. Secure the front screws (shown as m1) on the footplate. Insert the front nibs into the holes on the footplate (shown as M). - Page 13 FOOT LEVEL ADJUSMENT STEP 1. Elliptical trainers must be level for proper operation. Level the elliptical trainer by adjusting the feet . Raise or lower the leveling feet as needed. Tighten the washers against the frame to secure the feet. STEP 2.
- Page 14 STRIDE LENGTH ADJUSTMENT When the stride length adjustment handle is in position, make sure that the front end of handle (indicated as A) goes through the Bar. Fig.11...
- Page 15 NOTE: During operation, do not place your hands or any other articles near or on the roller bars oval openings to avoid jamming or other danger. Fig.12 The E822 Elliptical is now assembled and ready for use.
-
Page 16: Understanding The E822 Display
UNDERSTANDING THE E822 DISPLAY CONSOLE Display Windows The E822 is designed for user convenience. With better feedback about your workout, you get better results. The following explains the display key and window functions. Please read this manual, understand the display functions, and thereby get optimum enjoyment and benefit from this product. -
Page 17: Display Function Overview
Display Function Overview ˙ Windows: ■ - 65% HR TARGET shows the optimum heart rate zone for weight loss. ■ - HEART RATE shows actual heart rate. ■ - 80% HR TARGET shows the optimum heart rate for cardio workout. -... -
Page 18: Display Setting Ranges
2. In any circumstance, hold the STOP key for three seconds to go back to the start up banner screen. Display Setting Ranges ˙ WORKOUT LEVEL (resistance): 1 ~ 20 ˙ ~ : TIME: 00 99 59; setting range: 5:00 ~ 99:00. (After 99:00, 0 appears) ˙... -
Page 19: Operating The E822 Bike
Operating the E822 Bike To start: Press the START key or press the QUICK START key, or simply start pedaling (over 35 RPM). The startup banner "SPORTSART-E822" appears. 1. QUICK START (A) At the startup banner, press the QUICK START key. Quick start mode uses the default assumption of a 35-year-old, 165-lb/75-Kg user to calculate calorie and other feedback values. - Page 20 TIMES - 25:05 DISTS - 15.8 CALS - 1020 <▼> ˙ <▲> Use any key to choose a user ID. Then press ENTER to confirm your choice. 2. To set up a personalized user ID ˙ This function allows users to establish a user ID with up to 11 characters. ˙...
- Page 21 ˙ <▲ ▼> Press keys to select a weight. User weight is the basis for the calorie expenditure calculation. ˙ Press the ENTER key to confirm your choice and proceed to select your exercise program. (C) To select a workout program 1.
-
Page 22: Program Functions
PROGRAM functions 1. TRACK The TRACK function represents a running track. One lap is 400 Meters = 1/4 Mile. The user can manually adjust resistance and stride. 2. GLUTE The Glute Program exercises the gluteus muscle group of the body. There are three different exercise illustrations built into this program;... - Page 23 (B) At the start of the exercise or while exercising, if the user's heart rate is not detected, the message "NO HEART RATE READING, PLEASE CHECK TRANSMITTER" appears. At this time, while no heart rate is detected, resistance can only be adjusted manually. (C) When heart rate control starts operating, a message like the one below appears.
-
Page 24: Internal Settings
Internal settings determine basic operating conditions, for example, units of measure. 『 』 To access internal settings, at the startup banner SPORTSART-E822 , press and hold the CHANGE key for three seconds. 1. Follow the steps below to change internal settings. - Page 25 Press the ENTER key to confirm your choice and proceed to the next step. (E) The display shows the display main program IC version as follows: XXXXX _ XX Example: E822 - 1A ˙ Press the ENTER key to confirm settings and proceed to the start up banner.
-
Page 26: Maintenance Lubricating
Maintenance Lubricating: Shoulder Joint NOTE: For best performance, lubricate elliptical trainer once a year. Use a grease gun filled with red lithium ball bearing grease. Such grease is available at automotive supply stores. Follow the steps below: STEP 1. Remove the cap underneath the cover. STEP 2. -
Page 27: Wiring Schematic
WIRING SCHEMATIC Your Authorized SPORTS ART Distributor...
Need help?
Do you have a question about the E822 and is the answer not in the manual?
Questions and answers