
Related Manuals for Duplo DF-755


Summary of Contents for Duplo DF-755
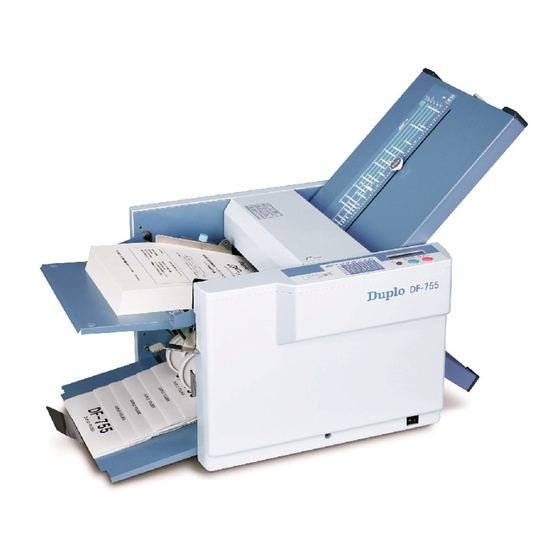
- Page 1 Duplo DF-755 Desktop Paper Folder Instruction Manual Provided By http://www.MyBinding.com http://www.MyBindingBlog.com...
- Page 2 Duplo Folder [120 V] INSTRUCTION MANUAL Be sure to read this manual prior to use. Please leave this manual at the site of use for easy reference.
- Page 3 “This equipment has been tested and found to comply with the limits for a Class B digital device, pursuant to Part 15 of the FCC Rules. These limits are designed to provide reasonable protection against harmful interference in a residential installation. This equipment generates, uses and can radiate radio frequency energy and, if not installed and used in accordance with the instructions, may cause harmful interference to radio communications.
- Page 4 Introduction Thank you for purchasing a Duplo product. Be sure to read this manual prior to using the product. After reading, leave the manual at the site of use for easy reference whenever questions related to the product arise in the future.
-
Page 5: Safety Precautions
Safety Precautions In this manual, operations and handling of the unit which are hazardous are described using the following marks to prevent personal injury or property damage to the user and others. Ignoring this mark could result in the possibility of serious injury or even death. -
Page 6: Operating Environment
Safety Precautions Operating Environment Operate this unit in the following environment. ● where the temperature range is between 41 and 95°F (14 to 122°F in storage) ● where the humidity range is between 20 and 85% RH (10 to 90% RH in storage, however no condensation) ●... -
Page 7: Maintenance / Other
Safety Precautions Maintenance / Other Do not damage the power cord or power plug. Do not scratch, alter, bend, twist, pull or place heavy objects on the power cord or power plug. This could result in damage, a fire or an electrical shock. Do not touch the power switch with wet hands. -
Page 8: Warning / Caution Labels
Safety Precautions WARNING / CAUTION Labels "WARNING" and "CAUTION" labels are pasted on the machine to ensure user safety. Do not remove or change them. When the labels become dirty or are lost, be sure to contact your dealer for a new one. When changing a huse, make sure that the fuse rating is same as that indicated on this label. -
Page 9: Table Of Contents
Contents Introduction ..........3 4. Cross Folding ........3-18 4-1. Cross Folding Standard Size Paper ..3-18 Safety Precautions ........i 4-2. Cross Folding Non-Standard Size Power Supply ............i Paper ........... 3-23 Operating Environment ........ii Chapter 4 Maintenance / Other ...........iii WARNING / CAUTION Labels ......iv TROUBLESHOOTING Chapter 1 GUIDE... -
Page 10: Before Operation
Chapter 1 BEFORE OPERATION... -
Page 11: Features
1. Features The DF-755 is designed to fold paper into six popular folding patterns and is capable of folding up to 135 sheets of paper per minute when single folding 11 lb of fine quality LT paper Single fold Double fold... -
Page 12: Setting Up The Machine
2. Setting Up the Machine 2-1. Components Duplo Folder DF-755 [220 to 2 0 V] INSTRUCTION MANUAL Be su e to ead th s manua p o o use ease eave th s manua at he s e o use o easy e e ence Name Qty. -
Page 13: Locking The Bearing Support Levers
Chapter 1 BEFORE OPERATION To remove the press release lever (A) on the non-operator's side, push it inwards and pull it out. Press release lever (A) Press release lever (A) To remove the press release lever (A) on the operator's side, push it inwards and pull it out. -
Page 14: Attaching The Parts
Chapter 1 BEFORE OPERATION Turn the bearing support lever on the Non-operator’s side non-operator's side in the direction of the arrow. The bearing will be locked. Bearing support lever Because the bearing support lever presses down the rubber roll, if it is not locked, thick paper may not be folded properly. - Page 15 Chapter 1 BEFORE OPERATION Make a ground connection using the earth wire attached to the power plug. ● Make sure that you make a ground connection before connecting the power plug to the wall socket. ● If earth leakage occurs without a ground connection, a short circuit may cause fire and electric shock.
-
Page 16: Names And Functions
3. Names and Functions Under the main cover [17] [16] [15] [14] [13] [12] [11] [10] Paper feed table (operator’s side) [18] [19]... - Page 17 Chapter 1 BEFORE OPERATION Name Function First folding plate Guide plate for deciding a paper folding position. First folding is made using this plate. Fine adjustment knob Used when adjusting a paper folding position. Rough adjustment knob Used when deciding a paper folding position. Control panel Used when operating the machine.
-
Page 18: Describing Control Panel
4. Describing Control Panel Name Function Counter/LCD display Counts up the number of folded paper or displays the status of the machine. Up to four digit number is displayed. Stop button When pressed, the machine stops. Start button When pressed, the machine starts folding operations. C (clear) button When pressed for two seconds or longer, the number counted up returns to "0."... -
Page 19: Handling Paper
5. Handling Paper 5-1. Paper Used ● Make sure that the printing ink on the paper has dried completely prior to use. If used without the ink completely dried, the folding roller or paper may become dirty. ● If curled paper is used, depending on the environmental condition (temperature, humidity), paper quantity, paper type, and paper fiber, it may not flow smoothly into the folding plate or may not be folded properly. - Page 20 Chapter 1 BEFORE OPERATION ● Paper Guide plate When stacking just a few sheets of paper on the paper feed table, lower the paper set lever while pressing the lead edge of the paper against the guide plate. Paper set lever 1-11...
-
Page 21: Emergency Stop
6. Emergency Stop An emergency stop device to ensure safety has been installed to the top cover. Opening the cover during operations will stop the machine. To resume operations, follow the procedures below. Top cover Close the top cover. Press the Start button. Operations will start. -
Page 22: Basic Operation
Chapter 2 BASIC OPERATION... -
Page 23: Standard Folding Of Standard Paper
1. Standard Folding of Standard Paper 1-1. Standard Paper There are six types of standard paper sizes; LD, LG and LT. Paper Size Long×WIde (inch) 11x17 8.5x14 8.5x11 LD and LG are detected as standard paper only when stacked with short edge feed. Paper Size Stacking Direction... -
Page 24: Operation Procedures
Chapter 2 BASIC OPERATION 1-3. Operation Procedures Insert the power cord in the wall socket and turn on the power. Press “ I ” to turn on the power. Press “O" to turn off the power. Power switch Fixing screw Loosen the fixing screws of the side Side guide guides, and move the side guides to... - Page 25 Chapter 2 BASIC OPERATION Lower the paper set lever. The paper feed table will be raised. Make sure that you lower the paper set lever. If you start operations without the paper set lever lowered, the paper feed rings will run idle, causing the machine to stop.
- Page 26 Chapter 2 BASIC OPERATION Paper feed pressure Set the paper feed pressure adjustment knob adjustment knob to “Thin paper.” If the paper slips and no paper is conveyed, change the paper feed pressure from “Thin paper” to “Thick paper”. Move the stacker rollers to the appropriate position referring to the table of stacker rollers position attached to the paper receiving tray.
- Page 27 Chapter 2 BASIC OPERATION After completing adjustments, press the C (clear) button for two seconds to clear the counter to "0." Clear button Press the Start button to start folding operations. Press the Stop button to interrupt or stop the operations. Pressing the Start button again will resume operations.
- Page 28 Chapter 2 BASIC OPERATION Folding paper into two Because the second folding plate is not used for a single fold, move the rough adjustment knob of the second folding plate to the upper end in the following methos. 1) Slide the rough adjustment knob of the second folding plate up to the upper end while lifting it up.
- Page 29 Memo...
-
Page 30: Advanced Operation
Chapter 3 ADVANCED OPERATION... -
Page 31: Single Folding Of Standard Paper
1. Single Folding of Standard Paper 1-1. Single Folding Thick Paper When folding drawing paper or fine quality thick paper 34 lb into two, the edge of the folding line of the paper or a part near the center may bend due to environmental conditions (temperature, humidity), paper size, paper fiber direction, etc. - Page 32 Chapter 3 ADVANCED OPERATION After completing adjustments, press the C (clear) button for two seconds to clear the counter to "0." Clear button Press the Start button to start folding operations. Press the Stop button to interrupt or stop the operations. Pressing the Start button again will resume operations.
-
Page 33: Double Folding Thick Paper
Chapter 3 ADVANCED OPERATION 1-2. Double Folding Thick Paper When folding fine quality thick paper 28 lb into four, its folding section may open when ejected to the stacker because of the paper thickness and consequently the folded paper may not be able to pass through the stacker rollers, resulting in paper jam. - Page 34 Chapter 3 ADVANCED OPERATION Move the stacker rollers to "5." Stacker roller Stacker roller While lifting up the stacker rollers Lever with your hand, pull the levers (left Stacker lever and right) attached to the stacker lever in the direction of the arrow so that the stacker rollers are lifted up.
- Page 35 Chapter 3 ADVANCED OPERATION Check the finish of test folding. Check for folding misalignment using the second test folded sample. If folding misalignments occur, refer to Chapter 4 "TROUBLESHOOTING" “1. Correcting Folding Misalignment” Test folded sample ( p.4-2). After completing adjustments, press the C (clear) button for two seconds to clear the counter to "0."...
-
Page 36: Double Folding Small Thin Paper
Chapter 3 ADVANCED OPERATION 1-3. Double Folding Small Thin Paper Paper jam may occur when folding 5.00 (W) x 7.00 (L) inch size fine quality paper of 22 lb or thinner into four. Using the supplied guide plate unit will prevent paper jam. Guide plate unit Remove the guide plate unit stored inside the top cover. - Page 37 Chapter 3 ADVANCED OPERATION Press the Start button for test folding and check if the paper is ejected smoothly. Press the Stop button after a couple of folded sheets are ejected. If the paper is not ejected smoothly, change the position of the stacker rollers.
- Page 38 Chapter 3 ADVANCED OPERATION Press the Start button to start folding operations. Press the Stop button to interrupt or stop the operations. Pressing the Start button again will resume operations. When there is no paper on the paper feed table, the machine will stop automatically. After completing the work, remove the guide plate unit.
-
Page 39: Custom Folding Of Standard Paper
2. Custom Folding of Standard Paper Custom folding is the method of folding paper where you specify the folding stoppers of the first and second folding plates. The following describes the custom folding procedures taking accordion fold as an example. Fixing screw Loosen the fixing screws of the side Side guide... - Page 40 Chapter 3 ADVANCED OPERATION Accordion fold Fold a piece of paper as desired and measure the dimensions of the A, B and C. The folding sizes should be within the following ranges. A: 1.60 to 12.80 inches B: 1.60 to 8.50 inches C: 8.50 inches or shorter Adjust the rough adjustment knob of the first folding plate to the mark...
- Page 41 Chapter 3 ADVANCED OPERATION Table of Stacker Rollers Position Stacker Length of Folded Paper Folding Pattern Rollers Position 7.0 to 8.5 inches LD: single fold, irregular accordion fold, gate fold Single folded paper larger than LD 6.0 to 7.0 inches LG: Irregular accordion, gate fold 5.0 to 6.0 inches LT: single fold, irregular accordion fold, gate fold...
- Page 42 Chapter 3 ADVANCED OPERATION Press the Start button to start folding operations. Press the Stop button to interrupt or stop the operations. Pressing the Start button again will resume operations. When there is no paper on the paper feed table, the machine will stop automatically. 3-13...
-
Page 43: Standard Folding Of Non-Standard Size Paper
3. Standard Folding of Non-Standard Size Paper Paper other than the six standard size paper are called non-standard size paper. The paper size that can be used as non-standard size paper is as follows. Paper feed direction Maximum: 11.00 (W) x 17.00 (L) inches Minimum: 5.00 (W) x 7.00 (L) inches The following describes the single folding procedures Length(L):... - Page 44 Chapter 3 ADVANCED OPERATION Move the stacker rollers to the appropriate position. Refer to Table of Stacker Rollers Position for their appropriate position ( p.3-12). For this example, move the stacker rollers to "2" for the finished size 6.00 inches. Stacker roller Fixing screw Loosen the fixing screws of the side...
- Page 45 Chapter 3 ADVANCED OPERATION Lower the paper set lever. The paper feed table will be raised. Make sure that you lower the paper set lever. If you start operations without the paper set lever lowered, the paper feed rings will run idle, causing the machine to stop.
- Page 46 Chapter 3 ADVANCED OPERATION Press the Start button to start folding operations. Press the Stop button to interrupt or stop the operations. Pressing the Start button again will resume operations. When there is no paper on the paper feed table, the machine will stop automatically. For custom folding of non-standard size paper, refer to "2.Custom Folding of Standard Paper"...
-
Page 47: Cross Folding
4. Cross Folding Cross folding is to fold single-folded paper another time into two or three. Cross fold Cross single fold Cross letter fold ● The maximum paper thickness is 28 lb. However, this thickness may differ slightly according to various conditions such as environmental conditions (temperature, humidity), paper size, and paper fiber direction. - Page 48 Chapter 3 ADVANCED OPERATION Raise the paper set lever and stack the single-folded paper on the paper Side guide feed table with the folded line facing the non-operator's side. The amount of paper stacked on 36 mm the paper feed table should be Paper set lever approximately 2/3 (approx.1-1/2 Paper...
- Page 49 Chapter 3 ADVANCED OPERATION Move the rough adjustment knob of the second folding plate to the upper end. ● The rough adjustment knob cannot be turned either clockwise or counterclockwise. Make sure that you pull up the knob when you want to Rough move it.
- Page 50 Chapter 3 ADVANCED OPERATION Take out the cross folding lever stored inside the top cover. Close the top cover. Cross folding lever Cross folding lever Attach the cross folding lever to the side guide of the non-operator' side. Place the weight roller on the folding line. Weight roller Side guide To replenish paper, lift the cross folding...
- Page 51 Chapter 3 ADVANCED OPERATION Press the Start button for test folding. Press the Stop button after a couple of folded sheets are ejected. Check the finish of test folding. Check for folding misalignment using the second test folded sample. If folding misalignments occur, refer to Chapter 4 "TROUBLESHOOTING"...
-
Page 52: Cross Folding Non-Standard Size Paper
Chapter 3 ADVANCED OPERATION 4-2. Cross Folding Non-Standard Size Paper Paper other than the six standard size paper are called non-standard size paper. The paper size that can be cross folded is as follows. Maximum: 11.00 (W) x 17.00 (L) inches Paper feeding direction Minimum: 5.00 (W) x 7.00 (L) inches The following describes the cross single folding... - Page 53 Chapter 3 ADVANCED OPERATION Side guide Fixing screw After pressing the side guide to each side of the paper lightly, tighten the screws to secure the side guides. Fixing screw Side guide Lower the paper set lever. The paper feed table will be raised. Make sure that you lower the paper set lever.
- Page 54 Chapter 3 ADVANCED OPERATION 2) Move the rough adjustment knob of the second folding plate to the upper end. ● The be turned either clockwise or counterclockwise. Make sure that you pull up the knob when you want to move it. ●...
- Page 55 Memo 3-26...
-
Page 56: Troubleshooting Guide
Chapter 4 TROUBLESHOOTING GUIDE... -
Page 57: Correcting Folding Misalignment
1. Correcting Folding Misalignment Folding misalignment consists of two types; “folding misalignment along the vertical length of the paper” and “folding misalignment along the sides of the paper.” Other than this, “deformed folding” may also occur due to paper characteristics. 1-1. - Page 58 Chapter 4 TROUBLESHOOTING GUIDE First folding plate Folding Style Fold Surface A Adjustment Fine adjustment knob Turn the fine adjustment knob When A is longer Feeding direction counterclockwise. Gate fold When A is Turn the fine adjustment knob shorter clockwise. Adjusting Fine Adjustment Knob of the Second Folding Plate First folding plate Folding Style...
-
Page 59: Correcting Folding Misalignment Along Sides Of Paper
Chapter 4 TROUBLESHOOTING GUIDE 1-2. Correcting Folding Misalignment along Sides of Paper When folded paper is misaligned along the sides Paper feeding of paper as shown in the figure, turn the slant correction direction knob to correct the misalignment. Turn the slant correction knob to adjust the folding slippage. -
Page 60: Correcting Deformed Folding
Chapter 4 TROUBLESHOOTING GUIDE 1.3 Correcting Deformed Folding Check the following when deformed folding occurs. Deformed folding ● Fan the paper well before stacking. ● Check if the folding plates have been installed properly. ( p.1-5) ● Spray a commercially-available air duster on the rubber roll because the static electricity may have resulted in deformed folding. -
Page 61: Removing Jammed Paper
2. Removing Jammed Paper When paper jam has occurred, "PAPER ERR" will be displayed on the LCD display. Check the machine to find out where the jam has occurred and remove the jammed paper following the procedures below. 2-1. When Paper Has Jammed Near the Paper Feed Ring Paper feed tray Raise the paper set lever to lower the paper feed table downwards. -
Page 62: When Paper Has Coiled Around The Rubber Roll
Chapter 4 TROUBLESHOOTING GUIDE 2-3. When Paper Has Coiled Around the Rubber Roll Turn off the machine before following the procedures below. Top cover Open the top cover. Non-operator’s side Turn the two bearing support levers in the direction of the arrow to relase them. -
Page 63: When Paper Has Jammed At The First Folding Plate
Chapter 4 TROUBLESHOOTING GUIDE 2-4. When Paper Has Jammed at the First Folding Plate Remove the first folding plate from the machine. First folding plate Top cover Open the top cover. Pull the jammed paper towards you. Close the top cover. Return the first folding plate. -
Page 64: When Paper Has Jammed At The Second Folding Plate
Chapter 4 TROUBLESHOOTING GUIDE 2-5. When Paper Has Jammed at the Second Folding Plate Turn off the machine before following the procedures below. Move the lock lever to the position of Lock lever "UNLOCK." UNLOCK LOCK Second folding plate Remove the second folding plate from the machine. -
Page 65: When Paper Has Jammed Near The Stacker
Chapter 4 TROUBLESHOOTING GUIDE 2-6. When Paper Has Jammed Near the Stacker Remove the paper stuck in the stacker section towards you. Paper 4-10... -
Page 66: Error Messages
3. Error Messages When a paper jam has occurred or the top cover is open, an error message is displayed on the LCD display. Follow the procedures below to fix the error. Message Cause Solution NO PAPER When the power is turned on, there Stack paper on the paper feed is no paper on the paper feed table. -
Page 67: Troubleshooting
4. Troubleshooting When trouble has occurred, find the symptom from the table below and solve the trouble according to the solution. If you cannot solve the trouble, contact your dealer. Symptom Cause Solution The machine does not start The power cord is not inserted to Insert the power cord to the wall the wall socket. - Page 68 Chapter 4 TROUBLESHOOTING GUIDE Symptom Cause Solution Paper slips at the paper feed The paper feed pressure Set the paper feed pressure section frequently. adjustment knob is set to “Thin adjustment knob to “Thick paper.” paper.” p.1-7) The paper feed ring is dirty. Clean it with alcohol.
- Page 69 Memo 4-14...
-
Page 70: Cleaning The Unit
Chapter 5 CLEANING THE UNIT... -
Page 71: Cleaning Each Section
1. Cleaning Each Section The adherence of paper dust and printing ink on the rubber rolls and paper feed rings may cause problems such as paper feed errors and folding misalignment. Adherence of paper dust near sensors will also cause misdetection. Clean the machine once a week. We recommend that you use a commercially-available air duster for office equipment to clean sensors. -
Page 72: Cleaning The Paper Feed Rings
Chapter 5 CLEANING THE UNIT While rotating the rubber roll, clean off the dirt with a cloth moistened with alcohol. Rubber roll 1-2. Cleaning the Paper Feed Rings Top cover Open the top cover. Rotate the rubber roll, and clean off Paper feed ring the dirt with a cloth moistened with alcohol. -
Page 73: Cleaning The Paper Separator
Chapter 5 CLEANING THE UNIT 1-3. Cleaning the Paper Separator Top cover Open the top cover. Insert a cloth moistened with alcohol Paper feed ring between the paper feed ring (middle) (middle) and the paper separator. Turn the paper feed rings in the direction of the arrow. -
Page 74: Cleaning The Ejection Gate Sensor
Chapter 5 CLEANING THE UNIT 1-5. Cleaning the Ejection Gate Sensor Clean the ejection gate sensor, located on the back of the stacker rollers using an air duster. Ejection gate Stacker rollers sensor 1-6. Cleaning the Paper Ejection Belts Move the stacker rollers to “5.” Stacker roller Paper ejection belt Stacker roller... - Page 75 Memo...
-
Page 76: Chapter 6 Appendix
Chapter 6 APPENDIX... -
Page 77: Specification
1. Specification Model DF-755 Type Office use, desktop Paper size Min. 5.00 (W) x 7.00 (L) inches that can Max. 11.00 (W) x 17.00 (L) inches be folded Paper quality Rough paper, fine quality paper, stencil paper, recycled paper Folding mode... - Page 78 Memo...
- Page 79 Duplo building, 1-6, Oyama 4 chome, Sagamihara, Kanagawa 229-1180, Japan TEL: +81-42-775-3602 FAX: +81-42-775-3606 E-mail: info@duplo.com 86V-74020-0...
Need help?
Do you have a question about the DF-755 and is the answer not in the manual?
Questions and answers