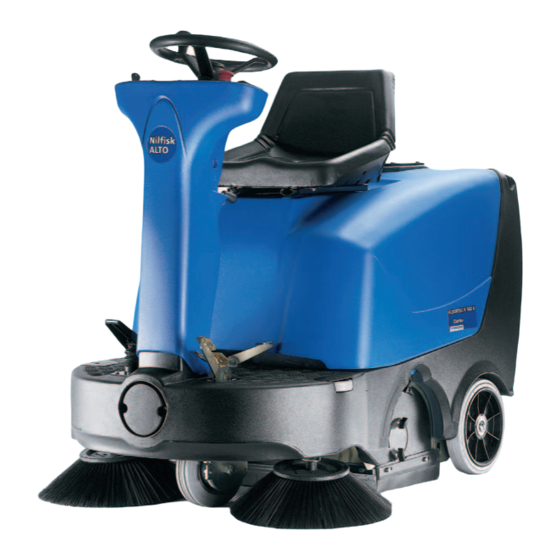
Summary of Contents for Nilfisk-ALTO FLOORTEC R 360 B
- Page 1 www.nilfisk-alto.com FLOORTEC R 360 B DEUTSCH BETRIEBSANLEITUNG FRANÇAIS MANUEL D’UTILISATION ENGLISH USER MANUAL NEDERLANDS GEBRUIKSAANWIJZING...
- Page 2 S310027 S310028 S310196 S310029 S310030 S310198 S310032 6 7b S310197 S310199 S310034...
-
Page 3: Table Of Contents
CHARGING THE BATTERIES ........................14 SAFETY FUNCTIONS ......................... 15 EMERGENCY SWITCH ..........................15 HOOD SAFETY SWITCH ..........................15 DRIVER'S SEAT MICROSWITCH ........................15 TROUBLESHOOTING ........................15 SCRAPPING ............................15 EC CERTIFICATE OF CONFORMITY ....................16 146 2596 000(1)2005-03 A FLOORTEC R 360 B... -
Page 4: Introduction
A careful and prudent Operator is the best MACHINE serial number ..........guarantee against accidents and is essential for successful completion of any prevention program. FLOORTEC R 360 B 146 2596 000(1)2005-03 A... -
Page 5: Symbols
(batteries, oils, etc.), which are subject to standards that require disposal in special centres (see the Scrapping WARNING! chapter). – Carefully read all the instructions before carrying out any maintenance/repair operations. 146 2596 000(1)2005-03 A FLOORTEC R 360 B... -
Page 6: Unpacking
15. Main broom the driver’s seat with the hands on the handlebar (1, Fig. 16. Left side skirt 17. Right side skirt 18. Front skirt 19. Rear skirt 20. Hopper FLOORTEC R 360 B 146 2596 000(1)2005-03 A... -
Page 7: Technical Data
Battery compartment max. size 357x375x385 mm 19. Switch for machine pushing 20. Battery connection diagrams Dust vacuuming and filtering Values Paper dust filter 5-10 µm Main broom compartment vacuum 18.3 mm H 146 2596 000(1)2005-03 A FLOORTEC R 360 B... -
Page 8: Accessories/Options
Forward/reverse gear microswitch SW4: Side broom microswitch SW5: Drive switch SW6: Manual vacuum switch (optional) SW7: Working light switch (optional) Colour code Black Blue Brown Green Grey Orange Pink Violet White Yellow FLOORTEC R 360 B 146 2596 000(1)2005-03 A... -
Page 9: Use
Charge the batteries (see the relevant procedure in thoroughly with water and call a physician. the Maintenance chapter). Batteries have to be filled in a well-ventilated area. Wear protective gloves. 146 2596 000(1)2005-03 A FLOORTEC R 360 B... -
Page 10: Before Machine Start-Up
When operating on wet grounds, it is operator is seated in the driver's seat. essential to deactivate the vacuum system by operating the lever (3, Fig. C) to prevent the dust filter from being damaged. FLOORTEC R 360 B 146 2596 000(1)2005-03 A... -
Page 11: Hopper Dumping
Dump the hopper (20, Fig. C) (see previous paragraph). – Remove the key from the ignition switch (2, Fig. B). – Engage the parking brake by rotating the lever (7, Fig. C) backward. 146 2596 000(1)2005-03 A FLOORTEC R 360 B... -
Page 12: Maintenance
Main broom drive belt replacement Main motor and drive motor carbon brush check and replacement (*): For the related procedure, see the Service Manual (1): and after the first 8 running-in hours. FLOORTEC R 360 B 146 2596 000(1)2005-03 A... -
Page 13: Main Broom Height Check And Adjustment
Be extremely careful when performing the above-mentioned checks and always use the machine according to the indicated conditions. 146 2596 000(1)2005-03 A FLOORTEC R 360 B... -
Page 14: Side Broom Height Check And Adjustment
Install the new broom on the machine engaging it on the pins (3) and on the tabs (1). Carry out the side broom height check and adjustment, as described in the previous paragraph. FLOORTEC R 360 B 146 2596 000(1)2005-03 A... -
Page 15: Skirt Height And Operation Check
Check the front (1, Fig. R) and rear (2) skirts for integrity. Replace the skirts when they have cuts (1, Fig. N) larger than 20 mm or cracks (2) larger than 10 mm (for skirt replacement, refer to the Service Manual). 146 2596 000(1)2005-03 A FLOORTEC R 360 B... -
Page 16: Charging The Batteries
Reconnect the battery connector (6, Fig. U) to its connector on the machine. Disengage the hood support rod (3, Fig. U) and close the hood (2); the machine is ready to be used. FLOORTEC R 360 B 146 2596 000(1)2005-03 A... -
Page 17: Safety Functions
– Battery – Polyester dust filter – Main and side brooms – Electronic board – Plastic components and hoses CAUTION! The removed components must be disposed according to the law in force. 146 2596 000(1)2005-03 A FLOORTEC R 360 B... -
Page 18: Ec Certificate Of Conformity
USER MANUAL ENGLISH EC CERTIFICATE OF CONFORMITY FLOORTEC R 360 B 146 2596 000(1)2005-03 A... - Page 19 6V 6V 6V 6V S310200 S310036 10 9 S310037 S310083 S310084 S310085 S310040 S310041 S310201 S310202...
- Page 20 Nilfi sk-ALTO HEADQUARTER HEADQUARTER DENMARK Nilfi sk-Advance Group Sognevej 25 2605 Brøndby Denmark Tel: (+45) 43 23 81 00 SUBSIDIARIES AUSTRALIA GERMANY SPAIN Nilfi sk - ALTO Nilfi sk-ALTO Nilfi sk-ALTO 48 Egerton St. Division of Nilfi sk-Advance A/S Division of Nilfi sk-Advance S.A. PO box 6046 Guido-Oberdorfer-Str.


Need help?
Do you have a question about the FLOORTEC R 360 B and is the answer not in the manual?
Questions and answers