Kenmore Elite Oasis 110.6703 Series Use & Care Manual
Kenmore clothes dryer user manual
Hide thumbs
Also See for Elite Oasis 110.6703 Series:
- Quick start manual (4 pages) ,
- Quick start manual (4 pages)
Table of Contents
Advertisement
Available languages
Available languages
Advertisement
Chapters
Table of Contents

Related Manuals for Kenmore Elite Oasis 110.6703 Series


Summary of Contents for Kenmore Elite Oasis 110.6703 Series
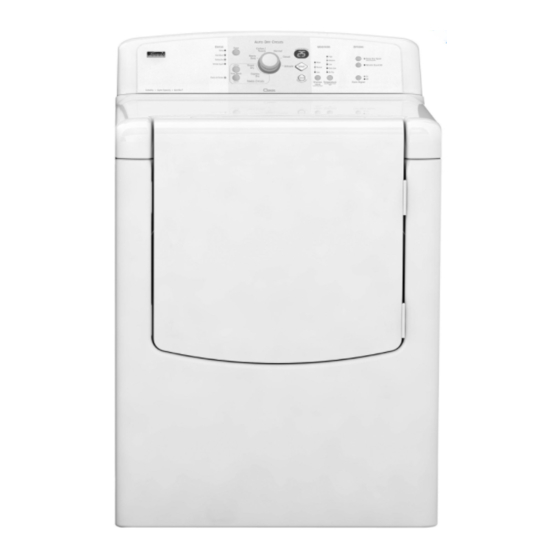
- Page 1 ® Oasis Electric Dryer Secadora el_ctrica _,,_,_ , +,..,_+'<_w._ _ )/" k>j _)_ _,_ _,_,._ _,'+,J Models/Modelos 110.6703_, 6704_ = color number/nemero de color W10035200 Sears Roebuck and Co., Hoffman Estates, IL 60179 U.S.A. www.sears.com...
-
Page 2: Table Of Contents
TABLE OF CONTENTS PROTECTION AGREEMENTS ... WARRANTY ... DRYER SAFETY ... INSTALLATION INSTRUCTIONS Tools and Parts ... Location Requirements Electrical Requirements ... Electrical Connection ... Venting Requirements ... Plan Vent System ... Install Vent System ... Install Leveling Legs ... Connect Vent ... -
Page 3: Protection Agreements
Agreements Congratulations on making a smart purchase. Your new Kenmore _product is designed and manufactured dependable operation. But like all products, it may require preventive maintenance or repair from time to time. That's when having a Master Protection Agreement can save you money and aggravation. -
Page 4: Dryer Safety
Your safety and the safety of others are very important. We have provided many important safety messages in this manual and on your appliance. Always read and obey all safety messages. This is the safety alert symbol. This symbol alerts you to potential hazards that can kill or hurt you and others. All safety messages will follow the safety alert symbol and either the word "DANGER"... -
Page 5: Installation Instructions
INSTALLATION INSTRUCTIONS Gather the required tools and parts before starting installation. Read and follow the instructions provided with any tools listed here. • Flat-blade screwdriver • Tin snips (new vent • #2 Phillips screwdriver installations) • Adjustable wrench that • Level opens to 1"... - Page 6 Installation Clearances The location must be large enough to allow the dryer door to open fully. Dryer Dimensions (1403. H (_2769. * Most installations require a minimum 5" (12.7 cm) clearance behind the dryer for the exhaust vent with elbow. See "Venting Requirements."...
-
Page 7: Electrical Connection
Electrical Connection To properly install your dryer, you must determine the type of electrical connection you will be using and follow the instructions provided for it here. If local codes do not permit the connection of a neutral ground wire to the neutral wire, see "Optional 3-wire connection"... - Page 8 Power Supply Cord Fire Hazard Use a new UL listed 30 amp power supply cord. Use a UL listed strain relief. Disconnect power before making electrical connections. Connect neutral wire (white or center wire) to center terminal (silver). Ground wire (green or bare wire) must be connected to green ground connector.
- Page 9 Put power supply cord through the strain relief. Be sure that the wire insulation on the power supply cord is inside the strain relief. The strain relief should have a tight fit with the dryer cabinet and be in a horizontal position. Do not further tighten strain relief screws at this point.
-
Page 10: Venting Requirements
Remove center silver-colored terminal block screw. Remove neutral ground wire from external ground conductor screw. Connect neutral ground wire and the neutral wire (white or center wire) of power supply cord under center, silver-colored terminal block screw. Tighten screw. A. Neutral ground wire B. - Page 11 3. Connect ground wire (green or bare) of direct wire cable to external ground conductor screw. Tighten screw. A. External ground conductor screw B. Neutral ground wire C. Ground wire (green or bare) of power supply cord D. 3/4" (1.9 cm) UL listed strain relief E.
- Page 12 When connecting to the terminal block, place the hooked end of the wire under the screw of the terminal block (hook facing right), squeeze hooked end together and tighten screw, as shown. Loosen or remove center silver-colored Place the hooked end of the neutral wire (white or center wire) of direct wire cable under the center screw of terminal block (hook facing right).
- Page 13 Fire Hazard Use a heavy metal vent. Do not use a plastic vent. Do not use a metal foil vent. Failure to follow these instructions can result in death or fire. WARNING: To reduce the risk of fire, this dryer MUST BE EXHAUSTED OUTDOORS.
- Page 14 Choose your exhaust installation type Recommended exhaust installations Typical installations vent the dryer from the rear of the dryer. Other installations are possible. A. Dryer E. Clamps B. Elbow E Rigid metal or flexible metal vent C. Wall G. Vent length necessary to connect D.
-
Page 15: Plan Vent System
Determine vent path • Select the route that will provide the straightest and most direct path outdoors. • Plan the installation to use the fewest number of elbows and turns. • When using elbows or making turns, allow as much room as possible. - Page 16 Check the levelness of the dryer. Check levelness first side to side, then front to back. If the dryer is not level, prop up the dryer using a wood block. Use a wrench to adjust the legs up or down and check again for levelness.
-
Page 17: Level Dryer
3. Remove the 4 screws from the opposite side of the door. 4. Install the 2 hinges to the front panel of the dryer using 4 screws. Use the non-slotted side to attach the hinge to the front panel. 5. Install screws in the top hinge holes in the door. Do not tighten screws. -
Page 18: Dryer Use
Explosion Hazard Keep flammable materials and vapors, such as gasoline, away from dryer. Do not dry anything that has ever had anything flammable on it (even after washing). Failure to follow these instructions can result explosion, or fire. WARNING: To reduce the risk of fire, electric shock, or injury to persons, read the IMPORTANT SAFETY INSTRUCTIONS before operating this appliance. -
Page 19: Cycles
To make changes during an Auto Dry Cycle: • PressSTOR • Adjust Dryness Level. NOTE: Dryness Level selections can be made only while using Auto Dry Cycles. More Normal Less Dryness Level Auto Dry Cycles take the guesswork out of drying time and enhance fabric care. - Page 20 Follow the progress of your dryer with the drying Status indicator lights. STATUS Damp CoolDown Clothes Dry WrinkleGuard Check Lint Scleen Damp The Damp light illuminates in an Auto Dry Cycle when the laundry is approximately 80% dry or suitable for ironing. Damp Dry Signal beeps, if selected.
-
Page 21: Changing Cycles, Modifiers And Options
Auto Preset Cycle Settings Follow care label directions. Auto Dry Cycles Temperature Load Type HEAVY DUTY High Heavyweight mixed loads, cottons, jeans COTTON/TOWELS High Towels, sheets, cottons NORMAL Medium Corduroys, work clothes CASUAL Business casual clothes, permanent press, synthetics DELICATE Extra-Low Lingerie, blouses, washable knit fabrics... -
Page 22: Options
You can customize your cycles by selecting OPTIONS Damp Dry Signal AUTOC', t S0t¥ Wrinkle Guard 60 Damp Dry Signal Select the Damp Dry Signal to alert you that your clothes are approximately 80% dry or suitable for ironing. This is useful when you want to remove lightweight items in a mixed load to avoid overdrying or remove partially dry items that may need ironing. -
Page 23: Dryer Rack
The dryer rack was shipped in the dryer drum. Use the dryer rack for items that you do not want to tumble dry, such as sweaters. Use Timed Dry to select the desired time. NOTE: Do not use Auto Dry Cycles with the dryer rack. To use the dryer rack: Do not remove the lint screen. -
Page 24: Dryer Care
Keep dryer area clear and free from items that would obstruct the flow of combustion and ventilation air. Explosion Hazard Keep flammable materials and vapors, such as gasoline, away from dryer. Place dryer at least 18 inches (46 cm) above the floor for a garage installation. -
Page 25: Cleaning The Lint Screen
From Inside the Dryer Cabinet Lint should be removed every 2 years, or more often, depending on dryer usage, Cleaning should be done by a qualified person. From the Exhaust Vent Lint should be removed every 2 years, or more often, depending on dryer usage. -
Page 26: Troubleshooting
First try the solutions suggested here and possibly avoid the cost of a service call... Dryer will not run Has a household fuse blown, or has a circuit breaker tripped? Replace the fuse or reset the circuit breaker. There may be 2 household fuses or circuit breakers for the electric dryer. - Page 27 Are fabric softener sheets blocking the grille? Use only one fabric softener sheet, and use it only once. Is the exhaust vent the correct length? Check that the exhaust vent is not too long or has too many turns. Long venting will increase drying times. See "Installation Instructions."...
- Page 28 iNDICE CONTRATOS DE PROTECCION ... GARANTiA ... SEGURIDAD DE LA SECADORA ... INSTRUCCIONES DE INSTALACION ... Herramientas y piezas ... Requisites de ubicaci6n ... Requisites electricos ... Conexi6n electrica ... Requisites de ventilaci6n ... Planificaci6n del sistema de ventilaci6n ... 40 Instalaci6n del sistema de ventilaci6n ...
-
Page 29: Contratos De Proteccion
Contratos Maestros de Proteccibn iFelicitaciones por su inteligente adquisici6n! Kenmore _ ha sido dise_ado y fabricado para brindarle aSos de funcionamiento confiable. Pero al igual que todos los productos, puede necesitar mantenimiento preventivo o reparaci6n de vez en cuando. Es alli donde el Contrato Maestro de Proteccidn puede ahorrarle dinero e inconvenientes. -
Page 30: Seguridad De La Secadora
SEGURIDAD DE LA SECADORA Su seguridad Hemos incluido muchos mensajes importantes de seguridad en este manual yen su electrodomestico. todos los mensajes de seguridad. Este sfmbolo le llama la atenci6n sobre peligros potenciales que pueden ocasionar la muerte o una lesion a usted y a los demas. -
Page 31: Instrucciones De Instalacion
INSTRUCCIONES DE INSTALACION ReQna las herramientas y piezas necesarias antes de comenzar la instalaci6n. Lea y siga las instrucciones cualquiera de las herramientas enlistadas aqui. Destornillador de hoja Tijeras de lata plana (instalaciones del nuevo ducto de escape) Destomillador Phillips # 2 Nivel Llave de tuercas •... - Page 32 Espacios de instalacibn La ubicaci6n debe ser Io suficientemente grande para poder abrir completamente la puerta de la secadora. Dimensiones de la secadora *La mayor[a de las instalaciones requieren un espacio m[nimo de 5" (12,7 cm) detras de la secadora para acomodar escape con code.
-
Page 33: Conexi6N Electrica
Conexibn el_ctrica Para instalar su secadora adecuadamente, determinar el tipo de conexidn electrica que va a usar y seguir las instrucciones que aquf se proveen para el caso. Si los cddigos locales no permiten la conexi6n de un conductor para conexi6n a tierra del equipo al alambre neutro, vea la secci6n "Conexidn opcional de 3 hilos". - Page 34 Cable desuministro el_ctrico Peligre de Incendio Use un cable de suministro electrico nuevo de 30 amperes que este en la lista de UL. Use un protector de cables que este en la lista de UL. Desconecte el suministre el_ctrico antes de hacer las conexiones electricaso Conecte el alambre neutro (el blanco o el del centre) al terminal...
- Page 35 Haga pasar el cable de suministro de energia a traves del protector de cables. Aseg_rese de que el aislamiento de cables del cable de suministro de energia este dentro del protector de cables. El protector de cables debera encajar bien con el gabinete de la secadora y estar en posici6n horizontal.
- Page 36 Saque el tornillo plateado central del bloque de terminal. Saque el hilo de tierra neutro del aparato del tornillo conductor de tierra externo. Conecte el hilo neutro de puesta a tierra y el hilo neutro (hilo blanco o central) del cable de suministro de energia debajo del tornillo central de color plateado del bloque de terminal.
- Page 37 Saque el tornillo central de color plateado del bloque de terminal. Saque el hilo de tierra neutro del tornillo conductor de tierra externo. Conecte el hilo neutro de puesta a tierra y coloque el extreme en forma de gancho (gancho mirando hacia la derecha) del hilo neutro (blanco o central) del cable de conexidn directa debajo del tornillo central del bloque de terminal.
-
Page 38: Requisites De Ventilaci6N
3. Conecte los otros hilos a los tornillos exteriores del bloque de terminal. Apriete los tornillos. 4. Apriete los tornillos del protector de cables. Introduzca la lengQeta de la cubierta del bloque de terminal en la ranura del panel posterior de la secadora. Asegure la cubierta con el tornillo de sujeci6n. - Page 39 Conexibn opcional de 3 hilos Use para cable directo o cable de suministro el_ctrico los cbdigos locales no permitan la conexibn del conductor de tierra del gabinete con el hilo neutro. 1. Saque el tornillo central de color plateado del bloque de terminal.
- Page 40 Ducto de escape de metal rigido • Para un 6ptimo rendimiento de secado, se recomiendan ductos de escape de metal rfgido. • Se recomienda el ducto de escape de metal rfgido para evitar que se aplaste o se tuerza. Ducto de escape de metal flexible •...
- Page 41 Instalaciones opcionales de escape Los sistemas de ventilacidn vienen en una amplia gama. Seleccione el tipo mas apropiado para su instalacidn. Peligro de Incendio Cubra el orificio de escape no usado con el juego siguiente: 8212503 Comuniquese con su distribuidor local. No seguir estas instrucciones puede ocasionar la muerte, incendio, choque electrico, o...
- Page 42 Cuadro del sistema de ventilacibn NOTA: Para el funcionamiento del ducto de escape inferior, debera considerarse como si fueran dos codos. Para determinar la Iongitud maxima del ducto de escape, agregue dos codos al cuadro. NOTA: Para el funcionamiento del ducto de escape posterior a ambos lados de la secadora, debera considerarse como si fuera un codo.
- Page 43 Usted puede invertir el cierre de la puerta de la apertura a la derecha a la apertura a la izquierda, si Io desea. 1. Coloque una toalla o un paso suave on la parte superior de la secadora o de la supen_icie de trabajo, para proteger la supe_icie.
-
Page 44: Nivelaci6N De La Secadora
3. Quite los 4 tornillos del lade opuesto de la puerta. Instale las 2 bisagras en el panel frontal de la secadora usando 4 tornillos. Utilice el lado sin ranuras para ajustar la bisagra al panel frontal, 5. Coloque los tornillos en los orificios superiores en ambas bisagras en la puerta, No apriete los tornillos, Deje aproximadamente 14"... -
Page 45: Uso De La Secadora
Peligro de Explosi6n IVlantenga los materiales y vapores como la gasolina, alejados de la secadora. No seque ningun articulo que haya tenido alguna vez cualquier substancia inflamable (aun despues de lavarlo), No seguir estas instrucciones puede ocasionar la muerte, explosion o incendio, ADVERTENCIA: A fin de reducir el riesgo de incendio, de... -
Page 46: Ciclos
El ajuste de sequedad prefijado es Normal cuando se selecciona un ciclo de secado automatico. seleccionar un nivel de sequedad diferente seg0n la carga, presionando Nivel de sequedad (DRYNESS LEVEL) y eligiendo Mas (More), Normal o Menos (Less). AI seleccionar Mas (More), Normal o Menos (Less) se ajusta automaticamente el nivel de sequedad, en el cual se... - Page 47 Sugerencias de secado Siga las instrucciones de cuidado de la etiqueta cuando • esten disponibles. Si desea, agregue una hoja de suavizante de telas. Siga las • instrucciones del paquete. Quite la carga de la secadora tan pronto se detenga la rotaci6n para reducir la formaci6n de arrugas.
- Page 48 Seleccione el ciclo de secado de acuerdo con el tipo de carga que va a secar. Vea los cuadros de Ajustes prefijados de ciclos automaticos o programados. AUTO DRY CYCLES Cotton / Towels Heavy Duty - Timed Express TIMED CYCLES Los ciclos de secado automatico (Auto Dry Cycles) le permiten regular el ciclo segqn la carga que va a secar.
-
Page 49: Modificadores
Secado expreso (EXPRESS DRY Use este ciclo para secar cargas pequer_aso cargas que necesitan un tiempo de secado corto. Ajustes prefijados de ciclos programados Ciclos programados Temperatura Tipo de carga por omisi6n Secado programado Alta (TIMED DRY) Ropa pesada, ropa voluminosa, cubrecamas, ropa de trabajo Secado expreso... -
Page 50: Opciones
Usted puede personalizar sus ciclos al seleccionar OPTIONS Damp Dry Signal AUTOC, LS0L¥ Wrinkle Guard 60 Serial de semi seco (Damp Dry Signal) Seleccione la sepal de semi seco para alertarle cuando su ropa este aproximadamente 80% seca o lista para plancharse. Esto es Qtil cuando usted quiere quitar articulos livianos en una carga mixta para evitar que se sequen en exceso, o para quitar articulos parcialmente secos que pudiesen necesitar un... -
Page 51: Estante De La Secadora
Los ajustes de nivel de sequedad pueden ajustarse para adecuarse alas diferentes instalaciones, medio ambiente o las preferencias personales. Existen 3 ajustes de secado: 1 (nivel de sequedad prefijado de fabrica), 2 (prendas ligeramente mas secas, aproximadamente de secado) y 3 (prendas mucho mas secas, aproximadamente 30% mas de tiempo de secado). -
Page 52: Cuidado De La Secadora
CUIDADO DE LA SECADORA Mantenga el Area donde esta la secadora despejada y libre de articulos que pudieran obstruir el flujo de aire para la combusti6n y la ventilaci6n. Peligro de Explosi6n Mantenga los materiales y vapores inflamables, la gasolina, lejoe de la secadora, Coloque la eecadora a un mfnimo el pieo para la inetalaci6n... -
Page 53: Limpieza Del Filtro De Pelusa
En el interior del gabinete de la secadora SegQn el uso de la secadora, se debe quitar la pelusa cada 2 ar3os, o con mas frecuencia. La limpieza debera efectuarla una persona calificada. En el ducto de escape La pelusa debe ser quitada cada 2 a_os, o con mas frecuencia, de acuerdo con el use de la secadora. -
Page 54: Solucion De Problemas
SOLUCION DE PROBLEMAS Pruebe primero las soluciones aqui sugeridas y posiblemente se evite el costo de una visita de servicio t_cnico... La secadora no funciona &Hay un fusible de la casa fundido o se dispar6 el cortacircuitos? Reemplace el fusible o reposicione el cortacircuitos. posible que la secadora tenga 2 fusibles o cortacircuitos. - Page 55 &Estdn las hojas del suavizante de telas bloqueando la rejilla? Use Qnicamente una hoja del suavizante de telas y L_selauna sola vez. &Tiene el ducto de escape el largo correcto? Controle el ducto de escape para verificar que no sea demasiado largo o no de demasiadas vueltas.
- Page 56 For repair-in lawn and garden equipment, no matter who made it, no matter who sold it! For the replacement owner's manuals that you need to do-it-yourself. For Sears professional and items like garage door openers and water heaters. 1-800-4-MY-HOME ® (1-800-469-4663) For repair of carry-in items like vacuums, and electronics, To purchase a protection agreement...