Table of Contents
Advertisement
Quick Links
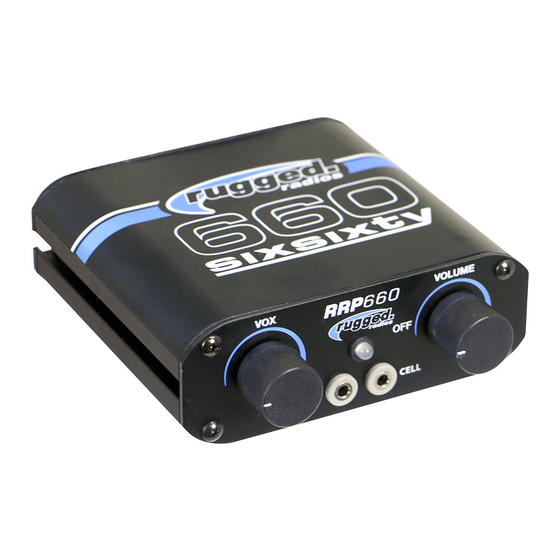
RRP660 Intercom Features
• Immediately ready for up to (4) headsets
• iPhone/iPod/Blackberry ready
• MP3 can connect from front or back / Cell phone connects from front
• Master Volume
• Radio Gain Adjustable
• VOX: voice activated transmission — adjust sensitivity with VOX knob
• Auto Music Muting: music mutes when speaking
• AUX Port: Connect devices like video camera to capture audio
• EXTENSION Port: Attach optional splitter to add more passengers
• PTT Push-to-Talk: Driver/Co-Driver can add optional corded PTT buttons
Location
Find a good location to mount intercom and
mobile radio. If possible mount mobile radio
no more than 3' from intercom. Standard
mobile radio to intercom cables are 3' long.
Mounting
During installation, mount intercom and/or
radio away from ignition boxes to avoid RF
interference. Mount intercom with supplied
'L' Bracket Mounts.
Be sure to allow enough room behind the
intercom for the cables to be connected. The
mounting design of the RRP660 intercom
allows you to easily slide the intercom out of
the mounting brackets for plugging in cables
and adjusting radio transmit levels.
Mount mobile radio with the U bracket
mounting supplied by manufacturer.
Headset Cables
Route the headset cables from the intercom to each seat. Be sure to run
cables in a location away from excessive heat (i.e. exhaust) to prevent
damage. Always route cables away from ignition boxes or coils as RF
interference may occur.
Be sure the driver cable is plugged into the driver position on the intercom.
If the co-driver and driver are reversed the co-drivers mic will turn on when
the driver pushes their push to talk for mobile radio transmitting. Plug cables
into back of the intercom.
3621 Sacramento Drive #1 • San Luis Obispo • CA • 93401
RRP 660 Intercom and Mobile Radio
These instructions include directions for both the RRP660 Intercom and Mobile Radio. Whether you
have a mobile radio or some accessories mentioned depends upon the equipment purchased.
Radio Extension
A 5' Radio Extension
Cable is available when
mounting requires more
than 3 feet. PN# CS-5P-EXT-5
Mounting Options
Have a roll bar?
Using optional Roll Bar
hangers may provide
additional mounting options
for Rugged Intercoms or other
accessories. Visit the Mounting
Solutions link on our website.
www.ruggedradios.com
Push-to-Talks
• If you're using headset direct cables
the push to talk on the headset will be
active for Car-to-Car transmitting.
• If you're using the intercom cables with
the blue colored jack, additional remote push to talks will need to be
installed.
• To use a Hole Mount Push to Talk, simply drill a ¾" hole and mount the
push to talk. Connect the CS-PTT-ADPT adaptor cable to the PTT and plug
into the back of the intercom. Use shrink tube to seal connection of PTT
and adaptor cable. Be sure to plug in the driver PTT into the PTT jack just
below the driver headset jack.
• Velcro Mount Push-to-Talks: can be mounted on the steering wheel,
grab bar, or shifter. If mounting on the steering wheel, be sure to coil
the cable around the steering wheel column. Turn steering wheel lock to
lock and make sure the cable does not bind. Damage can occur if the
cable binds while turning. Connect the CS-PTT-ADPT adaptor cable to
the PTT and plug into the back of the intercom. Use shrink tube to seal
connection of PTT and adaptor cable. Be sure to plug in the driver PTT
into the PTT jack just below the driver headset jack.
• Be sure to locate the push to talks and their cable away from pinching or
binding areas. Damage may occur because of improper location.
Intercom-to-Radio Cable
If you're installing a mobile
radio, plug the Serial Style
connector (Figure 1) into the
back of the car to car radio. Plug
in the 5 pin connector (Figure 2)
into the pigtail cable coming out
of the back of the intercom. Plug
the 3.5mm gold plug (Figure 3) into the back of the radio into the external
speaker port. Note: The cable may vary per radio brand and model.
Antenna and Coax Cable
For best performance, mount the antenna on a metal or aluminium roof in
the center. The ½ wave NGP antennas do
not require a ground plane but it is always
best to have enough metal surface area
over 2'x 2' area.
Mount NMO connector (Gold) to a 3/8"
hole in roof or roll bar tap. Be sure to remove any paint so the NMO
mount gets a good ground. Route the coax cable away from ignition boxes
and coils to the car to car radio. IMPORTANT! If there is any extra
coax cable DO NOT COIL CABLE, simply route cable further
around car. Coiling this cable will cause transmit problems,
and limit radio range. Rugged Radios has a helpful Video on our
website that offers further detailed information about proper antenna
installation and tuning.
local (805) 541-1696 • toll free (888) 541-7223 • fax (805) 541-1679
1
3
2
Advertisement
Table of Contents

Subscribe to Our Youtube Channel
Related Manuals for Rugged Radios RRP 660


Summary of Contents for Rugged Radios RRP 660
- Page 1 RRP 660 Intercom and Mobile Radio These instructions include directions for both the RRP660 Intercom and Mobile Radio. Whether you have a mobile radio or some accessories mentioned depends upon the equipment purchased. Push-to-Talks RRP660 Intercom Features • Immediately ready for up to (4) headsets •...
-
Page 2: Intercom Operation
RRP 660 Intercom and Mobile Radio These instructions include directions for both the RRP660 Intercom and Mobile Radio. Whether you have a mobile radio or some accessories mentioned depends upon the equipment purchased. Connect Power Check Installation • RADIO: Route the power cable supplied with the car to car radio directly •... - Page 3 RRP 660 Intercom and Mobile Radio These instructions include directions for both the RRP660 Intercom and Mobile Radio. Whether you have a mobile radio or some accessories mentioned depends upon the equipment purchased. Your particular setup may or may not use the...
- Page 4 From accessories to configurations, Rugged Radios offers plenty of options for you to get the most out of your communication experience. Visit our website to order or read more about these accessories. www.RuggedRadios.com DSP - Digital Speech Processor Music AMP...
Need help?
Do you have a question about the RRP 660 and is the answer not in the manual?
Questions and answers