
Related Manuals for Matador Retro


Summary of Contents for Matador Retro
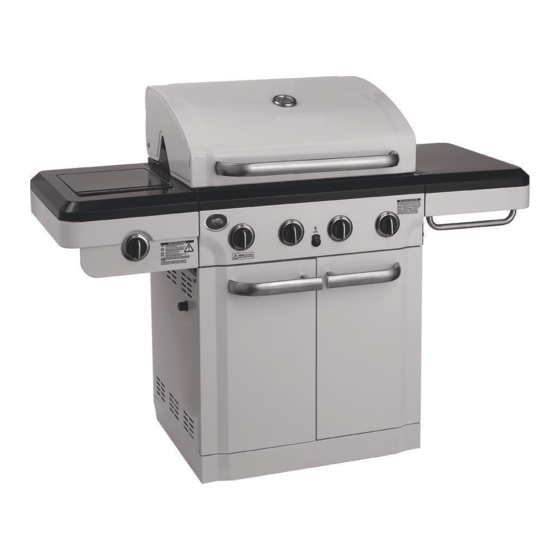
- Page 1 RETRO 4 BURNER BBQ 467200814 Retain manual for future reference. G518-001-110801 05/21/13...
-
Page 2: Table Of Contents
CONTENTS FEATURES IMPORTANT GAS AND SAFETY INSTRUCTIONS OPERATING PROCEDURE COOKING TIPS CARE AND MAINTENANCE BARBECUE ASSEMBLY INSTRUCTIONS PARTS DIAGRAM ASSEMBLY INSTRUCTIONS NATURAL GAS WARRANTY CONTACT INFORMATION For spare parts order from your nearest Bunnings Warehouse. For service and warranty queries call (07) 3279 1800 or email warranty@oztrail.com.au Your purchase receipt is required for all warranty claims. -
Page 3: Features
MATADOR RETRO FEATURES Retro design Double skinned Vitreous enamel Electronic Deluxe BBQ with hood for roasting hood ignition to all high output side maximum heat with temperature burners burner retention gauge Satin enamel Vitreous enamel Powder coated Handy towel rail grill &... -
Page 4: Important Gas And Safety Instructions
IMPORTAnT GAs & sAFETY InsTRucTIOns after the assembly has been secured, turn on the GEnERAl InFORMATIOn gas and check for leaks by brushing a soap and Gas installation codes water solution over all connections. Barbecues must be used in accordance with If you are unable to correct the leak by tightening the installation requirements of your gas supply the connections, turn off the gas and contact the... - Page 5 Replace the hose if necessary. Never test for gas leaks with a lit match or open flame. Never light barbecue with hood closed or before checking to ensure the burner tubes are fully seated over gas valve orifices. MATADOR INSTRUCTION MANUAL...
-
Page 6: Operating Procedure
OPERATInG PROcEduRE GEnERAl AssEMblY lIGHTInG PROcEduRE Connecting & Disconnecting to Gas Source Burner Operation & Ignition System Check Familiarise yourself with the general information 1. With cylinder valve in oFF position press the and safety guidelines located at the front of this electronic igniter button. -
Page 7: Cooking Tips
WHen cookIng WItH tHe Hood doWn. the side burner is designed for use with a wok or cooking pot up to 200mm in diameter. use of larger pots may result in discolouration of the finish. MATAdOR InsTRucTIOn MAnuAl... -
Page 8: Care And Maintenance
cARE & MAInTEnAncE your barbecue is supplied with a satin enamel grill as with all appliances, proper care and maintenance and plate. correct use and care of the cooking will keep them in top operating condition and surface is important to ensure trouble free cooking. prolong their life. -
Page 9: Barbecue Assembly Instructions
RUBBER BUMPER, ROUND, F/ SB LID, F/ SIDE BURNER NOTE: Some grill parts shown in the assembly steps may differ slightly in appearance from those on your particular grill model. However, the method of assembly remains the same. MATADOR INSTRUCTION MANUAL... -
Page 10: Parts Diagram
PARTS DIAGRAM... -
Page 11: Assembly Instructions
ASSEMBLY Caster pin 1/4-20x1/2” Screw Qty.6 7mm Lock Washer Qty.6 MATADOR INSTRUCTION MANUAL... - Page 12 1/4-20x1/2” screw Qty. 5 7mm Lock Washer Qty.5...
- Page 13 1/4-20x1 ½” Screw Qty.4 7mm Lock Washer Qty.4 MATADOR INSTRUCTION MANUAL...
- Page 14 Remove screws and washers Use screws and washers removed front 1ST one 7mm Lock Washer Fiber Washer 1/4" Nut 1/4-20x1/2” Screw Qty.1 Qty.1 Qty.1 Qty.1...
- Page 15 Remove screws and washers Keep the three screws and washers for next step #10-24x3/8” Screw 5mm Lock Washer 5mm Flat Washer Qty.3 Qty.3 Qty.3 MATADOR INSTRUCTION MANUAL...
- Page 16 Use the three screws and washers removed front last step 7mm Lock Washer 1/4-20x1/2” Screw Fiber Washer 1/4" Nut Qty.1 Qty.1 Qty.1 Qty.1...
- Page 17 1/4-20x1 ½” Screw Qty.4 1/4-20x1/2” Screw Qty.1 7mm Lock Washer Qty5 MATADOR INSTRUCTION MANUAL...
- Page 18 Remove screws and washers Side burner valve Use screws and washers removed from 1st one Side burner valve 4mm Lock #8-32x3/8” Screw Washer Qty.2 Qty.2...
- Page 19 Wing Nut Qty.1 MATADOR INSTRUCTION MANUAL...
- Page 20 Back of grill #8x3/8" self-tapping Screw Qty.2 Ignitor wires...
- Page 21 #10-24x3/8” Screw Qty.4 #10-24 Nut Qty.4 MATADOR INSTRUCTION MANUAL...
- Page 22 1/4-20x1/2” Screw Qty.4...
- Page 23 MATADOR INSTRUCTION MANUAL...
- Page 25 MATADOR INSTRUCTION MANUAL...
- Page 26 Battery...
- Page 27 Cylinder valve must face to front of trolley once tank is attached. Failure to install cylinder correctly may allow gas hose to be damaged in operation, resulting in the risk of fire. Direction for LP Cylinder tightening (not included) MATADOR INSTRUCTION MANUAL...
-
Page 28: Natural Gas
NATURAL GAS CONVERSION Warning: Improper installation, adjustment, TO BE INSTALLED ONLY ON OR IN alteration, service or maintenance can A NON-COMBUSTIBLE ENCLOSURE cause injury or property damage. Read the instructions thoroughly before installing or Note: Recommended clearances must be servicing this equipment. maintained, see page 4. - Page 29 4. Install NG bezel plates supplied in hardware pack using screws and washer removed in step 3 and replace control knobs (shown below). 5. Replace side burner. TEST OPERATION OF APPLIANCE BEFORE LEAVING Install NG Bezel Remove LP Bezel NG Bezel MATADOR INSTRUCTION MANUAL...
-
Page 30: Warranty
• Any repair does not extend the warranty period. Auckland, 1741. Tel: 09 –9780000 • Any parts other than original Matador parts will Fax: 09-9782222. Email Marketing@bunnings.co.nz void this warranty. Any claim under this warranty must be made within Installation Conditions 2 years of the date of purchase of the product. - Page 31 If you experience any technical issues with your • Scratches, dents, corrosion or discoloration Matador BBQ, in the first instance review the caused by heat, abrasive chemical cleaners or instruction manual or call the warranty service agent chipping of porcelain enamel parts.
- Page 32 AFE APP IA NC L C E O ATIO This appliance shall only be used in an above ground open-air situation with natural ventilation, without stagnant areas, where gas leakage and products of combustion are rapidly dispersed by wind and natural convection. •...
Need help?
Do you have a question about the Retro and is the answer not in the manual?
Questions and answers
how to replace a broken igntion switch