Table of Contents
Advertisement
Advertisement
Table of Contents

Related Manuals for Matador Supernova 6


Summary of Contents for Matador Supernova 6
- Page 1 ...
- Page 2 ONTE EATURES MPORTANT T GAS AND D SAFETY INSTRUCT TIONS PERATING G PROCED DURE OOKING T TIPS ARE AND M MAINTENA ANCE ARBEQUE E ASSEMBL LY INSTRU UCTIONS ARTS Diag gram SSEMBLY INSTRUCT TIONS WARRANTY CONTAC CT INFOR RMATIO...
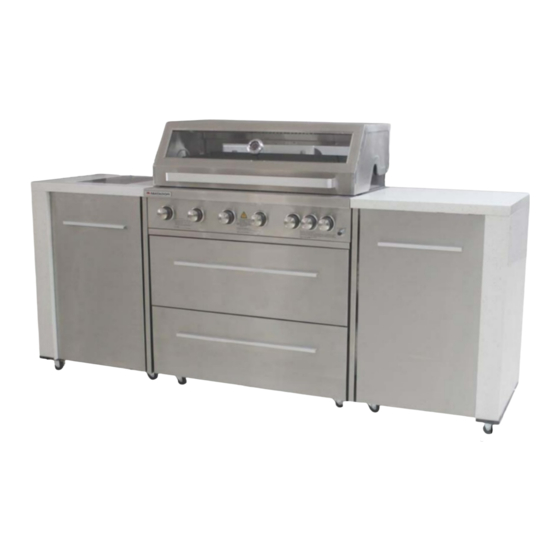
- Page 3 ATUR NCLUD ED IN Y YOUR B ■ 6 stainless steel burners s ■ Enameled cast iron hotp plate & stain less steel gril l ■ Warming r ack ■ Rotisserie burner Side e burner with h movable lid Stainless st teel hood wit th ...
- Page 4 liquids in the vicinity of this or any other appliance. ∎An LP cylinder not connected for use must not be shared in the vicinity of this or any other appliance MATADOR INSTRUCTIONSMANUAL 4...
- Page 5 s cylinder sa afety Mod difications • Do o not store ga as cylinders b below groun d level. LP y modification of the applian nce may be da angerous s is heavier t than air so if a leak occur rs the gas void the warr...
- Page 6 LOCATION N OF YOUR R BARBEQ • A n enclosure with walls on n all sides, b ut at least on Familiarise y yourself with the general information a ermanent ope ening at grou und level and d no overhea ...
- Page 7 BARBEQU UE CHECKS SAFE E OPERATIO ON OF YOU Check yo our barbequ ue for any d amage BARB BEQUE After r use Open the d door of the fram me to inspect the hose ...
- Page 8 ERAT TING G PRO EDUR ONNECTING G & SCONNECT TING GAS • To light burner, push and tu urn the contro ol knob ake sure all ba arbeque contro ol knobs are in n the off ...
- Page 9 5. If the ro otisserie bur ner FAILS to o light, turn th Contro lling the bu rners ROTIS SERIE KNO OB to the “OF FF” position a The kno obs have thre ee basic pos sitions.
- Page 10 when t there is insu fficient gas p pressure. MATADOR R INSTRUC C TIONSMANUAL 10...
- Page 11 own to be un nhealthy. Do not leave co ooked food anding for too o long before e eating. MATADOR R INSTRUC C TIONSMANUAL 11...
- Page 12 most active or when your grill has not been used for • Clean with clogged ports wire, such as open a period of time. paper clip. MATADOR INSTRUCTIONS MANUAL 12...
- Page 13 3. Store the grill in a cool dry place. 4. Always disconnect the gas cylinder and store it in MATADOR INSTRUCTIONS MANUAL 13...
- Page 14 NEVER use indoor, in an enclosed area or below ground level. • NEVER use an adjustable regulator with this grill. Use only the pressure regulator and hose supplied. • NOTE: Two people are required for assembly. MATADOR INSTRUCTIONSMANUAL 14...
- Page 15 Cart R si 13.Cart f ront —1pc —1p plat te —1pc frame R— —1pc MATADOR INSTRUC CTIONSMA ANUAL 1...
- Page 16 2pcs —2pc 29.cart r back plate e---1pc MATADOR R INSTRUC CTIONSMA ANUAL 1...
- Page 17 SEMB STRU CTIO Step Assem mble the C Cart L bott tomplate( (part 1), wheel l(part 26) locke dwheel (p part 2) as sh own. ...
- Page 18 B(x,1 ) and bolt A(X,4 ) to tight ten. MATADOR R INSTRUC C TIONSMANUAL 18...
- Page 19 Step Assem mble the cart Front t plate (pa art 9) Onto the cart show n,use bol lt G(x,1), bolt A A(x1) to t tighten. ...
- Page 20 27) as Sh own. MATADOR R INSTRUCTIONSMANUAL 20...
- Page 21 Onto t the cart as shown Use bo olt a(x4) t to tighte MATADOR R INSTRUCTIONSM M ANUAL 21...
- Page 22 (part 28) onto the e cart as s shown MATADOR R INSTRUC C TIONSMANUAL 2 2 2...
- Page 23 Step 13 Assembl le the car R side p plate (part t 14) And car rt support t(part 5) as show ...
- Page 24 /silicone s sealant(n not includ ded) To secure e the ston ne onto The bbq. MATADOR R INSTRUCTIONSMANUAL 24...
- Page 25 Step 17 Assembl le the QC regulato or and th valve as shown. Step 18 Assembl le the val ...
- Page 26 Step 19 Assembl le the car Onto th he body as shown , use the B Bolt a(x4) to tighten. ...
- Page 27 Step 21 Place th he marble (part 20 0) as show Please u use Liquid Nail/sili cone seal lant (not inc luded)To secure the ston ne Top on nto the ...
- Page 28 Step 23 Assembl le the car rt R as show wn, use th Bolt A(x x4) to tighten Step 24 ...
- Page 29 Step 25 Place the e heating plate (par rt 8) onto the bbq a as shown. Step 26 ...
- Page 30 Step 27 Place cyl linder into o the Cart cylin nder tray y, then Connect t the regul lator to The cylind der as sh hown. ...
- Page 31 ULLY SSEM MBLED ...
- Page 32 MATADOR INSTRUC CTIONSMA ANUAL 3...
- Page 33 . Any repair does not extend the warranty period. come with guarantees which cannot be excluded . Any parts other than original Matador parts will under the Australian Consumer Law. You are entitled to replacement or refund for a major Void this warranty.
- Page 34 to be of acceptable quality and the failure does not amount to a major failure. MATADOR INSTRUCTIONSMANUAL 34...
- Page 35 WHAT IS NOT COVERED IN FOR TECHNICAL ASSISTANCE For Australia customers if you experience any THE WARRANTY technical issues with your MATADOR BBQ, in the Removal or re-installation costs. This warranty first instance review the instructions manual or ...
- Page 36 Visit www.matadorbbqs.com.au For technical and warranty support call 08 9248 9822 (AU) 09 978 2200 (NZ) Your purchase receipt will be required for warranty claims. For spare parts contact your local Bunnings Warehouse MATADOR KC003 BBQ manual.indd 40 1/07/2011 10:38:03 AM...
- Page 37 Conve ersion In nstructio ons for Matado r HS-KC C009M iversal L LPG to N Natural G ARNING G!!! Gas co onversion for r this BBQ m must be perfo ormed and in nspected by a an authorize d person on ly. The autho orized person n must provid de a certificat te of complia ance. The co onverted app pliance must o only be instal led in accord...
- Page 38 Note: Thes e instruction s describe th e removal of ULPG gas inj ectors in ord er to reveal Natural G Gas injectors that are pre‐ ‐installed on the BBQ. Remo oval of LPG G Gas Injec ctors for th he Main Bu rners • Ensure gas s supply is tur rned off at th he gas cylinde er end. Check k that all gas c controls are t turned to the off position. • Ensure tha at the gas cyli inder is disco nnected. Rem...
- Page 39 Remov ve the LPG in njectors as sh ow below moval LPG G Gas Inj jectors F or The S ide Burne e r • Remove k nob from sid e burner. ...
- Page 40 emoval of LP PG Gas Injecto or for the Sid de Burner • Remove k nob from sid e burner • Remove th he screws on the side bur ner valve and d remove side e burner valv e from the p panel. • The gas inj jectors can n ow be visible e. • Please not te that the ga as injector is b bronze colour r. Please also note that th ere are two(2 2) sections on n the gas inje ector. The visible e end of the g gas injector (L LPG Injector) is approxima ately 1mm sm maller than th he bottom gas...
- Page 41 2. Re emove LPG injector fro m the side burner asse embly to rev veal Natura a l Gas Jet. ...
- Page 42 oval LPG Gas Injec ctors For T The Rotiss serie Burn • sure gas supp ply is turned o off at the gas s cylinder end d. Check that all gas contro ols are turned d to the off sition. • move the bla ack panel at t he back of th he BBQ that c over the rotis sserie burner r by removing g the screws t that cks the panel into place. • e gas injector rs can now be e visible. • ease note tha t the gas inje ector is bronze...
- Page 43 2. Re emove the L LPG jet from m the rotisse erie burner t to reveal th e Natural G Gas jet. ...
- Page 44 Inst tallation Proced dure Conn necting the e Natural G as Hose an nd Regulat Note: Installation a and Commiss sioning must t only be cond ducted by an n authorized person. onnect the N Natural Gas re egulator to th he gas inlet c connection by y using a 19m mm spanner. Tighten firm ly but DO NO OT over tighten. onnect the g gas regulator to the gas so ource using th he flexible co onnection and...
Need help?
Do you have a question about the Supernova 6 and is the answer not in the manual?
Questions and answers