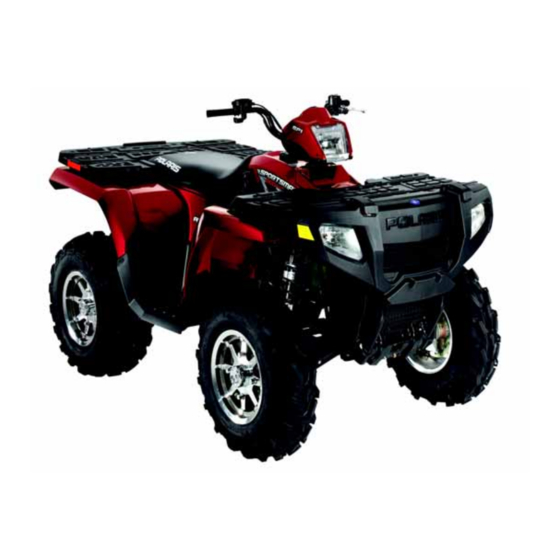
improvements in the design and quality of production components, some minor discrepancies may result between the actual vehicle and the information presented in this
publication. Depictions and/or procedures in this publication are intended for reference use only. No liability can be accepted for omissions or inaccuracies. Any reprinting
or reuse of the depictions and/or procedures contained within, whether whole or in part, is expressly prohibited. Printed in U.S.A.
Page 2
Mity-Vac, Registered Trademark of Neward Enterprises, Inc. Torx, Registered Trademark of Textron Hilliard, Trademark of the Hilliard Corporation Warn, Trademark of Warn Industries Some Polaris factory publications can be downloaded from www.polarisindustires.com, purchased from www.purepolaris.com or by contacting the nearest Polaris dealer.
Page 3
GENERAL MAINTENANCE ENGINE FUEL SYSTEM BODY / SUSPENSION CLUTCH TRANSMISSION FINAL DRIVE BRAKES ELECTRICAL INTERNATIONAL...
GENERAL INFORMATION MODEL INFORMATION Engine and Machine Serial Numbers Be sure to refer to the engine model number and serial number Model Number whenever corresponding about an engine. The machine model number must be used with any correspondence regarding warranty or service. This information can be found on the sticker applied to the top side of the crankcase (A).
A08DN76A 2008 9921356 9921359 International A08DN76F PAINT CODES Table 1-2: Paint Codes COLOR DITZLER POLARIS PAINTED PART DESCRIPTION NUMBER NUMBER Sportsman 700/800 EFI Frame Black 9440 P-067 REPLACEMENT KEYS Replacement keys can be made from the original key. To identify which series the key is, take the first two digits on the original key and refer to the chart to the right for the proper part number.
Special tools may be required while servicing this vehicle. Some of the tools listed or depicted are mandatory, while other tools maybe substituted with a similar tool, if available. Polaris recommends the use of Polaris Special Tools when servicing any Polaris product.
GENERAL INFORMATION Conversion Table Unit of Measure Multiplied by Converts to ft. lbs. x 12 = in. lbs. in. lbs. x .0833 = ft. lbs. ft. lbs. x 1.356 = Nm in. lbs. x .0115 = kg-m x .7376 = ft. lbs. kg-m x 7.233 = ft.
CC: Cubic centimeters. Center Distance: Distance between center of crankshaft and center of driven clutch shaft. Chain Pitch: Distance between chain link pins (No. 35 = 3/8" or 1 cm). Polaris measures chain length in number of pitches. CI: Cubic inches.
Change oil immediately and monitor level. If oil level begins to rise, discontinue use and determine cause.) E = Emission Control System Service (California). NOTE: Inspection may reveal the need for replacement parts. Always use genuine Polaris parts. WARNING: Improperly performing the procedures marked with a could result in component failure and lead to serious injury or death.
Inspect periodically Battery 20 H Monthly 125 (200) Check terminals; clean; test = Perform these procedures more often for vehicles subjected to severe use. E = Emission Control System Service (California) = Have an authorized Polaris Dealer perform these services.
Page 23
Inspect routing, condition (if applicable) Valve Clearance 100 H 12 M 620 (1000) Inspect; = Perform these procedures more often for vehicles subjected to severe use. E = Emission Control System Service (California) = Have an authorized Polaris Dealer perform these services.
Page 24
---- Inspect daily, adjust as needed Headlight aim ---- Adjust as needed = Perform these procedures more often for vehicles subjected to severe use. E = Emission Control System Service (California) = Have an authorized Polaris Dealer perform these services.
MAINTENANCE Polaris Lubricant Symbol Identification Pre-Ride / Daily Inspection NOTE: The symbols used are for quick reference in identifying Perform the following pre-ride inspection daily, and when servicing the vehicle at each scheduled maintenance. which lubricant/grease to use on each component.
Annually or 100 hours of operation (refer to Maintenance Schedule for additional information). More often under severe conditions (operating in water or hauling heavy loads. Grease conforming to NLGI No. 2, such as Polaris Premium All Season Grease, Conoco Superlube M, or Mobilgrease Special 2.11...
• Be sure vehicle is level before proceeding and in PARK • Check vent hose to be sure it is routed properly and unobstructed • The correct front gearcase lubricant to use is Polaris Premium Demand Hub Fluid. FRONT GEARCASE...
MAINTENANCE Rear Gearcase Lubrication - 800 EFI To Change Gearcase Lubricant: Remove gearcase drain plug (A) located on the bottom of The rear gearcase lubricant level should be checked and changed in accordance with the maintenance schedule. the gearcase and drain oil. (The drain plug is accessible through the skid plate.) Catch and discard used oil •...
Remove transmission drain plug to drain the oil. Discard used oil properly. Clean and reinstall the drain plug. Torque to specification. Remove fill plug. Add the correct amount of Polaris AGL Gearcase Lubricant. Oil Fill Plug Check for leaks. Install fill plug. Torque to specification.
Decreased performance may be encountered with Shift Mount inadequate bleed of the hydraulic circuit. Begin the bleeding process by filling reservoir to ‘MAX’ line with clean Polaris ADC hydraulic fluid. Locate bleeder valves found on either side of differential and remove the protective caps. Shifter Turn bleeder valves counter-clockwise to loosen.
MAINTENANCE Throttle Inspection Throttle Cable / Electronic Throttle Control (ETC Switch) Adjustment Check for smooth throttle opening and closing in all handlebar positions. Throttle lever operation should be smooth and lever Slide boot off throttle cable adjuster and jam nut. must return freely without binding.
MAINTENANCE Fuel System Remove fuel lines from filter, use shop towels to catch any leaking fuel. Install new filter in line with arrow pointed in direction of WARNING fuel flow. Install line locks on fuel lines and verify locks are seated. Gasoline is extremely flammable and explosive Start engine and inspect for leaks.
The Active Descent Control reservoir is located by the radiator fill cap. Check the level and verify it is between the ‘MAX’ and ‘MIN’ lines. Add only Polaris ADC fluid when required. Clean with electrical contact cleaner or a glass bead spark plug cleaner only.
Observe coolant levels often during the break-in period. • Overheating of engine could occur if air is not fully purged from system. • Polaris Premium 60/40 anti-freeze is premixed and ready to use. Do not dilute with water. 2.19...
Remove reservoir cap. Verify the vent is clear and open. Cooling Hoses Fill reservoir to upper mark with Polaris Premium 60/40 Anti Freeze / Coolant (PN 2871323) or a mixture of Inspect all hoses for cracks, deterioration, abrasion or leaks.
MAINTENANCE Radiator Coolant Level Remove clips (A) from air box cover and remove cover. Inspect the gasket. It should adhere tightly to the cover and seal all the way around. WARNING Never remove the radiator pressure cap when the engine is warm or hot. Escaping steam and fluid can cause severe burns.
MAINTENANCE NOTE: Apply a small amount of general purpose NOTE: The sediment tube will require more frequent grease to the sealing edges of the filter before service if the vehicle is operated in wet conditions or reinstalling. at high throttle openings for extended periods. Engine Breather Hose Proper Filter Main Filter...
MAINTENANCE PVT Inspection / Drying Procedure Engine Oil Level NOTE: If operating the ATV in or through water, be The twin engine is a wet-sump engine, meaning the oil is contained in the bottom of the crankcase. To check the oil level: sure to check the PVT cover and other components for water ingestion.
11. Install new filter and turn by hand until filter gasket contacts the sealing surface, then turn an additional 1/2 turn. 12. Remove dipstick and fill sump with 2 quarts (1.9 l) of Polaris PS 4 Plus Synthetic Oil. 13. Place gear selector in park and set the parking brake. 2.24...
Check for any looseness in front hub / wheel assembly by grasping the tire firmly at top and bottom in this chapter, Polaris recommends steering first, and then at front and rear. Try to move the wheel component repair and adjustment be performed by and hub by pushing inward and pulling outward.
MAINTENANCE Wheel Alignment Toe Alignment Place machine on a smooth level surface. If toe alignment is incorrect, measure the distance between vehicle center and each wheel. This will tell you which tie rod Set handlebars in a straight ahead position and secure needs adjusting.
(See Chapter 9) wheels. Make sure the machine is in neutral and repeat • Use Polaris DOT-approved Brake Fluid. Steps 2 and 3. See WARNING in this section. • Check brake system for fluid leaks, look for dust build...
MAINTENANCE Brake Hose Inspection • Inspect thickness of brake pad friction material (see Chapter 9) Check brake system hoses and fittings for cracks, deterioration, abrasion, and leaks. Tighten any loose fittings and replace any Sight Glass worn or damaged parts. Parking Lock Brake Auxiliary (Rear) Brake Test The auxiliary brake (A) should be checked for proper function.
If the rubber boot exhibits any of these symptoms, replace the boot. Refer to 1 inch or greater Chapter 7 for CV boot replacement, or have your Polaris dealer replace the boot. Floorboard If less than one inch, two things must be examined:...
MAINTENANCE ATV Controls Elevate the side of the vehicle by placing a suitable stand under the footrest frame. Check controls for proper operation, positioning and adjustment. Brake control and switch must be positioned to allow brake lever to travel throughout entire range without contacting switch body.
MAINTENANCE Tire Pressure Front / Rear Storage Compartments The front and rear storage (Sportsman Only) compartments are CAUTION easily accessible. To open the front compartment turn the latch handle to the horizontal position on both sides. To close the storage compartment turn the latch handles to the vertical position.
MAINTENANCE Winch Operation (If Equipped) The mini-rocker (IN/OUT) control controls the direction of the cable for the winch. IN pulls the cable into the winch and OUT feeds the cable out of the winch. This information is for Sportsman models equipped with a winch in the front.
Page 51
MAINTENANCE Winch Wire Locations Locate the Red wire (6 Ga.) with the yellow crimp cover is located in the rear fender area. The red wire connects to the battery. The winch wires can be located under the front cab area. Locate the wires, remove the cap and hook up to winch the Blue and Yellow (6 Ga.) wires to the winch.
Polaris dealer for free replacement. Warm the engine and change the oil and filter. Follow the Polaris does not recommend the use of a high pressure type car procedure in this chapter for proper oil change. wash system for washing the ATV. If a high pressure system is...
Page 53
Always place the transmission in park and lock the parking brake. Inspect all cables and lubricate with Polaris Cable Lubricant. Follow lubrication guidelines in the maintenance section of the Be sure the fuel cap, oil cap and seat are installed correctly.
Page 54
MAINTENANCE 800 EFI Dual Exhaust Canister Maintenance (Sportsman Only) The canisters on dual-exhaust Polaris Sportsman 800 EFIs are powder coated. To maintain the finish and (X2-Touring not applicable) prevent corrosion, periodic maintenance is required. CAUTION DO NOT use caustic chemicals to clean, as they may damage the finish.
ENGINE SPECIFICATIONS Crankcase Exploded Views A. JournalBearings B. Camshaft C. Thrust Plate D. Balance Shaft E. Woodruff Key F. Flange Seal G. Crankshaft H. Oil Pickup I. Journal Bearings J. Baffle K. Oil Plug L. Washer M. O-ring N. Crankcase O.
Page 60
Starter / Flywheel / Water Pump Exploded View Apply Polaris Water Pump Cover Starter Grease Bolt Tighten Sequence Apply Polaris 0W-40 oil to seal Loctite™ Pipe Sealant (PN 2871956) No Grease or Oil 84 ± 8 ft.lbs. (9.5 ± 0.9 Nm) 96 ±...
Page 61
ENGINE Oil System / Level Assembly Exploded View A. Clamp B. Oil Fill Tube C. Dipstick D. O-ring 50 ± 5 in.lbs. (5.64 E. Hex Plug ± 0.56 Nm) F. Oil Filter Nipple G. Oil Filter H. Dowel I. Galley Plug 22 ±...
Page 62
A. Head Bolts B. Rocker Arms C. Head Assembly D. Gasket E. Pushrods Circlip UP F. Bushing for Install G. Expansion Plug H. Cylinder I. Piston Assembly J. Circlip K. Gasket L. Hydraulic Lifter Apply Polaris 0W--40 Oil Apply Moly Lube Grease...
Page 63
ENGINE Engine Sensors & Misc. Exploded View 84 ± 4 in.lbs. (9.5 ± 0.9 Nm) A. Screws 20 ± 5 in.lbs. B. Rocker Cover (2.5 ± 0.55 Nm) C. Breather D. O-ring Seal E. Breather Bolts 18 ± 2 ft.lbs. F.
Page 64
ENGINE EFI Harness Exploded View A. Fuel Injector B. Fuel Rail C. EFI Harness 18 ± 2 ft.lbs. (24.5 ± 2.7 Nm) NOTE: See Chapter 4 for more information on the EFI system.
ENGINE Engine Fastener Torque Patterns Crankcase Bolt Tighten Sequence 22 ± 2 ft.lbs. (30 ± 3 Nm) Lubricate threads and between washer and underside of bolt with engine oil. Torque in sequence to spec provided, allow the gasket to set for 1 minute, then °...
• Counterbalance Shaft or Bearings restrict coolant flow and reduce heat dissipation, resulting in possible engine damage. Polaris Premium 60/40 Antifreeze/ • Connecting Rod Coolant is recommended for use in all cooling systems and comes pre-mixed, ready to use.
10 psi. The system must retain 10 psi for five minutes or longer. If pressure loss is evident within five minutes, check the radiator, hoses, Polaris Premium clamps and water pump seals for leakage. Antifreeze...
ENGINE Engine Removal (Typical) Relieve the fuel pressure in the fuel rail (refer to Chapter 4, FUEL INJECTION") for proper procedure. Carefully remove the fuel rail (B) and injectors. WARNING Always wear safety glasses and proper shop clothing when performing the procedures in this manual.
ENGINE 14. Refer to PVT System Chapter 6 to remove outer clutch 19. Remove all engine mount nuts and / or engine mount plates. cover, drive belt, drive clutch, driven clutch, and inner Remove the frame brace (G) from the front left side of the cover (F).
Engine Installation Notes Engine Break-In Period The break-in period for a Polaris ATV engine is defined as the After the engine is installed in the frame, review this checklist first ten hours of operation, or the time it takes to use two full and perform all steps that apply: tanks of gasoline.
Pay close attention to areas where the cylinder sleeve meets the aluminum casting (transfer port area). Use electrical contact cleaner if necessary to clean these areas. Rinse thoroughly, dry with compressed air, and oil the bore immediately with Polaris Lubricant. 3.19...
ENGINE Rocker Arms If the push rod (A) is visibly bent, it should be replaced. Mark or tag rocker arms in order of disassembly to keep them in order for reassembly. Cylinder Head Removal Inspect the wear pad at the valve end of the rocker arm for Loosen the six cylinder head bolts evenly 1/8 turn each in indications of scuffing or abnormal wear.
ENGINE Cylinder Head Inspection Valve Seal/Spring Service (On Engine) Thoroughly clean cylinder head surface to remove all traces of gasket material and carbon. NOTE: The following procedure is only for servicing the top end of the valve train when replacing valve springs or replacing valve seals.
ENGINE Cylinder Head Disassembly Remove valve guide seals. IMPORTANT: It is recommended to replace seals Carefully remove the cylinder components. Place the whenever the cylinder head is disassembled. Hardened, cracked or worn valve seals will cause hydraulic lifters (C), pushrods (D), and rocker arms (E) in excessive oil consumption and carbon buildup.
ENGINE Valve Inspection measurements total). Compare to specifications. Remove all carbon from valves with a soft wire wheel or Measure valve stem in several places. brush. Rotate the valve 90 degrees and measure Check valve face for runout, pitting, and burnt spots. To for wear.
Valve Seat Reconditioning Install pilot into valve guide. NOTE: Polaris recommends that the work be done by a local machine shop that specializes in this area. NOTE: The cylinder head valve guides cannot be replaced.
Page 83
ENGINE Inspect the cut area of the seat: NOTE: When using an interference angle, the seat contact point on the valve will be very narrow, and is * If the contact area is less than 75% of the circumference of the a normal condition.
ENGINE Lubricate the valve guides with clean engine oil, and apply Valve seals should be installed after the valves are in the oil or water based lapping compound to the face of the head to avoid valve seal damage. Install new valve seals valve.
ENGINE Valve Lifter Removal/Inspection Repeat procedure for remaining valves. When all valves are installed, tap lightly with soft faced hammer on the end Remove the valve lifter's by reaching into the crankcase of the valves to seat the split keepers. and pushing the lifter up through the lifter bore by hand.
ENGINE Piston Removal *By hand: Placing both thumbs as shown, spread the ring open and push up on the opposite side. Do not scratch the ring lands. Remove circlip (A). Mark the piston with a white pen to ensure proper orientation (if reused) during assembly. Repeat procedure for second ring.
ENGINE Cylinder Inspection Inspect cylinder for wear, scratches, or damage. Remove all gasket material from the cylinder sealing surfaces. Inspect the top of the cylinder (B) for warp using a straight edge (A) and feeler gauge (C). Refer to Ill. 1 and Ill. 2. Inspect cylinder for taper and out of round with a telescoping gauge or a dial bore gauge.
ENGINE Piston-To-Cylinder Clearance Measure piston pin O.D. Replace piston and/or piston pin if out of tolerance. Measure piston outside diameter at a point 5 mm up from the bottom of the piston at a right angle to the direction of the piston pin.
ENGINE Measure piston ring to groove clearance by placing the ring thoroughly with hot soapy water, rinsed, and dried completely. Wipe cylinder bore with oil immediately in the ring land and measuring with a thickness gauge. Replace piston and rings if ring-to-groove clearance to remove residue and prevent rust.
ENGINE Inspect gear teeth on starter drive (B). Replace starter drive Install Flywheel Puller (PN 2871043) and remove if gear teeth are cracked, worn, or broken. flywheel (A). CAUTION: Do not thread the puller bolts into the flywheel more than 1/4, or stator coils may be Inspect the bendix bushing (C) in the mag cover for wear.
ENGINE Engine Crankcase Disassembly / Inspection Install Flywheel Puller (PN 2871043) and remove flywheel (F). CAUTION: Do not thread the puller bolts into the Remove the stator cover (A) and water pump cover (B). flywheel more than 1/4, or stator coils may be damaged. Remove the starter bendix (G), wire holddown plate (H), and the woodruff key (I) from the crankshaft.
Page 92
ENGINE Note the positions of the gears in the photo. 10. Inspect the cam gear teeth and check to make sure there is spring tension offsetting the teeth between the two gears. If there is no tension, check the springs inside of the cam gear assembly.
Page 93
ENGINE 13. With a white marking pen, accent the timing mark on the 16. Insert the pointed dowels from the Tapered Pins (PU- gear that contains the springs. 45497-1) into the cam gear. PU-45497-1 Accent Timing Marks To Assemble: 14. Inspect the gear teeth and the three tabs on the gears for wear.
Page 94
ENGINE NOTE: Install the Cam Gear Alignment Tool (PU- 18. Line up the two gears using the timing marks and the three 45497-2) into one assembly hole counter clockwise gear tabs that were referenced earlier. Push the gears back together, using both hands and hold securely. from the timing mark.
Page 95
ENGINE 22. Remove the bolt and nut from the balance shaft gear. Try 25. Install the Flywheel Puller (PN 2871043) and remove the to remove the balance shaft gear. If the gear does not come crankshaft gear, if needed. off manually, use the Flywheel Puller (PN 2871043) to remove the balance shaft gear.
Page 96
ENGINE NOTE: Be sure to place the tapered end of the valve 28. Use a feeler gauge to measure the clearance between the (dowel) in first. If the valve is installed incorrectly, two rotors. Measure the gap between the two rotor tips as shown below.
Page 97
ENGINE 33. Place the shaft in a press to remove the bearing. 36. Press gear onto shaft while supporting the housing. Bearing 34. Press shaft into the new bearing.. 37. Remove thrust plate (U). New Bearing 35. Press the bearing/shaft assembly using the bearing's outer race.
ENGINE NOTE: Only remove the oil baffle if the baffle is 41. Remove and inspect crankshaft main journal bearings for damaged. When removing the oil baffle bolts, use a abnormal wear. It is recommended to replace the ™ heat gun to heat the bolts and loosen the Loctite bearings anytime the engine is disassembled.
ENGINE ENGINE REASSEMBLY Measure camshaft journal outside diameters (O.D.). CRANKCASE REASSEMBLY CAUTION After any reassembly or rebuild, the engine must be primed using the Oil Priming Adapter (PU-45778) and a 3/4-full oil filter before initial start-up. Follow Steps 45-46 of this section to prime the engine and to help aid proper break-in.
Page 100
ENGINE NOTE: Always install new balance shaft bearings. Apply Crankcase Sealant (PN 2871557) to the top gearcase halve. NOTE: Do not apply sealant to cam relief hole (E). Apply assembly lube to cam journals and balance shaft bearing surfaces of the MAG case halve. Install cam and Assemble the crankcase halves.
Page 101
ENGINE Lubricate lifters with engine oil and install in the original 12. Orientate the piston rings on the piston before installation order as removed in disassembly. Apply Lubriplate or into the cylinders. Set the gaps of the rings evenly 120° Moly Lube to the ends of the lifters.
Page 102
ENGINE 14. Position cylinder and piston assemblies onto the connecting 16. Install camshaft thrust plate (G) with new bolts. Torque rods and push the piston pins through the piston and bolts to specification. connecting rods. Push In Piston Pins NOTE: New bolts have patch lock on the threads 15.
Page 103
ENGINE NOTE: The application of lubrication aids in priming NOTE: Occasionally spin pump when the oil pump during initial engine start up. installing bolts to check for binding of the rotors. Lubricate Rotors 19. Align the bolt holes and install oil pump assembly into crankcase.
Page 104
ENGINE 22. Before installing the crankshaft gear (I), heat the crankshaft 25. Install counter balance shaft gear (J) with new key, aligning ° ° gear to 250 F (121 C) on a hot plate (J). timing marks with crankshaft gear (I). Install washer and bolt.
Page 105
ENGINE NOTE: Cam Spanner Wrench (PU-45498) is only Before installing the gear/stator housing, replace the seals in the needed to rotate the camshaft when the entire valve train is assembled. Timing Marks PU-45498 Counterbalance Gear and Camshaft Gear Bolt Torque: 22 ±...
Page 106
ENGINE 28. Install a new crankshaft seal (P) into the gear/stator housing 30. Carefully install the tapered end of the Crankshaft Seal cover (O). Use the Universal Driver Handle (PU-45543) Protection Tool (PA-45658) through the paper side of the and the Main Seal Installer (PA-45483) to seat the crankshaft seal.
Page 107
ENGINE 33. Apply Crankcase Sealant (PN 2871557) to the outside 35. Secure the gear/stator housing cover (O) to the crankcase edges of the crankcase halves (See arrows), where the with the cover bolts. Torque bolts in proper sequence to crankcases mate. (See photos below.) This helps to prevent specification.
Page 108
ENGINE 37. Install water pump impeller (P). Secure the impeller with 39. Sparingly apply Starter Drive Grease (PN 2871423) to the the washer and a new nylok nut (Q). Torque the nut to starter drive. Install the starter bendix. specification. NOTE: There are thrust washers on both sides of starter drive.
Page 109
45. Remove primer plug from the engine. Install Oil System Priming Adapter (PU-45778) into the oil plug hole. Push 3-5 oz. (approx.) of Polaris 0W-40 into the adapter or until resistance is felt. Remove the adapter. Apply sealant to the plug threads.
ENGINE Flywheel / Stator Installation Inspect the mating surface around the gear/stator housing cover and the crankcase for oil seepage. If there is seepage NOTE: Before assembly, clean the bolts and bolt between the mating surfaces, then the gear/stator housing holes with Primer N (PN 2870585) to remove any cover must be resealed.
ENGINE Cylinder Head Reassembly Lubricate push rods (D) and install into lifters. NOTE: Before reassembly, clean the bolts and bolt holes with Primer N (PN 2870585) to remove any debris. This will ensure proper sealing when installing bolts. Install the head gasket (A) on the cylinder (B). Lubricate rockers (E) with engine oil.
Page 112
ENGINE Install breather reed (G) into rocker cover (H). Lightly 11. Install thermostat (J), new O-ring, and thermostat housing. apply black RTV sealant to the outer edges of the breather Torque to specification. reed. The reed has a tab and will assemble one-way only. Torque the breather bolts to specification.
ENGINE TROUBLESHOOTING Engine Idles But Will Not Accelerate • Spark plug fouled/weak spark Engine • Broken throttle cable Spark Plug Fouling • Obstruction in air intake • Spark plug cap loose or faulty • Air box removed (reinstall all intake components) •...
ENGINE Cooling System Excessive Smoke and Carbon Buildup • Excessive piston-to-cylinder clearance Overheating • Wet sumping due to over-full crankcase • Low coolant level • Worn rings, piston, or cylinder • Air in cooling system • Worn valve guides or seals •...
Dual Exhaust Layout Polish if desired using a soft cloth. Repeat this procedure as often as desired to maintain the The dual exhaust canisters on select Polaris 800 EFIs are powder canister's finish. coated. To maintain the finish and prevent corrosion, periodic maintenance is required.
* Always stop the engine and refuel outdoors or in a Test Valve well ventilated area. Special Tools Table 4-1: PART NUMBER TOOL DESCRIPTION Polaris EFI Diagnostic PU-47063 Software Fuel Pressure Sportsman and Touring Fuel Rail Damper PU-43506 Test Kit...
Page 119
SmartLink Unit Kit - PU-47471 ™ Available to Polaris dealers through our tool supplier, SPX (1-800-328-6657) This kit contains the necessary cables and hardware to communicate between the vehicle ECU and the Digital Wrench diagnostic software. Polaris dealers can also order separately: SmartLink Module PU-47468, Vehicle Interface Cable PU-47469 and PC Interface Cable PU-47470.
• 80% of all EFI problems are caused by wiring harness connections. • For the purpose of troubleshooting difficult running issues, a known-good ECU from another Polaris ATV EFI of the same model may be used without damaging system or engine components.
FUEL INJECTION EFI System Component Locations 11. Engine Coolant Temperature Sensor (ECT) Electronic Control Unit (ECU) Intake Air Temperature and Barometric Air Pressure Sensor (T-BAP) Crankshaft Position Sensor (CPS) Fuel Injectors 2 Fuel Filters (1 located in tank, 1 under front cab cover not pictured) Fuel Pump / Regulator / Gauge Sender Assembly (located In tank as an assembly...
FUEL INJECTION Fuel Tank Assembly Fuel Lines - Quick Connect Sportsman 700/800 EFI models use quick connect fuel lines. Refer to the steps below for fuel line removal. Place a shop towel around the fuel line to catch any dripping fuel. Squeeze the connector tabs together and push the locking slide back.
NOTE: Accurate testing of EFI components is The ignition and injection functions are electronically controlled, monitored and continually corrected during recommended utilizing Polaris Diagnostic operation to maintain peak performance. Software (dealer only). The central component of the system is the Bosch Engine...
For the purpose of troubleshooting, a known-good ECU from stores the fault code in its fault memory. Depending on the another Polaris ATV EFI of the same model may be used significance or severity of the fault, normal operation may without system or engine component damage.
Fuel Pump Connect the fuel rail end cap (damper) onto adapter PU- 47476 and install on the fuel rail. Attach Polaris pressure tester PU-43506. Route the tester Internal 30 Micron clear hose into a portable gasoline container or the Strainer (Bottom) equipment fuel tank.
FUEL INJECTION If the pump did not activate (Step 2), disconnect the plug Remove the clamps on the PVT intake duct and remove the from the fuel pump. Connect a DC voltmeter across PVT duct. terminals “A” and “C” in the plug, turn on the key switch and observe if a minimum of 7 volts is present.
FUEL INJECTION NOTE: A small amount of fuel may come out of the FUEL PRESSURE REGULATOR fuel line or tank. Plug the fuel line and tank inlet or use a shop towel during removal. Operation Overview The fuel pressure regulator maintains the required operating WARNING system pressure of 39 psi + 3psi.
FUEL INJECTION FUEL INJECTORS • Disconnect the electrical connector from an injector and listen for a change in idle performance (only running on one cylinder) or a change in injector noise or vibration. Operation Overview NOTE: Do not apply voltage directly to the fuel NOTE: All EFI units utilize quick connect fuel lines.
FUEL INJECTION CRANKSHAFT POSITION SENSOR Disconnect speed sensor connector from wiring harness. (the connector with one heavy black lead) Viewing the (CPS) connector with dual aligning rails on top, test resistance between the terminals. A reading of 560Ω ± 10% should Operation Overview again be obtained.
If it is faulty, it must be replaced. This sensor requires a 5 Vdc input to operate, therefore the T-BAP sensor should only be tested using the Polaris Diagnostic Software (dealer only). Refer to the EFI Diagnostic Software Manual for more information.
FUEL INJECTION Throttle Position Sensor Test low, verify the 9 volt battery is good or try a new 9 volt battery. The throttle position sensor (TPS) is a non-serviceable item. If it is faulty, it must be replaced. It can be tested using the following method: •...
Page 133
FUEL INJECTION • Remove cover and disconnect throttle cable from STEP 2 throttle cam. Establishing correct flow: Now that the zero offset voltage has • With engine off, back out air flow screw until it no been set, you can now set the throttle body to the correct air flow longer is in contact with throttle plate cam.
‘HOT’ should indicate on the instrument cluster. This indicates all other components are working properly. Refer to Chapter 10 for ETS testing. Polaris dealers can also test the sensor by using the Polaris Digital Wrench‘ Software (dealer only). Refer to the Digital Wrench‘ Software Manual for more information.
FUEL INJECTION TROUBLESHOOTING NOTE: To clear codes manually, disconnect the positive battery lead for 20 seconds. Diagnostics Using “Blink Codes” To enable the blink codes, turn the ignition from “OFF” to “ON” 3 times, leaving it 'on' the 3rd time, within 5 seconds. Any “blink codes”...
FUEL INJECTION EFI Troubleshooting Poor Idle Fuel Starvation / Lean Mixture Symptom: Idle Too High (If greater than 1300 RPM when engine is warm) Symptoms: Hard start or no start, bog, backfire, popping through intake / exhaust, hesitation, detonation, low power, •...
To install the inserts, press outside insert (B) into the hole. Press inside insert (A) until it snaps into place. Some Polaris ATVs use a two piece plastic insert in place of a NOTE: The outside insert (B) should be flush metal screw.
BODY / STEERING / SUSPENSION BODY Reinstall the side panel by reversing the removal procedure. Step 3 Side Panel Removal Side panel removal is quick and easy, use the following instructions for removal and installation. Remove seat by releasing the latch (if equipped) and lifting up on the seat.
BODY / STEERING / SUSPENSION Foot Well Removal / Installation X2-Touring Foot Well Removal / Installation Remove the four plastic inserts (A) that secure the wheel Remove the four plastic inserts (A) that secure the wheel well to the front and rear cabs. (See “PLASTIC INSERT well to the front and rear cabs.
BODY / STEERING / SUSPENSION Front Storage Removal Remove the four bolts that secure the storage rack to the frame. Front Storage Remove Bolts Remove the two (T25) screws that secure the storage box to the front fender well areas (each side). Remove Bolts T-25 Screws Remove the front radiator cap cover (A) by lifting upward...
Page 147
BODY / STEERING / SUSPENSION Winch Installation Area Remove the front headlights (C) or simply disconnect the electric connector (D) before removing the front plastic Remove the front cover piece by lifting up on sides of the bumper. two locking tabs as shown. Pull the tabs out of the notches and lift up on the cover piece.
BODY / STEERING / SUSPENSION Front Storage Installation Install the front radiator cap cover (E). Front Storage Sportsman Rear Rack Removal / Installation inserts T-25 Screw A. 14 ft.lbs. (19 Nm) C. 10 in.lbs. (1.13 Nm) B. 10 in.lbs. (1.13 Nm) D.
BODY / STEERING / SUSPENSION Place spacers on frame. Remove the two screws (B) that secure the front cab to the frame in the fuel tank mount area. Install rear rack onto rear frame and cab. Remove the side panels (D), refer to the “SIDE PANEL Install the two bolts (B) and six (A) T-27 screws.
BODY / STEERING / SUSPENSION Sportsman Rear Cab / Fender Removal / X2 Rear Quarter Panel Removal / Installation Installation Remove the seat. Follow the “REAR RACK REMOVAL” procedure to Remove the plastic inserts (circled) that secure the quarter remove the rear rack. panel to the rear footwell.
BODY / STEERING / SUSPENSION Sportsman Rear Storage Removal / Radiator Screen Removal Installation Pull out slightly on the top of the radiator screen. Follow the “REAR RACK REMOVAL” and “REAR With the top free, pull out on the bottom of the screen to CAB REMOVAL”...
BODY / STEERING / SUSPENSION Sportsman Body Assembly Exploded View Rear Cab Assembly Pull UP on rear of seat and back to disengage tabs at front of seat. Seat Latch Rear Cab Wheelwell Storage Frame Front Cab Assembly Side Cover Frame Front Cover Front Brush Guard...
BODY / STEERING / SUSPENSION X2- Touring Body Assembly Exploded View Rear Cab Assembly Footwell RH Rear Cab Frame Footwell Support Front Cab Assembly Side Cover Frame Front Cover Front Brush Guard Support Front Cab Splash Shields 5.13...
BODY / STEERING / SUSPENSION Headlight Pod Exploded View Worklight Switch Instrument Cluster Brake Clean knurling when repositioning handlebars Wheel Speed Sensor - Sportsman (X2 Speed Sensor Located on Transmission) Disassembly Assembly • Remove two side Phillips screws (A) • Install bottom of pod onto handlebar and secure to brackets •...
BODY / STEERING / SUSPENSION STEERING Handlebar Block Installation Procedure Clean knurling when repositioning handlebars The pin (A) on the bottom side of the top handlebar block faces down and to the front of the ATV. The bottom handle bar block has a side with 3 holes, the side with 3 holes faces up and to the front of the ATV. Align the pin (A) in the top block with the middle hole (B) in the bottom block for proper installation.
BODY / STEERING / SUSPENSION Ball Joint Replacement Install puller guide (G) with extension cap (H). Apply grease to extension cap and threads of puller bolt to NOTE: Refer to the illustration on the previous page ease removal. for this procedure. 10.
BODY / STEERING / SUSPENSION Steering Post Removal SUSPENSION Remove the front cab. Front Strut Cartridge Replacement Remove the handle bar pod. NOTE: Refer to illustration on following page. Remove the handle bar. Remove the fuel tank bracket assembly. Hold strut rod and remove top nut. Remove the steering tie rod ends from the steering bracket.
BODY / STEERING / SUSPENSION Removal / Installation Disconnect the two wire harnesses connected to each of the taillights. IMPORTANT: Before attempting to remove the cargo box, be sure that the cargo box is not set up for 2-UP riding. The passenger backrest should be face down in the cargo box and the driver seat backrest should be locked into position.
Page 169
BODY / STEERING / SUSPENSION Lift up firmly in the cargo box release lever on either side Carefully remove the cargo box from the ATV. of the ATV. 10. Reverse the removal steps to reinstall the cargo box. Refer to the standard fastener torque values in Chapter 1 during Remove the four bolts attaching the rear of the cargo box assembly.
BODY / STEERING / SUSPENSION X2 Seat Operation - Configuring Cargo Box Fold the driver seat backrest down into place to serve as the For Passenger Riding passenger seat bottom. Passenger Backrest Unlatch the driver seat backrest by turning the engagement knobs on each side in the directions shown below.
BODY / STEERING / SUSPENSION X2 Driver Seat Backrest Removal / X2 Passenger Seat Backrest Removal / Installation Installation Configure the seating for 2-UP riding. With the passenger Configure the seating for 2-UP riding. Lift up on the latch seat bottom in place, remove the two screws retaining the for the passenger backrest and lift the backrest to the full seat bottom.
Page 173
BODY / STEERING / SUSPENSION Remove the two screws retaining the passenger backrest. Remove the two pivot pins holding the backrest to the frame. Lift up on the backrest latch and tilt the backrest in towards the cargo box and lift up to remove it. For installation, reverse the removal steps.
Page 174
BODY / STEERING / SUSPENSION NOTES 5.34...
Page 175
CLUTCH SYSTEM CHAPTER 6 CLUTCH SYSTEM SPECIAL TOOLS AND SPECIFICATIONS ........6.2 SPECIAL TOOLS .
CLUTCH SYSTEM PVT EXPLODED VIEWS PVT Sealing And Ducting Components Clutch Inlet Duct Transmission Cover Seal Inner Clutch Cover Clamps Boot Duct Clutch Cover Seal Inner Seal Cover Seal Retainer Bracket Clutch Cover Drive Clutch Exploded Views (EBS vs. Non-EBS) One Way Clutch NON-EBS...
During the continually shifting to maintain optimum engine RPM. At full development of a Polaris ATV, the PVT system is matched first throttle a perfectly matched PVT system should hold engine to the engine power curve; then to average riding conditions and RPM at the peak of the power curve.
CLUTCH SYSTEM EBS Clutch Operation PVT Maintenance / Inspection This EBS driven clutch provides the same engine braking Under normal operation the PVT system will provide years of abilities as the EBS drive clutch. trouble free operation. Periodic inspection and maintenance is required to keep the system operating at peak performance.
CLUTCH SYSTEM Drive Clutch Spring Measuring Spring Length: With the spring resting on a flat surface, measure its free length from the outer coil surfaces as shown. Refer to the spring specification chart for specific free length measurements and tolerances. Also check to see that spring coils are parallel to one another.
CLUTCH SYSTEM Optional Shift Weights Shown below are optional shift weights which can be used in a PVT system. These shift weights have many different factors designed into them for controlling engagement RPM and shifting patterns. Shift weights should not be changed or altered without first having a thorough understanding the effects they have on belt to sheave clearance, clutch balance, engagement and shifting characteristics.
CLUTCH SYSTEM PVT Drying PVT Disassembly IMPORTANT: If operating the ATV through water, be NOTE: Some fasteners and procedures will vary. sure to check the PVT cover and other ATV Refer to the appropriate parts manual for proper components for water ingestion. The ATV should be fasteners and fastener placement.
CLUTCH SYSTEM PVT Installation Remove driven clutch offset spacers from the transmission input shaft. NOTE: Remember to keep spacers in order for Inspect PVT inner cover-to-engine seal. Replace if proper clutch offset on reassembly. cracked or damaged. Align the alignment mark on the cover with the mark on the engine seal.
CLUTCH SYSTEM Drive Belt Removal / Inspection Install clutch offset spacer(s) on transmission input shaft. Remove outer PVT cover as described in PVT Offset Spacer Disassembly. Mark drive belt direction of rotation so that it can be installed in the same direction. The belt is normally positioned so part numbers are easily read.
CLUTCH SYSTEM DRIVE BELT INSTALLATION Measure the distance where the side straight edges intersect the top, as shown in the illustration. NOTE: Be sure to position belt so part number is easily read. Verify new belt is seated properly in the clutches before operating the ATV.
CLUTCH SYSTEM Clutch Alignment Measure belt deflection and measure offset both above and below shaft centerlines. Adjust if necessary. Remove belt and install the Clutch Offset Alignment Tool as shown. Center Line Offset Alignment Tool Measure Above and Below Centerline 1/8”...
CLUTCH SYSTEM EBS DRIVE CLUTCH SERVICE Remove and inspect spring. See “Drive Clutch Spring Specifications” for spring inspection. Drive Clutch Disassembly Inspect Shaft Using a permanent marker, mark the cover, spider, and moveable and stationary sheaves for reference, as the cast- in X's may not have been in alignment before disassembly.
Page 190
CLUTCH SYSTEM NOTE: It is important that the same number and Inspect all rollers, bushings and roller pins by pulling a flat thickness of washers are reinstalled beneath the metal rod across the roller. Turn roller with your finger. If spider during assembly.
Never replace parts with used parts from another clutch assembly! All PVT maintenance or repairs should be performed only by a certified Polaris Master Service Dealer (MSD) technician who has received the proper training and understands the procedures Button to Tower Clearance: .000-.001 outlined in this manual.
CLUTCH SYSTEM Moveable Sheave Bushing Inspection Lift one-way clutch (3) and thrustwasher (4) off shaft. Replace as an assembly if worn, damaged, or if problems Inspect the Teflon™ coating (arrow) on the moveable sheave were noted. bushing. Inspect BOTH sheaves for signs of wear, grooving or cracking.
Page 193
CLUTCH SYSTEM NOTE: Bushings are installed at the factory using Drive Clutch Bushing Installation ™ Loctite 609. In order to remove bushings it will be Place main adapter (Item 8) on puller. necessary to apply heat evenly to the area around ™...
CLUTCH SYSTEM One-Way Clutch Inspection (Drive Clutch) Cover Bushing Removal Install main adapter (Item 8) on puller. Rotate one-way clutch clockwise (as viewed from the cover plate side). The clutch should rotate on the shaft Removal Tool (3) with only slight amount of drag. Verify there is no binding Nut (C) or rough spots.
Page 195
CLUTCH SYSTEM C) “X”, or the marks that were made earlier under weight Install limiter nut on top of spider using the Clutch Spider Nut Socket (PN 2870338). Torque to specification. Reinstall shift weights using new lock nuts on the bolts. Spider Nut Torque: 15 ft.
CLUTCH SYSTEM EBS DRIVEN CLUTCH SERVICE Place the clutch into Clutch Compression Tool PN 8700220. Using Compression Extensions PN PS-45909, Press down on top of the spider assembly, compressing the Driven Clutch Disassembly spider onto the shaft. Remove snap ring (A) and slowly Remove driven clutch from the transmission input shaft.
Page 197
CLUTCH SYSTEM Remove the inside spider plate (D) and spider dampener 10. Pull out the clutch roller pins (L) and rollers (M). (E). Inspect the spider dampener (E) for wear and replaced if needed. Remove the E-clip (F), washer (G), and the clutch rollers (H).
CLUTCH SYSTEM DRIVEN CLUTCH BUSHING REMOVAL/ 12. Inspect the bearing for wear. Spin the bearing, if the INSTALLATION bearing does not spin smoothly replace as needed. To remove the bearing, simply press the bearing from the shaft. NOTE: Special Tool Required: EBS CLUTCH 13.
CLUTCH SYSTEM EBS DRIVEN CLUTCH REASSEMBLY Install left hand nut (C) and spacer onto puller rod and tighten by hand. Turn puller barrel for further tension if Press a new bearing onto the output shaft using a press. needed. Turn clutch sheave counterclockwise until bushing is removed and sheave comes free.
Page 200
CLUTCH SYSTEM Install the small and large retaining rings into the outer Install the roller (A) onto the roller pin (B). (Both Sides). sheave above the bearing. Install the roller pin into the sheave assembly. (Both sides). The flat side of the roller pin faces downward when the shaft side is laying flat on the bench.
Page 201
CLUTCH SYSTEM Install the spacer washer. 12. Install the spider assembly onto the shaft with the retaining ring on top of the spider. NOTE: Use the marks previously Install Spacer Washer made to align the skip tooth spider, or use the “X” on top of the spider and align it with the skip tooth on the shaft.
Page 202
CLUTCH SYSTEM 15. Install the cam assembly (helix) over the shaft. Line up the “X” on the cam, “X” on spider, and “X” on the stationary sheave or use the marks previously made before disassembly. NOTE: If the cam assembly (helix) is difficult to install, be sure the sheaves are aligned.
During this procedure, the throttle should not be held at the full position for more than 10 seconds. PVT seals should be inspected for damage if repeated leaking occurs. Inspection/repair of clutch components should be performed by a certified Polaris MSD Clutch malfunction.
CLUTCH SYSTEM Problem, Cause and Remedy Chart Table 6-2: Problem, Cause and Remedy ITUATION OSSIBLE AUSE EMEDY -Wrong or broken drive clutch spring. -Replace with recommended spring. Engine RPM below specified operating range -Install correct shift weight kit to match engine -Drive clutch shift weight too heavy.
Page 205
CLUTCH SYSTEM Table 6-2: Problem, Cause and Remedy ITUATION OSSIBLE AUSE EMEDY -Abuse (continued throttle application when -Caution operator to operate machine within vehicle is stationary, excess load) guidelines. -Vehicle operated with park brake on. Inspect brake Belt burnt, thin spots -Dragging brake system.
FINAL DRIVE FRONT DRIVE SHAFT (CV) SERVICE From the back side, tap on the outer bearing race with a drift punch in the reliefs as shown. Removal Set the ATV in park. Remove hub dust cap. Remove cotter pin. Loosen the hub retaining nut. Loosen - but do not remove - the wheel nuts.
FINAL DRIVE Installation Remove cotter pin and nut from lower A-arm ball joint. Remove lower A-arm from ball joint. Install new compression ring on drive shaft. Apply an anti-seize compound to splines. Align splines of drive shaft with front gearcase and install by lightly tapping on drive shaft with rubber faced hammer.
FINAL DRIVE Inspection Disconnect A-arm from ball joint using a tie rod fork. Check the front and rear driveshaft CV boots for any tears or leaking grease. If the driveshaft boot loses all of the grease CV joint failure will occur. Slide strut off end of drive shaft and tie it up out of the way of the shaft.
Page 212
FINAL DRIVE Remove small clamp and boot from driveshaft. 13. Install the small clamp on the boot. NOTE: If the ATV has been operated with a damaged Front Shaft boot, the CV joint grease may be contaminated. Inspect the grease carefully for contamination, and clean the joint thoroughly if necessary.
FINAL DRIVE PROP SHAFT - FRONT OR REAR U-JOINT Removal and Installation Disassembly Using Roll Pin Removal Tool (PN 2872608), remove the CAUTION roll pin from prop shaft at rear of housing (front only) or transmission output shaft (rear only). Slide prop shaft back and away from housing, then pull sharply forward to Always wear eye protection when working with remove from transmission shaft.
FINAL DRIVE Assembly Support U-joint in vise as shown and drive inner yoke down to remove remaining bearing ca Install new bearing caps in yoke by hand. Carefully install U-joint cross with grease fitting properly positioned inward toward center of shaft. Take care not to dislodge needle bearings upon installation of cross joint.
Page 215
FINAL DRIVE Install snap ring to contain bearing cap just installed. Repeat procedure for other side. Install snap ring to contain bearing cap just installed. Repeat procedure for other side. Seat all bearing caps against snap rings by supporting cross shaft and tapping on each corner as shown.
FINAL DRIVE DRIVE AXLE EXPLODED VIEWS Drive Shafts and Propshafts NOTE: Refer to your parts manual for the proper replacement parts. Drive Axle Components Compression Inner CV Joint Compression Ring Inner Boot Ring Outer Boot Compression Outer CV Joint Ring Clamps Drive Boot Replacement Kits Clamp...
FINAL DRIVE FRONT GEARCASE - CENTRALIZED HILLIARD W/ ACTIVE DESCENT CONTROL Operation Rollers Engaging front gearcase: The AWD switch may be turned on or off while the vehicle is moving. AWD will not enable until the engine rpm is below 3100 RPM. Once enabled, the AWD Ring Gear remains engaged while the front gearcase is moving and will not disengage until the rear wheels regain traction.
FINAL DRIVE ADC Operation ADC Engagement: When the AWD switch is set to ‘4x4/ ADC’, a 12 Vdc current is present at the input shaft coil (1). Operation is controlled by the ECU grounding and ungrounding Engaging Front Gearcase: Active Descent Control (ADC) is the coil.
FINAL DRIVE Front Gearcase Diagnosis Inspect the armature plate for a consistent wear pattern. There should be two distinct wear bands (one band inside Symptom: AWD Will Not Engage • the other). If only one band of wear is present (or if there is wear between the two bands, inspect the coil area as Check the gearcase coil resistance.
FINAL DRIVE Gearcase Removal Inspect the rollers for nicks, scratches, and flat spots. Also inspect the roll cage for cracks and ensure the rollers are Stop engine, place machine in Park and set parking brake. able to slide up and down and in and out freely within the roll cage sliding surfaces.
FINAL DRIVE Gearcase Installation Remove the roller pin from the front prop shaft. Use the Roller Pin Removal Tool (PN 2872608). To install gearcase, reverse removal procedures. Use new Remove bolts securing the bottom of housing to the skid roll pin in front prop shaft. plate frame.
Begin the bleeding process by filling reservoir to ‘MAX’ assembly if found to be damaged or non-working. line with clean Polaris ADC oil. Remove bolts (arrows) retaining the outer cover plate Locate bleeder valves found on either side of differential assembly.
Page 224
FINAL DRIVE Remove the outer cover plate assembly. Remove and Remove the armature plate. Inspect the armature plate for inspect the cover o-ring (1). Inspect thrust bearing (2) for wear, distortion or other damage. Replace component as wear. Replace items as required. required.
Page 225
FINAL DRIVE Remove the ring gear (1) and spacer (2). 12. Inspect roll cage sliding surface (2). This surface must be clean and free of nicks, burrs or scratches. Remove and inspect the H-springs (4). Replace any components as required. Remove and inspect the bearing surfaces of the output hub.
Page 226
FINAL DRIVE 14. Inspect the magnetic coil (1) in the outer cover plate 16. Inspect the magnetic coil (1) and bushing in the input cover assembly. Inspect the backlash pad (2) for excessive wear. plate assembly. Replace the input cover seal. 17.
FINAL DRIVE ADC Gearcase Piston Replacement 19. Remove the snap ring retaining the input shaft assembly. Procedure CAUTION This repair procedure involves the use of compressed air. Safety glasses or a face shield are required. Place ADC Piston Tool PA-48542 on top of the piston. Using moderate hand pressure, hold the tool on top of the piston while using compressed air at the gearcase passage (circled) to force piston up and out of the case.
Page 228
FINAL DRIVE Coat new piston and o-rings with a moderate amount of Place ADC Piston Tool PA-48542 on top of the piston and white lithium grease or assembly lube. Coat the edges of the verify alignment of the sight hole (circled) and piston mark piston cavities.
FINAL DRIVE Assembly Install the eccentric cam assembly (1). Thoroughly clean the gearcase components before beginning reassembly. Install a new seal in the main gearcase halve. Install the input shaft assembly. Install the pinion gear/ bearing assembly (1). Install a new seal and o-ring the input shaft cover (2) prior to reassembly.
Page 230
FINAL DRIVE Install a new seal (1) in the outer cover plate assembly. 10. Install the clutch pack (1), spacer (2) and ring gear (3). Install a new o-ring on the backlash pad (2) stem . NOTE: Align locating pins / holes for installation. NOTE: Ring gear backlash (2) is set at the factory.
Page 231
FINAL DRIVE 13. Install new cover o-ring (1) on the cover plate assembly 15. Place cover assembly on Install bolts (arrows) retaining the and a new passage o-ring (2) on the gear case. outer cover plate assembly and torque to specification. 14.
FINAL DRIVE Setting Ring Gear Backlash Turn the screw in until it is lightly seated, then turn the screw out 1/4 turn. NOTE: Ring gear backlash is set at the factory. No Set the gearcase upright. Rotate the input shaft at least 4 adjustment is required, unless the front cover is times.
FINAL DRIVE REAR HUB Remove hub nut, domed washer and flat washer. Removal Place the ATV in Park and lock the parking brake. Remove rear hub cap. Remove hub. Remove cotter pin (A). Loosen the hub retaining nut (B). Loosen the wheel nuts (C). Safely support the rear of the ATV.
FINAL DRIVE 11. Remove both lower control arm bolts. From the back side, tap on the outer bearing race with a drift punch in the reliefs as shown or press out using a hydraulic press. 12. Remove bearing carrier. NOTE: Drive bearing out evenly by tapping on outer Disassembly race only.
FINAL DRIVE Assembly Press bearing into place until outer race bottoms on housing. Support bottom of bearing carrier housing. Start bearing in housing. CAUTION Use an arbor press only on the outer race to avoid bearing damage. Install snap ring into groove. Installation Insert bearing carrier on drive shaft.
FINAL DRIVE REAR DRIVE (CV) SHAFT Removal Lower Control Arm Bolt Torque: Remove rear hub, see “REAR HUB REMOVAL”. 37 ft. lbs. (50 Nm) Remove upper carrier bolt. Tip hub outward and remove Lift bearing carrier until top aligns with upper control arm. shaft from carrier.
FINAL DRIVE Service Refit CV joint on interconnecting shaft by tapping with a soft-faced hammer on the joint housing. Take care not to NOTE: The following procedure applies to BOTH damage threads on the outboard CV joint. The joint is fully inner and outer CV joints.
FINAL DRIVE CV Boot Replacement Remove excess grease from the CV joint's external surfaces and position the large boot joint over the CV housing, Remove CV joint from end of shaft. making sure boot is seated in groove. Position clamp over boot end and make sure clamp tabs are located in slots.
FINAL DRIVE INSTALLATION Install brake caliper and tighten bolts to specification. Refer to Chapter 9. Slide shaft assembly into bearing carrier hub. Install rear wheel and torque wheel nuts to specification. 80 ft.lbs. (109 Nm) Apply anti-seize compound to splines of shaft. Refer to Page 7.2 for Wheel Nut Torque.
FINAL DRIVE REAR GEARCASE Remove the shim, thrust button, and thrust button shim from the gearcase. Removal Place ATV on a level surface and place transmission in ‘PARK’. Loosen both rear wheel nuts. Loosen both rear center hub nuts. Lift and safely support rear of ATV so that the rear wheels are off the ground.
FINAL DRIVE Reassembly Inspect the ring gear for abnormal wear, broken, or chipped teeth. Spin the bearing to check the ball bearings for Inspect the pinion shaft bushing for wear. smoothness. Replace the bearing if needed. Remove the input shaft cover and the pinion shaft from the gearcase housing.
FINAL DRIVE Install the drain plug and fill plug. Replace the drain plug washers to ensure proper sealing after filling. Input Cover Bolt Torque: 25 ft.lbs. (34 Nm) Install the original shim(s), thrust button, and thrust button shims into the gearcase cover. Fill Plug Drain Plug Drain / Fill Plug Torque:...
Page 243
80 ft. lbs. (109 Nm) Wheel Nut Torque: see “Torque Table” on page 7.2 Re-install gearcase vent line. Refill the rear gearcase with Polaris Premium Gearcase Lubricant (PN 2871653). Refer to the “REAR GEARCASE LUBRICATION” procedure in Chapter 2. 7.37...
NOTE: TRANSMISSION ILLUSTRATIONS DEPICTED Linkage Rod WITH PARK LOCK. PARK LOCK IS REMOVED FOR 2007. Lubricant / Capacity Use only Polaris recommended products if possible. Specified Lubricant: Transmission Polaris AGL Gearcase Lubricant Switch (Gallon - PN 2873603) (12 oz. - PN 2873602) Disconnect gear position switch harness.
SPORTSMAN TRANSMISSION Disassembly 11. Use the Roll Pin Removal Tool (PN 2872608) to remove the roll pins from the front prop shaft and the rear prop shaft. Place the bellcrank in neutral position. Remove the front propshaft. Shift Shaft Cover Remove Roll Pin Detent Pawl Case...
Page 252
SPORTSMAN TRANSMISSION NOTE: It may be helpful to place a mark just above Remove the five bolts that secure the cover. Remove the the keyed spline. Note the raised edge on the detent detent spring (B). gear for reassembly. Remove the shift shaft and detent lever. Mark the detent gear (C) with a white pen.
Page 253
SPORTSMAN TRANSMISSION Remove the upper gear cluster and shift forks. You may 12. Remove the bearing from the reverse shaft using a puller. need to move the assembly back and forth to aid in removal. 13. Remove the park lock engagement dog. Remove the wave spring and reverse engagement dog.
Page 254
SPORTSMAN TRANSMISSION 15. Remove the snap ring and washer from the reverse shaft. 19. Use a press to remove the gear from the shaft. 16. Remove low gear (33T) and the needle bearing. 20. Make note of the direction of the gear and hub location. 21.
Page 255
SPORTSMAN TRANSMISSION 22. Slide off the shift dogs and wave springs. 25. Remove the pinion shaft retainer plate and the pinion shaft. 26. Remove the front housing cover screws. 23. Remove the snap ring, washer, gear, and split bearing. 27. Remove the front housing cover, shim, thrust button, and 24.
SPORTSMAN TRANSMISSION Assembly 28. Remove the shafts as an assembly. Reinstall the chain onto the front output shaft and rear output shaft. 29. Remove the silent chain from the assembly for shaft inspection. Install front and rear output shafts into the case. Note location of hubs 30.
Page 257
SPORTSMAN TRANSMISSION ™ Reinstall the thrust button shim, thrust button, and other Apply Loctite 262 (Red) (PN 2871951) to screw threads shims into the cover. Reinstall cover and torque bolts in a and torque screws to specification. criss-cross pattern in 3 steps to specification. NOTE: Verify case locating pins (knock pipes) are in place.
Page 258
SPORTSMAN TRANSMISSION 10. Slide the reverse shaft assembly through the silent chain. 14. As the engagement dogs are installed onto the shaft, place the wave springs into the spring groove. Keep the spring in place while the fork is being installed on the shaft and while placing the shafts into the case.
Page 259
SPORTSMAN TRANSMISSION 16. Position the shift forks up and so the pins point toward the 19. Lift the shift rail slightly and rotate the rail/fork assembly 9 o'clock position, before installing the shift drum so it meshes with the tracks on the shiftdrum. Be sure the assembly.
Page 260
SPORTSMAN TRANSMISSION 24. Place a small amount of grease (PN 2871551) into the 27. Apply Crankcase Sealant (PN 2871557) onto the cover and pocket before installing the sector gear. Install the shift gear case mating surfaces. Install the cover and hand tighten all (16T) on the shift drum shaft.
NOTE: Rotate the bellcrank to line the flat side of the switch up to the flat side of the shaft. 32. Install transmission and add Polaris AGL Gearcase Lubricant (PN 2873602) in the recommended amount. Refer to Maintenance Chapter 2 for more information.
Bearing Seal Driver 2871282 (50 mm) Lubrication Specified Lubricant Polaris AGL Fluid Gearcase Capacity Approx. 32 oz. (948ml) Remove PVT outer cover, drive and driven clutches, and the inner PVT cover. (refer to Chapter 6). Refer to Chapter 2 for transmission lubricant service.
Page 268
X2 / Touring Transmission Remove both rear drive shafts. Brake caliper removal is 14. Remove the middle transmission support bracket (K) required. Do not let calipers hang by the brake line. (See completely from the ATV. Chapters 7 and 9) Remove both upper shock absorber mounting bolts and swing shocks away from the transmission.
Transmission Installation Reconnect the torsion bar to both lower control arms. Torque to specification. Apply Polaris Premium All Season Grease (PN 2871423) to splines of front output shaft ,install new O–ring in prop shaft. With the help of an assistant, rotate transmission into place Lower Torsion Bar Bolt Torque: 17 ft.lbs.
11. Once the PVT system is installed. Tighten all remaining transmission mounting bolts to specification. See page 8.2 17. With the ATV on level ground, add Polaris AGL Gearcase for transmission bolt placement. Lubricant to the proper level. See Chapter 2 for proper fill procedures and Torque Specifications.
X2 / Touring Transmission Transmission Disassembly Remove the compression spring (7). Place the transmission in the Neutral gear before disassembly. Drain and properly dispose of transmission oil. See Chapter Remove the bellcrank nut (1) and remove the bellcrank (2). Remove the c-clip (3) that holds the gear selector switch (4) onto the shaft and remove the selector switch.
Page 272
X2 / Touring Transmission 10. Remove all cover bolts. Using suitable pry tools, remove 12. Remove the cam chain tensioner spring (14). Slide the cam the cover using the designated pry points. Tap cover with chain tensioner shoe (15), pins (16), and cam chain soft face hammer to remove.
Page 273
X2 / Touring Transmission 15. Remove the T27 screws that secure the output gear (21) with a T27 hex socket or driver. Gear Cluster Disassembly 16. Remove the shift drum (22) from the gearcase by moving the drum up and to the right to clear the shift shaft. Reverse Shaft Needle...
Page 274
X2 / Touring Transmission 22. The reverse shaft should slide out of the silent chain (4) to 26. To disassemble the shift fork rail remove the snap ring (10) separate the assembly. from the end of the shift rail on either side. CAUTION 23.
Page 275
X2 / Touring Transmission 29. Use a 2 3/8” wrench to loosen and remove the front drive 30. If needed, remove the seal from the front of the snorkel shaft snorkel tube (11). tube. Remove the snap ring (12). 31. Remove the second snap ring (13) and spacer (14) from the Front Drive Snorkel Assembly snorkel shaft.
X2 / Touring Transmission 33. To remove the remaining bearing on the snorkel shaft (15), Inspect the output gear assembly (1), replace bearings if remove the retaining ring and press the bearing off. needed. Inspect the 91T gear for damage, chips, or abnormal worn teeth.
X2 / Touring Transmission Install the output gear assembly. Be sure to properly mesh • Check the output shaft gear backlash again by feel. If the output shaft lash appears to be too tight, rotate the the snorkel shaft bevel gear with the output bevel gear. snorkel shaft counterclockwise to the next notch or 8th Install the 4 torx screws (2) to secure the output gear notch.
Page 278
X2 / Touring Transmission Once the gear backlash is found, to install the snorkel lock Assemble the input shaft assembly if previously screw, you may have to rotate the snorkel tube clockwise disassembled. or counterclockwise slightly. This will allow the lock screw Input Shaft Assembly A.
Page 279
X2 / Touring Transmission Inspect the shift drum for any damage or wear. Inspect the NOTE: To ease assembly use a plastic tie strap to hold the shift forks (D) and the shift drum (C) together during splines of the shift drum. Replace the O-rings on the end of the shift drum and lubricate them before assembly.
Page 280
X2 / Touring Transmission 10. With all of the components in the correct positions install 12. Install the rear drive differential and drive chain, following the 4 output gear assembly screws. Apply Loctite™ 262 these precautions: (PN 2871952) to the threads of the screws. Torque the •...
Page 281
X2 / Touring Transmission 14. Lift the leg of the spring up and over the rear pin. The 15. Apply a continuous bead of Crankcase Sealant (3-Bond) tensioner cam will lift the shoe and tension chain. (PN 2871557) to the LH gearcase mating surface and install the cover.
Page 282
X2 / Touring Transmission 17. Install the shift gear (16T) (G) on the shift drum shaft. 20. Install the compression spring (K). Install the sector gear (F) in the bushing pocket on the left side. Aligning the timing marks on the gears. Timing marks 21.
BRAKES BRAKE CALIPER EXPLODED VIEWS Sportsman and X2, Touring Front Caliper Assembly Apply Polaris DOT approved Brake Fluid to Component Apply Polaris All Purpose Grease A. Socket Set Screw B. Bleeder Screw C. Caliper Asm. D. Boot E. Square O-rings F.
Never overfill the The Polaris disc brake system consists of the following reservoir! Fill to 1/4, - 5/16, (.64 - .80 cm) from top of the components or assemblies: brake lever;...
/ park brake Educate operator to brake fail applied) When servicing Polaris ATV brake systems, use only Polaris Tighten wheel, hub nuts or DOT-approved brake fluid. Loose wheel hub or bearings replace bearings if worn...
Page 290
25-30 in.lbs. (2.80-3.40 Nm) 10. Repeat procedure Steps 5-9 for the remaining caliper(s). Begin bleeding procedure with the caliper that is farthest 11. Add Polaris DOT-approved Brake Fluid to MAX level from the master cylinder. Install a box end wrench on inside reservoir.
BRAKES 12. Install diaphragm, sight glass, cap and screws. 15. Field test machine at low speed before putting into service. Check for proper braking action and lever reserve. With Master Cylinder Cap lever firmly applied, lever reserve should be no less than 1/ 2”, (1.3 cm) from handlebar.
BRAKES FRONT BRAKES Place new sealing washers on each side of banjo fitting on the brake line and torque banjo bolt to specification. Pad Removal Torque to 15 ft.lbs. (21 Nm) Sealing Washer Elevate and support the of the ATV. CAUTION Banjo Bolt Use care when supporting vehicle so that it does not...
Assembly edge. Remove inner pad. Lubricate mounting bracket pins with a light film of Polaris Premium All Season Grease (PN 2871423), and install rubber dust boots. Measure the thickness of the pad material. Replace pads if worn beyond the service limit.
BRAKES Compress mounting bracket and make sure dust boots are Install the adjuster screw and turn clockwise until fully seated. Install pads with friction material facing each stationary pad contacts disc, then back off 1/2 turn other. (counterclockwise). Verify fluid level in reservoir is up to MAX line inside WARNING reservoir and install reservoir cap.
BRAKES Removal / Replacement Measure the disc thickness at eight different points around the pad contact surface. Replace disc if worn beyond NOTE: To reduce the possibility of warping, service limit. removing the brake disc mounting bolts before applying heat to the bolts. Apply heat to the hub in the area of the brake disc mounting bolts to soften the bolt locking agent.
BRAKES FRONT CALIPER Remove mounting bracket, pin assembly and dust boot. Removal CAUTION Use care when supporting vehicle so that it does not tip or fall. Severe injury may occur. Loosen and remove brake line to caliper. Place a container under caliper to catch fluid draining from brake line.
BRAKES Compress the mounting bracket and make sure the dust Install brake line and torque the banjo bolt to specification. seals are fully seated. Install the brake pads. Clean the disc and pads with brake parts cleaner or denatured alcohol to remove any dirt, oil or grease.
BRAKES REAR BRAKE PAD Push caliper piston into the caliper bore slowly using a C- clamp or locking pliers with pads installed. X2, Touring Pad Removal Elevate and support the rear of the ATV. Remove the rear wheel Loosen pad adjuster screw 2-3 turns. NOTE: Brake fluid will...
Maintain at least 1/2, (12.7 mm) of brake fluid in the Lubricate mounting bracket pins with a light film of reservoir to prevent air from entering the brake system. Polaris Premium All Season Grease (PN 2871423), and install rubber dust boots. Install the adjuster screw and turn clockwise until the stationary pad contacts the disc, then back off 1/2 turn (counterclockwise).
BRAKES Sportsman Rear Pad Removal NOTE: When removing caliper, be careful not to damage brake line. Support caliper so as not to kink Support the machine. Remove the rear tire. or bend brake line. Remove the slide pin clips from the slide bolt. Push caliper pistons into caliper bore slowly with pads installed.
BRAKES Sportsman Rear Pad Installation Install the slide bolt snap ring. Torque the slide pin to specification. Install new brake pads in caliper body. Install Pads 30-35 ft.lbs. (41-48 Nm) WARNING Caliper Slide Bolt Torque: If the brake pads are contaminated with grease, 30-35 ft.lbs.
BRAKES X2, TOURING REAR CALIPER Remove piston, dust seals and piston seals. Removal CAUTION Use care when supporting vehicle so that it does not tip or fall. Severe injury may occur. Clean caliper area before removal. Place a container below the caliper to catch brake fluid that will drain from the brake line.
Rear Caliper Piston Bore I.D. Service Limit: 1.193” (30.30 mm) Lubricate the mounting bracket pins with Polaris Premium All Season Grease (PN 2871423), and install the rubber Inspect piston for nicks, scratches, wear or damage. dust seal boots.
BRAKES Compress the mounting bracket and make sure the dust Remove the slide bolt snap rings (A), the slide pins (B), the seals are fully seated. Install the brake pads. Clean the disc bracket pad (C), and the brake pads (D). and pads with brake parts cleaner or denatured alcohol to Caliper remove any dirt, oil or grease.
BRAKES Assembly Measure the inside diameter of the rear caliper. The caliper body is a 2-step piston. The rear step is measured as well Install new O-rings in the slide bolt bushing holes. Be sure as the outside step. O-ring and seal grooves are thoroughly cleaned of all residue, or piston may bind in bore.
BRAKES REAR BRAKE DISC NOTE: The slide pins should be torqued when installed on caliper mount. Inspection Visually inspect disc for scoring, scratches, or gouges. Replace the disc if any deep scratches are evident. Use a micrometer and measure disc thickness at 8 different points around perimeter of disc.
BRAKES REAR MASTER CYLINDER X2, Touring Exploded View A. Master Cylinder Bolts B. Rear Brake Line C. Rear Master Cylinder D. Bushing(s) E. Washer(s) F. Cotter Pin G. Foot Pedal H. Spring I. Front Brake Line J. Banjo Fitting 9.26...
If required, remove the rear brake line from the master cylinder. Use a suitable container to catch the brake fluid. Polaris disc brake systems are light weight, low maintenance Dispose of brake fluid properly. and perform well in the conditions ATV’s routinely encounter.
BRAKES Sportsman Rear Master Cylinder Removal / Reinstall the brake line and torque the banjo bolt to Installation specification depending on the style of fitting. Remove the RH footwell to gain access to the rear master cylinder. Remove the rear brake lines from the master cylinder. Use Banjo Bolt Torque: a suitable container to catch the brake fluid.
BRAKES Pedal Removal and Installation TROUBLESHOOTING Brakes Squeal • Dirty/contaminated friction pads • Improper alignment • Worn disc • Worn disc splines X2, Touring Shown Poor Brake Performance • Air in system • Water in system (brake fluid contaminated) • Caliper/disc misaligned Remove the RH footwell to gain access to the rear master •...
Introduction Refer To Illustration 1: Overview The Polaris ATV Instrument Cluster is powered by battery (A) Speedometer Needle (flashes during warning condition) voltage (12 VDC) and requires inputs from the engine RPM, transmission gear, and speed sensor for proper operation. Two (B) Speedometer harnesses plug into the cluster head;...
ELECTRICAL Instrument Cluster Diagnostic Mode 4. High/Low Battery Voltage • This warning usually indicates that the ATV is being NOTE: This gauge features auto shut-off protection operated at an RPM too low to keep the battery if the voltage on the DC bus is excessive. This is charged.
Page 317
ELECTRICAL Screen 3 - Tachometer: (Ill. 3) indicates engine RPM. Screen 5 - Gear Circuit Diagnostic: This screen displays the resistance value (in ohms) being read at the gear switch input of the gauge. NOTE: 10--20% Variance from these reading is within normal parameters.
ELECTRICAL Setting A New Service Interval While in the service interval mode, press and hold the mode/override button until the wrench icon flashes. When it begins to flash, release the button. The setting will increase by one hour each time the button is pressed.
NOTE: The EFI diagnostic mode is intended to displayed. quickly view fault codes stored in the EFI module. Polaris dealers are equipped with the proper diagnostic tools to further diagnose the blink code. To download blink codes (failure codes) from you EFI module: Be sure the ATV key switch is off and with the shifter is in Park.
ELECTRICAL Speedometer Removal Remove the three screws that secure the headlight pod EFI C AILURE ESCRIPTION cover and disconnect the wire connectors from the No RPM Signal instrument cluster. Loss of Synchronization TPS: Open or Short Circuit to Ground TPS: Short Circuit to Battery RAM Error: Defective ECU Transmission Input - Invalid Gear Vehicle Speed Sensor - Implausible...
ELECTRICAL Speedometer Installation Spray a soap and water mixture onto the outer surface area of the instrument cluster. This will help the instrument cluster slide into the pod assembly more easily. Be sure the rubber grommet inside the pod is fully installed and that the indexing key is in the headlight pod keyway.
ELECTRICAL ACTIVE DESCENT CONTROL (ADC) ALL WHEEL DRIVE (AWD) COIL COIL Operation Overview Operation Overview • AWD switch must be ‘ON’. 12Vdc power is present at the ADC hub coil. • AWD switch must be ‘ON’. 12Vdc power is present at the ADC hub coil.
ELECTRICAL COOLING SYSTEM COMPONENTS Coolant Temperature Sensor The coolant temperature sensor can be tested using an ohmmeter Fan Control Circuit Operation / Testing or voltmeter. Power is supplied to the fan via the Orange/Black wire when the With the engine and temperature sensor at room relay is ON.
ELECTRICAL Fan Motor Current Draw GEAR POSITION INDICATOR SWITCH A current draw test will provide a good indication of fan motor Test Diagram condition. A worn or damaged fan motor will draw more current, which causes a reduction in blade speed and reduced NOTE: Also see “INSTRUMENT CLUSTER cooling.
ELECTRICAL ELECTRONIC THROTTLE CONTROL functioning properly, the engine will lose spark and stop. (ETC) SWITCH Electronic Throttle Control (ETC) Switch (Composite Throttle Housing) ETC Switch Operation The Electronic Throttle Control (ETC) system is designed to ETC Switch contacts are stop the engine of an ATV in the event of a mechanical problem closed in a fault condition with the throttle mechanism.
ELECTRICAL IGNITION SYSTEM Flywheel Identification The flywheel can be identified by the stamp mark in location A. Refer to I.D." location in chart below. Do not use the cast mark to determine flywheel application. Kokusan Flywheel Timing Marks Production Date Part Number Engine Application Cast...
ELECTRICAL Crankshaft Position Sensor Gap CHARGING SYSTEM Measure trigger coil gap with a feeler gauge. The gap should be Current Draw - Key Off .059 inch (1.0 mm). CAUTION Do not connect or disconnect the battery cable or ammeter with the engine running. Damage will occur to electrical components.
ELECTRICAL Charging System “Break Even” Test Alternator Output Test Three tests can be performed using a multimeter to determine CAUTION the condition of the stator (alternator). Do not connect or disconnect the battery cable or ammeter with the engine running. Damage will occur to electrical components.
Page 335
ELECTRICAL TEST 2: Resistance Value of Stator Leg to Ground Measure the resistance value of each of the stator legs to ground: Y1 to Ground, Y2 to Ground, Y3 to Ground. NOTE: Any measurement other than Infinity (open) will indicate a failed or shorted stator leg. TEST 3: Measure AC Voltage Output of Each Stator Leg at Charging RPM Set the selector dial to measure AC Voltage.
ELECTRICAL Charging System Testing Flow Chart Whenever charging system problems are suspected, proceed with the following system check after verifying that all wires are in good condition, connected and not kinked or pinched. Using a multitester set on D.C. volts, measure the battery open circuit voltage (See earlier test).
ELECTRICAL RELAYS POWER RELAY Operation OLOR UNCTION KEY-ON Battery power supply, switched The relays, located next to the ECU, assist with component operation such as the fan, fuel pump, etc. on by the key and LH control switches, Red/White enables power to relay. Tied to Fan Relay The fan relay, controlled by the ECU, operates the fan.
ELECTRICAL FUSES/CIRCUIT BREAKER LIGHTING Operation High Beam Headlight Bulb Replacement The fuse panel, located next to the ECU, assists with component protection such as the Instrument Cluster/ECU, EFI system, Chassis Power and Accessories. A 20-amp circuit breaker protects the fan circuit. Remove 3 Screws CAUTION Do not service while headlight is hot.
ELECTRICAL Turn the headlight lamp socket counter-clockwise and Unplug headlamp harness (C). remove. Turn Harness Assembly Loosen Tighten Remove O-Ring (D) from headlight pivot pins. (Both Carefully remove headlamp bulb from housing. Sides) Remove the headlamp and replace with a new headlamp. NOTE: Do not touch the lamp with bare fingers.
ELECTRICAL Reverse the steps to install the new housing and reassemble Place the vehicle on a level surface with the headlight the pod. approximately 25' (7.6 m) from a wall. 25’ (7.6 m) Lamp Center Height 2” (5.1 cm) 5 1/8” (13 cm) NOTE: The distance from the headlamp parting line to the end of the adjustment knob stop is 5 1/8”, (13 Measure the distance from the floor to the center of the...
ELECTRICAL Low Beam Headlight Adjustment Pull the harness assembly out from the headlight assembly. The low beam can be adjusted slightly upward or downward. Loosen Screw Remove the lamp and replace with a new headlamp. NOTE: Do not touch the new lamp with bare fingers. Hold the plastic part (1) of the lamp.
ELECTRICAL Work Light / Differential Switch Sportsman / Touring Brake Light / Work Light Replacement Remove the headlight pod cover to locate the switch wires. The switch snaps out by pushing in on the tabs on both sides of the The brake light (A) and the work light (B) are both located in the switch.
ELECTRICAL X2 BRAKE LIGHT / WORK LIGHT To remove the brake light electrical connector (B), press in REPLACEMENT on the tab on the connector to unlock the connector and pull the connector from the bulb assembly. The brake light (A) and the work light (B) are both located in the rear tail lamp housing.
ELECTRICAL Brake Light Switch X2 and Touring - Carefully pull out the red locking tab on the connector. Remove the front cover. Brake Lamp Switch X2 and Touring - Once the red tab is pulled out, press in on the black tab and pull out to disconnect harness. Black Tab Red Tab Brake Switch...
ELECTRICAL FUEL SENDER X2 / TOURING DIFFERENTIAL SYSTEM Testing Solenoid Testing Drain the fuel tank and remove it from the atv. Set the fuel tank on a flat surface. Disconnect from the wire harness. Using a digital ohmmeter, test the solenoid at the connector leads and compare to the Hook up an ohm meter to the fuel sender harness Violet/ specification.
ELECTRICAL Differential Relay Operation X2 / TOURING SPEED SENSOR • The AWD switch must be turned to ‘TURF’ mode. Testing • Speed must be below 15mph and transmission must not Using the special tools listed, test the speed sensor according to be in ‘Park’.
ELECTRICAL ACCESSORY POWER NOTE: Refer to the accessory instructions for accessory hook-up and installation. Wire Connections Winch Installation Orange/White Wires Located In This Area The Sportsman models have the main winch cables routed and installed from the factory. This enables quick installation. Refer to Chapter 2 for more information on winch installation and operation.
ELECTRICAL STARTER SYSTEM Sportsman Starter Lockout Overview and Diagnostic The Sportsman starter lockout is controlled by the ECU. Pin #20 senses the transmission signal and determines if the switch is in Neutral or Park. Pin #24 senses when the brake is applied. When the conditions are met, the ECU will activate Pin #16 to ground the starter solenoid.
ELECTRICAL X2 /TOURING Starter Lockout Overview and Diagnostic The Sportsman X2 and Touring starter lockout is controlled by the ECU. Pin #20 senses the transmission signal and determines if the switch is in Neutral or Park. Pin #24 senses when the brake is applied. When the conditions are met, the ECU will activate Pin #16 to ground the starter solenoid.
ELECTRICAL Troubleshooting Starter Motor Removal / Disassembly NOTE: Use electrical contact cleaner to clean starter Starter Motor Does Not Run motor parts. Some solvents may leave a residue or • Battery discharged - Low specific gravity damage internal parts and insulation. •...
ELECTRICAL Remove the front bracket assembly and the rear bracket Measure resistance between insulated brush and starter assembly. Remove the shims from the armature shaft and housing. Reading should be infinite. (OL). Inspect inspect the O-rings located on the armature housing. insulation on brush wires for damage and repair or replace as necessary.
ELECTRICAL Brush Replacement Measure the resistance between each commutator segment and the armature shaft. The reading should be infinite (no Remove terminal nut with lock washer, flat washer, large continuity). phenolic washer, the small phenolic spacers, and sealing O-ring. Inspect O-ring and replace if damaged. Slide positive brush springs to the side, pull brushes out of their guides and remove brush plate.
ELECTRICAL Starter Reassembly / Installation Lightly grease pinion shaft and install pinion, spring stopper, and snap ring. Install brush plate to field magnet housing aligning index tab. 10. Install the starter onto the engine case. Hand tighten each of the starter bolts. Torque the bottom bolt first to 9 Install O-ring, two small phenolic spacers, large phenolic ft.lbs.
ELECTRICAL Starter Drive Pinion Gear - Anti-kick Out Shoe, Garter Spring Replacement If the garter spring is damaged, the overrun clutch may fail to return properly. Use either of the following methods to remove and install a new garter spring: A.
ELECTRICAL STARTER SYSTEM TESTING FLOW CHART Condition: Starter fails to turn motor. NOTE: Make sure engine crankshaft is free to turn before proceeding with dynamic testing of starter system. A digital multitester must be used for this test With the tester on the VDC position, place the tester's black lead on the battery negative and the Remove battery and properly service.
ELECTRICAL BATTERY Battery Activation (Conventional) Battery Identification WARNING NOTE: It is important to identify what type of battery you have installed in your ATV. Different types of Battery electrolyte is poisonous. It contains sulfuric batteries require different service procedures. acid. Serious burns can result from contact with Proper servicing and upkeep of your battery is very skin, eyes or clothing.
1.270 or higher. Battery Terminals/Bolts Terminal Preparation Use Polaris corrosion resistant Nyogel™ grease (PN 2871329) on battery bolts and terminals when installing a battery. This will help to prevent corrosion and maintain good electrical connection.
ELECTRICAL Install clear battery vent tube from vehicle to battery vent. WARNING Vent tube must be free from obstructions and kinks and Battery Hydrometer (PN 2870836) securely installed. If not, battery gases could accumulate and cause an explosion. The vent tube should be routed away from frame and body to prevent contact with Route the cables correctly.
ELECTRICAL Battery Load Test NOTE: Recharge to full capacity every 30 to 60 days during a non-use period. If the battery is stored during the winter months, electrolyte will freeze at CAUTION higher temperatures as the battery discharges. The chart below indicates freezing points by specific gravity.
ELECTRICAL Install clear battery vent tube from vehicle to battery vent. NEW BATTERIES: Batteries must be fully charged before use or battery life can be reduced by 10-30% of full potential. Charge battery for 3-5 hours using a variable rate charger. Do WARNING not use the alternator to charge a new battery.
ELECTRICAL BATTERY CHARGING REFERENCE TABLE The X2 and Touring battery is located under fuel tank and can be accessed by removing the right hand side panel. TATE OF HARGE OLTAGE CTION HARGE None, check voltage at 3 mos. None 100% 12.8-13 V after manufacture Required...
ELECTRICAL Low Maintenance Battery - OCV- Open Low Maintenance Battery Load Test Circuit Voltage Test CAUTION Battery voltage should be checked with a digital multitester. Readings of 12.8 volts or less require further battery testing and charging. See charts and Load Test. To prevent shock or component damage, remove NOTE: Lead-acid batteries should be kept at or near spark plug high tension leads and connect securely...
ELECTRICAL Low Maintenance Battery Off-season Low Maintenance Battery Charging Storage Procedure Battery voltage should be checked with a digital multitester. Remove the battery from the ATV to prevent damage from Readings of 12.8 volts or less require further battery testing and leaking or spilled acid during charging.
ELECTRICAL TROUBLESHOOTING DIAGRAMS Overview IMPORTANT: Illustrations are representative and may not apply to all models. Refer to the wire diagrams for the correct wire circuit and technical information (if applicable). All Wheel Drive - EFI Charging Circuit - EFI 10.54...
800 TOURING EFI INTERNATIONAL 800 TOURING EFI INTERNATIONAL BRAKE SYSTEM Overview The Sportsman Touring International brake system consists of a complete hydraulic brake system. All-wheel braking is integrated into the foot brake and hand brake systems and allows 4 wheel braking from either control separately, or at the same time. When the foot brake is applied, all brake calipers are active, as braking pressure is routed from the foot brake master cylinder through the proportioning valve and distribution block, exiting one line to the front calipers, while the other line exits the proportioning valve and feeds the outer line to the rear calipers.
800 TOURING EFI INTERNATIONAL 800 TOURING EFI INTERNATIONAL STEERING POST AND LOCK ASSEMBLY Steering Assembly Exploded View The 800 Touring EFI International Sportsman is equipped with a locking mechanism to prevent theft or unauthorized use. Steering post removal may be required for lock service or repair. Lock System Item Number / Description: 11.
Need help?
Do you have a question about the 2008 sportsman 800efi and is the answer not in the manual?
Questions and answers