Table of Contents
Advertisement
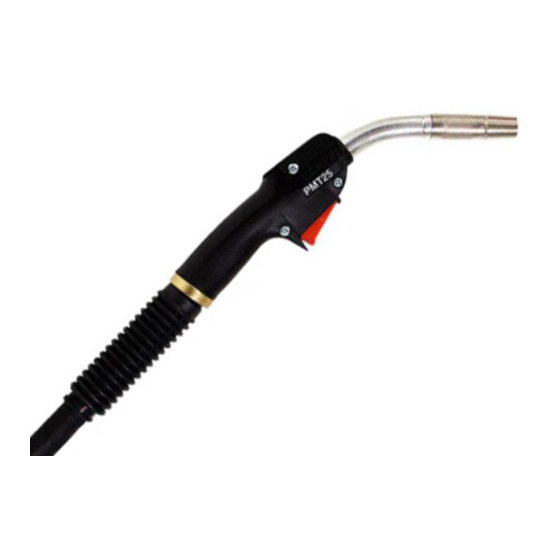
PMT
25, 27, 32, 35, 42
30W, 42W, 52W
Operating manual • English
Bruksanvisning • Svenska
Bruksanvisning • Norsk
Brugsanvisning • Dansk
Gebrauchsanweisung • Deutsch
Gebruiksaanwijzing • Nederlands
Manuel d'utilisation • Français
Инструкции по эксплуатации • По-русски
EN
FI
Käyttöohje • Suomi
SV
NO
DA
DE
NL
FR
RU
Advertisement
Table of Contents

Subscribe to Our Youtube Channel
Related Manuals for Kemppi 25


Summary of Contents for Kemppi 25
- Page 1 25, 27, 32, 35, 42 30W, 42W, 52W Operating manual • English Käyttöohje • Suomi Bruksanvisning • Svenska Bruksanvisning • Norsk Brugsanvisning • Dansk Gebrauchsanweisung • Deutsch Gebruiksaanwijzing • Nederlands Manuel d’utilisation • Français Инструкции по эксплуатации • По-русски...
- Page 3 OPeraTing Manual english...
-
Page 4: Table Of Contents
COnTenTs PreFaCe ......................... General .......................... Product Introduction .................... Operation Safety ...................... COnneCTing THe gun ................ using THe PMT gun wiTH uniTs OTHer THan PrOMig and Feed ..............Changing the connection .................. MOunTing THe gun regulaTOr rMT 10 ....using THe gun regulaTOr rMT 10 ........ -
Page 5: Preface
While every effort has been made to ensure that the information contained in this guide is accurate and complete, no liability can be accepted for any errors or omissions. Kemppi reserves the right to change the specification of the product described at any time without prior notice. Do not copy, record, reproduce or transmit the contents of this guide without prior permission from Kemppi. -
Page 6: Product Introduction
PrOduCT inTrOduCTiOn Kemppi PMT MIG/MAG guns for manual welding are designed for demanding professional use. They are suitable to be used in all MIG units equipped with a Euro adapter. OPeraTiOn saFeTy Please study these Operation safety instructions and respect them when installing, operating and servicing the machine. -
Page 7: Connecting The Gun
COnneCTing THe gun In its delivery state, internal connections of PMT guns are made so that they are suitable to be used only with Promig and Feed wire feeders. Do not use the PMT gun in any other wire feeder than Promig and Feed before you have changed internal connections of gun according to the instructions in the following paragraph. -
Page 8: Using The Pmt Gun With Units Other Than Promig And Feed
using THe PMT gun wiTH uniTs OTHer THan PrOMig and Feed In the PMT guns, in addition to start operations, gun control and thermal protection operations are also transmitted along the control lines of the snap connector (PMT 30W, PMT 42W, PMT 52W). Hence the delivery state of the guns is such that without any alternations to the internal connections, the guns are suitable to be used only with Promig and Feed wire feed units. - Page 9 • Press the cover of the plastic protection back in place. Make sure that the cooling liquid hoses and their bending protections are placed inside plastic protection without any sharp bends and make that they retain the original shape of the hose. • Tighten the screws of the cover.
-
Page 10: Mounting The Gun Regulator Rmt 10
MOunTing THe gun regulaTOr rMT 10 In the handle of the PMT gun there is a place for the gun regulator RMT 10 (6185475), which is available as an accessory. This regulator enables you to ragulate the welding power of synergic MIG or pulsed MIG welding with the Promig and Feed, or select preprogrammed welding parameters according to your wishes. -
Page 11: Using The Gun Regulator Rmt 10
using THe gun regulaTOr rMT 10 Depending on the panel used in the Promig (or Feed) wire feeder, the gun regulator RMT 10 will enable you to regulate wire feed speed in MIG welding as well as the welding power of synergic MIG or pulsed MIG welding. You can also select preprogrammed welding parameters from Selecto channels 1 –... - Page 12 1,5 mm • Loosen the hexagon socket head screw (1) until the bearing (2) is released and pressed against the outer edge of potentiometer (3) (look in the gap between the regulator frame and the potentiometer). Restoring the RMT 10 into its normal state, where potentiometer positions corresponding to Selecto channels are not felt: • Turn the potentiometer (3) a little so that the bearing (2) is forced out of the groove on the potentiometer edge.
-
Page 13: Operation Of The Thermal Shield
TwisTing THe neCk If necessary, you can twist gun neck of PMT 25, PMT 27, PMT 32, PMT 35 and PMT 42 ±360° in the direction of the handle (see picture). Grip the handle firmly with one hand and twist the neck with your other hand into the wanted position. -
Page 14: Use And Maintenance
PMT 25, PMT 27, PMT 32: When adjusting the neck, always make sure that the fastening thread of the gun neck has been tighthened almost completely. If you twist the neck too much outwards, the connection between the neck and the cable becomes loose, which increases the voltage drop. -
Page 15: Operation Disturbances
OPeraTiOn disTurBanCes welding is stopped and the pilot lamp of thermal shield of the Promig unit is lit: • Thermal shield of the gun has stopped welding. Find the fault before you continue welding. Especially check connections of the cooling liquid hoses (also in the interconnecting cable). -
Page 16: Ordering Numbers
15 – 30 mm from the work piece. • Angle of tilt of the gun is too large. • There is too much draught at the welding location. Ordering nuMBers Length 3,0 m Length 4,5 m PMT 25 6252513 6252514 PMT 27 6252713 6252714... -
Page 17: Technical Data
CO2 (A) in inlet rate (bar) (bar) (°C) (l/min) PMT 25 0,6 – 1,2 PMT 27 0,6 – 1,2 PMT 32 0,8 – 1,6 PMT 35 0,8 – 1,6 PMT 42 0,8 – 1,6 PMT 30W 0,8 –... - Page 18 78681 EPONE CEDEX myynti.fi@kemppi.com info.ru@kemppi.com FRANCE Tel +33 1 30 90 04 40 KEMPPI SVERIGE AB KEMPPI, TRADING (BEIJING) COMPANY, Telefax +33 1 30 90 04 45 LIMITED Box 717 sales.fr@kemppi.com Room 420, 3 Zone, Building B, S-194 27 UPPLANDS VÄSBY No.12 Hongda North Street,...
Need help?
Do you have a question about the 25 and is the answer not in the manual?
Questions and answers