Table of Contents
Advertisement
Quick Links
Advertisement
Table of Contents

Related Manuals for Neopost AS-520C


Summary of Contents for Neopost AS-520C
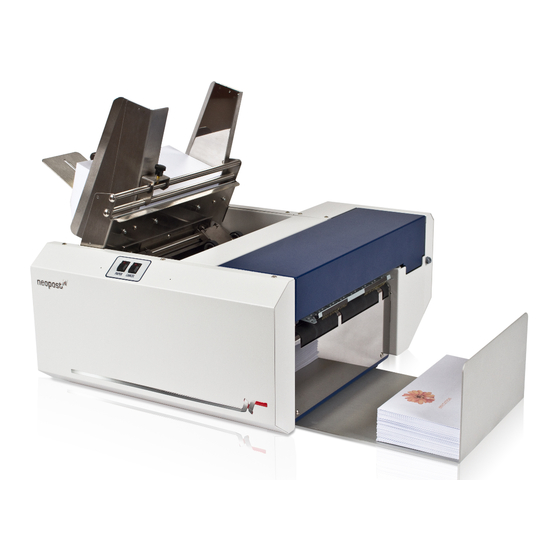
- Page 1 AS-520C ADDRESS AND GRAPHICS PRINTING SOLUTION USER GUIDE...
-
Page 3: Table Of Contents
Table of Contents Getting Acquainted Safety Precautions ..................3 Front View ....................... 4 Rear View ....................... 6 Installing the Printer Choosing a Location ..................11 Unpacking and Setup ................... 12 Plugging in the Printer .................. 16 Connecting to the Computer ................. - Page 4 Supplies, Service and Support ..............100...
-
Page 5: Getting Acquainted
Getting Acquainted Safety Precautions ..............3 Front View ................4 Rear View ................6... -
Page 7: Safety Precautions
Safety Precautions THIS EQUIPMENT PRESENTS NO PROBLEM WHEN USED PROPERLY. HOWEVER, CERTAIN SAFETY RULES SHOULD BE OBSERVED WHEN OPERATING THE PRINTER. BEFORE USING THE PRINTER, YOU SHOULD READ THIS MANUAL CAREFULLY AND FOLLOW THE RECOMMENDED PROCEDURES, SAFETY WARNINGS, AND INSTRUCTIONS: •... -
Page 8: Front View
Front View Paper Key –The LED on this key blinks when an action is required, such as loading paper or a misfeed (paper didn’t feed into position, or jammed). Once the problem is solved (paper loaded, jam cleared), press this key to continue printing. Cancel Key –... - Page 9 Blinking Printer is receiving/processing data. Printer is in standby mode or powered off (main power off).
-
Page 10: Rear View
Rear View Parallel Port Connection – The Centronics Parallel cable attaches here. USB Port Connection – The USB cable attaches to the printer here. Main Power Switch – This switch connects/disconnects main power to the printer. Note: The printer performs an extensive cartridge cleaning process when first powered on and a print job is sent. - Page 11 Rear Paper Guide – Allows for adjustments in stack angle, based on paper type and length. Helps to force the paper against the separation area. Fixed Side Guide – The paper is registered against this guide.
-
Page 13: Installing The Printer
Installing the Printer Before using the printer the following must be done: • Choose a location for the printer • Unpack and assemble the printer. • Install the Inkjet Cartridges • Set up the feed on the printer • Plug in the printer and connect it to the computer •... -
Page 15: Choosing A Location
Choosing a Location The printer should be placed on a sturdy worktable or cabinet at least 22 cm (9 inches) from any walls. Protect the printer from excessive heat, dust, and moisture – avoid placing it in direct sunlight. -
Page 16: Unpacking And Setup
Unpacking and Setup Remove the Printer and its parts from the carton. Save the packing material. Remove all packing tape. The screws that attach the various parts of the guides to the printer are under the tape in their respective positions. -
Page 17: Installing The Fixed Side Guide
Installing the Fixed Side Guide Begin by installing the Fixed Side Guide. It is held in place by two screws [1]... - Page 18 Next install the Adjustable Side guide using the two screws [2] provided. Attach the Rear Paper Support using the two knobs [3] provided. The large slots fit over the socket head screws.
- Page 19 Install the Rear Paper Guide using the thumbscrew and washer [4] provided. The washer goes between the screw and the Rear Paper Support.
-
Page 20: Plugging In The Printer
Plugging in the Printer Plugging in the Printer Make sure that the Main Power Switch [3], is in the OFF position. Connect the power cord from the power pack to the connector [4] at the rear of the Printer. Plug the power cord into the power pack and then plug the other end into a 115- 220 Volt AC, 50/60 Hz. -
Page 21: Connecting To The Computer
Connecting to the Computer > Important: Before connecting the printer to the computer, for the first time; please be sure to follow the instructions for “Installing the Printer Drivers”. Power the printer off before connecting/disconnecting the Parallel cable. The Printer has both a USB [2] and a Parallel Port [1] connection. The two ports are located one above the other. -
Page 22: Installing The Inkjet Cartridges
Installing the Inkjet Cartridges The printer uses two ink cartridges, the C6657 Color cartridge and the C6656 Black cartridge or C6658 Photo cartridge. Use the C6656 Black cartridge for everyday printing and the C6658 Photo Cartridge for photos and high quality printing. -
Page 23: Installing And Replacing The Cartridge
Installing and replacing the cartridge Installing and replacing the cartridge is done in the following manner: Plug in the Printer and turn the main power switch ON. Open the top cover and press the soft power button [1], the button will light... The printhead carriage will move side to side and the printhead wiper mechanism will move to its downward position. - Page 24 Press down on the cartridge latches until you hear a click, and then close the top cover. THE INK IN THE CARTRIDGE MAY BE HARMFUL IF SWALLOWED, KEEP NEW AND USED CARTRIDGES OUT OF REACH OF CHILDREN, DISCARD EMPTY CARTRIDGES IMMEDIATELY.
-
Page 25: Setting Up The Feed
Setting up The Feed Adjusting the feed system The printer’s feed system is adjusted as follows: Move the adjustable side guide so that the locking screws on the sheet separator assembly are accessible. Loosen the locking screw and raise the separator, then tighten the locking screw to hold the separator in the up position. - Page 26 Position the adjustable side guide so that it about 0.8 mm (1/32-inch) from the sides of the media. Tighten the locking screw on the side guide. If not already present place a single piece of media into the feed area so it is starting to feed under the separators.
- Page 27 Adjust the “standard” rear paper guide by loosening the locking screw and position the guide so that the back edge of the media is raised approximately 13 mm (1/2-inch) above the rear paper support. The same procedure is used for most other media sizes and types. See Appendix: Envelope Feed Setup on page 97 for additional setup instructions and devices that...
-
Page 28: Installing The Printer Driver On Window Vista And Xp
Installing the Printer Driver on Window Vista and XP Installing the Printer Driver on Windows Vista Please be sure to follow the procedure as described below. Place the “Product CD”, supplied with the printer, in your CD-ROM drive. Turn the printer’s Main Power switch OFF. Connect the printer to the computer via the port you wish to use (USB or Parallel) and then turn the printer ON. - Page 29 After the system searches for the driver (be patient, this may take a few minutes), you will be prompted with “Insert the disc that came with your amcamc50”. click Next. Even though you have a disk with drivers on it, inserted in the CD ROM drive, Windows Vista will not be able to automatically locate the drivers on this CD and the install will fail if you click on Next.
- Page 30 When prompted to “Browse for driver software on your computer”. Click on the “Browse” button. Locate and select the CD ROM drive that contains the “Product CD”. Locate and select the “Printer Drivers” folder on this CD. Then Click on OK.
- Page 31 When the appropriate “Printer Drivers” folder is displayed Click on Next The system will search the folder, locating the driver, and then the “Installing driver software…” message will appear briefly.
- Page 32 A “Windows Security” window will open with the message “Windows can’t verify the publisher of this driver software”. Click on the selection “Install this driver software anyway”.The system will continue “Installing driver software…” Once the files are finished copying to your computer, you will be presented with the following message.
- Page 33 The installation is complete when the message box “AMC50 Device driver software installed successfully”, appears in the lower right-hand corner of your screen. Renaming the Printer Driver on page 36 for renaming the printer.
-
Page 34: Installing The Printer Driver On Windows Xp
Installing the Printer Driver on Windows XP Please be sure to follow the procedure as described below. Place the “Product CD”, supplied with the printer, in your CD-ROM drive. Turn the printer OFF. Connect the printer to the computer via the port you wish to use (USB or Parallel) and then turn the printer ON. - Page 35 When prompted with “Please choose your search and installation options.” Select “Don’t search. I will choose the driver to install.”. Then Click on NEXT>. If prompted to “Select a hardware type, and click Next.” scroll down the list and select “Printers”. Then Click on NEXT>.
- Page 36 When the “Add Printer Wizard” window appears; Click on the “Have Disk…” button. When the “Install From Disk” window opens; Click on the “Browse…” button.
- Page 37 Locate the “Product CD”, which you previously placed in your CD-ROM drive. Select and Open the “Printer Drivers” folder on the “Product CD”. Then select the file “spf800k”. Click on the “Open” button. When the “Install From Disk” window appears, displaying the appropriate “Printer Drivers”...
- Page 38 The “AMC50” printer choice will appear in the window. Select it and Click on Next>. If the “Update Driver Warning” box appears, asking if you want to continue installing this driver; Click on the “Yes” button. After a few moments a warning window will appear, to inform you that “The software you are installing for this hardware has not passed Windows Logo testing…”.
- Page 39 Once the files are finished copying to your computer You will be presented with the message “The wizard has finished installing the software for: AMC50”. Click on the “Finish” button. The installation is complete when the “Found New Hardware” box appears in the lower right-hand corner of your screen.
-
Page 40: Renaming The Printer Driver
Renaming the Printer Driver This procedure is not necessary, but you may find it useful. After the printer driver is loaded on your system, you may want to rename the printer driver, so it is easier to identify. Renaming the Printer Driver on Window Vista Click on Start Click on Control Panel Click on the Printer selection, located under the “Hardware and Sound”... -
Page 41: Renaming The Printer Driver On Window Xp
Renaming the Printer Driver on Window XP Click on Start Click on Control Panel Double Click on the Printers and Faxes icon Right Click on the AMC50 icon Click on Rename Type the new name then press the ENTER key... -
Page 43: Operating The Printer
Operating the Printer Once the Printer Driver is installed on your computer, you are ready to start printing. This section is divided into two parts. The first part describes how to set up a job to print from Microsoft Word. The second part describes the driver properties and the various options available when you run a job. -
Page 45: Ink-Backup Mode
Ink-backup Mode You can run the printer with only one print cartridge installed. This is called "ink-backup mode". This mode is commonly used when you only need to print in black, or if one of the print cartridges runs out of ink and you don't have a replacement available. -
Page 46: Pausing A Print Job
Pausing a Print Job To temporarily pause a print job; remove the media from the feed area. To resume the print job, insert media into the feed area. Then press the Paper key (LED will be blinking) to resume printing. -
Page 47: Operating Tips
Operating Tips 1. In general, you should avoid shutting off the main power switch unless you don't plan to use the printer for an extended period of time (more than a few days). At power on, the printer must perform an extensive cartridge cleaning process. If you always power the printer off and on with the main power switch, you will reduce the print cartridges life (waste ink) and you will increase the accumulation of ink partial buildup inside the printer;... -
Page 48: Setting Up A Job In Ms Word
Setting Up a Job in MS Word The first thing that you have to take into account when setting up a job to print in MS Word or any other application is the print area of the printer and the paper sizes it can handle. The maximum print area for the Printer is 22 cm (8.5 inches) wide by 43 cm (17 inches) long. - Page 49 For other page sizes such as 21 cm (8.5 inches) by 29.7 cm (11 inches) (standard letter) or 21 cm (8.5 inches) by 35 cm (14 inches) (legal size) set the paper size to their exact sizes and choose the margins you want. The top and bottom margin default is 6 mm (0.24 inches), but you can make them larger.
-
Page 50: Printing On A Dl Envelope (Portrait)
Printing on a DL Envelope (Portrait) If you are using a DL envelope; the envelope should be run portrait, flap first, with the wide side touching the separators. This is the fastest way to run a DL envelope. If you need to print the entire length of the envelope, please see the procedure Printing the entire length of a DL Envelope (Landscape), using MS-Word on page 50... -
Page 51: Printing On A Dl Envelope
Printing on a DL Envelope Click on File, Print and make sure the printer has been selected as your printer. Click on the Properties button. Under the heading “Paper options” “Size is:”, select “DL envelope” from the pull down list. Click on OK to close the Properties window. Then click on Close to close the Print dialog box. - Page 52 Click on the Margins tab. Make sure the Orientation is set to Portrait. Then set the margins that you want to use for the layout. The minimum top and bottom margin is 6 mm (0.24”).The minimum left margin is 0 mm (0”)and the minimum right margin is 2.5 mm (1”) Close the window by clicking OK.
- Page 53 Insert and position the data where you want it on the page. Click on File, Print. Select the range of data and or number of copies you want to print, and then click OK. For more information about changes that can be made in the driver, please see the “Printer Driver Properties on page 51”...
-
Page 54: Printing The Entire Length Of A Dl Envelope
Printing the entire length of a DL Envelope Normally a DL envelope would be fed and printed in portrait orientation (flap first), as described on the previous page. However; if you need to print the entire length of the DL envelope you will need to feed and print in the landscape orientation. -
Page 55: Printer Driver Properties
Printer Driver Properties The Printer Driver for the machine works the same as any other Printer Driver for Windows. It does, however have some enhancements to help you maximize the ability of the printer to print variable addressed quickly and efficiently. Once the job is set up Click on File, and then on Print. - Page 56 Paper/Quality Tab Click on the Size is box, to select the size of the material to be printed.
- Page 57 If the paper size you are using is not listed; Click on the Custom button, then select the Custom # you want to edit/use from the pull down list. Enter the dimensions (width and length), then click on the Save button. You can save up-to five custom sizes. The next step is to click on the Paper Length box and select Automatic Detection.
- Page 58 “Automatic Detection” will cause the printer to feed one sheet of paper and measure its length. The printer will then use this information for each succeeding sheet. The first sheet is not printed. “Select from above” will eliminate the first piece feeding blank, to measure the length, but this is not the preferred method.
- Page 59 The Print Quality box allows you to select the amount of ink and the resolution of the image the printer will print. • Fast Draft uses the least amount of ink, has the lowest resolution and prints the fastest. It is equivalent to 300 dpi (dots per inch). •...
- Page 60 At the top of every page in the Properties window, you will notice a selection for Print Task Quick Sets. This feature allows you to select, edit, add, and save tasks that you plan to reuse.
-
Page 61: Finishing Tab
The Quick Set menu list contains some standard tasks to select from. To save a new task; type a new Quick Set name into the box, then press the Save button. To modify an existing task; make the desired changes to the properties, then click on the Save button. -
Page 62: Effects Tab
Effects Tab The Effects tab gives you additional options for print size. You can use the Print document on option to specify a particular size of paper that you want to print on regardless of the size of the original document. The printer will reduce or enlarge the output to match the document. -
Page 63: Basics Tab
Basics Tab The Basics Tab allows you to select Orientation, Page order, Copies, and Print preview. Orientation should always be set to Portrait. Verify that the paper size (Paper/Quality, “Size is”) matches your media dimensions, according to the orientation that the media is being fed into the printer. Page order is used to select the print order of the job. - Page 64 The last option in this window is the Low memory mode. Checking this box will manage the memory in your computer to print a large job if you do not have enough computer memory. This box should be left unchecked unless you really need it.
-
Page 65: Color Tab
Color Tab The Color tab helps you control the printer’s color output. If you wish to print in black only click on the Print in grayscale and select one of the three options that are available. The second option Print in sepia will print a sepia colored color image. You can not click on both the Print in grayscale and the Print in sepia boxes together. - Page 66 You can adjust Saturation, Brightness and Color tone. You can also adjust the individual colors with this window. This is very useful when printing color photos.
-
Page 67: Service Tab
Service Tab The Services tab allows you to perform maintenance and check functions on the printer. Clicking on the Print a Test Page button will print a sample page on the printer. - Page 68 Clicking on the Print a Diagnostic Page button will print a nozzle test pattern.
- Page 69 This image can be used to visually verify the condition of the ink cartridges. If all nozzles are firing, there will be no voids in the grid patter lines. If you see voids in the nozzle test image; use the “Clean the Print Cartridge” button, described on the next page, to try to clear the nozzles.
- Page 70 Clicking on the Intermediate Clean button will present the screen. Clicking on the Prime button will take you to the next level of cleaning if necessary. When the cartridges are clean click on the Done button to exit this routine.
- Page 71 The Display Ink Level button will show you an approximation of the amount of ink remaining in the cartridges.
- Page 72 Click OK to exit this function. The following message may be briefly displayed before the “Estimated Ink Level” window opens. “The computer is unable to establish twoway communication with the device”. If this message appears for more than 30 seconds then you may need to reboot your computer and cycle printer power to re-establish a two-way connection.
- Page 73 Clicking on the Print Cartridge Ordering Information button will display a window with the message “Please see user documentation”. Please contact your local Neopost Dealer to order supplies. The Calibrate the Device button is used to automatically calibrate the relationship between the black and color cartridges, to make sure they line up with each other.
- Page 74 The Calibrate Color button has no function. Pressing it will return an error message.
-
Page 75: Maintenance
Maintenance This section covers how to care for the ink cartridges, clear paper jams, replace the sheet separators, and perform routing maintenance on the printer. The Inkjet Cartridge ............73 Replacing the Inkjet Cartridge ..............73 Replacing the Sheet Separators ........75 Replacing the Sheet Separators ..............75 Cleaning ................76... -
Page 77: The Inkjet Cartridge
The Inkjet Cartridge The inkjet cartridges must be replaced when out of ink, when print quality is poor, or when the built in cleaning has not helped the image quality. The Approximate life of the Black number C6656 inkjet cartridges based on three lines of 20 characters at 10-point size per address is 20,000 addresses in the Fast Draft mode. - Page 78 Storing Inkjet Cartridges Since the printer has a built-in, automatic, print cartridge cleaning and sealing mechanism, there is normally no need to remove print cartridges from the printer to store them; unless you are swapping a black cartridge for a photo cartridge, or you plan to print using the "Ink-backup mode".
-
Page 79: Replacing The Sheet Separators
Replacing the Sheet Separators The sheet separators insure separation of the pieces as they are being fed. They do wear and must be replaced from time to time. If you experience double sheet feeding and can not adjust the separators to prevent it, the sheet separators should be replaced. -
Page 80: Cleaning
Cleaning The Printer DANGER: THE PRINTER IS A PRECISION MACHINE THAT SHOULD BE CLEANED REGULARLY TO INSURE MANY YEARS OF SERVICE. BEFORE PERFORMING ANY MAINTENANCE DISCONNECT THE MACHINE FROM ITS POWER SOURCE! NEVER SPRAY OR POUR CLEANERS DIRECTLY ON OR INTO THE PRINTER. - Page 81 Feed Rollers and Forwarding Rollers Unplug the printer from the power receptacle before cleaning. The feed and forwarding rollers can become glazed with paper lint and ink from the media. They should be regularly cleaned with a mild abrasive household cleaner on a damp cloth. Avoid using solvents on the rubber rollers.
-
Page 83: Troubleshooting Guide
Troubleshooting Guide The following trouble shooting guides are provided to assist you in solving any problems that might occur with the Printer. We have tried to make them as complete as possible. The best advice we can offer is to make sure that the system is setup properly, plugged in, that it has an adequate supply of ink before attempting to trouble shoot any problem. -
Page 85: Hp Inkjet Print Cartridges
HP Inkjet Print Cartridges CONDITION PROBLEM SOLUTION Lint or paper dust on Replace the ink cartridge Black streaks in text printhead. Cartridge will not print Sheet is blank even after it Check to make sure the has gone underneath tape is off the printhead. cartridge(s). -
Page 86: The Printer
The Printer CONDITION PROBLEM SOLUTION Extra lines; losing data Database problem. Check data. Interference or bad data Check cable/connection cable connection. Improper output (printing Wrong driver selected. Check driver selection. strange characters, Wrong interface settings Check software or data base missing information) Static electricity on PC. - Page 87 Feeding problems Double sheets. Adjust the sheet separator. Miss feeds. Paper Misfeeds Paper LED flashes Add paper or readjust sheet (Hesitation in paper feed separation. Then press the or out of paper.) Paper button to feed the paper into position for printing.
-
Page 88: Correcting Paper Feeding Issues
Correcting Paper Feeding Issues Removing Jammed Media If a jam occurs, STOP the Printer. You can do this by lifting up the front cover. Some possible reasons for jamming are: Feeding more than one piece of media. Check separation adjustment. Damaged media, such a dog-eared (turn-up or turned-down corners). - Page 89 Misfeeds (Hesitations in Paper Feed or Out of Paper) Misfeeds can cause the printer to stop and the Red light on the Paper key will blink (indicating an out of paper condition). Add more paper. Press the Paper key to feed the media.
-
Page 90: Led Status Indicators
LED Status Indicators Printer LEDs The buttons and LEDs are shown below. The LEDs on the printer indicate the status of the printer. PAPER Button and LED CANCEL Button and LED Soft Power Button and LED... - Page 91 LED Status Indicators LED Status Possible Cause Possible Solution Soft Power LED is on Printer is powered on. Waiting for data. Send your steady. print job. Soft Power LED is flashing Printer is The LED will stop flashing receiving/processing data. when the printer has received processed all the print data.
- Page 92 PAPER LED is flashing and Paper stall or problem with Turn off the printer and Soft Power LED is off the printer disconnect the power cable and other printer cables. Re-connect the power directly to a wall outlet (without a power strip or surge protector) and other printer cables.
- Page 93 Open the top cover on the printer. Remove the ink cartridges, then close the cartridge flaps after removing the ink cartridges. Close the top cover on the printer. Turn the printer off, then on again, using the Soft Power button. Open the top cover on the printer.
- Page 94 CANCEL LED is on steady Print cartridge might be low If one of the cartridges on ink. is low on ink, replace If neither cartridge is low, press the PAPER button. If the LED remains on, turn the printer off and on using the Soft Power button.
- Page 95 Open the top cover on the printer. Remove one cartridge and close the top cover. If the CANCEL LED goes off, the bad cartridge has been removed. If the CANCEL LED continues to flash, open the top cover, remove the other cartridge and reinstall the first one.
- Page 96 Paper mismatch: The paper Do one of the following: width does not match the Press the PAPER paper size in the driver button. setting Set the paper size in the driver to match the paper size being used in the printer.
-
Page 97: Appendix
Appendix Machine Specifications .............95 Envelope Feed Setup ............97 Installing The Envelope Feed ..............98 Supplies, Service and Support ........100... -
Page 99: Machine Specifications
Machine Specifications PRINT Thermal Inkjet, C6656 Black and C6657 Full Color Cartridges TECHNOLOGY ADDRESS Up to 4,300 /hour at 300 dpi Fast Draft Quality SPEED Up to 2,600 /hour at 600 dpi Normal Quality (Max Speeds) (3 Lines, black cartridge only, on a DL Envelope or Postcard) PRINT QUALITY Description Dots Per Inch... - Page 100 All Specifications Subject To Change Without Notice...
-
Page 101: Envelope Feed Setup
Envelope Feed Setup These instructions and additional feeding devices are designed to improve the feeding of envelopes, by providing better support to the envelopes at the point of feed. Additional Feeding Devices: • Two “weights” (one for small and one for DL envelopes). •... -
Page 102: Installing The Envelope Feed
Installing The Envelope Feed Slide the adjustable side guide approximately 25 cm (10 inches) away from the stationary side guide; to provide room for the “wide, rear paper guide”. Remove the “standard” rear paper guide. Set this guide aside. It will be used when feeding media narrower than 17 cm (7-1/2 inches). - Page 103 Adjust the rear paper support so that it is centered on the stack of envelopes and the height of the rear paper support is set to its middle position. Adjust the “wide, rear paper guide” so the first envelope is at the bend in the guide. Load envelopes to the top of the side guides and then place the appropriate weight on top of the pile.
-
Page 104: Supplies, Service And Support
Supplies, Service and Support Supplies and Optional Hardware The following supply items and optional hardware are available from authorized Neopost dealers and branches. Supplies Black Inkjet Cartridge (C6656) Color Cartridge (C6657) Optional Hardware: Conveyor /Stacker Available Obtaining Supplies, Service and Support Please contact your local Neopost representative to obtain supplies, service and support for your printer. - Page 105 Index Account 44, 52 Received 87 Rollers 3, 6, 77 Base 82 Side Guide 4, 6, 82 Stacker 95, 100 Can 41, 44, 52, 58, 59, 61, 63, 73, 74, Standard 44, 76 75, 76, 79, 84, 85, 97 Cartridge 6, 41, 63, 74, 81, 82, 87, 95, Task 52 Cover 3, 87 Text 81, 82...
Need help?
Do you have a question about the AS-520C and is the answer not in the manual?
Questions and answers