Table of Contents
Advertisement
Quick Links
Advertisement
Table of Contents

Related Manuals for Vents Fan


Summary of Contents for Vents Fan
- Page 1 Operation Manual 2012...
- Page 2 ð. 16 Figures - external view and dimensions ð. 21 Figures - installation options ð. 23 Figures - fan mounting options relative to walls and ceiling ð. 24 Figures - installation sequence ð. 29 Figures - power mains connection ð. 30 Schematic diagrams of fan connection to power mains ð.
- Page 3 Prior to installation check for visible damage of the impeller, casing, grill and make sure there are no foreign objects in the fan casing which may damage the impeller blades. The product may only be used as intended. No modifications or alterations are allowed.
- Page 4 * - with the outlet on top ÕÕÕ - KV, KP or KVK. Sample designation: VN-1 A 80 H - High Pressure Fan with a plastic front panel, air flow rate 35/60 m /h, outlet diameter 80 mm, equipped with a humidity sensor.
- Page 5 VNV-1 80 ÊP/ ÊP 80/ VNV-1 80 PACKAGE VN-1 80 Ê VNV-1 80 KVK KVK 80 Fan System (complete), pcs Fan Assembly, pcs Casing, pcs. Set of Fasteners, pcs. Mounting Bracket, pcs. Protective fiberboard plate, pcs. Plastic screwdriver, pcs (only for timer-equipped models) Operation Manual, pcs Packing Box, pcs.
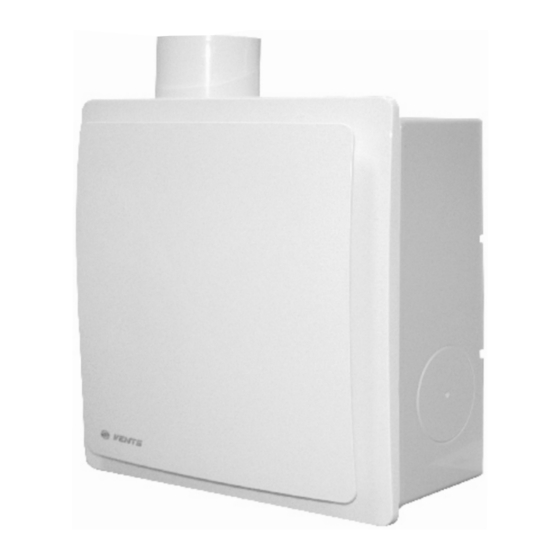
- Page 6 PURPOSE spaces heated in the winter season. The fan can be mounted on the ceiling or on a wall with the air exhaust directed into a ventilation shaft or a round duct of suitable diameter. Each fan model is designed for a specific installation type: VENTS VN 80 (Ê) / VENTS VN-1 80 (Ê) - wall surface mounting;...
- Page 7 Depending on the connection pattern the fan remains off or constantly operates at speed 1. Following activation with an external switch and on elapsing of the timer delay which can be set within the range from 0 to 150 seconds the fan switches to speed 2.
- Page 8 When the lights are switched on the fan switches to the maximum speed in 50 seconds. When the lights are switched off the fan continues at speed 2 for a period from 2 to 3 minutes and then revert to the initial state.
- Page 9 The fan can be mounted on the ceiling or on a wall with the air exhaust directed into a INSTALLATION ventilation shaft or a round duct of suitable diameter. AND SETUP Examples of fan installations are given on Fig. 12-22.
- Page 10 4.4. Perform operations 2.2-2.4 in the reverse order. Fans VN-1 80 KV, VN-1 80 KK and VN-1 80 KP contain fan assembly VN-1 80 and fan casing KV 80, KK 80 and KP 80, respectively. These fans are installed in two stages - i.e. the casing installation is followed by the final assembly: The casing is installed at the structural works stage.
- Page 11 The grill design allows its adjustment relative to the casing while mounting the fan to compensate for any misalignment (Fig. 62). If KV 80, KVK 80 or KP 80 casings and VNV-1 80 fan assembly are supplied separately the fan disassembly during installation is not required.
- Page 12 Prior to mounting the fan check the position of back valve 2 which should close under ATTENTION its own weight at zero air pressure (Fig. 63). By default the back valve position matches the outlet fitting orientation to the right or upwards.
- Page 13 Rotate the scroll 180° to access the turbine and remove the dust using a soft brush or compressed air stream (Fig. 74); Re-assemble the fan in the reverse order and connect it to the power mains (Fig. 75). TRANSPORTATION The unit can be carried in the original packing by any mode of transport without limitation.
- Page 14 The manufacturer hereby warrants normal operation (service life) of the fan over the period of 60 months from the retail sale date provided observance of the transportation, storage, installation and operation regulations. Should any malfunctions occur in the fan operation through the Manufacturer's fault during the guaranteed period of operation (service life) the user is entitled to elimination of faults by means of warranty service offered free of charge.
- Page 15 Connection to the power mains with voltage in excess of the figures given in the User's Operation Manual; Voltage surges in the power mains resulting in product failure; Product repair by the user; Product repair by a third party without Manufacturer's permission; Expiration of the product warranty term (service life);...
- Page 16 VN 80 VN-1 80...
- Page 17 VN 80 Ê VN-1 80 Ê...
- Page 18 VNV-1 80 KV VNV-1 80 KP...
- Page 19 VNV-1 80 KVK VNV-1 80...
- Page 20 KP 80 KV 80 KVK 80...
- Page 21 INSTALLATION EXAMPLES VN 80, VN-1 80 VN 80 Ê, VN-1 80 Ê...
- Page 22 INSTALLATION EXAMPLES VNV-1 80 KV, VNV-1 80 KVK INSTALLATION EXAMPLES VNV-1 80 KP...
- Page 23 INSTALLATION EXAMPLES FOR FANS WITH SUPPLEMENTARY INLET FITTING VN 80, VN-1 80 VN 80, VN-1 80 FAN MOUNTING VN 80 Ê, VN-1 80 Ê VN 80 Ê, VN-1 80 Ê EXAMPLES RELATIVE TO WALLS AND CEILING VN 80, VN-1 80 VN 80, VN-1 80 VN 80 Ê, VN-1 80 Ê...
- Page 24 VN-1 80 INSTALLATION PROCEDURE...
- Page 25 VN-80 INSTALLATION PROCEDURE VN-1 80 K INSTALLATION PROCEDURE...
- Page 27 VNV-1 80 KV VNV-1 80 KVK VNV-1 80 KP INSTALLATION PROCEDURE...
- Page 28 PROTECTIVE FIBERBOARD PLATE...
- Page 29 ELECTRICAL MAINS CONNECTION...
- Page 30 Sample schematic of basic three-speed fan model connection - basic modification and FAN CONNECTION modification C. TO POWER MAINS SCHEMATICS The fan is set to one of the three speeds The fan is set to one of the 3 speeds with...
- Page 31 Sample schematic of basic two-speed fan model connection - modifications A, B and D. S(SW) The fan is set to one of the 2 speeds as The fan is set to one of the 2 speeds with required with the help of external switch S the help of external switch S (e.g.
- Page 32 Sample schematic of basic two-speed fan model connection - modifications A, B and D. CONTINUED. The fan constantly remains on operating at speed 1 or speed 2. The speed is selected with the help of switch SW. A - Fan...
- Page 33 Sample schematic of basic two-speed fan model connection (modifications A, B and D) with a timer (T), adjustable timer (TR) or interval switch (I). SÂ With a timer (Ò) or adjustable timer (TR): If supplied with Ò and TR options the fan is constantly on operating at speed 1 with SB switch closed or constantly off with the switch open.
- Page 34 Sample schematic of basic two-speed fan model connection (modifications A, B and D) with photoelectronic sensors (F). SÂ The fan initial state is off. The fan constantly operates at speed 1 with On switching the lights on the switch SB closed or remains off with the photoelectric sensor sets the fan to switch open.
- Page 35 Sample schematic of basic two-speed fan model connection (modifications A, B and D) with a humidity sensor (H). SÂ The fan constantly operates at speed 1. The fan operates at speed 1 with switch As the relative humidity on the premises...
- Page 36 Sample schematic of basic two-speed fan model connection (modifications A, B and D) with a humidity sensor (H). CONTINUED. SÂ The fan initial state is off. The fan constantly operates at speed 1 if As the relative humidity on the premises...
- Page 37 MAINTENANCE...
- Page 38 TIMER AND HUMIDITY SENSOR ADJUSTMENT Modification TR (Fig. 76): Ò1 - turn-on delay time can be set from 0 to 150 seconds; Ò - turn-off delay can be set from 2 to 30 minutes. Modification I (Fig. 77): Ò - interval timer can be set within the range from 30 minutes to 15 hours. Modification F (Fig.
- Page 39 The MANUFACTURER shall not be liable for any damage resulting from any misuse of ATTENTION or gross mechanic interference with the fan. The fan owner must follow the applicable instructions. ACCEPTANCE CERTIFICATE Plastic casing KV 80 _______________________ Fire-preventing casing KP 80...
- Page 40 WARRANTY CARD V22EN-06...
Need help?
Do you have a question about the Fan and is the answer not in the manual?
Questions and answers