Table of Contents
Advertisement
Quick Links
Advertisement
Table of Contents

Subscribe to Our Youtube Channel
Related Manuals for Quick MILL Super Automatic Espresso Machine


Summary of Contents for Quick MILL Super Automatic Espresso Machine
- Page 1 Super Automatic Espresso Machine Owner’s Manual...
- Page 2 Super Automatic We would like to thank you for purchasing one of our products. Before using the machine we suggest you carefully read this manual to obtain the necessary information for correct use and servicing of the product. If you have any questions please feel free to contact us.
- Page 3 Super Automatic FIGURE 1 FIGURE 2 FIGURE 3 14 (Key1) 15 (Key2) 16 (Key3) 18 (Key5) 17 (Key4) 19 (Key6) INDEX...
- Page 4 Super Automatic Symbols………………………………………………………………..………………...page 2 Important safeguards……………………………………………………...………..page 4 Description……….………………………………………………….………..………...page 5 3.1. Characteristics…….…………………………………………………..………page 5 3.2. Safety……………….…………………………………………………..……….page 5 3.3. Vibrations……………………………………………………………………….page 5 Technical specification……………………………………………………….....page 5 Legend……………………………………………………………………………..…..page 5 Intended use……………………………………………………………..………..page 5 Transport………………………………………………………………………..…………page 5 Installation……………………………………….……………………………..…………page 6 8.1. Installation……………………………………………………………..………page 6 8.2. Description of controls……..……………………………………...………..page 6 Operation……………………………………………………………………..……….page 6 9.1.
-
Page 5: Important Safeguards
Super Automatic 2. IMPORTANT SAFEGUARDS The warning triangle identifies all explanations important for personal safety. Packing materials (plastic bags, expanded polystyrene, nails, boxes etc.) are a potential hazard and must not Follow these instructions to avoid accidents! be left within reach of children. Before plugging in the machine ensure that the mains Numbers and letters refer to illustrations voltage is 110Volts/15Amp. -
Page 6: Intended Use
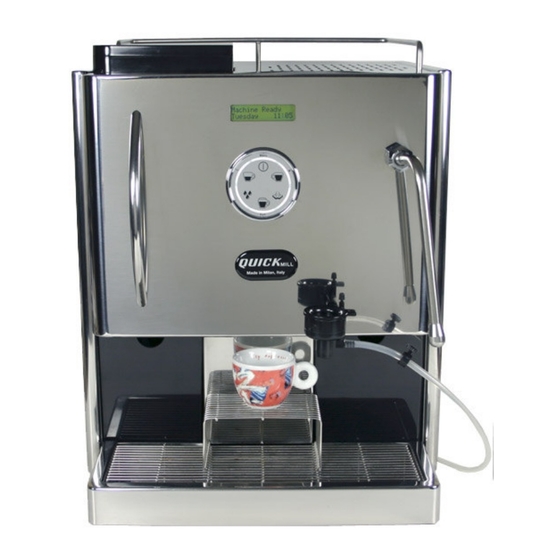
Super Automatic 15 Espresso coffee dispenser button/- (key 2) 3. DESCRIPTION 16 Diluted “long” coffee dispenser button/+ (key 3) 17 Hot water dispenser button (key 4) 3.1 Characteristcs 18 Steam dispenser button (key 5) The machine consists of an automatic group to dispense 19 Cappuccino dispenser/exit button (key 6) coffee;... -
Page 7: Installation
Super Automatic Press the key once for one coffee dispensing cycle, Check the condition of the machine, the accessories, the power cord and the plug, and in the event of press twice for two cycles. During exploration of the damage notify the retailer immediately. menu it serves to navigate and to increase a parameter. -
Page 8: Maintenance
Super Automatic 9.2 Grind adjustment FIGURE 5 The degree of coffee grind is set when the machine is tested, but it can be changed to suit requirements by turning the knob clockwise for a finer grind “–“, or anti- clockwise for a coarser grind “+” (figure 4). To adjust the quantity of coffee ground, follow the instructions at point 13. -
Page 9: Troubleshooting Guide
Super Automatic 11. TAKING OUT OF SERVICE C) Does not dispense hot water or steam: The machine has not reached operating temperature. The water level in the boiler has not been topped up; 11.1. Temporarily switch machine off and on again. Run a cleaning cycle for the coffee group Nozzles blocked;... -
Page 10: Menu Settings
Super Automatic 13. MENU SETTINGS This section contains all the items in the menu with a description of the relative functions. To access the menu press key 1 “Enter” To navigate the menu press keys 2 “-” or 3 “+” To access a sub-menu press key 1 “Enter”... - Page 11 Super Automatic Enables the descaling alarm to be set. The water being used should be Water hardness analysed before a value is set. Enables the degree of hardness of the water supply to be set to activate the descaling alarm. To set the water hardness select the relative type of Off/average/ water used, press enter to confirm and then esc to exit.
Need help?
Do you have a question about the Super Automatic Espresso Machine and is the answer not in the manual?
Questions and answers