Table of Contents
Advertisement
Quick Links
Advertisement
Table of Contents

Related Manuals for ADJ COB CANNON LP200ST


Summary of Contents for ADJ COB CANNON LP200ST
- Page 1 COB CANNON LP200ST User Manual...
- Page 2 Products, LLC brands and product names are trademarks or registered trademarks of their respective companies. ADJ Products, LLC and all affiliated companies hereby disclaim any and all liabilities for property, equipment, building, and electrical damages, injuries to any persons, and direct or indirect economic...
-
Page 3: Table Of Contents
TABLE OF CONTENTS Introduction Limited Warranty (USA Only) Warranty Registration | Features Safety Guidelines Overview Installation Accessory Installation Remote Device Management (RDM) Control Panel System Menu DMX Setup DMX Traits Color Temperature Presets Color Macros Chart Dim Modes Remote Control Guidelines Daisy Chain Power Linking | Cleaning and Maintenance Dimensional Drawings Specifications... -
Page 4: Introduction
INTRODUCTION Unpacking: Thank you for purchasing the COB Cannon LP200ST by ADJ Products, LLC. Every device has been thoroughly tested and has been shipped in perfect operating condition. Carefully check the shipping carton for damage that may have occurred during shipping. If the carton appears to have been damaged, carefully inspect your fixture for any damage and be sure all accessories necessary to operate the unit have arrived intact. -
Page 5: Limited Warranty (Usa Only)
LIMITED WARRANTY (USA ONLY) A. ADJ Products, LLC hereby warrants, to the original purchaser, ADJ Products, LLC products to be free of manufacturing defects in material and workmanship for a prescribed period from the date of purchase (see specific warranty period on reverse). This warranty shall be valid only if the product is purchased within the United States of America, including possessions and territories. -
Page 6: Warranty Registration | Features
WARRANTY REGISTRATION The COB Cannon LP200ST carries a 2 year limited warranty. Please fill out the enclosed warranty card to validate your purchase. All returned service items, whether under warranty or not, must be freight pre-paid and accompanied by a return authorization (R.A.) number. The R.A. number must be clearly written on the outside of the return package. -
Page 7: Safety Guidelines
THIS FIXTURE IS COMPOSED OF SOPHISTICATED ELECTRONIC COMPONENTS. TO GUARANTEE SMOOTH OPERATION, IT IS IMPORTANT TO FOLLOW ALL INSTRUCTIONS AND GUIDELINES IN THIS MANUAL. ADJ PRODUCTS, LLC IS NOT RESPONSIBLE FOR INJURY AND/OR DAMAGES RESULTING FROM THE MISUSE OF THIS FIXTURE DUE TO THE DISREGARD OF THE INFORMATION PRINTED IN THIS MANUAL. -
Page 8: Overview
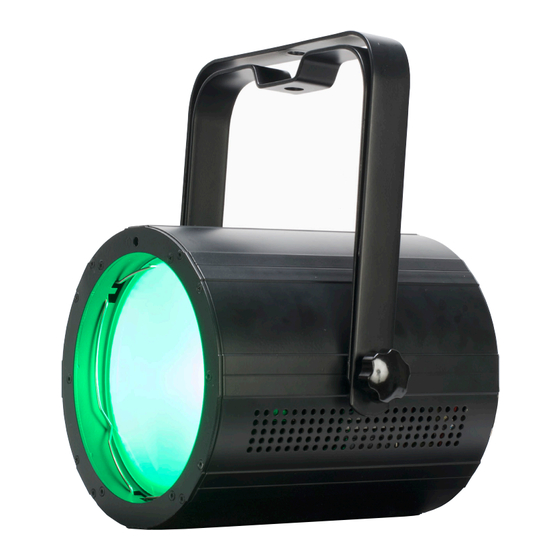
OVERVIEW Display Screen Bracket Setup Button Adjustment Button Down Knob Button Mode Button 3-pin DMX Out Power Power Fuse 3-pin Service DMX In Port 5-pin 5-pin DMX In DMX Out Mounting Mounting Clamp Bracket Attachment Point... -
Page 9: Installation
INSTALLATION FLAMMABLE MATERIAL WARNING Keep fixture minimum 5.0 feet (1.5m) away from flammable materials and/or pyrotech- nics. ELECTRICAL CONNECTIONS A qualified electrician should be used for all electrical connections and/or installations. MINIMUM DISTANCE TO OBJECTS/SURFACES IS 6.6 FEET (2 METERS). MINIMUM DISTANCE OF FLAMMABLE MATERIALS FROM THE SURFACE IS 1.6 FEET (0.5 METER) DO NOT INSTALL THE FIXTURE IF YOU ARE NOT QUALIFIED TO DO SO! - Page 10 INSTALLATION CLAMP INSTALLATION This fixture features an attachment point for a mounting clamp located at the top the mounting bracket (see the illustration below). When mounting the fixture to a truss or any other suspended or overhead installation, be sure to secure an appropriately rated clamp (not included) to the mounting bracket.
- Page 11 INSTALLATION STAND MOUNTING This unit can also be installed atop a tripod stand. Simply insert the threaded bolt on the top of the tripod stand through the hole in the top of the mounting yoke. Tighten the nut onto the threaded bolt to secure the mounted device in place.
- Page 12 LEDs. This issue is not unique to ADJ lighting fixtures, but rather it is a common issue with lighting fixtures from all manufacturers. Although there is no true way to completely prevent this issue from occur- ring, the guidelines below can reduce the risk of any potential damage if followed.
-
Page 13: Accessory Installation
ACCESSORY INSTALLATION 40- AND 50-DEGREE LENSES, FROST FILTER Included with this unit are additional 40- and 50-degree lenses, as well as a frost filter. To install these accessories, simply remove the lens retainer ring located inside the lens housing, as shown in the below left image. -
Page 14: Remote Device Management (Rdm)
REMOTE DEVICE MANAGEMENT (RDM) NOTE: In order for RDM to work properly, RDM enabled equipment must be used throughout the entire system, including DMX data splitters and wireless systems. Remote Device Management (RDM) is a protocol that sits on top of the DMX512 data standard for lighting, allowing the DMX systems of the fixtures to be modified and monitored remotely. -
Page 15: Control Panel
CONTROL PANEL The fixture includes an easy to navigate system menu control panel display where all necessary set- tings and adjustments are made. (See image below) • MODE: Cycles through the main menu options and/or return to previous menu without making changes. -
Page 16: System Menu
SYSTEM MENU 001 - 512 Address Set DMX address 8ch-A 8ch-B 10ch-A Ch. Mode Select DMX mode 10ch-B 12ch 13ch 16ch DMX SET 20ch Holds last used DMX setup Hold in the event that DMX signal is lost Takes all DMX channels to 0 Blackout in the event that DMX signal is lost... - Page 17 SYSTEM MENU 1 - 10 Save Dlay Lock Off, 30s - 10min Display flipped Display Rotate Display Display in normal orientation Display automatically rotates Auto to keep readout upright 000 - 255 Green 000 - 255 PERSONALITY (continued) Blue Calibrat 000 - 255 Amber Service...
- Page 18 SYSTEM MENU Speed 000 - 255 Prog 0 Fade 000 - 255 On / Off Sound 000 - 255 Speed 000 - 255 Prog 1 Fade 000 - 255 INT PROGS On / Off Sound 000 - 255 Speed 000 - 255 Prog 13 Fade 000 - 255...
-
Page 19: Dmx Setup
DMX address of 1, the DMX controller knows to send DATA assigned to address 1 to that unit, no matter where it is located in the DMX chain. Data Cable (DMX Cable) Requirements (For DMX Operation):The COB Cannon LP200ST can be controlled via DMX-512 protocol, and features multiple DMX channel modes. Your unit and your DMX controller can operate with either a 3-pin or 5-pin XLR connector for data input and data out- put. - Page 20 DMX SETUP DMX ADDRESSING All fixtures should be given a DMX starting address when operating with a DMX controller, in order to ensure that the correct fixture responds to the correct control signal. This digital starting address is the channel number from which the fixture starts to “listen” to the digital control signal sent out from the DMX controller.
-
Page 21: Dmx Traits
DMX TRAITS CHANNEL FUNCTION 10CH 10CH VALUE 12CH 13CH 16CH 20CH 000 - 255 Red, 0% to 100% 000 - 255 Red Fine 000 - 255 Green, 0% to 100% 000 - 255 Green Fine 000 - 255 Blue, 0% to 100% 000 - 255 Blue Fine 000 - 255 Amber, 0% to 100% 000 - 255 Amber Fine... - Page 22 DMX TRAITS CHANNEL FUNCTION 10CH 10CH VALUES 12CH 13CH 16CH 20CH Auto Programs (continued) 077 - 093 Auto Program 5 094 - 110 Auto Program 6 111 - 126 Auto Program 7 127 - 143 Auto Program 8 144 - 160 Auto Program 9 161 - 176 Auto Program 10 177 - 193 Auto Program 11 194 - 210 Auto Program 12...
- Page 23 DMX TRAITS CHANNEL FUNCTION 10CH 10CH VALUES 12CH 13CH 16CH 20CH Dim Speed (continued) 2.0s 3.0s 4.0s 5.0s 6.0s 7.0s 8.0s 9.0s 10.0s 161 - 255 Default to unit setting Dim Curves 000 - 020 Square 021 - 040 Linear 041 - 060 Inv.
-
Page 24: Color Temperature Presets
COLOR TEMPERATURE PRESETS COLOR TEMP DMX VALUE 000 - 015 2300K 016 - 031 2600K 032 - 047 2800K 048 - 063 3100K 064 - 079 3400K 080 - 095 3800K 096 - 111 4100K 112 - 127 4500K 128 - 143 4900K 144 - 159 5500K... -
Page 25: Color Macros Chart
COLOR MACROS CHART COLOR MACRO DMX VALUE COLOR TEMP GREEN BLUE AMBER LIME Macro 1 001 - 004 Macro 2 005 - 008 Macro 3 009 - 012 Macro 4 013 - 016 Macro 5 017 - 020 Macro 6 021 - 024 Macro 7 025 - 028... - Page 26 COLOR MACROS CHART MACRO COLOR DMX VALUE COLOR TEMP GREEN BLUE AMBER LIME Macro 37 145 - 148 Macro 38 149 - 152 Macro 39 153 - 156 Macro 40 157 - 160 Macro 41 161 - 164 Macro 42 165 - 168 Macro 43 169 - 172...
-
Page 27: Dim Modes
DIM MODES... -
Page 28: Remote Control Guidelines
REMOTE USAGE This device can be operated wirelessly using the ADJ UC IR remote unit. In order to control the device, the IR Remote setting in the system menu’s Personality sub-menu must be set to the “On”... - Page 29 REMOTE CONTROL GUIDELINES REMOTE FUNCTIONS The functions available on the ADJ UC IR remote unit are detailed below: • Standby - Press once to black out the fixture, and press again to return the fixture to the original state. • Full On - Press to fully illuminate the device.
-
Page 30: Daisy Chain Power Linking | Cleaning And Maintenance
Regular inspections are recommended to ensure proper function and extended life. There are no user serviceable parts inside this fixture. Please refer all other service issues to an authorized ADJ service technician. Should you need any spare parts, please order genuine parts from your local ADJ dealer. -
Page 31: Dimensional Drawings
DIMENSIONAL DRAWINGS... -
Page 32: Specifications
• Built-in color temperature presets accessible via DMX • 64 built-in color macros • 4-button OLED display on rear panel • Compatible with the ADJ UC IR remote control (included) • LED pulse and strobe effect • Electronic Dimming: 0 - 100% •...
Need help?
Do you have a question about the COB CANNON LP200ST and is the answer not in the manual?
Questions and answers