Table of Contents
Advertisement
Available languages
Available languages
Benefits You Can Depend On
• Ultra quiet operation for your everyday living
• Safe for you and your family
Peace of mind with automatic high temperature
shutoff feature
• 2 sets of heating elements with smart grill design
provide consistent, comfortable warmth
• Common sense components designed with you in
mind
1. NO sharp edges
2. Corrosion resistant
3. Easy to install wall can
• Your Cadet heater has been thoroughly tested
and is guaranteed with a 2 year extended
warranty
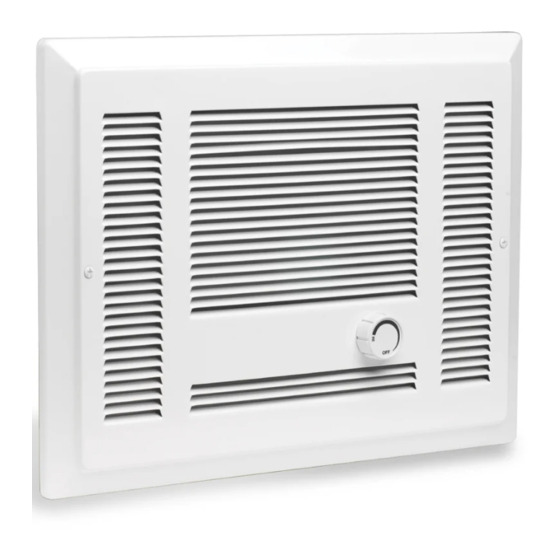
Side
Grill Front
/
"
16¾"
13
16
2.06
42.54
Wall Can Bottom
14½"
36.83
4"
10.16
www.cadetheat.com
Wall Can Side
/
12
"
7
11
/
"
1
8
8
32.7
28.26
3"
7.62
7
/
"
8
2.22
SAVE THESE INSTRUCTIONS
Tel: 360-693-2505
Owner's Guide
http://www.cadetheat.com/products/wall-heaters/SL
Line
Model w/
Voltage
Thermostat
SL101T
120
SL151T
SL152T
SL192T
(2)
240
SL252T
SL302T
(1) Standard built-in thermostat is double pole and provides "OFF" position.
(2) 240 volt models can be used at 208 volts. Wattage equals 75% of 240v rated
wattage.
New installation requires wall can (sold separately): Model Numbers WC1
Recess Mount or SLCS Surface Mount.
Wall Thermostat Not Required
Reset
Button
10"
25.4
TOOLS REQUIRED:
• Phillips Screwdriver
• Straight Screwdriver
• Wire Strippers
PO Box 1675 Vancouver, WA
SL Heater
SL Models
Watts
(1)
1000
1500
1500/1125
1900/1425
2500/1875
3000/2250
SL with Thermostat
Built-in Thermostat
• Utility Knife
• (4) 1 1/2" Wood Screws
• Insulated Wire Connectors
• (1) Strain Relief Connector
98668-1675
Amps
8.33
12.50
6.25/5.41
7.92/6.74
10.42/9.01
12.5/10.82
Rating Label
Page 1
Advertisement
Table of Contents

Related Manuals for Cadet SL101T


Summary of Contents for Cadet SL101T
- Page 1 (2) 240 volt models can be used at 208 volts. Wattage equals 75% of 240v rated 3. Easy to install wall can wattage. • Your Cadet heater has been thoroughly tested New installation requires wall can (sold separately): Model Numbers WC1 Recess Mount or SLCS Surface Mount.
-
Page 2: Important Instructions
IMPORTANT INSTRUCTIONS WARNING When using electrical appliances, basic precautions should always be followed to reduce the risk of fire, electric shock, and injury to persons, including the following: WARNING 1. Read all instructions before installing or using this heater. Risk of Electrical Shock. Do not insert or allow foreign objects to enter any ventilation or exhaust WARNING opening as this may cause an electric shock or... -
Page 3: Installation Instructions
Cut a hole 14 5/8 inches wide by 10 inches high next to a wall stud. REQUIRED MINIMUM distance of 6 inches from adjacent es and 6 inches from the floor (See Figure 4). However, Cadet surfaces and 6 inches from the floor (See Figure 4). However, Ca-... - Page 4 INSTALLATION INSTRUCTIONS (continued) __________________________ __________________________ Part One How do I install for new construction? How do I install in an existing wall? Route Supply Wires Mount Wall Can STEP 3 STEP 2 Route supply wire from circuit breaker to wall can. Remove a Insert wall can into opening.
- Page 5 8. These warranties give you specific legal rights, and you may any SL heater found to be defective within two years after the also have other rights which vary from state to state. Cadet nei- date of purchase. ther assumes, nor authorizes anyone to assume for it, any other...
-
Page 6: Maintaining Your Heater
3 feet for furniture or other objects placed directly in front of the heater. 3. Fan or motor is jammed. 3. Remove obstruction, and press heater manual reset button (see “Operating” section for instructions). 4. None of the above. 4. Replace heater assembly. Page 6 ©2013 Cadet Printed in USA Rev 10/13 #720118... - Page 7 ‘OFF’. (2) Los modelos de 240 voltios pueden usarse a 208 voltios. El vatiaje es igual al • Su calentador Cadet ha sido completamente 75% de la potencia nominal de 240 v. probado y cuenta con una garantía extendida Nueva instalación requiere cámara de pared (se vende por separado): Númer-...
-
Page 8: Instrucciones Importantes
INSTRUCCIONES IMPORTANTES ADVERTENCIA Al utilizar artefactos eléctricos, siempre se deben adoptar precauciones básicas para reducir el riesgo de incendios, electrocución y lesiones personales, incluyendo lo siguiente: ADVERTENCIA 1. Lea todas las instrucciones antes de instalar o usar este calentador. Riesgo de electrocución. No introduzca ni permita que ingresen objetos en las aberturas ADVERTENCIA de la ventilación o escape, ya que ello puede... -
Page 9: Instrucciones Para La Instalación
QUERIDA es de 6 pulgadas desde las superficies adyacentes y 6 superficies adyacentes y 6 pulgadas desde el piso (consulte la pulgadas desde el piso (consulte la figura 4). Sin embargo, Cadet figura 4). Sin embargo, Cadet RECOMIENDA 12 pulgadas desde... - Page 10 INSTRUCCIONES PARA LA INSTALACIÓN (continuación) _________________________ _________________________ Parte Uno ¿Cómo se instala el calentador en paredes de ¿Cómo se instala el calentador en una pared construcciones nuevas? existente? Instalación de los cables de suministro Montaje de la cámara de pared PASO 2 PASO 3 Dirija el cable de suministro desde el cortacircuito a la cámara...
- Page 11 8. Estas garantías le otorgan derechos legales específicos y es posible todo calentador SL que se determine esté averiado en un plazo de dos que usted tenga otros derechos que varíen de un estado a otro. Cadet años a partir de la fecha de compra.
- Page 12 3. Retire la obstrucción y oprima el botón de reglaje manual del calentador (vea las instrucciones trabado. en la sección “Operación del Calentador”). 4. Ninguna de las anteriores. 4. Reemplace el conjunto del calentador. Página 12 ©2013 Cadet Impreso en EE UU Rev 10/13 #720118...
Need help?
Do you have a question about the SL101T and is the answer not in the manual?
Questions and answers