Table of Contents
Advertisement
Quick Links
Download this manual
See also:
Service Manual
Advertisement
Table of Contents

Related Manuals for Sun Microsystems Sun Blade 100


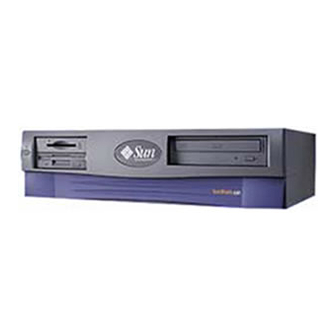
Summary of Contents for Sun Microsystems Sun Blade 100
- Page 1 Sun Blade 100 CD-ROM or ™ DVD-ROM and Hard Disk Drive Installation Guide Sun Microsystems, Inc. 4150 Network Circle Santa Clara, CA 95054 U.S.A. 650-960-1300 Part No. 806-6637-12 January 2002, Revision A Send comments about this document to: docfeedback@sun.com...
- Page 2 être reproduite sous aucune forme, par quelque moyen que ce soit, sans l’autorisation préalable et écrite de Sun et de ses bailleurs de licence, s’il y en a. Le logiciel détenu par des tiers, et qui comprend la technologie relative aux polices de caractères, est protégé...
-
Page 3: Table Of Contents
Contents Sun Blade 100 CD-ROM or DVD-ROM and Hard Disk Drive Installation 1 Preparing for Installation 2 Powering Off the System 2 Removing the System Cover 4 Attaching an Antistatic Wrist Strap 4 CD-ROM or DVD-ROM Drive 5 Removing a CD-ROM or DVD-ROM Drive 5... - Page 4 Inserting a CD Into the Drive 15 Ejecting a CD 16 Cleaning a CD 16 Handling and Storing CDs 16 Sun Blade 100 CD-ROM or DVD-ROM and Hard Disk Drive Installation Guide • January 2002...
-
Page 5: Sun Blade 100 Cd-Rom Or Dvd-Rom And Hard Disk Drive Installation
CD-ROM drive, DVD-ROM drive, and hard drives in the Sun Blade 100 system. For more detail, refer to the Sun Blade 100 Service Manual, part number 806-3416, on the Sun Blade 100 Hardware Documentation CD or... -
Page 6: Preparing For Installation
3. Verify that the power-indicator LED on the power switch turns off. 4. Turn off power to the monitor and to all external devices. Sun Blade 100 CD-ROM or DVD-ROM and Hard Disk Drive Installation Guide • January 2002... - Page 7 Preparing for Component Installation FIGURE 1 Sun Blade 100 CD-ROM or DVD-ROM and Hard Disk Drive Installation...
-
Page 8: Removing The System Cover
2. Peel the liner from the copper foil at the opposite end of the wrist strap. 3. Attach the copper foil end of the wrist strap to the system chassis to provide ground for electrostatic discharge (see FIGURE 1 Sun Blade 100 CD-ROM or DVD-ROM and Hard Disk Drive Installation Guide • January 2002... -
Page 9: Cd-Rom Or Dvd-Rom Drive
3. Remove the following from the back of the CD-ROM or DVD-ROM drive (see FIGURE 2 CD-ROM or DVD-ROM drive IDE cable connector Power cable connector Removing and Replacing a CD-ROM or DVD-ROM Drive FIGURE 2 Sun Blade 100 CD-ROM or DVD-ROM and Hard Disk Drive Installation... -
Page 10: Replacing A Cd-Rom Or Dvd-Rom Drive
Removing a Primary Hard Drive 1. Power off the system, remove the system cover, and attach an antistatic wrist strap as described in “Preparing for Installation” on page 2. Sun Blade 100 CD-ROM or DVD-ROM and Hard Disk Drive Installation Guide • January 2002... - Page 11 3. Pull the hard drive tray ejection lever away from the chassis. CD/DVD-ROM CD/DVD-ROM drive power cable IDE cable connector IDE 1 Primary hard drive Removing and Replacing a Primary Hard Drive FIGURE 3 Sun Blade 100 CD-ROM or DVD-ROM and Hard Disk Drive Installation...
-
Page 12: Replacing The Hard Drive Tray Latch Clip
Note – It is easier to remove the left side of the clip first because it only has one tang on the left side. The right side of the clip has two tangs. Sun Blade 100 CD-ROM or DVD-ROM and Hard Disk Drive Installation Guide • January 2002... -
Page 13: Replacing A Primary Hard Drive
Note – Before you replace any hard drive, verify that the hard drive mode-select jumper is set to “CS,” “Enable Cable Select,” or “Cable Select.” 1. Position the hard drive into the hard drive tray (see FIGURE 3 Sun Blade 100 CD-ROM or DVD-ROM and Hard Disk Drive Installation... -
Page 14: Installing A Secondary Hard Drive
“Finishing Component Installation” on page 14. Installing a Secondary Hard Drive The secondary hard drive option for the Sun Blade 100 system mounts next to the primary hard drive on the hard drive tray (see ). The secondary IDE cable FIGURE 6 assembly is used with the secondary hard drive. - Page 15 Follow the instructions in “Replacing the Hard Drive Tray Latch Clip” on page 8. 7. Place the new secondary hard drive onto the hard drive tray. 8. Turn the tray upside down on an antistatic mat. Sun Blade 100 CD-ROM or DVD-ROM and Hard Disk Drive Installation...
- Page 16 11. Connect the secondary IDE cable connector to riser board connector IDE2 (J503). FIGURE 7 and FIGURE 8. Note – Be sure that you use the cable labeled “Sun Blade 100” which is included in your new hard drive kit. The kit may contain another cable which you do not need.
- Page 17 17. Ensure that the cables will not be damaged when you replace the system cover. 18. Detach the wrist strap, replace the system cover, and power on the system as described in “Finishing Component Installation” on page 14. Sun Blade 100 CD-ROM or DVD-ROM and Hard Disk Drive Installation...
-
Page 18: Finishing Component Installation
Started Guide, part number 806-3415. Hard Drive Mirroring This section describes the requirements and constraints of a hard drive mirroring solution that uses Solstice DiskSuite software. Sun Blade 100 CD-ROM or DVD-ROM and Hard Disk Drive Installation Guide • January 2002... -
Page 19: Hard Drive Mirroring Configuration
“primary” and “secondary.” The system riser board has a connector for each IDE Channel, labelled IDE1 (J504) and IDE 2 (J503). When mirroring hard drives in a Sun Blade 100 system, both hard drives should be jumpered as “CS,” “Cable Select” or “Enable Cable Select” to allow for automatic configuration. -
Page 20: Ejecting A Cd
Make sure CDs are at room temperature before using them. Store CDs in storage boxes so that they remain clean and free of dust. Sun Blade 100 CD-ROM or DVD-ROM and Hard Disk Drive Installation Guide • January 2002...
Need help?
Do you have a question about the Sun Blade 100 and is the answer not in the manual?
Questions and answers