Table of Contents
Advertisement
Quick Links
- 1 Exploded Parts Diagram: Df2426, Df2550, Dfg2562, 6905050100-500
- 2 Wiring Diagram: Df2426, Df2550, Dfg2562, 6905050100-500
- 3 Exploded Parts Diagram - Bf9000, 6907560100
- 4 Wiring Diagram - Bf9000, 6907560100
- 5 Light Assembly Replacement
- 6 Flicker Motor/Flicker Rod Replacement
- 7 Heater Assembly Replacement
- 8 Troubleshooting Guide
- Download this manual
For service questions, please call Dimplex at 1-888-346-7539.
For sales inquiries, please call Sylvane at 1-800-934-9194 or visit sylvane.com.
IMPORTANT SAFETY INFORMATION: Always read this manual first before attempting to service this
fireplace. For your safety, always comply with all warnings and safety instructions contained in this
manual to prevent personal injury or property damage.
Dimplex North America Limited
1367 Industrial Road Cambridge ON Canada N1R 7G8
1-888-346-7539 www.dimplex.com
In keeping with our policy of continuous product development, we reserve the right to make changes without notice.
© 2011 Dimplex North America Limited
Service Manual
Model Number:
DF2426
DF2550
DFG2562
BF9000
UL Part Number
6905050100 to 500
6907560100
REV
00
01
02
03
PCN
DATE
-
22-JUL-11
-
26-AUG-11
13118
13-DEC-11
-
31-JAN-14
7400250000R03
Advertisement
Table of Contents

Related Manuals for Dimplex 6905050100-500


Summary of Contents for Dimplex 6905050100-500
- Page 1 For service questions, please call Dimplex at 1-888-346-7539. For sales inquiries, please call Sylvane at 1-800-934-9194 or visit sylvane.com. Service Manual Model Number: DF2426 DF2550 DFG2562 BF9000 UL Part Number 6905050100 to 500 6907560100 IMPORTANT SAFETY INFORMATION: Always read this manual first before attempting to service this fireplace.
-
Page 2: Table Of Contents
Exploded Parts Diagram: DF2426, DF2550, DFG2562, 6905050100-500 . . . . . . . . 5 Wiring Diagram: DF2426, DF2550, DFG2562, 6905050100-500 . . . . . . . . . . . . . . . . 6 Exploded Parts Diagram - BF9000, 6907560100 . -
Page 3: Operation
CAUTION: If you need to continuously reset the heater, Figure 2 disconnect power and call Dimplex customer service at 1-888-DIMPLEX (1-888-346-7539). Button Remote Control The fireplace is supplied with a radio frequency remote Off Button control. -
Page 4: Maintenance
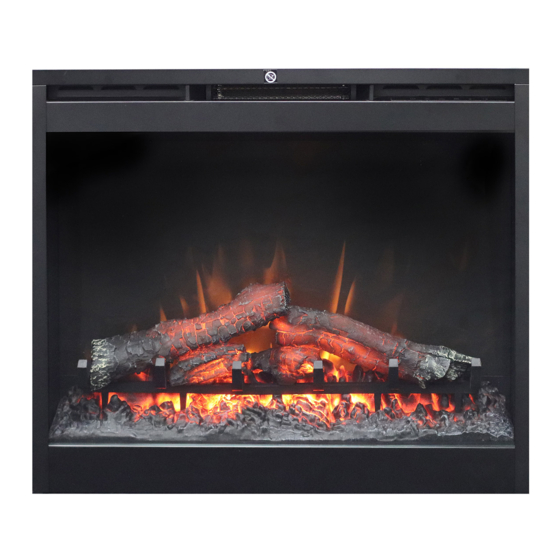
(Figure 4). ! NOTE: Ensure the log set is installed tightly under the back ledge to prevent light leakage. Mirror 9. Replace glass assembly. Ember Bed Assembly Back Ledge Rear Tab Front Edge Side Section www.dimplex.com... -
Page 5: Exploded Parts Diagram: Df2426, Df2550, Dfg2562, 6905050100-500
EXPLODED PARTS DIAGRAM: DF2426, DF2550, DFG2562, 6905050100-500 MOD 0-A Mod B 1. Remote Control ....3000370500RP 2. Flicker Motor ..... 2000210200RP 14. -
Page 6: Wiring Diagram: Df2426, Df2550, Dfg2562, 6905050100-500
WIRING DIAGRAM: DF2426, DF2550, DFG2562, 6905050100-500 MOD 0-A MOD B BLOWER HEATER ASSEMBLY THERMOSTAT HEATER ON/OFF FLICKER MOTOR ON/OFF REMOTE SWITCH OUPUT CAPACITOR CORD SET LED LIGHT HARNESS LED DRIVER BOARD www.dimplex.com... -
Page 7: Exploded Parts Diagram - Bf9000, 6907560100
EXPLODED PARTS DIAGRAM - BF9000, 6907560100 MOD 0-A MOD B 1. Remote Control ....3000370500RP 11. Power Cord ..... 4100040300RP 2. -
Page 8: Wiring Diagram - Bf9000, 6907560100
THERMOSTAT HEATER ON/OFF FLICKER MOTOR ON/OFF REMOTE SWITCH OUPUT CORD SET CAPACITOR LIGHT HARNESS ASSEMBLY MOD B BLOWER HEATER ASSEMBLY THERMOSTAT HEATER ON/OFF FLICKER MOTOR ON/OFF REMOTE SWITCH OUPUT LOG SET ASSEMBLY CORD SET CAPACITOR LED LIGHT HARNESS ASSEMBLY www.dimplex.com... -
Page 9: Preparation For Service
PREPARATION FOR SERVICE LIGHT ASSEMBLY REPLACEMENT CAUTION: If unit was operating prior to servicing allow MOD 0-A at least 10 minutes for lights, heating elements and top Tools required: Phillips head screw driver panel to cool off to avoid accidental burning of skin. Small wire cutter 1. -
Page 10: Mod B
9. Insert the 3 wire ends from the new flicker motor as well as the 2 wires from the original capacitor into the terminal block following the orientation of the original motor & capacitor. (See Assembly Part Pictures) 10. Tighten terminal screws to secure wires in place. www.dimplex.com... -
Page 11: Heater Assembly Replacement
11. Re-assemble the firebox in reverse order. 2 on the top. NOTE: Ensure the rear tab/ledge on the log-set/em- 2. Lift the top off the firebox. Turning the panel 45 de- ber-bed is installed tightly under the bottom of the partially grees, rest it inside the cavity in the top to provide you reflective glass to prevent light leakage. -
Page 12: 3-Position Or Heater Switch Replacement
2 on the left side; 2 on the right side; 3 on the backside; 5. Taking note of the original location of each wire con- 2 on the top. nected to the board, remove each wire and connect www.dimplex.com... -
Page 13: Led Log Driver Replacement
them onto the same location on the new receiver the 2 Philips screws mounted to the back panel of the board. fireplace. NOTE: Using a flat head screwdriver gently pry 2. Unscrew the 2 wire connectors that join the power cord between the end of the connector and the circuit board to at the bottom to the wire leads coming down from the release the wires. -
Page 14: Assembly Part Pictures
Red - Connects to the Inside/ Red - From High Temperature middle prong on heat on/off Cutout switch Grey - From High Temperature Cutout Grey - Connects to the Thermostat Grey - To Blower motor outside prong. www.dimplex.com... -
Page 15: Heater Assembly Connections
HEATER ASSEMBLY CONNECTIONS Blower White - Connects to Connects to Terminal Terminal Block Block White - Jumper to Blower Motor Jumper to “Piggy Back” connection on lower prong of element Yellow - Connects to Thermostat Grey - Connects to High Temperature Cutout on Terminal Block Red - From the high... -
Page 16: Remote Control Receiver Board Connections
• Outside Prong (Black) connects to Yellow from Heating Lower Electrical Housing Element • Outside Prong (Black - “Piggy Back”) Grey from Upper to Switch Output on Receiver Board Panel Terminal Block Inside Prong (Red) connects to Upper Terminal Block www.dimplex.com... -
Page 17: Troubleshooting Guide
TROUBLESHOOTING GUIDE PROBLEM CAUSE SOLUTION General Circuit breaker trips or fuse Short in unit wiring. Trace wiring in unit. blows when unit is turned on Improper circuit current rating Additional appliances may exceed the current rating of the circuit breaker or fuse. Plug unit into another outlet or install unit on a dedicated 15 amp circuit. - Page 18 Grinding or excessive noise with Flicker Rod hitting or rubbing against Ensure rod is straight and mounted properly in the the heater off internal components bracket, spinning freely away from other components. Replace if necessary. Defective Flicker Motor Replace Flicker Motor www.dimplex.com...
Need help?
Do you have a question about the 6905050100-500 and is the answer not in the manual?
Questions and answers