3M G5 Installation Manual
Drive-thru systems
Hide thumbs
Also See for G5:
- Operating instructions manual (77 pages) ,
- Installation manual (69 pages) ,
- Manual (36 pages)
Table of Contents
Advertisement
Advertisement
Table of Contents
Troubleshooting

Related Manuals for 3M G5


Summary of Contents for 3M G5
- Page 1 3M™ Drive-Thru Systems Model G5 and Model XT-1 Installation Manual...
- Page 2 3M Commercial Solutions Division 3M™ Drive-Thru Systems Model G5 and Model XT-1 Installation Manual March 2014 – Revision 2.0...
-
Page 3: Table Of Contents
Install the Battery Charger ..................... 13 Install the Order Point Speaker and Microphone Assemblies ..........16 Install the Vehicle Detector(s)....................16 Assemble the 3M™ Drive Thru Headset G5 ................. 16 Install the Base Station ......................19 Installing Accessory Boards in the Base Station ..............30 Power Up .......................... - Page 4 Installation Guidelines — Separate Housings ............... 67 Installation Guidelines — Single Housing ................68 Appendix: Loop and cable condition test ................70 Index ............................71 March 2014 – Revision 2.0 3M™ Drive-Thru Systems Model G5 and Model XT-1 Page 4 of 74 Installation Manual...
-
Page 5: Overview
If power supply is supplied with a grounding pin, connect directly to a grounding receptacle – 3 prong. • Do not use the XT-1 Base Station or the XT-1 Headset or the G5 Battery Charger if the power supply cord or enclosure is damaged. 3M™ Drive-Thru Systems Model G5 and Model XT-1 March 2014 –... -
Page 6: Other Conventions
FCC RF Exposure Statement: 3M™ Wireless Communication System, Model XT-1 and the 3M™ Drive Thru Headset G5 comply with FCC RF radiation exposure limits set forth for an uncontrolled environment when operating based on time-averaged output power with duty cycle not to exceed 7.63% with a separation distance of 25mm. - Page 7 Overview The use of accessories not approved by 3M Company, including but not limited to batteries, antennas, wall adapters, chargers, ear pads and foam tips and convertible covers, may cause your headset to malfunction or in the case of unapproved electrical accessories may cause the devise to exceed RF energy exposure guidelines.
- Page 8 Overview Note: Modifications to this device shall not be made without the written consent of 3M Company. Unauthorized modifications may void the authority granted under Federal Communication Rules and Industry Canada Rules permitting the operation of this device. March 2014 – Revision 2.0 3M™...
- Page 9 Overview 3M™ Drive-Thru Systems Model G5 and Model XT-1 March 2014 – Revision 2.0 Installation Manual Page 9 of 74...
-
Page 10: Installation
The twisted pair of wires for the microphone connection must be shielded for proper operation. In duplex systems, microphone and speaker cannot be in the same jacket unless specially designed for duplex such as 3M™ Cable part number 78-8117-4313-3. •... - Page 11 (one in front of the other) and one or two drive thru windows for payment and pick up. Pick Up Cash Order Order Point #2 Point #1 Figure 2 3M™ Drive-Thru Systems Model G5 and Model XT-1 March 2014 – Revision 2.0 Installation Manual Page 11 of 74...
- Page 12 Number and Configuration of Base Stations Regardless of the drive thru type(s) there must be one base station for each order point: March 2014 – Revision 2.0 3M™ Drive-Thru Systems Model G5 and Model XT-1 Page 12 of 74 Installation Manual...
-
Page 13: Install The Battery Charger
Install the Battery Charger The G5 headset batteries can be charged while the battery is still in the headset using the G5 Headset Charging Station G5 or separately using a standalone Drive-thru Headset Battery Charger, G5 12-slot. All lights and indications will flash on the battery and not on the chargers. - Page 14 Connect the power supply transformer between the wall receptacle and the charger. • Insert a G5 Headset (with a G5 battery in it) into the Headset bay on the charger. Alternatively, you may insert the G5 battery to be charged into a slot on battery bay of the charger.
- Page 15 Installation Notes: Power plugs are available on both sides of the stand-alone Battery Charger, G5, 12-slot to allow daisy chaining an additional Battery Charger, G5, 12-slot or a Headset Charging Station, G5. You may use the power plug on the last charger in the daisy chain to supply power to the basestation.
-
Page 16: Install The Order Point Speaker And Microphone Assemblies
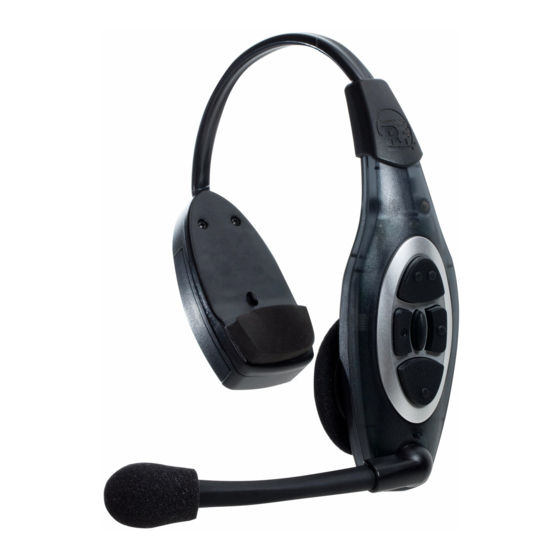
“Installing Accessory Boards in the Base Station” on page 30 Assemble the 3M™ Drive Thru Headset G5 The components that make up a 3M™ Drive Thru Headset G5 are packaged and shipped as individual parts: 3M™ Control Pod, G5 (includes a pack of ID Tags) 3M™... - Page 17 LED indicator lights on the Headset should start blinking (refer to component Identification and Description section below). The headset is now ready for registrations to a base station. Figure 1 3M™ Drive-Thru Systems Model G5 and Model XT-1 March 2014 – Revision 2.0 Installation Manual Page 17 of 74...
- Page 18 Installation Figure 2 Figure 3 Figure 4 March 2014 – Revision 2.0 3M™ Drive-Thru Systems Model G5 and Model XT-1 Page 18 of 74 Installation Manual...
-
Page 19: Install The Base Station
To remove the base station cover: • Disconnect power from the base station. • Loosen the two screws located at the bottom of the cover. 3M™ Drive-Thru Systems Model G5 and Model XT-1 March 2014 – Revision 2.0 Installation Manual Page 19 of 74... - Page 20 Mount the Station Perform the following procedure to install the base station (See Figure 6). • Remove the base station cover: March 2014 – Revision 2.0 3M™ Drive-Thru Systems Model G5 and Model XT-1 Page 20 of 74 Installation Manual...
- Page 21 Figure 7 identifies all of the wiring terminals and their labels. The table that follows provides definitions of the labels and identifies where they should be connected in the system. 3M™ Drive-Thru Systems Model G5 and Model XT-1 March 2014 – Revision 2.0 Installation Manual...
- Page 22 Negative phase microphone wire Microphone wire shielding MEN SPKR+ Positive phase order point speaker MEN SPKR- Negative phase order point speaker March 2014 – Revision 2.0 3M™ Drive-Thru Systems Model G5 and Model XT-1 Page 22 of 74 Installation Manual...
- Page 23 Shorting this pin to GND will play a selected message (if optional greeter board is installed) VEH_APP Active low vehicle approaching Ground 3M™ Drive-Thru Systems Model G5 and Model XT-1 March 2014 – Revision 2.0 Installation Manual Page 23 of 74...
- Page 24 Fold un-insulated wire over onto itself before inserting into a terminal. • Make sure screw terminals are tight. A minimal, typical arrangement of the components is shown in Figure 8: March 2014 – Revision 2.0 3M™ Drive-Thru Systems Model G5 and Model XT-1 Page 24 of 74 Installation Manual...
- Page 25 Vehicle Detector 1 (VEHDET.1) must always be used for proper base station operation. Vehicle detectors 2 and 3 (or any integral detectors installed with optional modules) can be used at your discretion. 3M™ Drive-Thru Systems Model G5 and Model XT-1 March 2014 – Revision 2.0 Installation Manual...
- Page 26 Installation Vehicle Detector Power Order Point Microphone Order Point Speaker Monitor Speaker Figure 9 March 2014 – Revision 2.0 3M™ Drive-Thru Systems Model G5 and Model XT-1 Page 26 of 74 Installation Manual...
- Page 27 Figure 11 shows where the connections are made for a 3M™ Wired Intercom Systems Classic Series Model D15. You can use a different brand of intercom system, but the wire color coding will be different, so you will have to determine how to wire the systems together by following the terminal labels.
- Page 28 The relay terminals are numbered according to the vehicle detector they are paired with. For example, RELAY1_COM, RELAY1_NO, and RELAY1_NC are paired with Vehicle Detector 1 (VEHDEH.1). March 2014 – Revision 2.0 3M™ Drive-Thru Systems Model G5 and Model XT-1 Page 28 of 74 Installation Manual...
- Page 29 Vehicle Approach Monitor If one of your vehicle detectors will be used as a vehicle approach monitor, use an auxiliary as shown in Figure 13. 3M™ Drive-Thru Systems Model G5 and Model XT-1 March 2014 – Revision 2.0 Installation Manual...
-
Page 30: Installing Accessory Boards In The Base Station
Accessory boards include up to three vehicle detectors, greeter module and timer module. They must be installed into the base station according to the following procedures. March 2014 – Revision 2.0 3M™ Drive-Thru Systems Model G5 and Model XT-1 Page 30 of 74 Installation Manual... - Page 31 • Configure the dip switches according to the table on the circuit board and your needs (see Figure 15). 3M™ Drive-Thru Systems Model G5 and Model XT-1 March 2014 – Revision 2.0 Installation Manual Page 31 of 74...
- Page 32 Note: The vehicle detector fails closed; therefore if there is a fault, the system assumes that there is a vehicle present. March 2014 – Revision 2.0 3M™ Drive-Thru Systems Model G5 and Model XT-1 Page 32 of 74 Installation Manual...
- Page 33 (such as Back Door Open). The message plays in each headset configured to play the ALERT Message. See Figure 16 for an example. Figure 16 3M™ Drive-Thru Systems Model G5 and Model XT-1 March 2014 – Revision 2.0 Installation Manual...
-
Page 34: Power Up
, down , left , and right . The remaining buttons function only in manager or installer configuration modes. March 2014 – Revision 2.0 3M™ Drive-Thru Systems Model G5 and Model XT-1 Page 34 of 74 Installation Manual... -
Page 35: Configuration
Navigating the Base Station Display Once you are in the configuration mode, you can use the buttons on the base station display to update all configuration parameters. 3M™ Drive-Thru Systems Model G5 and Model XT-1 March 2014 – Revision 2.0 Installation Manual... - Page 36 For instance, pressing the 7 button three times creates a letter “t” (7-s-t). See button below for creating upper-case Service letters. March 2014 – Revision 2.0 3M™ Drive-Thru Systems Model G5 and Model XT-1 Page 36 of 74 Installation Manual...
-
Page 37: Configuring With A Computer
Use the button to access upper-case Service (Shift) Service letters or to initiate a service call to 3M or as a confirmation in some items. Pressing and holding the button while Service editing a field that permits alphabet letter entry (e.g., store address) shifts the letter to... - Page 38 ( > 13 Change Passcodes , then look at the current code). Change User Passcodes March 2014 – Revision 2.0 3M™ Drive-Thru Systems Model G5 and Model XT-1 Page 38 of 74 Installation Manual...
-
Page 39: Change Basic Volume Settings
Select a new value for > 01 Drivethru Volume Greeter Message . The range is 0 (silent) to 20 (maximum). Volume 3M™ Drive-Thru Systems Model G5 and Model XT-1 March 2014 – Revision 2.0 Installation Manual Page 39 of 74... -
Page 40: Change The Monitor Volume
To change the volume level, select a new value for Vehicle . The range is 0 (silent) to 20 (maximum). Present: Volume March 2014 – Revision 2.0 3M™ Drive-Thru Systems Model G5 and Model XT-1 Page 40 of 74 Installation Manual... -
Page 41: Change The Night Volume
With the night volume set, the system automatically adjusts the volume during night hours, then back to normal during the day. 3M™ Drive-Thru Systems Model G5 and Model XT-1 March 2014 – Revision 2.0 Installation Manual... -
Page 42: Registering Headsets
XT-1 headsets have a single serial number. This number is imprinted on the headset. G5 headsets have 2 serial numbers - one for the G5 Control Pod and the other for the G5 Carrier. The G5 Control Pod serial number is the primary tracking number for the G5 headset and this is the serial number that gets registered on the base station. -
Page 43: Change Noise Reduction Level
Remove Headsets Perform the following steps to un-register a lost, destroyed, or otherwise removed headset from the system, including a headset that is sent back to 3M for repair. The headset would have to be registered again at a later date. -
Page 44: Set System Date And Time
Enter the base station configuration mode, see page 35. • Change the value for > 07 Global Settings Text & Audio , or Prompts Language English Español Deutsch Francais March 2014 – Revision 2.0 3M™ Drive-Thru Systems Model G5 and Model XT-1 Page 44 of 74 Installation Manual... - Page 45 • On the second base station, stations, change the value for 07 Global > Settings Lane Number of This Base Station 3M™ Drive-Thru Systems Model G5 and Model XT-1 March 2014 – Revision 2.0 Installation Manual Page 45 of 74...
- Page 46 • Change the value for > 07 Global Settings Order Point Prompts in French? March 2014 – Revision 2.0 3M™ Drive-Thru Systems Model G5 and Model XT-1 Page 46 of 74 Installation Manual...
- Page 47 #X Minimum (Seconds) customer’s wait time, but decrease false detections that could be caused by cars driving over the detector without stopping. 3M™ Drive-Thru Systems Model G5 and Model XT-1 March 2014 – Revision 2.0 Installation Manual Page 47 of 74...
- Page 48 Scroll to the number of the headset you want to un-register. • Press Enter. 3. Rebooting the base station will now restore the Kitchen Noise Reduction feature. March 2014 – Revision 2.0 3M™ Drive-Thru Systems Model G5 and Model XT-1 Page 48 of 74 Installation Manual...
-
Page 49: Order Taking Modes Setup
These options are, by default, set to YES. This option only applies to G5 headsets. If you currently have no G5 headsets and only XT-1 headsets, then enabling or disabling this option will not affect the normal functioning of the XT-1 headset. -
Page 50: Change Site Scheduling
(Press or to scroll up and down the list) Notes: Order taking modes are described in the Operation section. 3M recommends you do not set up more than three order taking modes. Change Site Scheduling The site schedule is the calendar of store open and closing times. -
Page 51: Change Site Information
Press to implement the change or press to abandon the Enter Mode change and leave the passcode at its previous setting. 3M™ Drive-Thru Systems Model G5 and Model XT-1 March 2014 – Revision 2.0 Installation Manual Page 51 of 74... -
Page 52: Two Base Station Setup
• Enter the configuration mode, see page 35. • Select 14 Installer Setup • Change the value for Save Installation Settings March 2014 – Revision 2.0 3M™ Drive-Thru Systems Model G5 and Model XT-1 Page 52 of 74 Installation Manual... -
Page 53: Factory Setup (Restore Factory Defaults)
• Remove the base station cover. • Press and latch the two switches named “BACKUP INTERCOM.” 3M™ Drive-Thru Systems Model G5 and Model XT-1 March 2014 – Revision 2.0 Installation Manual Page 53 of 74... -
Page 54: Change The Microphone Preamp Gain
-72 dB -85 dB -73 dB For example, according to its specifications, the 3M™ Duplex Microphone (78- 6911-4935-1) has an output level of -71dB at 1 kHz. According to the table, the setting in the base station should be 8. -
Page 55: Troubleshooting
3. Select 04 Registration 4. Select 02 Remove Headsets. 3. Scroll to the number of the headset you want to un-register. 4. Press Enter. 3M™ Drive-Thru Systems Model G5 and Model XT-1 March 2014 –Revision 2.0 Installation Manual Page 55 of 74... - Page 56 "Powering Off". The headset registration data is now cleared. 7. The Headset will momentarily turn off and power back again March 2014 – Revision 2.0 3M™ Drive-Thru Systems Model G5 and Model XT-1 Page 56 of 74 Installation Manual...
-
Page 57: General Troubleshooting
Unplug the loop detector from the AC outlet and plug it back in to reset the detector. Defective vehicle detector. Call for authorized service. 3M™ Drive-Thru Systems Model G5 and Model XT-1 March 2014 – Revision 2.0 Installation Manual Page 57 of 74... - Page 58 Press the other button into the correct one of the other two buttons is pressed). location. Headset(s) amber LED flashing. Headset(s) not registered. Register the headset(s). March 2014 – Revision 2.0 3M™ Drive-Thru Systems Model G5 and Model XT-1 Page 58 of 74 Installation Manual...
-
Page 59: Battery And Battery Charger Troubleshooting
G5 Battery Indicator Light Modes Indicator Mode Description Green LEDs The battery is out of the G5 battery Charger and the button has been pressed and held down. Each LED represents 25% charge. A fully charged battery would have all 4 LEDS lit Green. -
Page 60: Appendix: Declaration Of Conformity
Appendix: Declaration of Conformity Appendix: Declaration of Conformity 3M™ Drive-Thru Systems Model G5 and Model XT-1 March 2014 –Revision 2.0 Installation Manual Page 60 of 74... -
Page 61: Appendix: Base Station Specifications
Maximum number of headsets per more than 15 base station Maximum number of vehicle detectors per base station Maximum number of greeter modules per base station 3M™ Drive-Thru Systems Model G5 and Model XT-1 March 2014 –Revision 2.0 Installation Manual Page 61 of 74... -
Page 62: Appendix: Best Practices
PreAmp Setting Set the PreAmp gain setting according to the type of wiring you are using: • If you are using the provided 3M Microphone and the 20 AWG cable, set the PreAmp gain setting to 8. • If a 22 AWG cable is used, set the PreAmp gain setting to 9. -
Page 63: Dealing With Delay/Echo
This needs to be prevented by isolating within the order point. Acoustical foam can be used to do this. Figure 19 3M™ Drive-Thru Systems Model G5 and Model XT-1 March 2014 – Revision 2.0 Installation Manual Page 63 of 74... - Page 64 Appendix: Best Practices March 2014 – Revision 2.0 3M™ Drive-Thru Systems Model G5 and Model XT-1 Page 64 of 74 Installation Manual...
-
Page 65: Appendix: Dual Lane Installation Instructions
Important Note: Interconnected base stations must be the same revision level. Note: 3M recommends that the base stations be as close together as possible. Recommended Procedure • Start charging the batteries. •... - Page 66 Inbound volume (page 34) • Thoroughly test the lane #2 intercom system. • Complete the configuration for both base stations (page 35). March 2014 – Revision 2.0 3M™ Drive-Thru Systems Model G5 and Model XT-1 Page 66 of 74 Installation Manual...
-
Page 67: Appendix: 3M™ Acoustic Kit Installation Guide
Appendix: 3M™ Acoustic Kit Installation Guide Appendix: 3M™ Acoustic Kit Installation Guide The 3M™ Acoustic Kit that is used for communication posts is suitable for new or retrofit installations and can readily be used with various housing designs. One kit contains enough material to accommodate a typical microphone and speaker system. -
Page 68: Installation Guidelines - Single Housing
Ensure that the inside of the housing is clean and dry. • Install the 3M™ Vibration Control Tape to the inside of the top and side walls of the housing (fig.4). Using a pair of scissors, cut one piece of tape to be approximately 1"... - Page 69 Appendix: 3M™ Acoustic Kit Installation Guide Additional illustrations of 3M speaker and microphone installation using the 3M Acoustic Kit and product instructions as a guideline for installation. Fig.3 Fig.4 Fig.1 Fig.2 Secure connections with Solder all connections. Install 3M Vibration tape Install 3M foam and connectors.
-
Page 70: Appendix: Loop And Cable Condition Test
Resistance below 20 megohms: Loop wire insulation has been damaged. Loop integrity is questionable Resistance less than 10 megohms: Loop wire must be replace March 2014 – Revision 2.0 3M™ Drive-Thru Systems Model G5 and Model XT-1 Page 70 of 74 Installation Manual... -
Page 71: Index
............ 34 prompts ............43 Dual (double) drive thru Listing headsets ..........42 definition ............. 12 Load templates ..........52 Location base station ...........18 3M™ Drive-Thru Systems Model G5 and Model XT-1 March 2014 – Revision 2.0 Installation Manual Page 71 of 74... - Page 72 ..........38 approach ............40 present ............39 Vehicle detector configure ............. 30 installation ....See separate manual(s) LED ............. 31 March 2014 – Revision 2.0 3M™ Drive-Thru Systems Model G5 and Model XT-1 Page 72 of 74 Installation Manual...
- Page 73 Warning definition ..........5 monitor ............39 wiring night ............. 40 base to base ..........26 outbound greeter message ......38 components ..........23 3M™ Drive-Thru Systems Model G5 and Model XT-1 March 2014 – Revision 2.0 Installation Manual Page 73 of 74...
- Page 74 This warranty does not cover: (1) the cost of shipping products to or from 3M for repair, (2) repair or replacement of existing cable or wiring, (3) product failure caused by misuse, abuse, improper installation, or unapproved modifications, or (4) intercom products that are installed or serviced by a non-3M authorized party.
Need help?
Do you have a question about the G5 and is the answer not in the manual?
Questions and answers