B&G Zeus Touch Installation Manual
B & g zeus touch multifunction display installation guide
Hide thumbs
Also See for Zeus Touch:
- Operator's manual (115 pages) ,
- Quick start manual (9 pages) ,
- Handover reference manual (2 pages)
Table of Contents
Advertisement
Quick Links
Advertisement
Table of Contents

Subscribe to Our Youtube Channel
Related Manuals for B&G Zeus Touch


Summary of Contents for B&G Zeus Touch
-
Page 1: Installation Guide
Zeus Touch Installation Guide ENGLISH www.bandg.com... - Page 2 Zeus Touch installation manual...
- Page 3 The user is cautioned that any changes or modifi cations not expressly approved by the party responsible for compliance could void the user’s authority to operate the equipment. This equipment has been tested and found to comply with the limits for a Class B digital Zeus Touch installation manual...
- Page 4 • Connect the equipment into an outlet on a circuit diff erent from that of the receiver • Consult the dealer or an experienced technician for help About this manual This manual is a reference guide for installing Zeus Touch systems. The manual assumes that the user has basic knowledge of navigation, nautical terminology and practices.
-
Page 5: Table Of Contents
T7 / T8 potential system example T12 potential system example Planning the installation Preparing for installation Check the contents Mounting location Mounting the Zeus Touch display Flush mount Bracket mounting with optional kit Wiring the Zeus Touch Wiring guidelines Connecting power... -
Page 6: Contents | Zeus Touch Installation Manual
Wiring the autopilot system Autopilot setup CZone connection to NMEA 2000 CZone setup Applying Software Updates Backing up user data Zeus Touch software updates NMEA 2000 and Ethernet device updates Touch Screen Calibration Dimensioned Drawings Zeus Touch 7 Zeus Touch 8... -
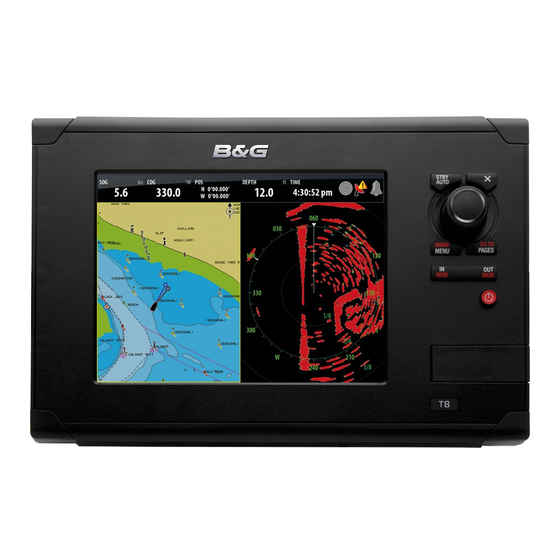
Page 7: Zeus Touch Overview
Ultrabright LED backlit screens are used across the range. All three models include an internal GPS antenna. The Zeus Touch 12 features an internal ethernet switch with 3 ethernet connectors for extra network connectivity, whereas the Zeus Touch 7 and Zeus Touch 8 have built-in echosound- ers and a single ethernet connector. -
Page 8: Front - Controls
Man Over Board (MOB) mark at vessel’s position. Power key A long press turns the unit ON/OFF. A short press brings up the light options dialog. Repeated short presses toggles between preset brightness levels. Zeus Touch overview | Zeus Touch installation manual... -
Page 9: Rear - Connectors
Connects Zeus Touch display to a NMEA 2000 or SimNet network (see NMEA 2000 ‘“NMEA 2000” on page 33 page 33) Three Ethernet network ports on the Zeus Touch 12 or one on the NETWORK Zeus Touch 7 and Zeus Touch 8 for connecting to other Zeus Touch displays and Network modules. -
Page 10: T7 / T8 Potential System Example
BROADBAND RADAR Heading Sensor: RC42 3G / 4G IMAGING SONAR Audio: SonicHub Engines: NMEA2000 Instruments: Triton LSS-2 Digital Switching: WEATHER CZONE Sirius satelite weather and radio USA Only Optional accessory 10 | Zeus Touch overview | Zeus Touch installation manual... -
Page 11: T12 Potential System Example
Instruments: Triton Digital Switching: WEATHER CZONE Sirius satelite weather WM-2 and radio (USA only) LSS-1 Transducer Audio cable Optional Optional 2nd transducer for high deadrise hulls accessory AUDIO iPod Dock | 11 Zeus Touch overview | Zeus Touch installation manual... -
Page 12: Planning The Installation
Planning the installation Preparing for installation Tools required Drill Jig Saw Drill Bit Drill Bit Hole Saw (25mm / 1”) Pozi Screw Driver File PVC Electrical Tape 12 | Planning the installation | Zeus Touch installation manual... -
Page 13: Check The Contents
Check the contents Description Description Sun Cover Documentation wallet Cosmetic screw covers (x2) Video/NMEA0183 cable (T12 only) Zeus Touch Display Power cable Flush mount gasket Machine screws (x4) | 13 Planning the installation | Zeus Touch installation manual... -
Page 14: Mounting Location
Poor ventilation combined with a small mounting enclosure could potentially cause the display to overheat - B&G displays are designed to operate in temperatures from -15° C to +55° C (+5° F to +131° F). 14 | Planning the installation | Zeus Touch installation manual... -
Page 15: Mounting The Zeus Touch Display
Secure the display to the surface. To fi nish off the installation, fi rmly clip the upper and lower bezels in place. | 15 Mounting the Zeus Touch display | Zeus Touch installation manual... -
Page 16: Bracket Mounting With Optional Kit
Drill cable and fastener pilot holes. screw bracket down with fasteners. Fit rear bezel to Zeus Touch using supplied machine screws. Align the Zeus Touch ratchet teeth with those of the bracket and partially screw in the bracket knobs one at a time. -
Page 17: Wiring The Zeus Touch
Be sure that the voltage of the power supply is compatible with the Zeus Touch display Warning: The Zeus Touch has a voltage rating of 12 V DC or 24 V DC. (9 V DC - 32 V DC max range). NMEA 2000 and SimNet are 12 V DC only Warning:... -
Page 18: Connecting Power
12 - 24 V DC Power Control (yellow wire) Planning is required how you want to be able to turn on and off the Zeus Touch an connected compatible devices. The yellow (Power Control) wire on the Zeus Touch power cable can either be an input that will turn on the display when power is applied, or an output that turns on other devices when the display is powered on. -
Page 19: Power Control Setup
The following Navico products require (+) DC Volts on the yellow wire in order to function: NEP-2, BSM-1, BSM,-2, WM-2, Broadband radar, RI10, SonicHub. The +DC volts can come via a switch, a breaker or from an Zeus Touch or Zeus display yellow wire (when set to Power Master). -
Page 20: External Alarm
The SIREN ENABLED option must be set in order for the unit to drive the external alarm when an alarm condition arises. This setting also controls whether sound is emitted by the internal buzzer. 20 | Connecting power | Zeus Touch installation manual... -
Page 21: External Gps
GPS source such as the ZG05 can be used to overcome this, by allowing remote installation in a location that has an unobscured view of the sky. An NMEA 2000 expansion kit may be required to connect the GPS antenna to the Zeus Touch, if no other network cabling is installed. -
Page 22: Internal Echosounder
External echosounder An optional external sounder module (BSM-1, LSS-1, BSM-2) can be added to the Zeus Touch 7, Zeus Touch 8 and Zeus Touch 12 via the ethernet port on any of these devices. Zeus Touch display BSM-1 Broadband Echosounder module Ethernet cable yellow 5 pin See page 58 for more cable length options. -
Page 23: Transducer Adapter Cables
Use 000-10046-001 7 pin to bare wire adapter cable. Not all transducers are compatible with Zeus Touch or BSM-1. Refer to the transducer type selection list in the Echo Installation page to see if your transducer is mentioned for the selected echo source. -
Page 24: Echosounder Setup
Choose the Echosounder source in the Echo Settings . MENU > MENU > ECHO. This can be selected to be the echosounder built in to the display (Zeus Touch 7 and Zeus Touch 8 only), or an external sounder module such as the BSM-1. - Page 25 Transducer type is used for selecting the transducer model connected to the echosounder module. In some transducers with built-in temperature sensors, the temperature reading may be inaccurate if the wrong transducer is selected from the transducer type menu. | 25 External GPS | Zeus Touch installation manual...
-
Page 26: Radar
Allows display to receive heading informa- tion for chart overlay and MARPA RC42N heading sensor AT10HD NMEA 0183 - NMEA 2000 Converts NMEA0183 to NMEA2000/SimNet (only heading information is converted) NMEA 2000 Micro-C backbone 26 | RADAR | Zeus Touch installation manual... -
Page 27: Hd Radar
HD radar Optional second Zeus Touch FUSE FUSE FUSE FUSE Magnetic heading source required for Chart Overlay / MARPA Micro-C cable Ethernet cable extra ethernet cables Description Zeus Touch display HD radar scanner HD radar processor module Ethernet adaptor cable... -
Page 28: Radar Setup
MARPA calculations. Reset device ID Zeus Touch displays only support one radar on the network. Should a radar be connected, that has been connected to a dual radar network in the past, it may not be detected by the display because it has an incorrect Device ID. - Page 29 Traverse the area again and readjust if sidelobes returns still occur. Exit the installation menu. Restore radar to Factory Default This can be used to revert all user adjustments. | 29 RADAR | Zeus Touch installation manual...
-
Page 30: Video In
(optional for T7 and T8, supplied with T12). This connects to the VIDEO IN port on the rear of the display. Note: The video images will not be shared with another Zeus Touch unit via the network. It is only possible to view video on the unit connected to the video source. Connecting video sources... -
Page 31: Nmea 0183
note: when connecting to a DB-9 plug for interfacing to a PC, combine Rx_GND and TX_GND from the Zeus Touch, and connect to pin 5 (PC GND) of the plug. Rx is connected to pin 3, Tx to pin 2. -
Page 32: Serial Port Setup
To enable data output, enable the ‘Serial output’ option, and then select which sentences the Zeus Touch needs to transmit to other devices from the ‘Serial output sentences’ list. Only a select list of the most commonly used sentences are enabled by default. -
Page 33: Nmea 2000
NMEA 2000 NMEA 2000 device connection All models of Zeus Touch are equiped with an NMEA 2000 port, which allows the receiving and sharing of a multitude of data from various sources. Essential network information • A NMEA 2000 network consists of a linear “backbone” from which “drop cables” connect to NMEA 2000 devices •... -
Page 34: Power The Nmea 2000 Network
NMEA 2000 power source. Stable 12 V DC only 5 Amp fuse or breaker Switch Power cable Micro-C T-joiners NMEA 2000 GPS antenna NMEA 2000 backbone daisy chained using instruments with two ports. NMEA 2000 Micro-C backbone 34 | NMEA 2000 | Zeus Touch installation manual... -
Page 35: Data Bridging
NMEA 0183 sentences. Note: When bridging data from ethernet, a Zeus Touch display has to be nominated to bridge the data. If this nominated display is turned off , no data will be displayed, until the display is turned on or another display is selected to bridge the data (see page 36) ... -
Page 36: Nmea 2000 Setup
In order to enable group selection, the display must be set to ‘Default’ group. In some cases it may be desired that an Zeus Touch on a network receives the same type of data, but from diff erent sources to that of the rest of the network devices. To do this set the data Group setting to None, and select a source for the data. - Page 37 Display (ie backlighting), units, damping, and alarms can be grouped either in ‘Default’ group, or groups ‘1’ through to ‘6’. If any of the settings require discrete control, set it to ‘none’. | 37 NMEA 2000 | Zeus Touch installation manual...
-
Page 38: Ethernet (Network Port
The Zeus Touch system uses an Ethernet network to interconnect high bandwidth devices such as radar, echosounder and to another Zeus Touch, or Zeus display. The Zeus Touch 7 and Zeus Touch 8 displays have one NETWORK port each, whereas the Zeus Touch 12 has three Ethernet ports. - Page 39 BSM-1 Broadband Radar A second Zeus Touch connected to one of the Zeus Touch12’s three built in ports will have full visibilty and control over any devices connected to another port on the Zeus Touch12, in the same way it would if all devices were connected via an NEP-2 expansion port.
-
Page 40: Ethernet Setup
The upper table gives an account of the various automatically synchronised databases that ensure B&G display units (Zeus Touch, Zeus, plus Simrad NSS, NSE, and NSO) are all using the same user settings and data. Each unit stores the database locally, so that all information is available if the device is run in standalone. -
Page 41: Autopilot
B&G Autopilot Computer (AC12N, AC42N, and SG05), you will have complete control, setup and integration with your autopilot. The Zeus Touch display can be used in conjunction with B&G Triton Autopilot Control units or the Zeus Touch can be used alone to conserve dash space. -
Page 42: Autopilot Setup
Touch unit or from a Triton Display (if fi tted). The following sections describe how you con- fi gure the autopilot from the Zeus Touch unit. If you select to setup the system from a Triton Display, refer to the Triton User manual for further information. - Page 43 You can switch the autopilot to standby mode and take manual control of the boat at any time during the seatrial by pressing the key. STBY/AUTO The following seatrial calibration should be done: • Compass calibration; used to automatically compensate for on-board magnetic interference | 43 Autopilot | Zeus Touch installation manual...
- Page 44 ±3° may have to be accepted. Compass mounting off set After compass calibration, the diff erence between the compass lubber line and the boat’s center line should be compensated for. 44 | Autopilot | Zeus Touch installation manual...
- Page 45 Active response parameter set is shown in the autopilot popup, and the following abbrevia- tions are used: HI-A High response parameters set automatically LO-A Low response parameters set automatically HI-M High response parameters set manually LO-M Low response parameter set manually | 45 Autopilot | Zeus Touch installation manual...
- Page 46 Layline steering is useful when navigating. Cross Track Error (XTE) from the navigator will keep the boat on the track line. If the XTE from the navigator exceeds 0.15 nm, the autopilot will calculate the layline and track towards the waypoint. 46 | Autopilot | Zeus Touch installation manual...
- Page 47 The settings are used for the tack-prevent function. They also applies when the autopilot is Operating the autopilot operating in WindNAV mode. Refer to the section. You can select diff erent minimum wind angles for port and starboard. The diff erence between | 47 Autopilot | Zeus Touch installation manual...
- Page 48 This parameter defi nes the maximum course change where the autopilot is allowed to auto- matically change the course when the Zeus Touch follows a route (NAV steering). If the required course change to next waypoint in a route is more than the set limit, you are prompted to verify that the upcoming course change is acceptable.
-
Page 49: Czone Connection To Nmea 2000
Network interface bridge provides power isolation and correct termination. C-ZONE 12- 24 V DC NETWORK C-ZONE Network 1 Network 2 NETWORK INTERFACE CZONE C-ZONE Micro-C 12 V DC Power cable Micro-C - NMEA2000 Network Network terminators | 49 CZone connection to NMEA 2000 | Zeus Touch installation manual... -
Page 50: Czone Setup
Marine Ltd, and associated CZone distributors. The Zeus Touch system provides a means to load the Confi g fi le, as well as apply updates to module fi rmware, removing the need to take a laptop computer aboard the vessel. -
Page 51: Applying Software Updates
The backup procedure is similar for both. The fi le formats for waypoint backup: • User data fi le version 4: Use with current Navico MFDs (Zeus Touch, Zeus, NSS, NSE). Off ers most detail • User data fi le version 3 (with depth): Use with legacy Lowrance GPS chartplotters •... -
Page 52: Nmea 2000 And Ethernet Device Updates
Hold the MENU key during power on, until the calibration utility screen comes up Touch crosshair shown on screen to perform nine point calibration After successful calibration the unit will return to normal application screen 52 | Applying Software Updates | Zeus Touch installation manual... -
Page 53: Dimensioned Drawings
Dimensioned Drawings Zeus Touch 7 | 53 Dimensioned Drawings | Zeus Touch installation manual... -
Page 54: Zeus Touch 8
Zeus Touch 8 54 | Dimensioned Drawings | Zeus Touch installation manual... -
Page 55: Zeus Touch 12
Zeus Touch 12 | 55 Dimensioned Drawings | Zeus Touch installation manual... -
Page 56: Connector Pinouts
Video Cable: 000-00129-001 Colour Function Video 1 Ground Video 1 (+) (coax) Green Video 2 Ground (coax) Video 2 (+) Blue TX_B (RS232 GND) Yellow TX_A Orange RX_B (RS232 GND) Green RX_A 56 | Connector Pinouts | Zeus Touch installation manual... -
Page 57: Nmea 2000
Network (Ethernet) NETWORK (Ethernet) Connector Function TX + TX - RX + RX - Echosounder Echosounder Connector Function Depth + Speed Speed power Temp Depth - Shield Temp / speed Gnd Accessories | 57 Accessories | Zeus Touch installation manual... -
Page 58: Nmea 2000 Cables
Ethernet cable yellow 5 Pin 2 m (6.5 ft) 000-0127-29 Ethernet cable yellow 5 Pin 4.5 m (15 ft) 000-0127-30 Ethernet cable yellow 5 Pin 7.7 m (25 ft) 000-0127-37 Ethernet cable yellow 5 Pin 15.2 m (50 ft) 58 | Accessories | Zeus Touch installation manual... -
Page 59: Supported Data
Time & Date 129038 AIS Class A Position Report 129039 AIS Class B Position Report 129040 AIS Class B Extended Position Report 129283 Cross Track Error 129284 Navigation Data 129539 GNSS DOPs | 59 Supported data | Zeus Touch installation manual... - Page 60 130832 Fuel Used - High Reolution 130834 Engine and Tank Confi guration 130835 SetEngineAndTankConfi guration 130838 Fluid Level Warning 130839 Pressure Insect Confi guration 130843 Sonar Status, Frequency and DSP Voltage 60 | Supported data | Zeus Touch installation manual...
- Page 61 SetEngineAndTankConfi guration 130836 Fluid Level Insect Confi guration 130837 Fuel Flow Turbine Confi guration 130839 Pressure Insect Confi guration 130845 Weather and Fish Prediction and Barometric Pressure History 130850 Evinrude Engine Warnings | 61 Supported data | Zeus Touch installation manual...
-
Page 62: Nmea 0183 Supported Sentences
Receive Transmit Echo Receive Transmit Compass Receive Transmit Wind Receive Transmit AIS / DSC Receive AIS sentences are not bridged to or from SimNet. MARPA Transmit These are only output sentences 62 | Supported data | Zeus Touch installation manual... -
Page 63: Specifi Cations
Specifi cations | 63 Specifi cations | Zeus Touch installation manual... - Page 64 64 | Specifi cations | Zeus Touch installation manual...
- Page 65 | 65 Specifi cations | Zeus Touch installation manual...
- Page 66 0191 N2584...
Need help?
Do you have a question about the Zeus Touch and is the answer not in the manual?
Questions and answers