Advertisement
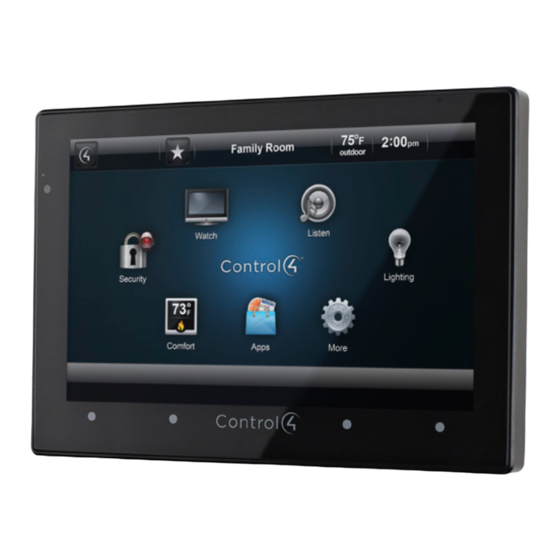
7" In-Wall Touch Screen
with Camera
Installation Guide
Introduction
The Control4® 7" In-Wall Touch Screen with Camera
offers complete system control in an elegant and
compact design. This Touch Screen is equipped
with a capacitive Touch Screen and four (4)
programmable shortcut buttons plus Audio and
Video Intercom (with a built-in camera) using SIP.
The available power options are AC power or Power-
over-Ethernet (PoE); the network options are WiFi
or Ethernet connections. This Touch Screen supports
new construction or retrofit installations.
• AC. AC power is used to power the Touch
Screen when using an Ethernet or WiFi network
connection.
• PoE. PoE is used to power the Touch Screen
when using an Ethernet or WiFi network
connection.
The following table shows the available network
options with power.
• Ethernet with PoE
• Ethernet with AC
• WiFi with AC
™
NOTE:
Video Intercom using 802.11b is not
recommended or supported for Video
Intercom. Control4 recommends Wireless-N
for Video Intercom. See "Wireless Network
Limitations" and "Power and Network
Installation Options."
• Option 1: Ethernet with PoE. The Ethernet
network connection is provided through the PoE
Injector. No additional wiring is needed.
• Option 2: Ethernet with AC. Connect the Touch
Screen to one of the RJ-45 LAN ports on the
gateway/router using the RJ-45 Ethernet cable.
• Option 3: WiFi with AC. The internal WiFi will
communicate with the LAN's WAP. If the LAN has
a WAP set up, no additional wiring is needed.
Supported Models
• C4-TW7C0- BL - 7 Inch Wall Mount Capacitive
Touch Screen with Camera, Ethernet/WiFi, PoE/
Universal Voltage, Black
• C4-TW7C0- WH - 7 Inch Wall Mount Capacitive
Touch Screen with Camera, Ethernet/WiFi, PoE/
Universal Voltage, White
Associated SKUs:
• C4-TSWMC5-EG-WH – 5" In-Wall Touch Screen,
White (no camera)
• C4-TSWMC7-EG-WH – 7" In-Wall Touch Screen,
White (no camera)
• C4-TSWMC5-EG-BL – 5" In-Wall Touch Screen,
Black (no camera)
• C4-TSWMC7-EG-BL – 7" In-Wall Touch Screen,
Black (no camera)
Box Contents
Carefully unpack the contents of the box, and make
sure the following items are included. If any item is
missing or damaged, please contact your Control4
Reseller.
• 7" In-Wall Touch Screen with Camera
• Power box (used to power the Touch Screen)
• Two (2) screws to attach the power box
• Warranty card
1
Advertisement
Table of Contents

Subscribe to Our Youtube Channel
Related Manuals for Control 4 C4-TW7C0-BL


Summary of Contents for Control 4 C4-TW7C0-BL
- Page 1 NOTE: Video Intercom using 802.11b is not ™ recommended or supported for Video Intercom. Control4 recommends Wireless-N for Video Intercom. See “Wireless Network Limitations” and “Power and Network 7” In-Wall Touch Screen Installation Options.” with Camera • Option 1: Ethernet with PoE. The Ethernet Installation Guide network connection is provided through the PoE Injector.
-
Page 2: Specifications
™ Dimensions 4.88” x 7.2” x .60” (124 mm x 183 mm x (H x W x D) 15.24 mm) Weight 1.15 lbs. (.52 kg) Shipping Weight 1.8 lbs. (.81 kg) Network WiFi (802.11 b/g/n) wireless access point (WAP) already configured 7”... -
Page 3: Front And Rear Panel Descriptions
connection is required) Back View - A 14-gauge electrical wire long enough to pull Figure 2. Back View - 7” In-Wall Touch Screen with between the Touch Screen and the power source Camera and Power Box Front and Rear Panel Descriptions Front View Figure 1. -
Page 4: Installation
CAUTION! Do not attempt to use PoE and Camera LED Color/ Touch Screen Status AC power at the same time. Choose only one State power option. - Camera is off ATTENTION! Ne pas tenter d’utiliser PoE et Green - Camera is on AC en même temps. Choisir une seule option Green (blinks slowly) - Booting up d’alimentation. -
Page 5: Power Installation
Figure 5. Ethernet - Requires a Connection to Figure 6. WiFi - Requires AC Power and WAP Ethernet and AC Power Power Installation Option 3: WiFi Connection with AC Prepare the plastic power box for installation into the Place the Touch Screen above a power source, for back box by inserting either the Ethernet cable or the example, an outlet. - Page 6 Figure 8. Ethernet Connection Align and bend the wires carefully to fit them inside the back box. Align and carefully slide the power box into the Back Box Ethernet back box. Connection Secure the power box into the back box using the screws provided.
-
Page 7: Troubleshooting
configuration page. The network configuration Restore to Factory Default screen displays. If the camera’s LED blinks on and off for more than Under Wireless, select Enable. If you don’t see 30 seconds, the device will need to be restored. the network you want, select Other. At Network Name, select to add the SSID or To access the Factory Restore switch, you’ll first need wireless network when the keyboard appears. - Page 8 Figure 12. Insert Paper Clip Through Small Hole change on the next power up, and will initiate the restore process. When you are finished with the restore, reattach the Touch Screen into the power box in the wall— top first—and then snap the bottom of the Touch Screen back into place.
- Page 9 IMPORTANT! Using this product in a manner product until you consult your physician. other than outlined in this document voids Magnetic fields can cause damage to your warranty. Further, Control4 is NOT liable magnetic storage media (for example, credit for any damage incurred with the misuse of cards, video tapes, computer hard drives, etc).
-
Page 10: About This Document
About this Document Third-Party Trademarks Libertas Libertas Firmware copyright statement for Touch Screens 6/26/09 Part Number: 200-00288, Rev B, 6/11/2012 Copyright (c) 2006, One Laptop per Child and Marvell Corporation. All rights reserved. Redistribution. Redistribution and use in binary form, without modification, are permitted provided that the following conditions are met: * Redistributions must reproduce the above copyright notice and the following disclaimer in the documentation and/or other materials provided with the...
Need help?
Do you have a question about the C4-TW7C0-BL and is the answer not in the manual?
Questions and answers